Work Planner is the standard access level for PMs, team leads, and anyone responsible for scheduling other people's time. It includes everything a Base Member can do, plus the two spaces where schedules and work plans actually get built: Workload (the member view) and Planner (the project view). You can also see budget information in hours and percentages — but not in dollars.
Start here when you want to:
Build and adjust work plans for your team
See who is available and who is overbooked before committing to new work
Manage a project schedule, phase dates, dependencies, and milestones
Balance work across the team in a weekly capacity meeting
Understand how much of the team's time is already planned
Note: Work Planner access is configurable. Your admin sets whether you have view only or can edit rights, and the scope of that access — all projects, only projects you are a member of, or only projects where you are the Project Manager. If you cannot edit something you expect to, that is the first thing to check
Everything at Base Member level — Home Space, Projects, your own time off and tasks
Workload space — The capacity heat map and member-level work plan management
Planner space — Project-level scheduling, phase dates, project members, open roles
Budget information in hours and percentages — No dollar amounts, no bill rates
Term | What it means to you: |
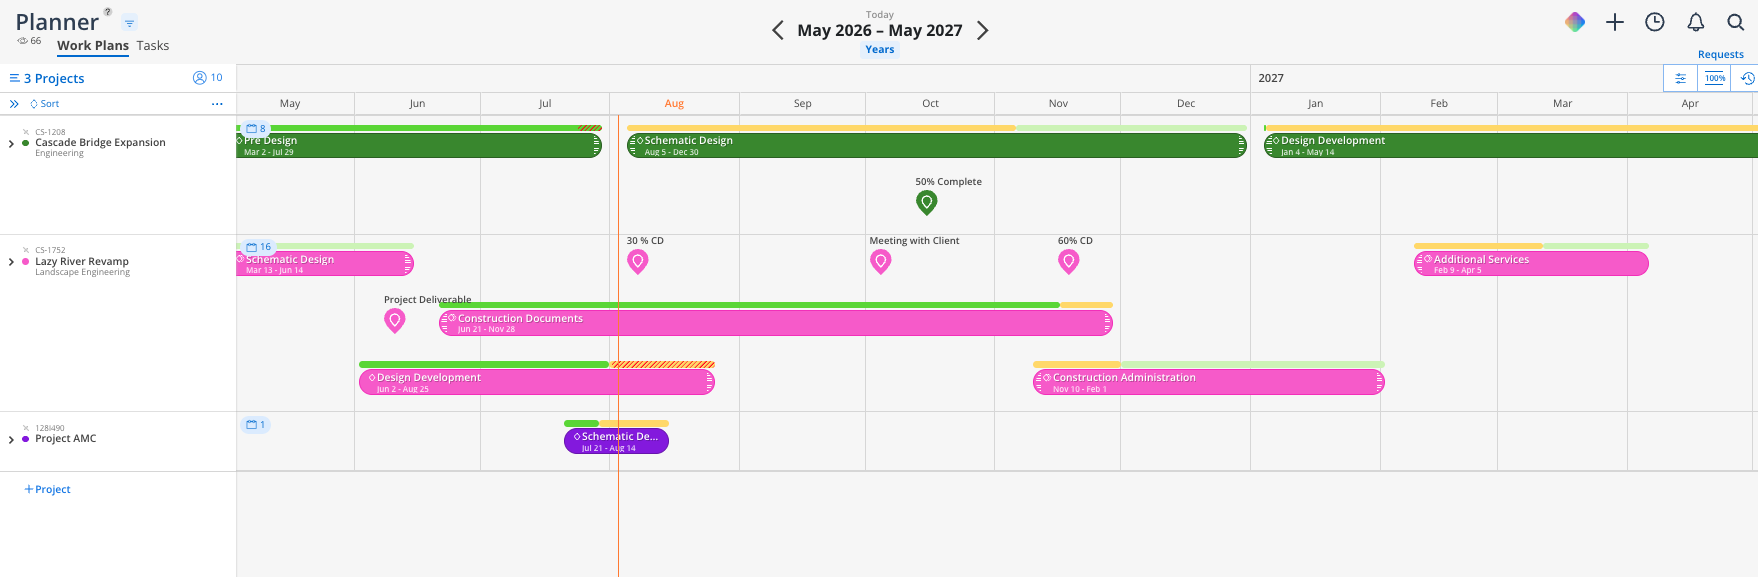
Phase | A stage of work with start and end dates, synced from your ERP. Work plans and budgets attach here — always plan at the phase level |
Milestone | A single date with no hours or budget. Not ERP-linked. Add these generously; they appear on every project member's calendar |
Work Plan | The building block of everything you do. A member + a project + a phase + hours + a date range |
Capacity | A member's available hours in a period. Work plans and time off consume it |
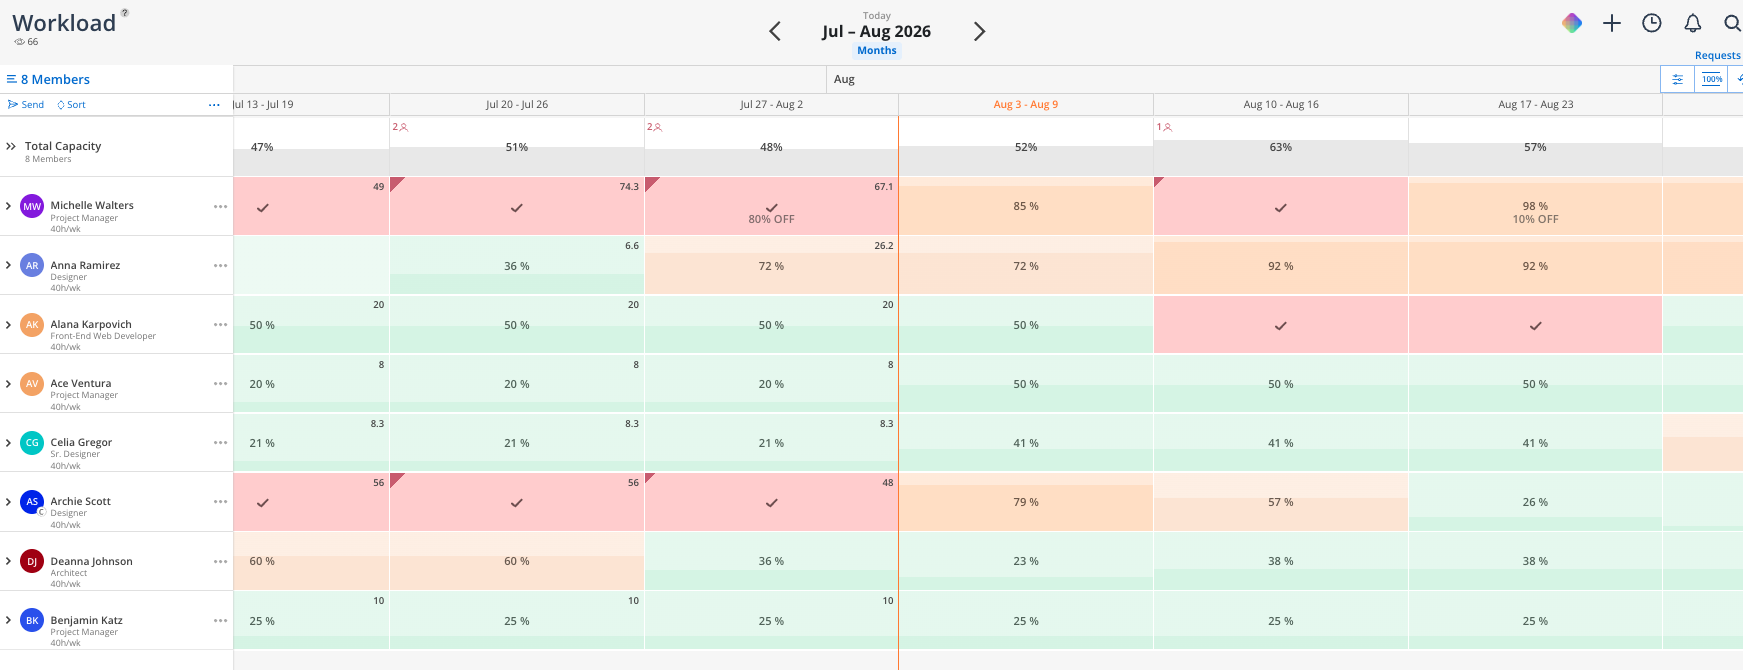
Heat Map | The color-coded grid in Workload showing how much of each member's capacity is planned. Default green = low utilization, red = at or near full |
Work Plan Lock | The field you typed into when creating a plan — hours/day, hours/week, or total hours. It stays constant when dates change. Everything else recalculates around it |
Tentative Plan | A plan marked tentative so it can be toggled on and off. Use these to test capacity scenarios without committing |
Dependency | A link tying one phase's start to another phase's end, or a work plan to a phase date. When the upstream item moves, the dependent item follows. Shows as a squiggly connector line |
Portfolio | The folder a project lives in. One project, one portfolio |
Open Role / Generic Resource | A placeholder on a project for work that needs doing before you know who will do it. Fill it with a named member later |
Open the Workload space and click Select Members. The view starts blank — pick your direct reports, your department, or the full team.
Use the Filter button to narrow by department, role, office, or skills. Filters stack.
Click the gear icon and choose your heat map display value: % of capacity, planned hours, or available hours. Most planners prefer available hours.
Use the display toggles to hide data you don't need and condense row height.
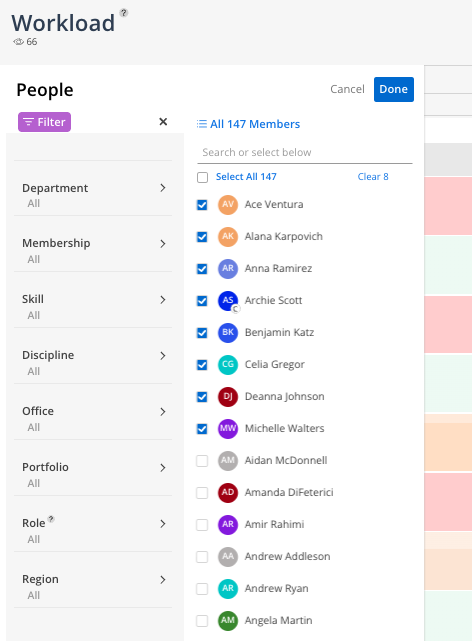
Your selections and settings save to your account for your next log-in!
👉 Member Selection & Filtering · Workload Settings
Filter to your team - use attributes like departments, regions or offices to find the correct grouping.
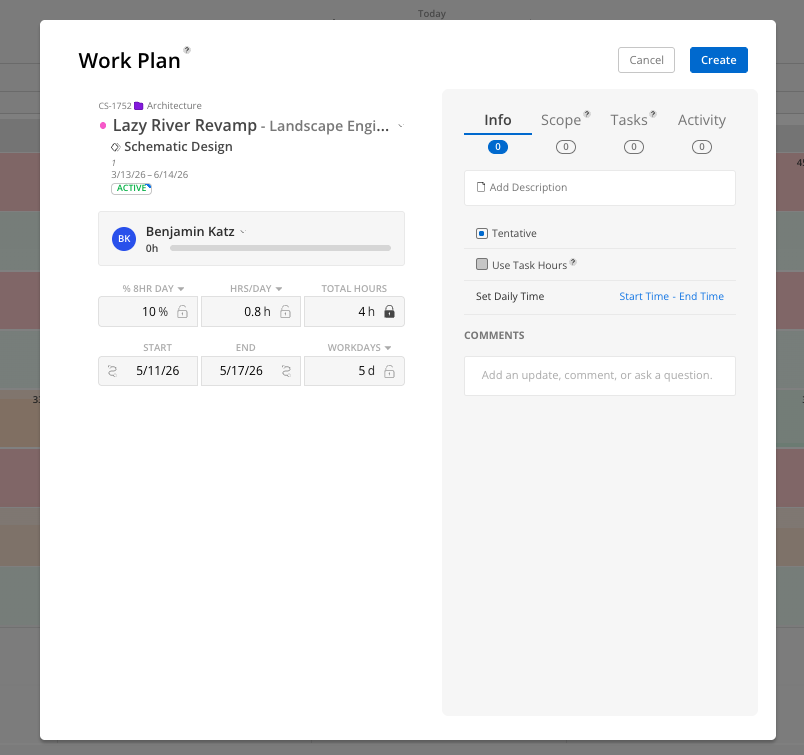
Click into a member's row to expand it, then click the plus (+) icon on a blank cell.
Select the project by name or number, then the phase.
Choose a scheduling mode: percentage of day/week, hours per day/week, or total hours.
Enter the amount — the lock icon lands on the field you typed in.
Set your start and end dates. The calendar picker shows gray fill for existing plans and red numbers where the member is already at capacity.
Optionally add a description, mark it tentative, or leave a comment with an @mention.
Start broad. Create big plans first and split them week by week as detail firms up.
Drag and drop a plan left or right to move dates, or up and down to reassign it to another member
Drag the edges to extend or condense — the locked value holds, the total adjusts
Right-click → Split to divide a plan at a point in the timeline, then adjust each half independently
Right-click → Copy to duplicate a plan onto another member
Right-click → Delete to remove it; capacity updates immediately
👉 Managing and Modifying Work Plans
Condense row height so the full team fits on screen.
Sort by availability — today, this week, next 2 weeks, or next 4 weeks — to surface who can take on work.
Watch for the red triangle chip marking members over 100%.
Check the summary row at the top for total capacity and the over-capacity member count. Click it to expand every row at once.
Make adjustments live in the meeting. Drag work from overbooked members to available ones.
Open a project's Plan tab for the Gantt view. Drag phases and milestones to adjust dates, and add milestones directly from the timeline
Set phase dependencies so a date change cascades through dependent phases and their work plans instead of being fixed by hand
Use the members count icon at the top of the project to add members or set individuals to view-only
Create open roles for work that needs staffing before you know who is doing it, then use the split-screen availability view to fill them
👉 Projects
Click the clock icon in the top right of Workload for a filterable log of every work plan change — filter by project, editor, or date range. Each individual work plan has its own log too. If the editor shows as IS, the change came from your ERP integration sync, not a person.
Space | Your Access |
Home Space | Full |
Projects | Full within your access scope |
Workload | Full — member-level capacity planning |
Planner | Full — project-level scheduling |
Budget | Hours and percentages only. Dollar amounts require Budget Manager |
Workload and Planner are the same data — Workload is the member view (a "W" flipped upside down is an "M" for Members), Planner is the project view. Both are built from the same work plans. Start wherever you are comfortable
75% planned for the next 30 days is the onboarding goal — Don't try to plan six months out on day one. Get near-term coverage solid, then extend
Use tentative plans to answer "can we take this on?" — Build the plan, look at the heat map, then toggle tentative plans off to compare
Enable Default Full Week Planning if your team plans in weeks — It pre-selects weekly increments and snaps dates to Monday–Sunday
It's a plan, not a commitment — Tell your team this out loud. Plans that move are working as intended
