A work plan is a scheduled block of time that assigns a member to work on a specific project or phase. Work plans are the foundation of capacity planning in Mosaic. They appear in both the Workload and Planner spaces and directly impact the heat map, capacity calculations, and project budgets.
By default, a work plan impacts the assigned member's capacity. As you create plans, you will see the heat map update in real time.
Click the "Work Plan" widget on the personal dashboard to view work plans that have been assigned to you for this week.
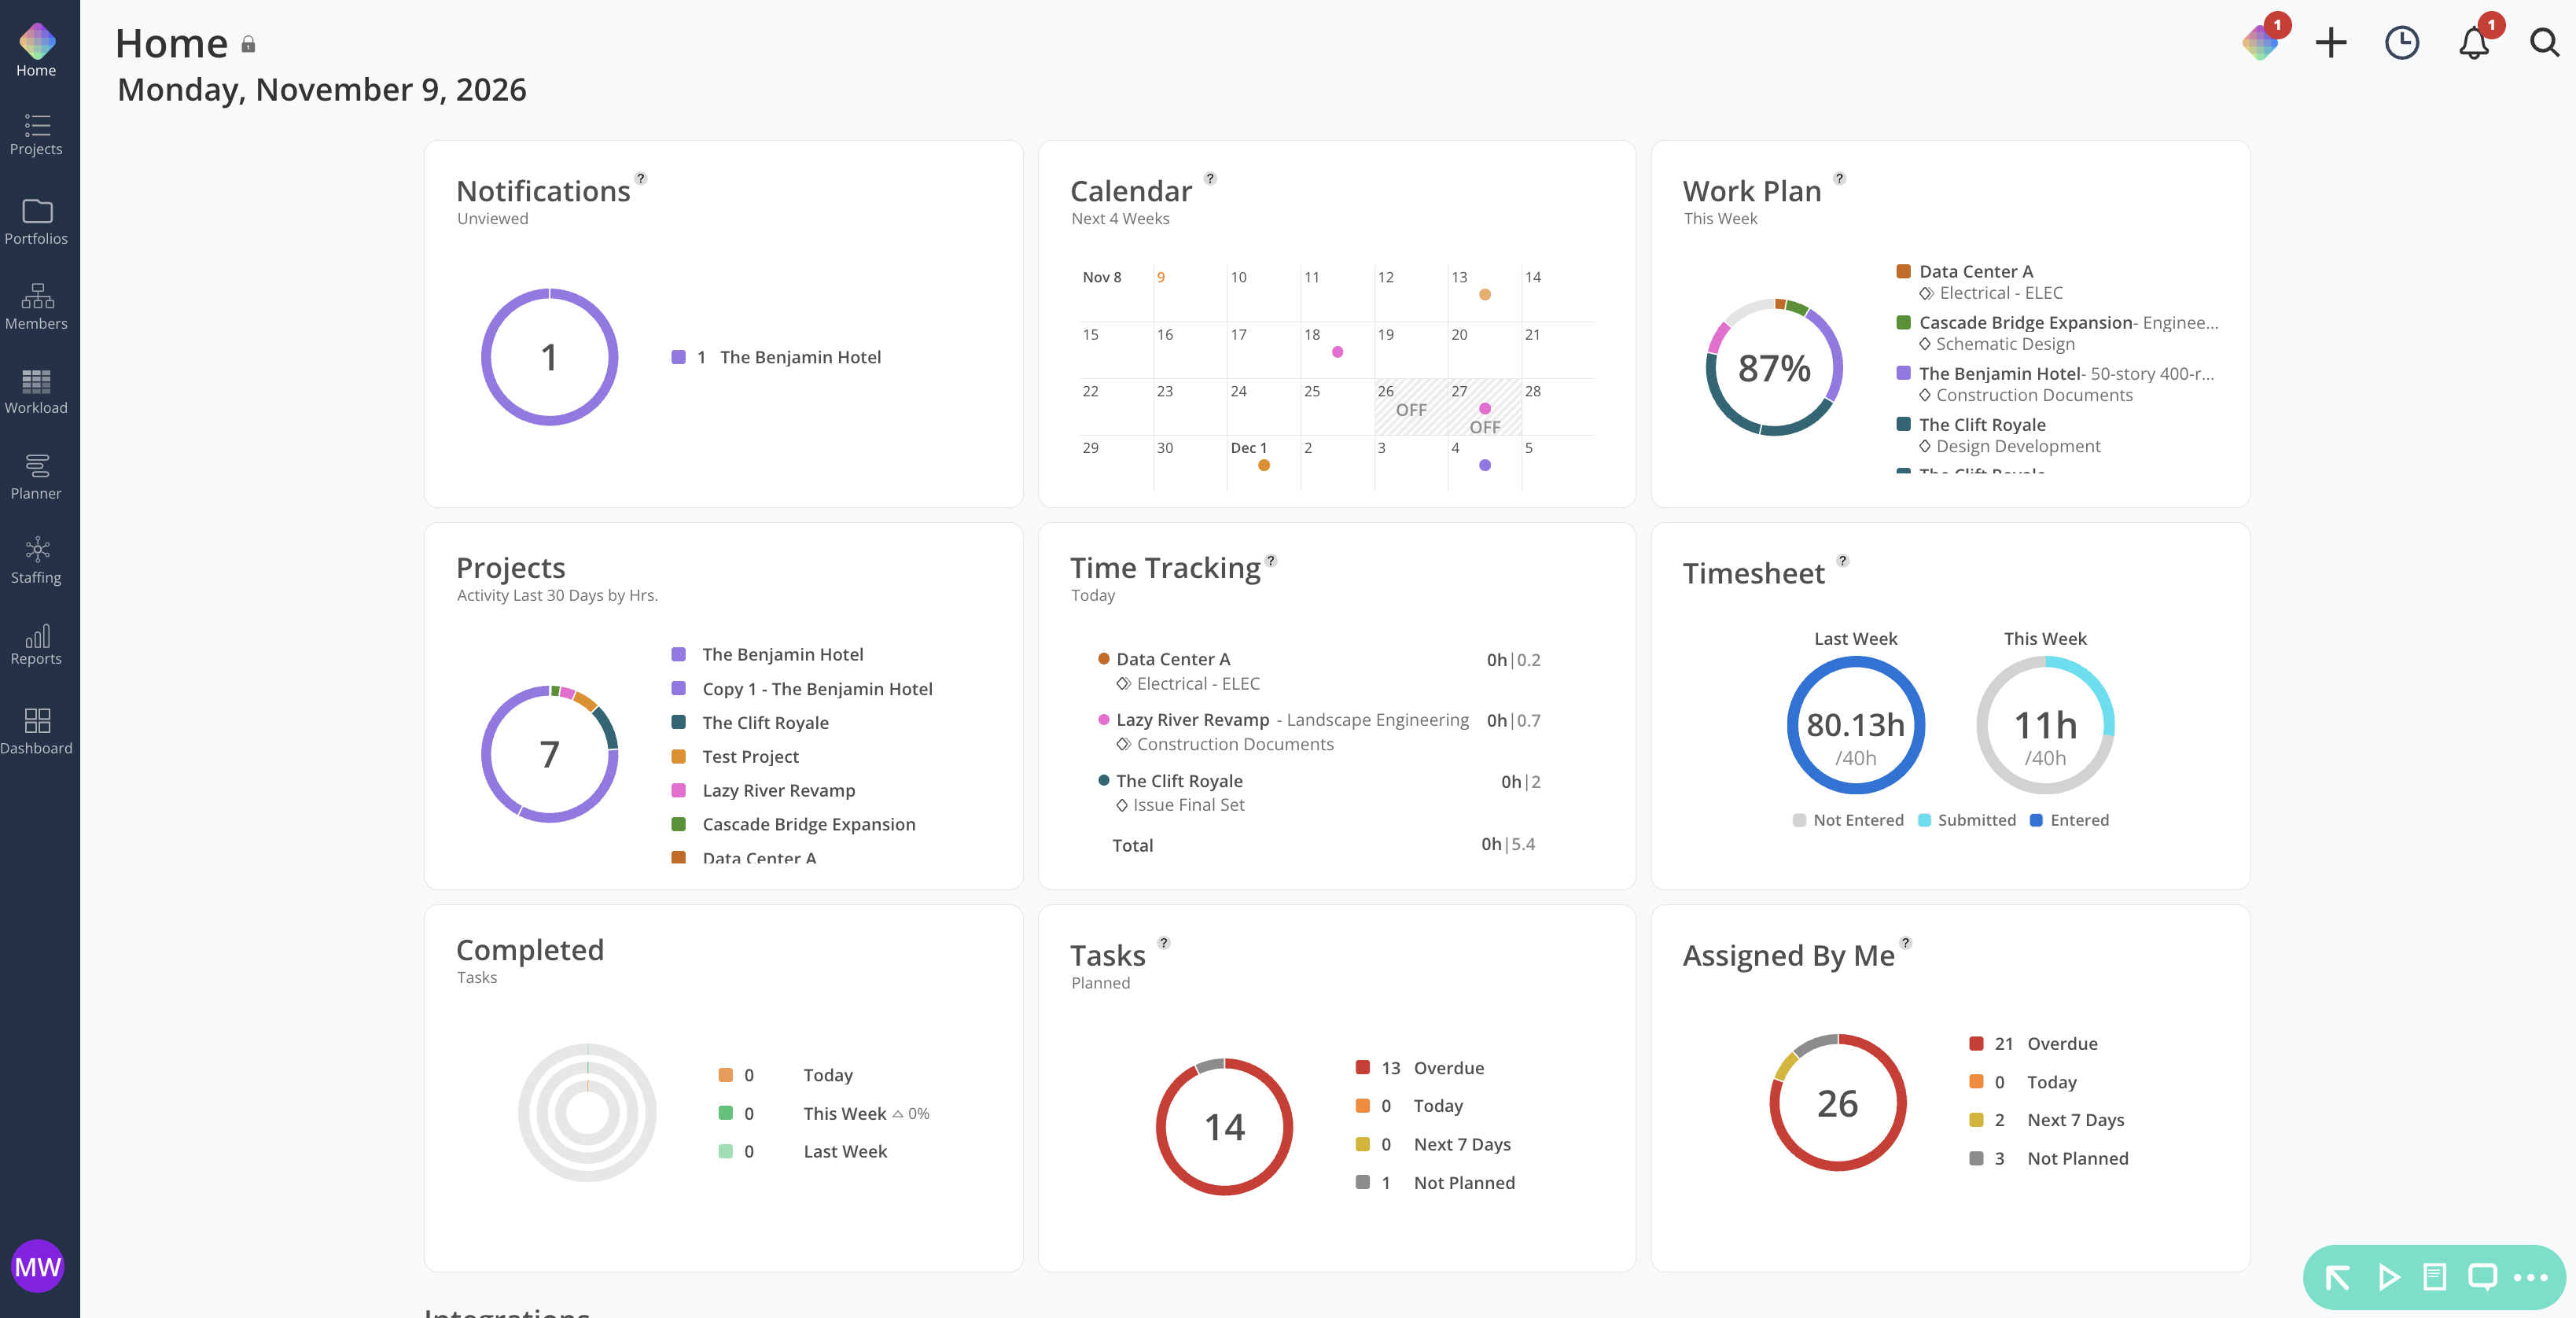
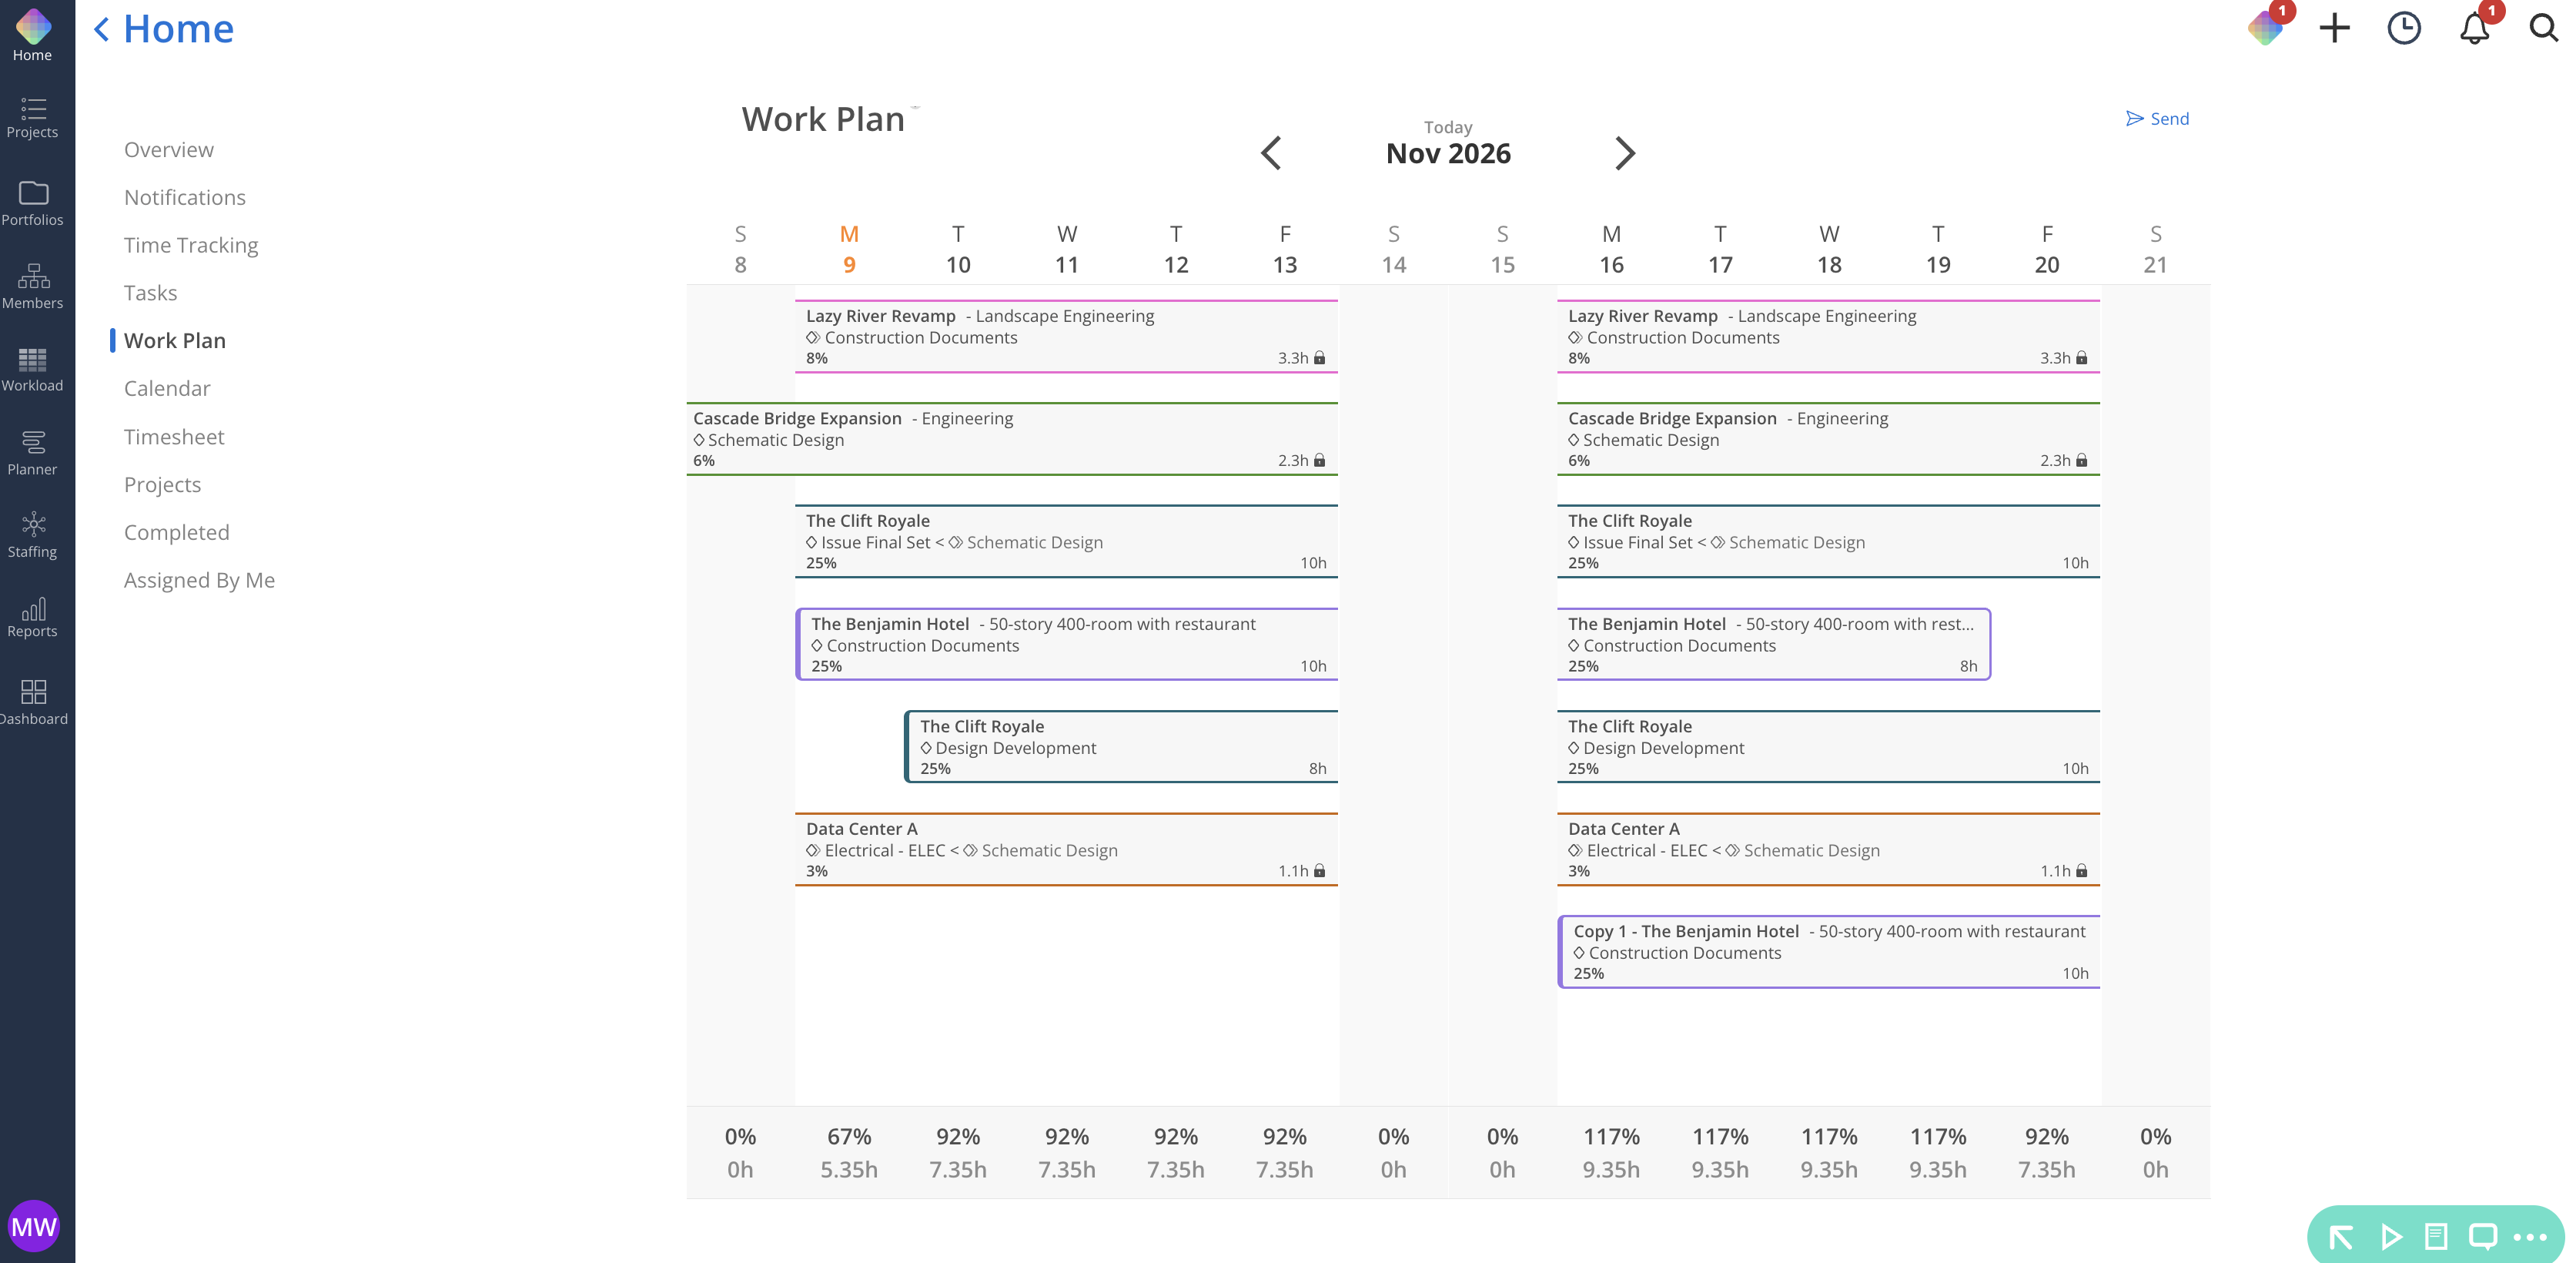
Read more about work plan page
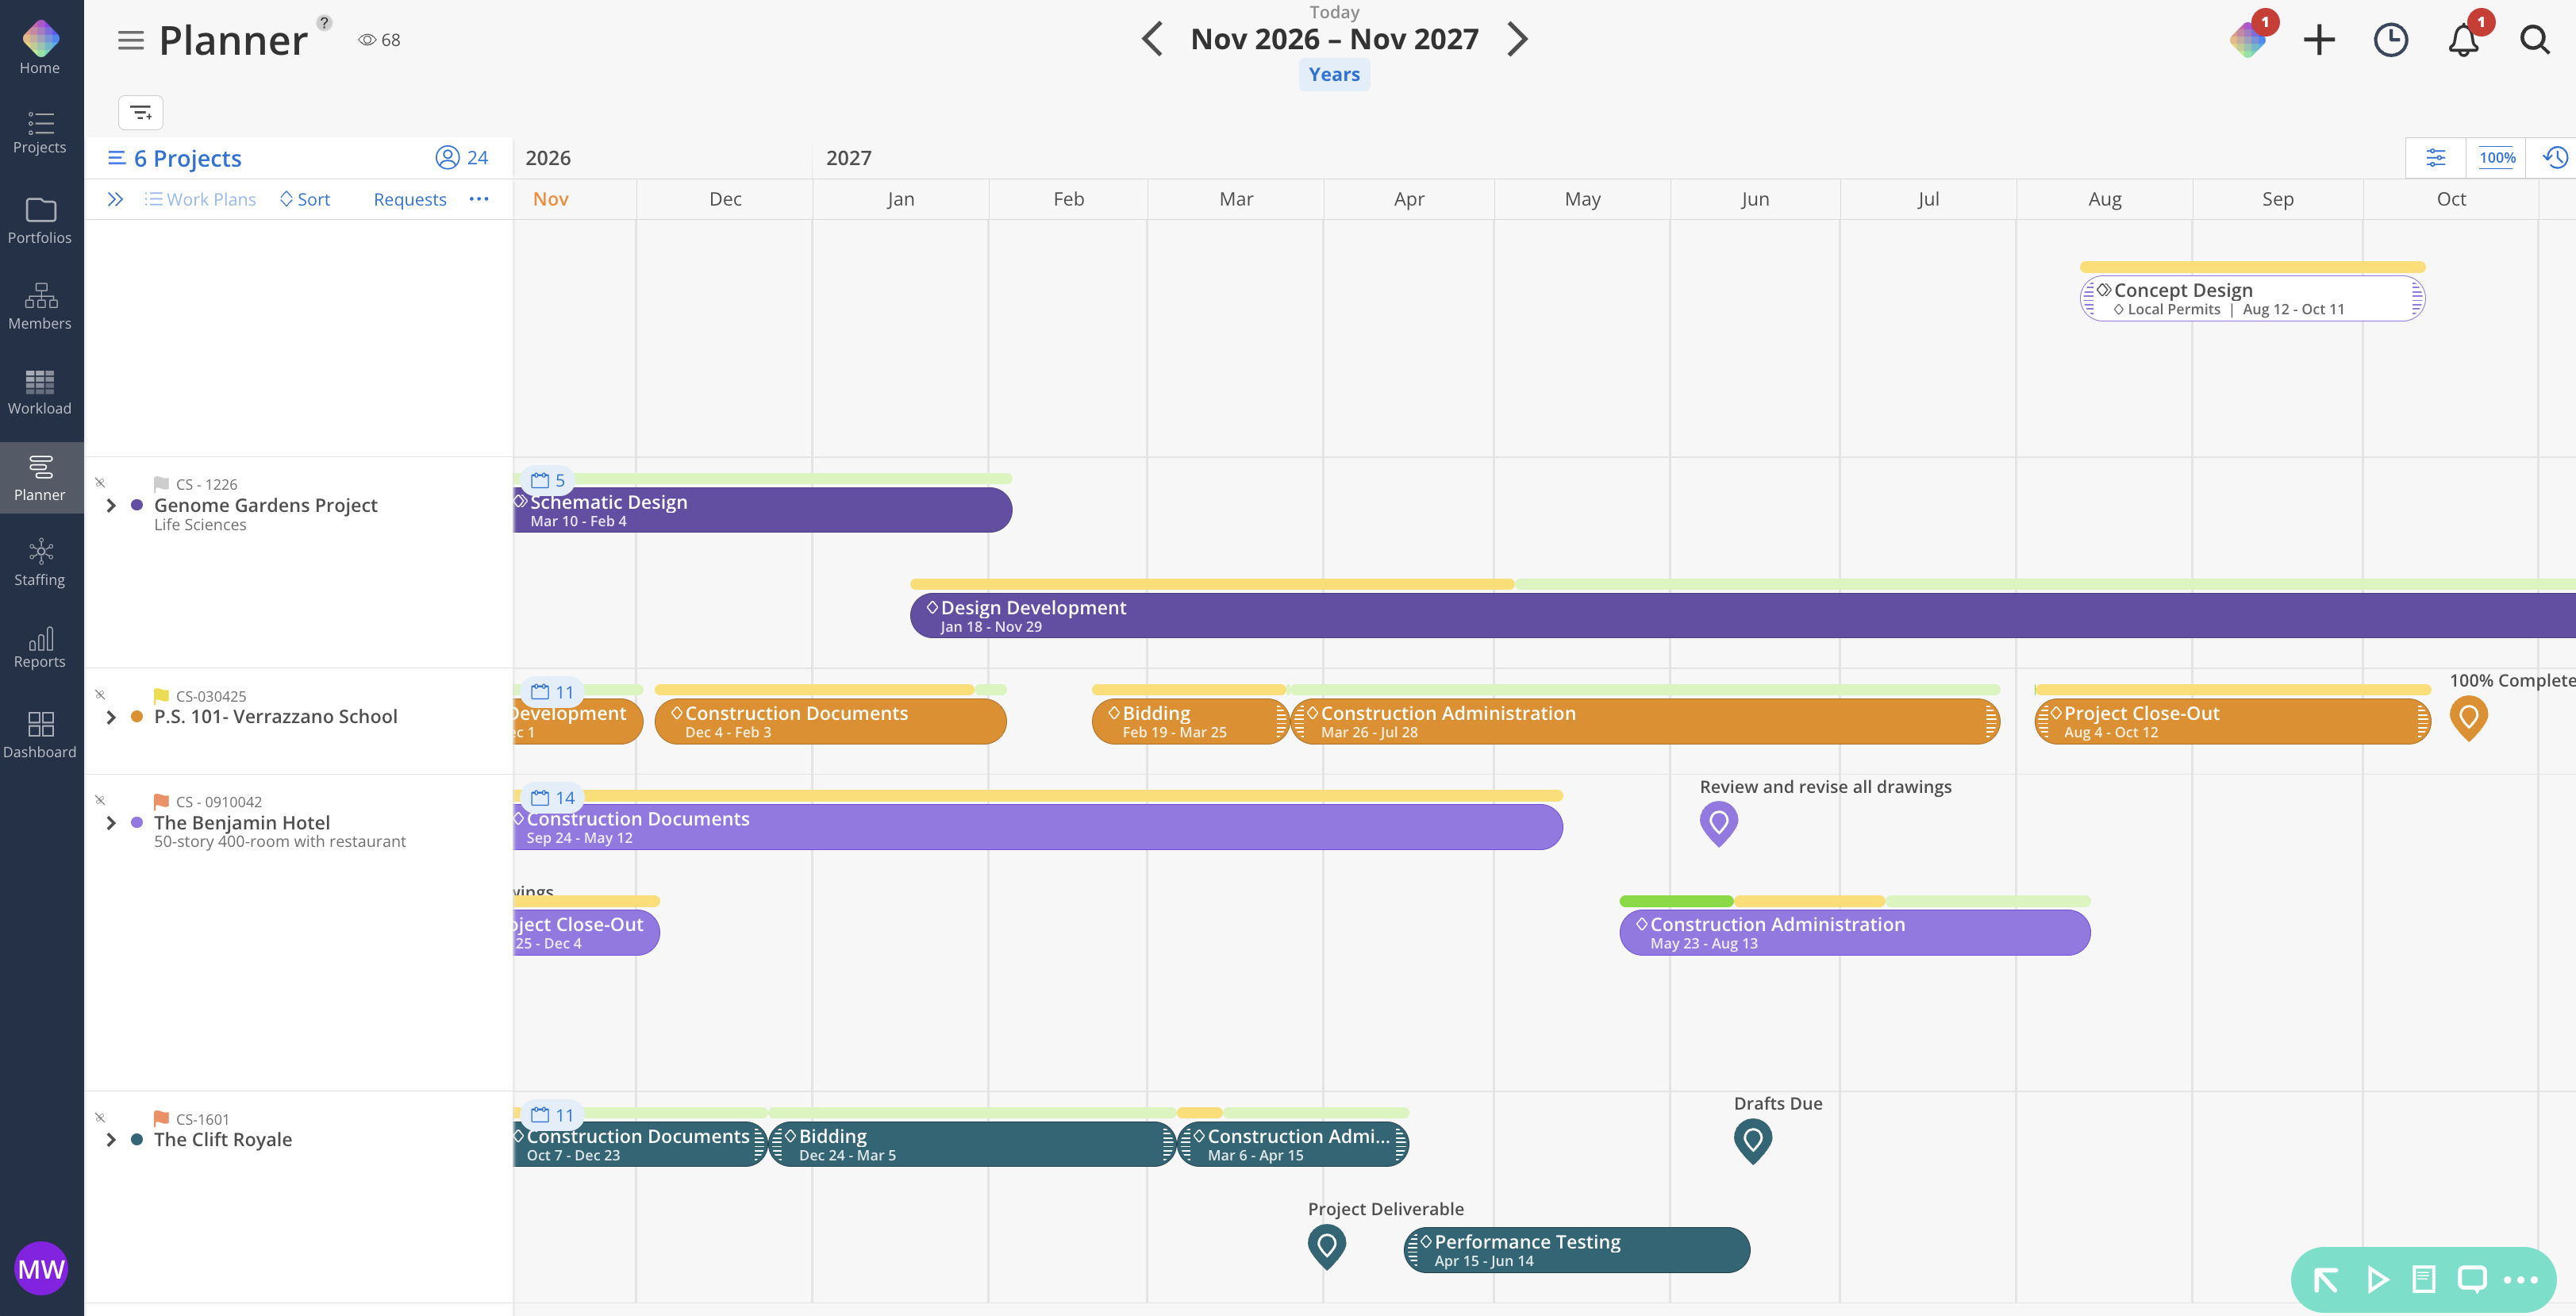
Work planners and above have access to the Planner space where they are able to view and assign work plans to members.
Work planners and higher-ups have the privilege of accessing the Workload space, where they can monitor the member workloads and delegate work plans to members.
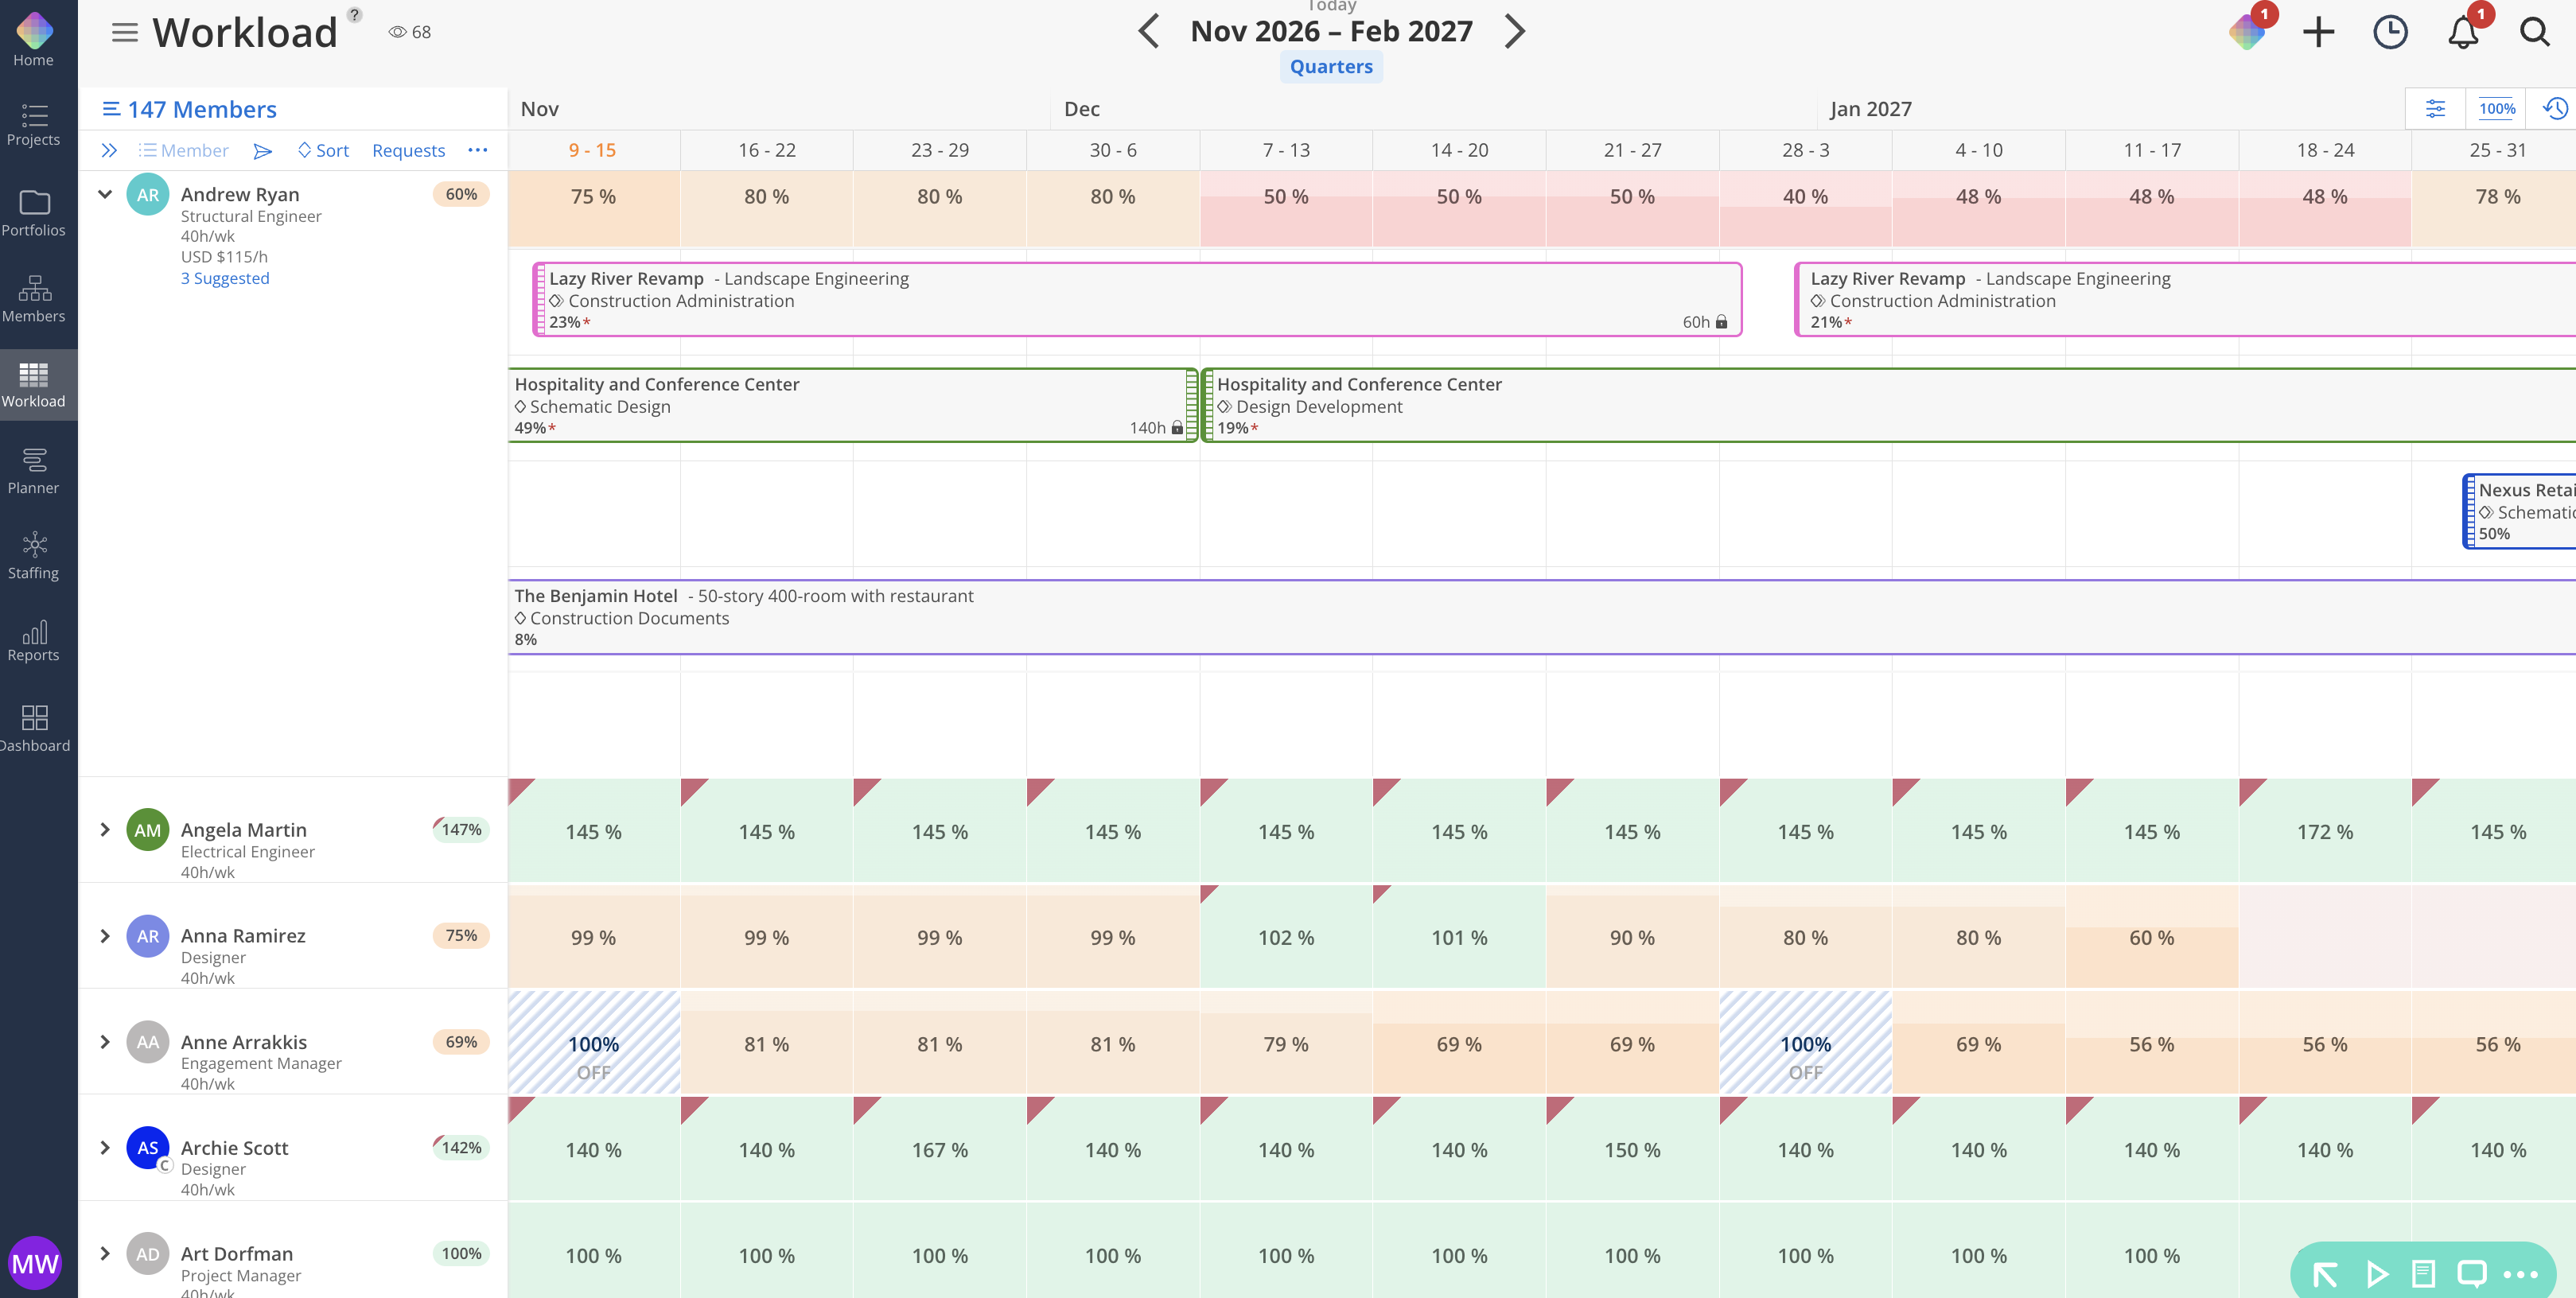
Read more about workload space
When you open a work plan, the modal displays:
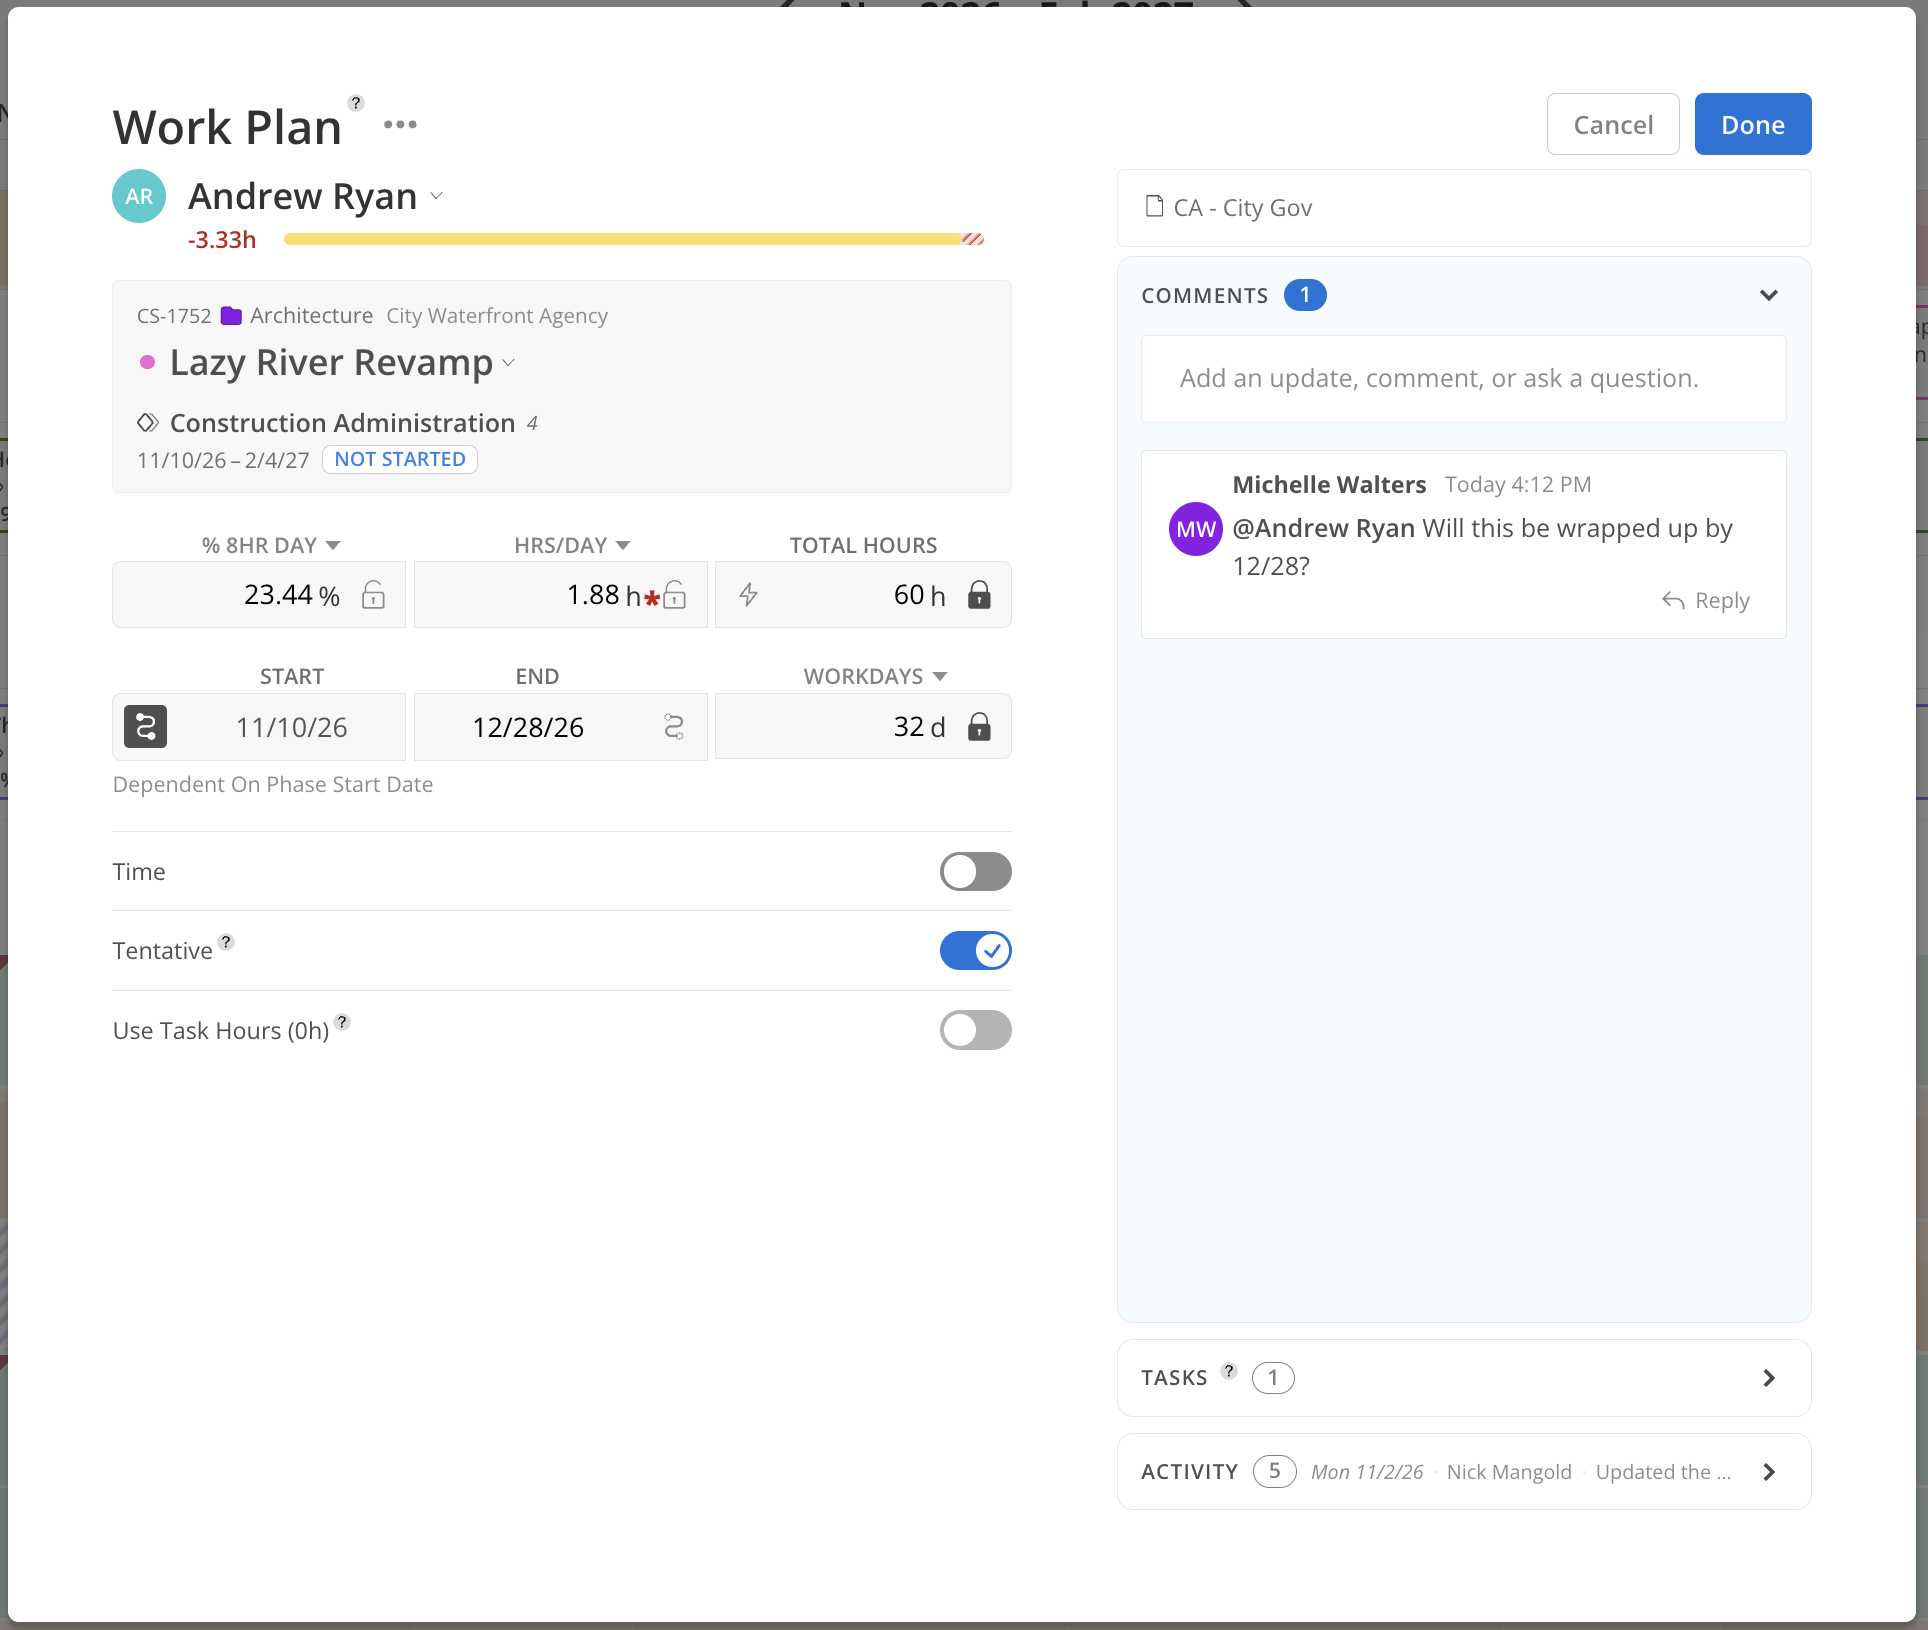
Member. The team member assigned to this plan.
Project. The project this plan is for, searchable by name or number.
Phase. The specific phase within the project, if the project has more than one.
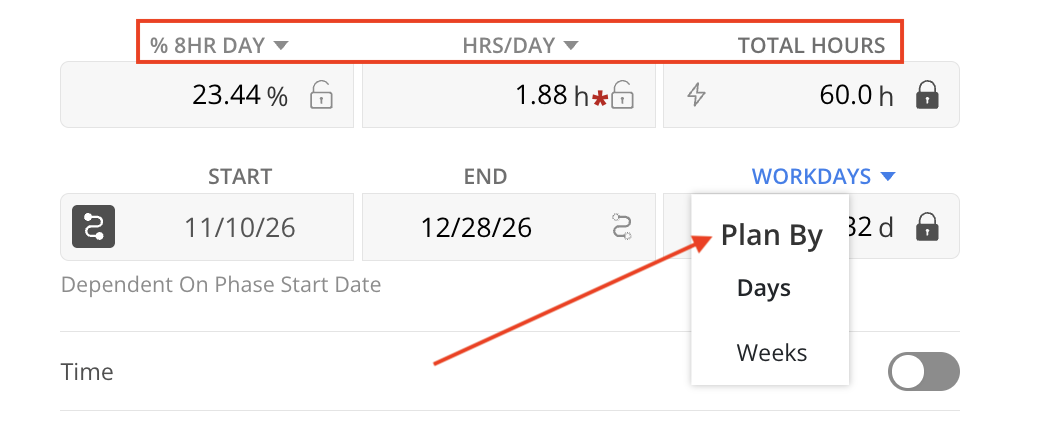
Scheduling fields. Percentage of day or week, hours per day or week, or total hours, with a lock icon showing your constant.
Start and end dates. The date range of the plan.
Time toggle. Turn this on to set a specific start and end time of day the work is scheduled for, instead of only a date range.
Tentative toggle. Marks the plan as tentative so it can be shown or hidden across Workload and Planner.
Task hours toggle. Lets the work plan's hours come from the estimated hours on its associated task, instead of a number you type in yourself.
Description. An optional text field for notes, on the right side of the modal.
Comments. Tag team members with @mentions on the right side of the modal. They receive email and in-app notifications.
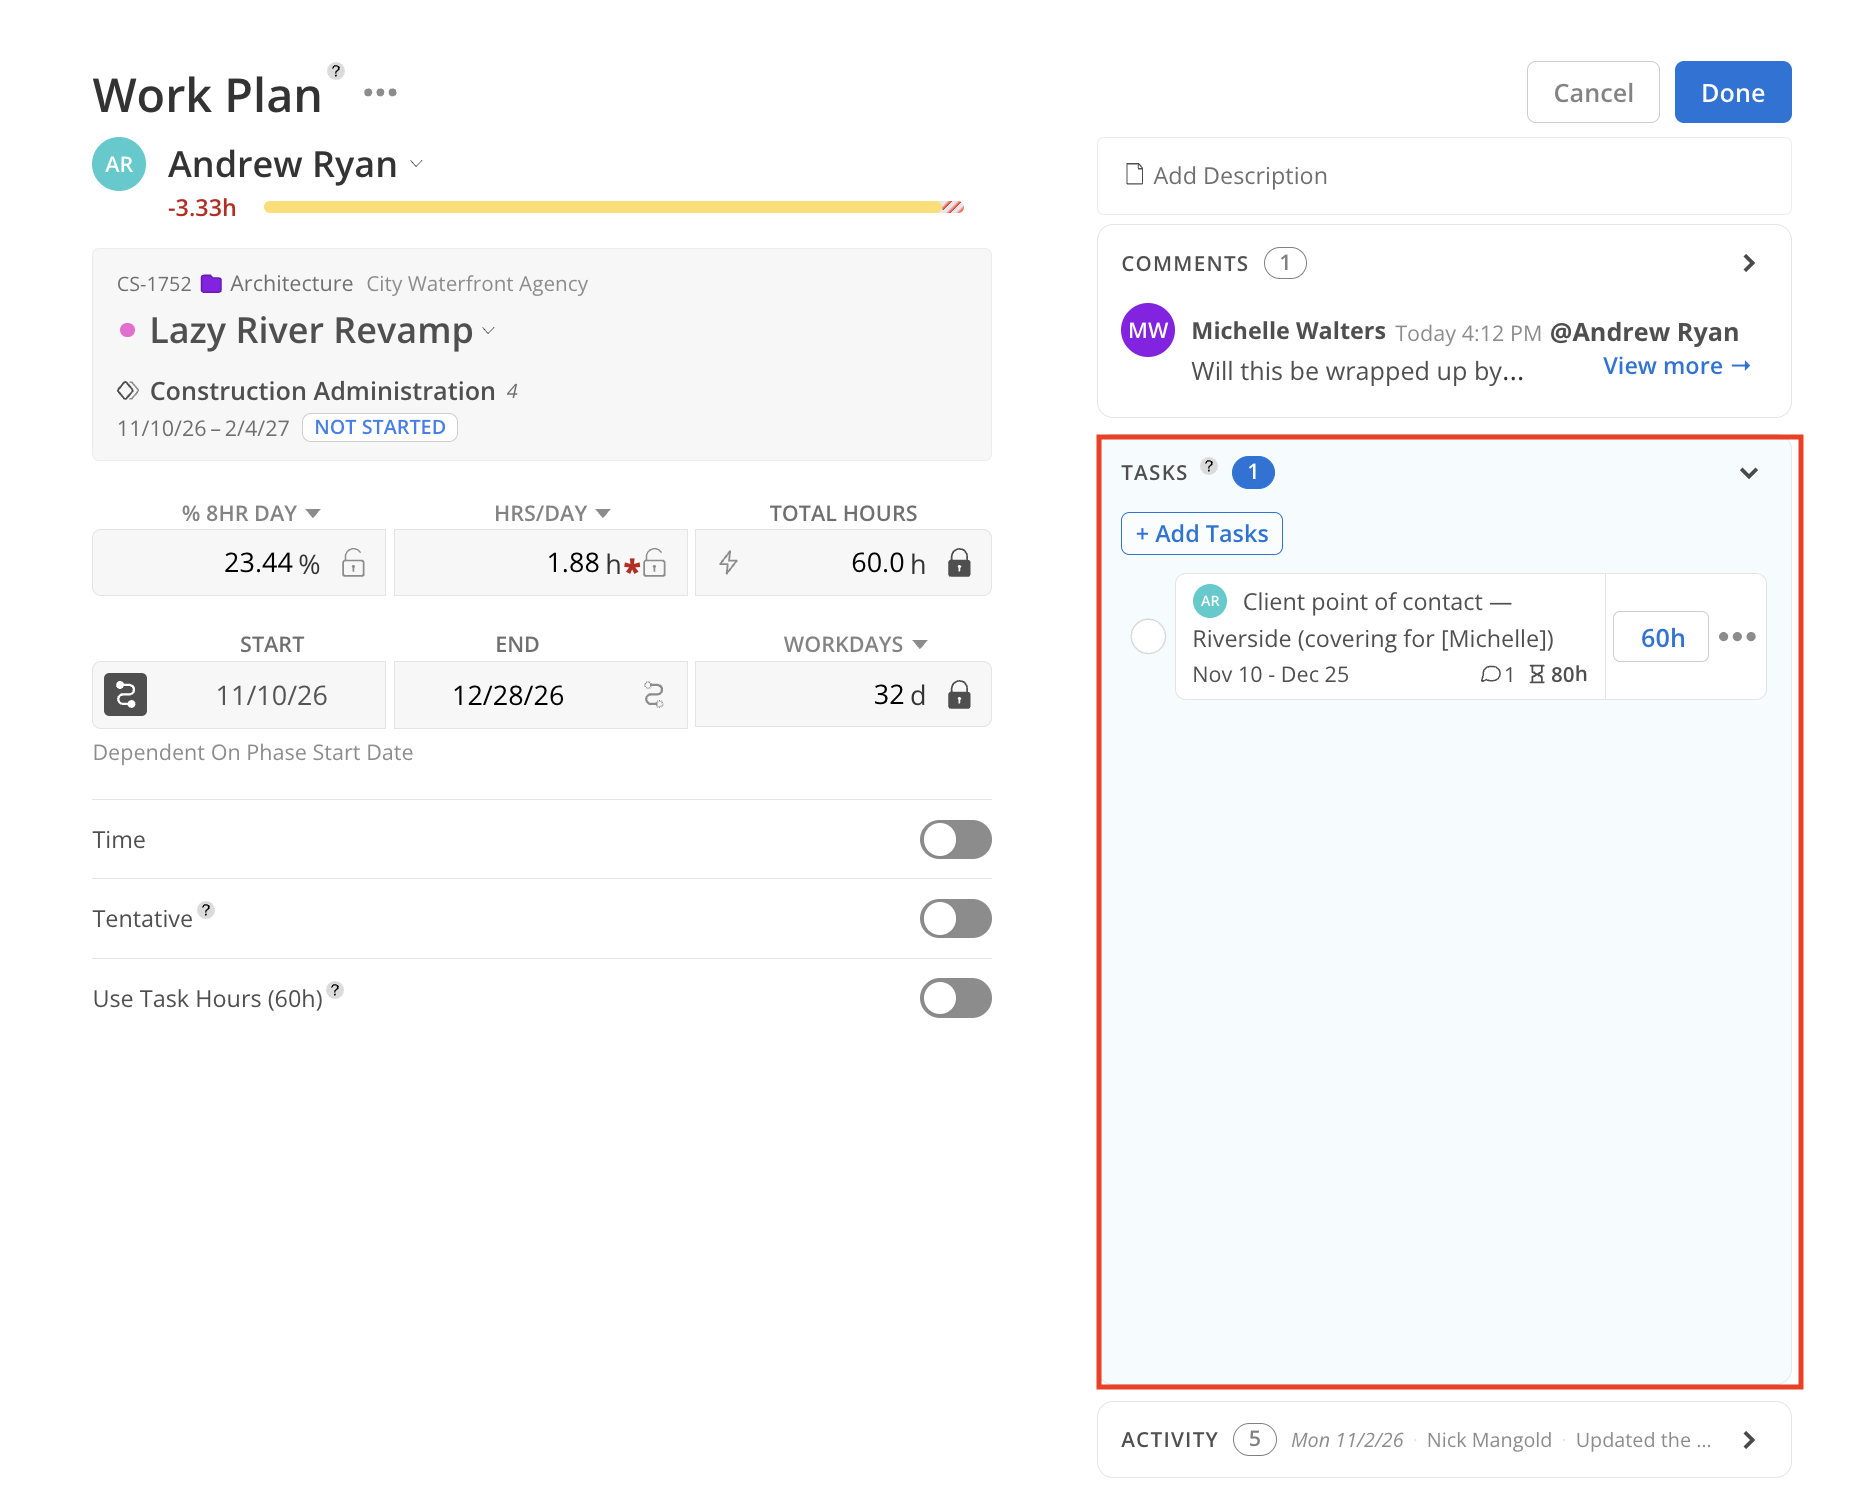
Tasks. Add an existing task from the project's phase, or create a new one, and associate it with this work plan.
Activity log. A record of every change made to this plan, at the bottom of the modal.
Click into a member's row in the Workload or Planner space to expand it.
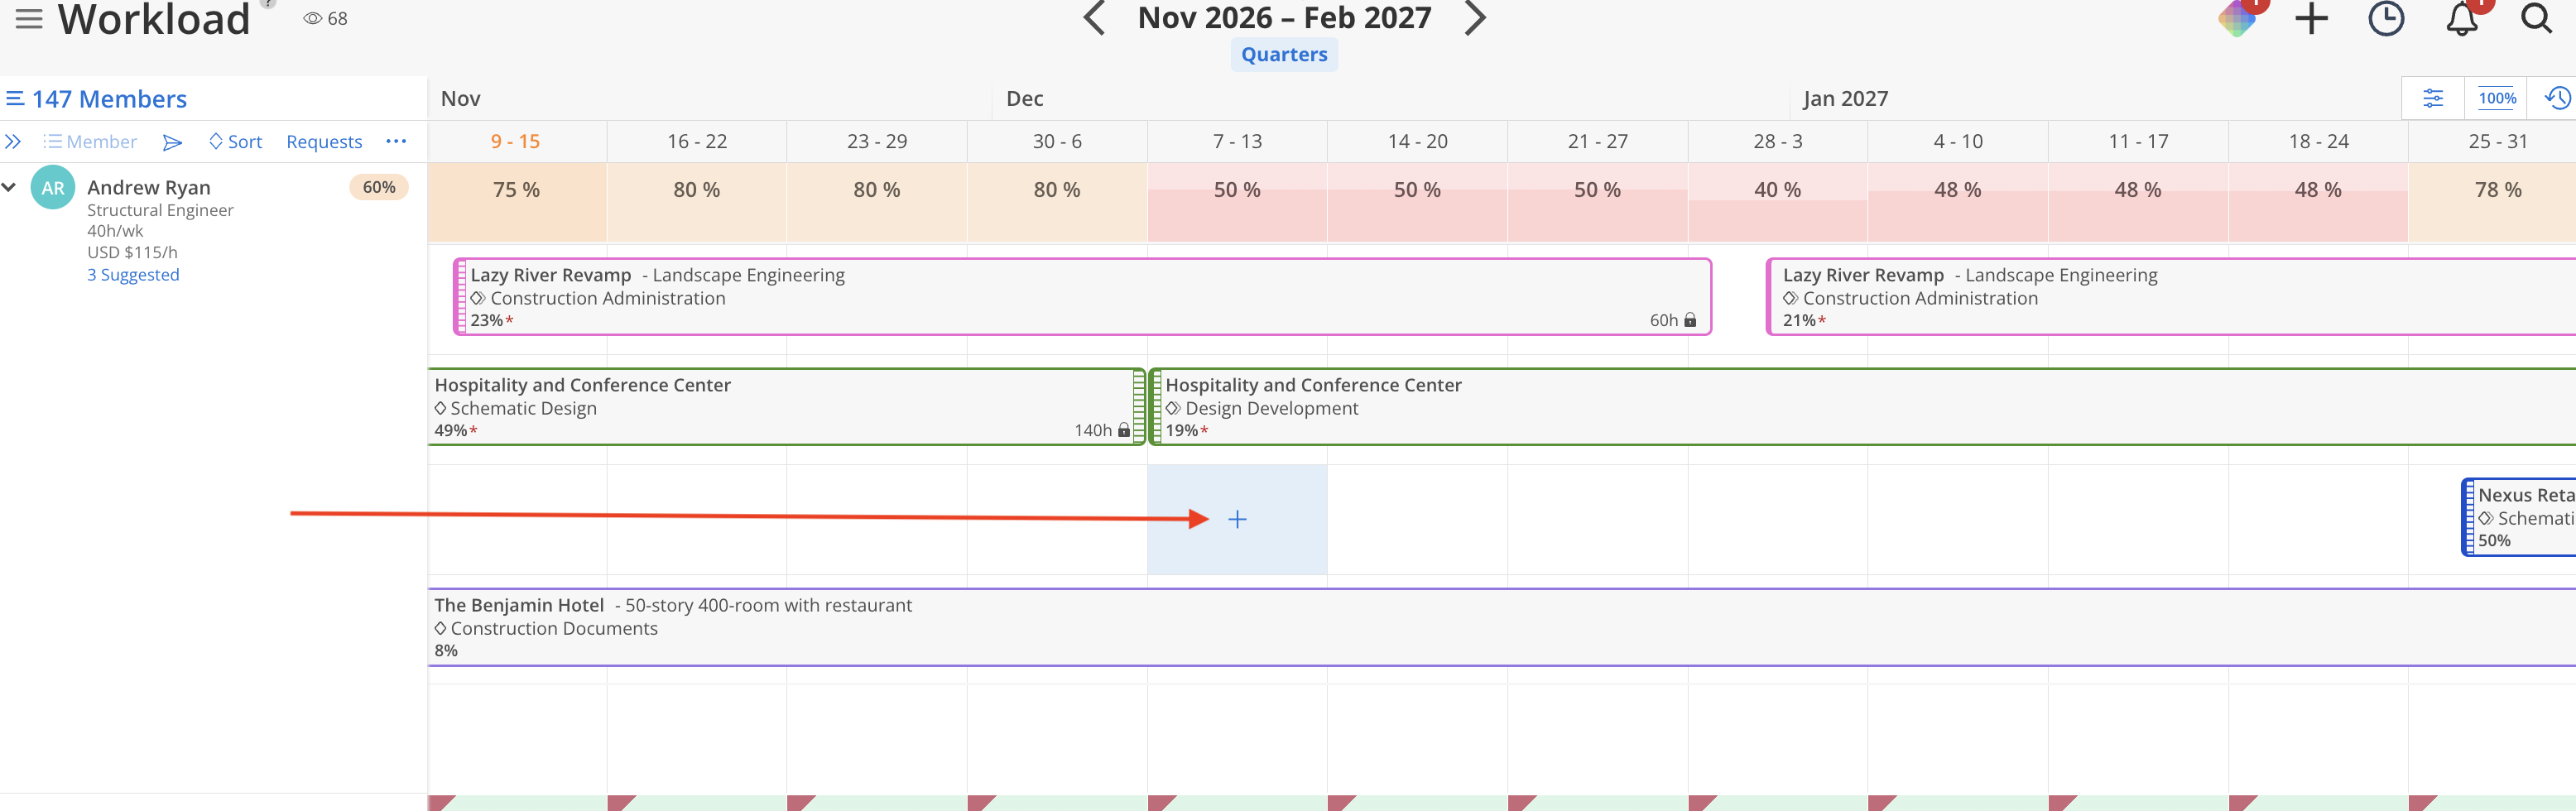
Hover over any blank cell in the timeline and click the plus (+) icon.
Select the project by typing the name or number.
If prompted, confirm adding the member to the project.
Select the phase, if the project has more than one.
Choose how to schedule time:
Percentage of day or week — e.g., 50% of their day
Hours per day or week — e.g., 20 hours per week
Total hours — e.g., 100 hours spread across the date range
Enter the amount. The lock icon appears on the field you type in. This becomes your constant.
Set the start date and end date using the calendar picker.
Turn on the time toggle if the plan needs a specific start and end time of day. See Setting a Time of Day below.
Turn on tentative if the plan should start out tentative.
Optionally add a description or leave a comment on the right side of the modal.
Add a task if one applies to this plan. See Adding a Task to a Work Plan below.
Click Create.
Turn on the time toggle to schedule a work plan against a specific window of the day, rather than just a date range.
Turn on the time toggle inside the work plan.
Enter a start time and an end time for the day, such as 8:00 AM to 5:00 PM.
The plan now reflects that specific time window for each scheduled day.
Use this when a member's work on a project needs to happen during a specific part of the day, such as a shift schedule or a window that has to avoid a standing meeting.
Associate a task with a work plan to connect the staffing side of the work to the checklist item that drives it.
Inside the work plan, open the Tasks section and select Add Task.
If the project's phase already has a task, it populates here for you to select. Otherwise, create a new task.
Add a schedule and an hours estimate for the task.
Open the task to see the full task modal if you need to review or edit more detail.
Select Add to associate the task with the work plan.
Mark the task complete from here if it's finished.
Turn on the task hours toggle if you want the work plan's hours to use the task's estimated hours instead of a number you enter manually.
The lock icon indicates which value stays constant when you change the dates.
If locked on hours per week (e.g., 20), changing the dates will change total hours but keep 20 hours/week
If locked on total hours (e.g., 100), extending the date range spreads those hours thinner across more weeks
You can move the lock to a different field at any time by clicking into that field.
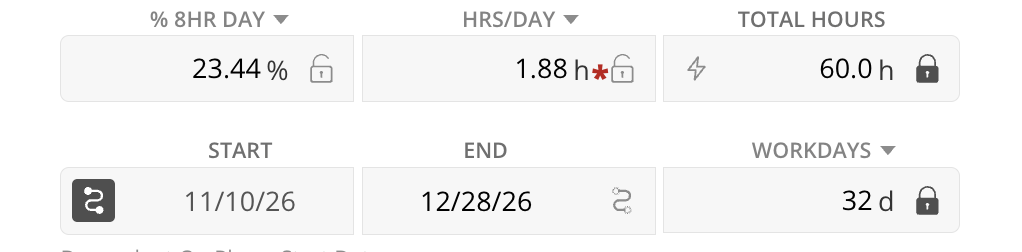
Percentage of day — Allocates a percentage of the member's daily capacity (toggle to weekly)
Hours per day — Sets a fixed number of hours per day (toggle to weekly)
Total hours — Allocates a lump sum of hours over the full date range

Start broad, refine later. Create big work plans first, then split them week by week as details become clear
Use tentative plans to test capacity. Mark a plan as tentative to see impact without committing
The calendar shows capacity. When setting dates, the calendar picker shows gray fill indicating existing plans and red numbers when the member is at capacity
Use the time toggle for shift-based work. It keeps the plan accurate when a member's hours need to land in a specific part of the day.
Associate tasks as you staff. Adding a task from the work plan keeps the checklist item and the scheduled time together instead of creating them separately.
