The Workload space provides a member-level view of your team’s capacity, allowing you to see who is working on what, where team members have availability, and where work may be over-allocated.
It is designed to help answer key questions such as:
Who has availability next week?
Who is already heavily booked?
Where are there gaps or bottlenecks across the team?
How will time off impact capacity?
This space is commonly used by leadership, resource managers, and team members responsible for balancing work across projects.
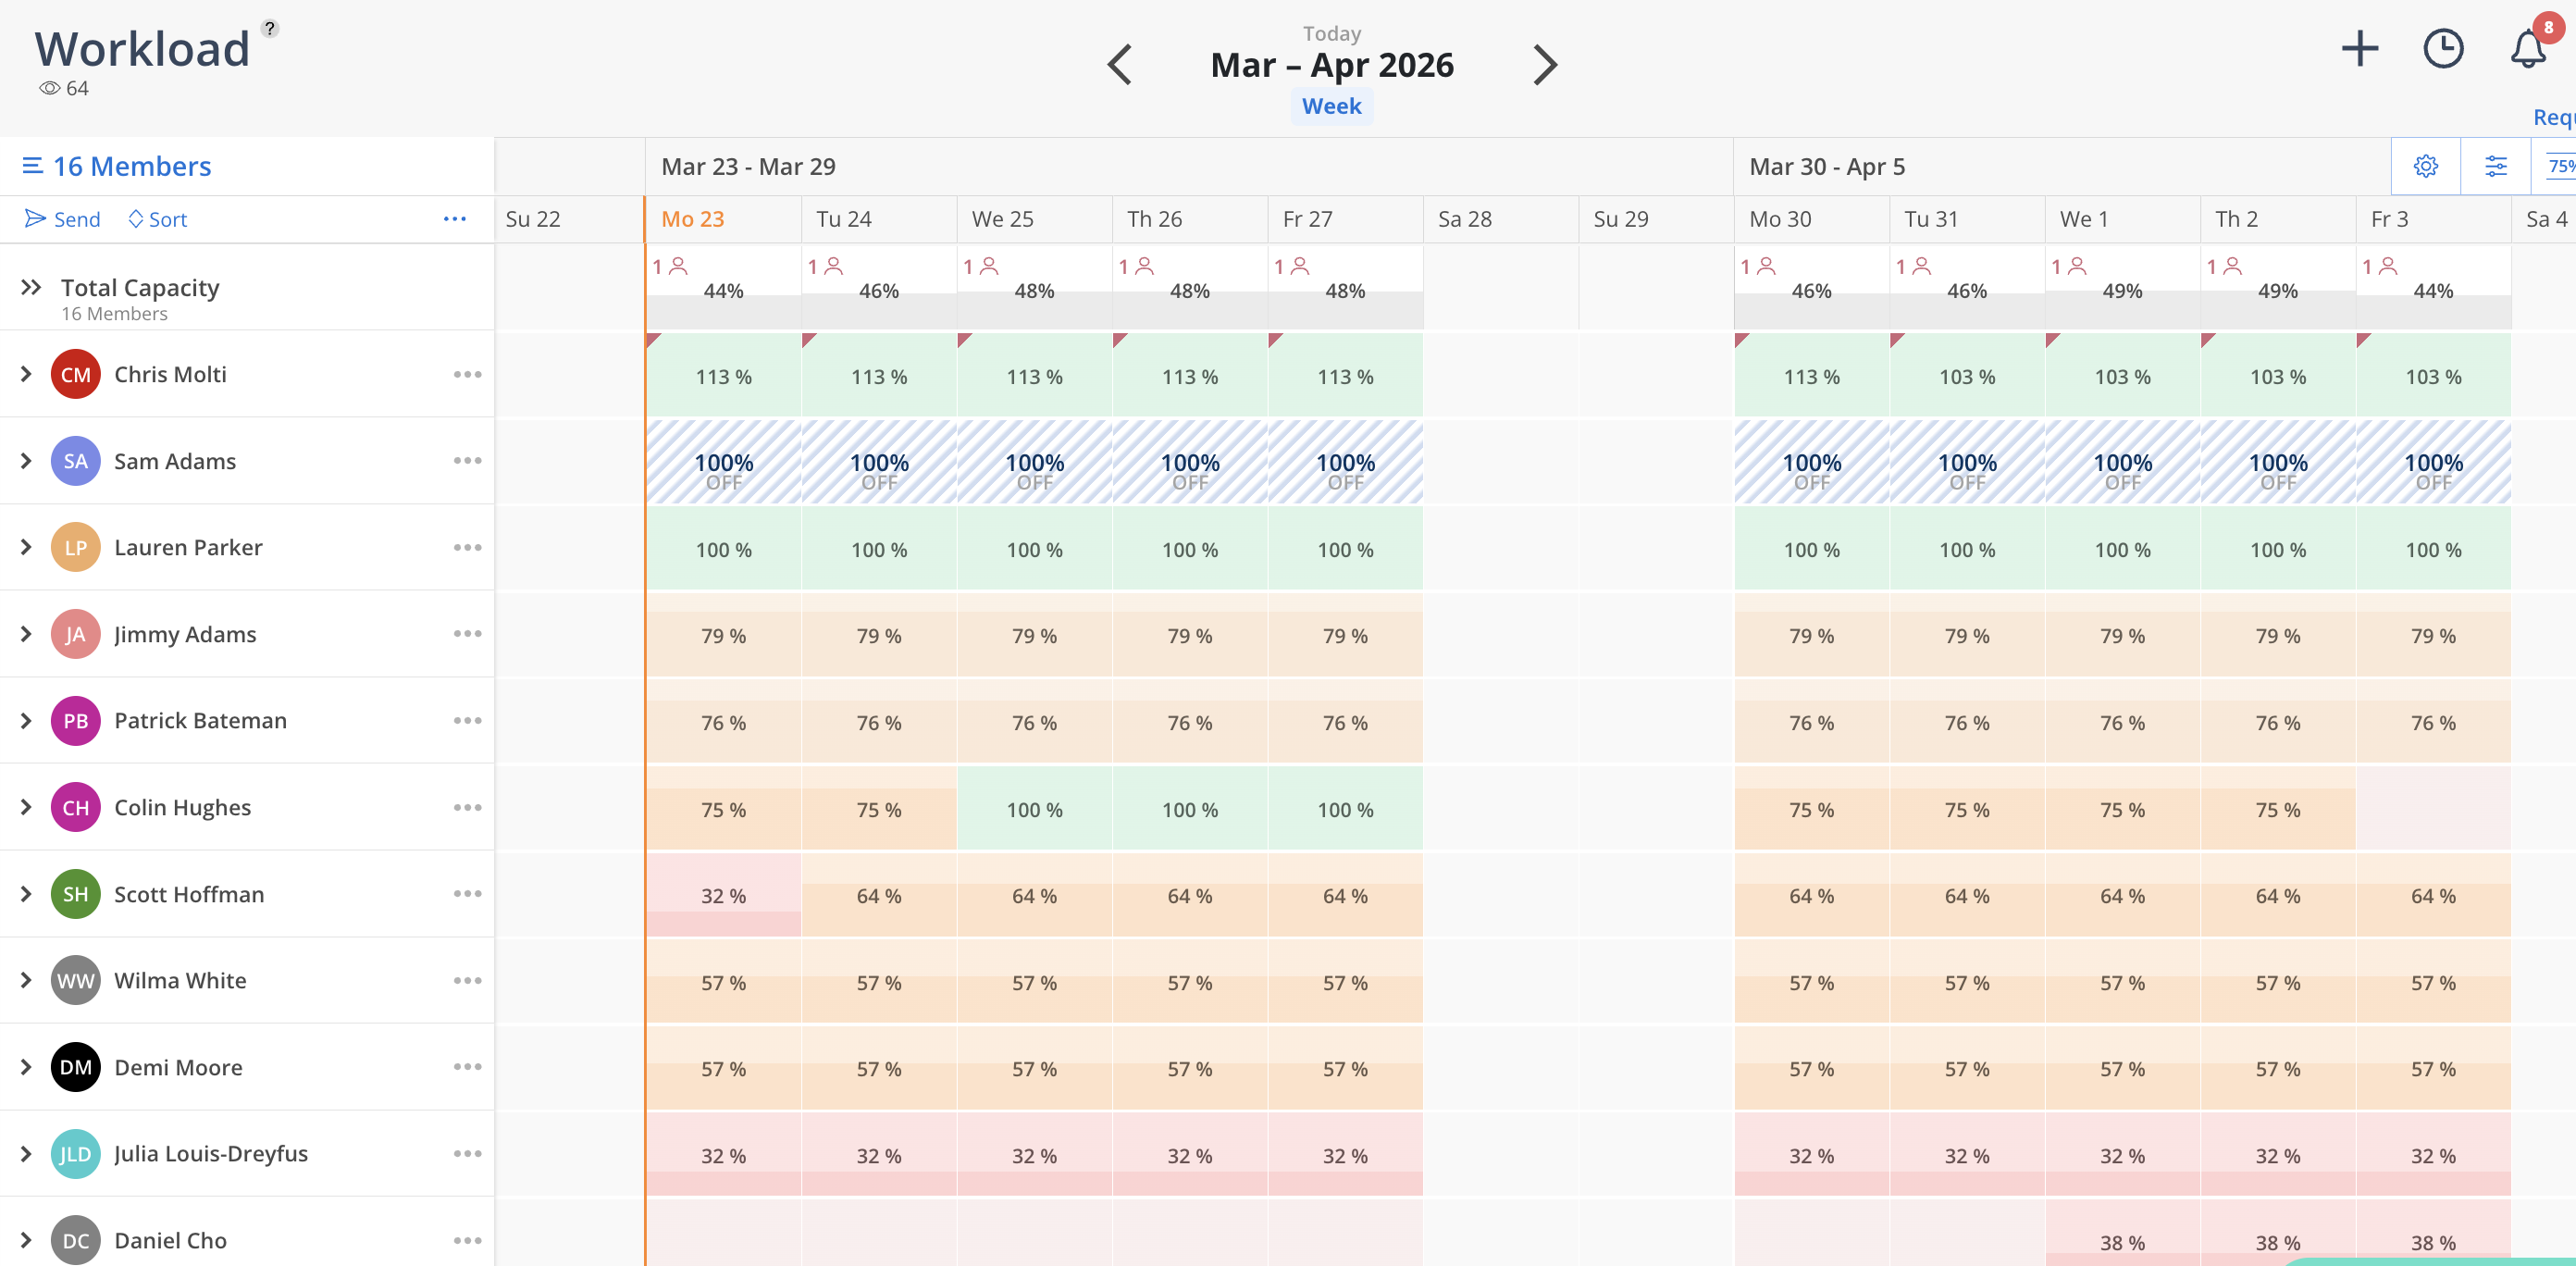
The Workload space provides a member-by-member view of your team’s capacity, based on their assigned work plans.
It allows you to:
View each team member’s workload individually
Understand capacity and availability over time
Identify overbooked or underutilized team members
Key components of the Workload space include:
Timeline view of scheduled work
Filtering and sorting options
Capacity heat map
📸 Add image: Workload overview (timeline, filters, and heat map highlighted)
The Workload space displays each team member’s scheduled work over time, based on their assigned work plans.
Work plans are the foundation of the Workload view. As work plans are created and updated, they determine each person’s planned hours and how their capacity is displayed.
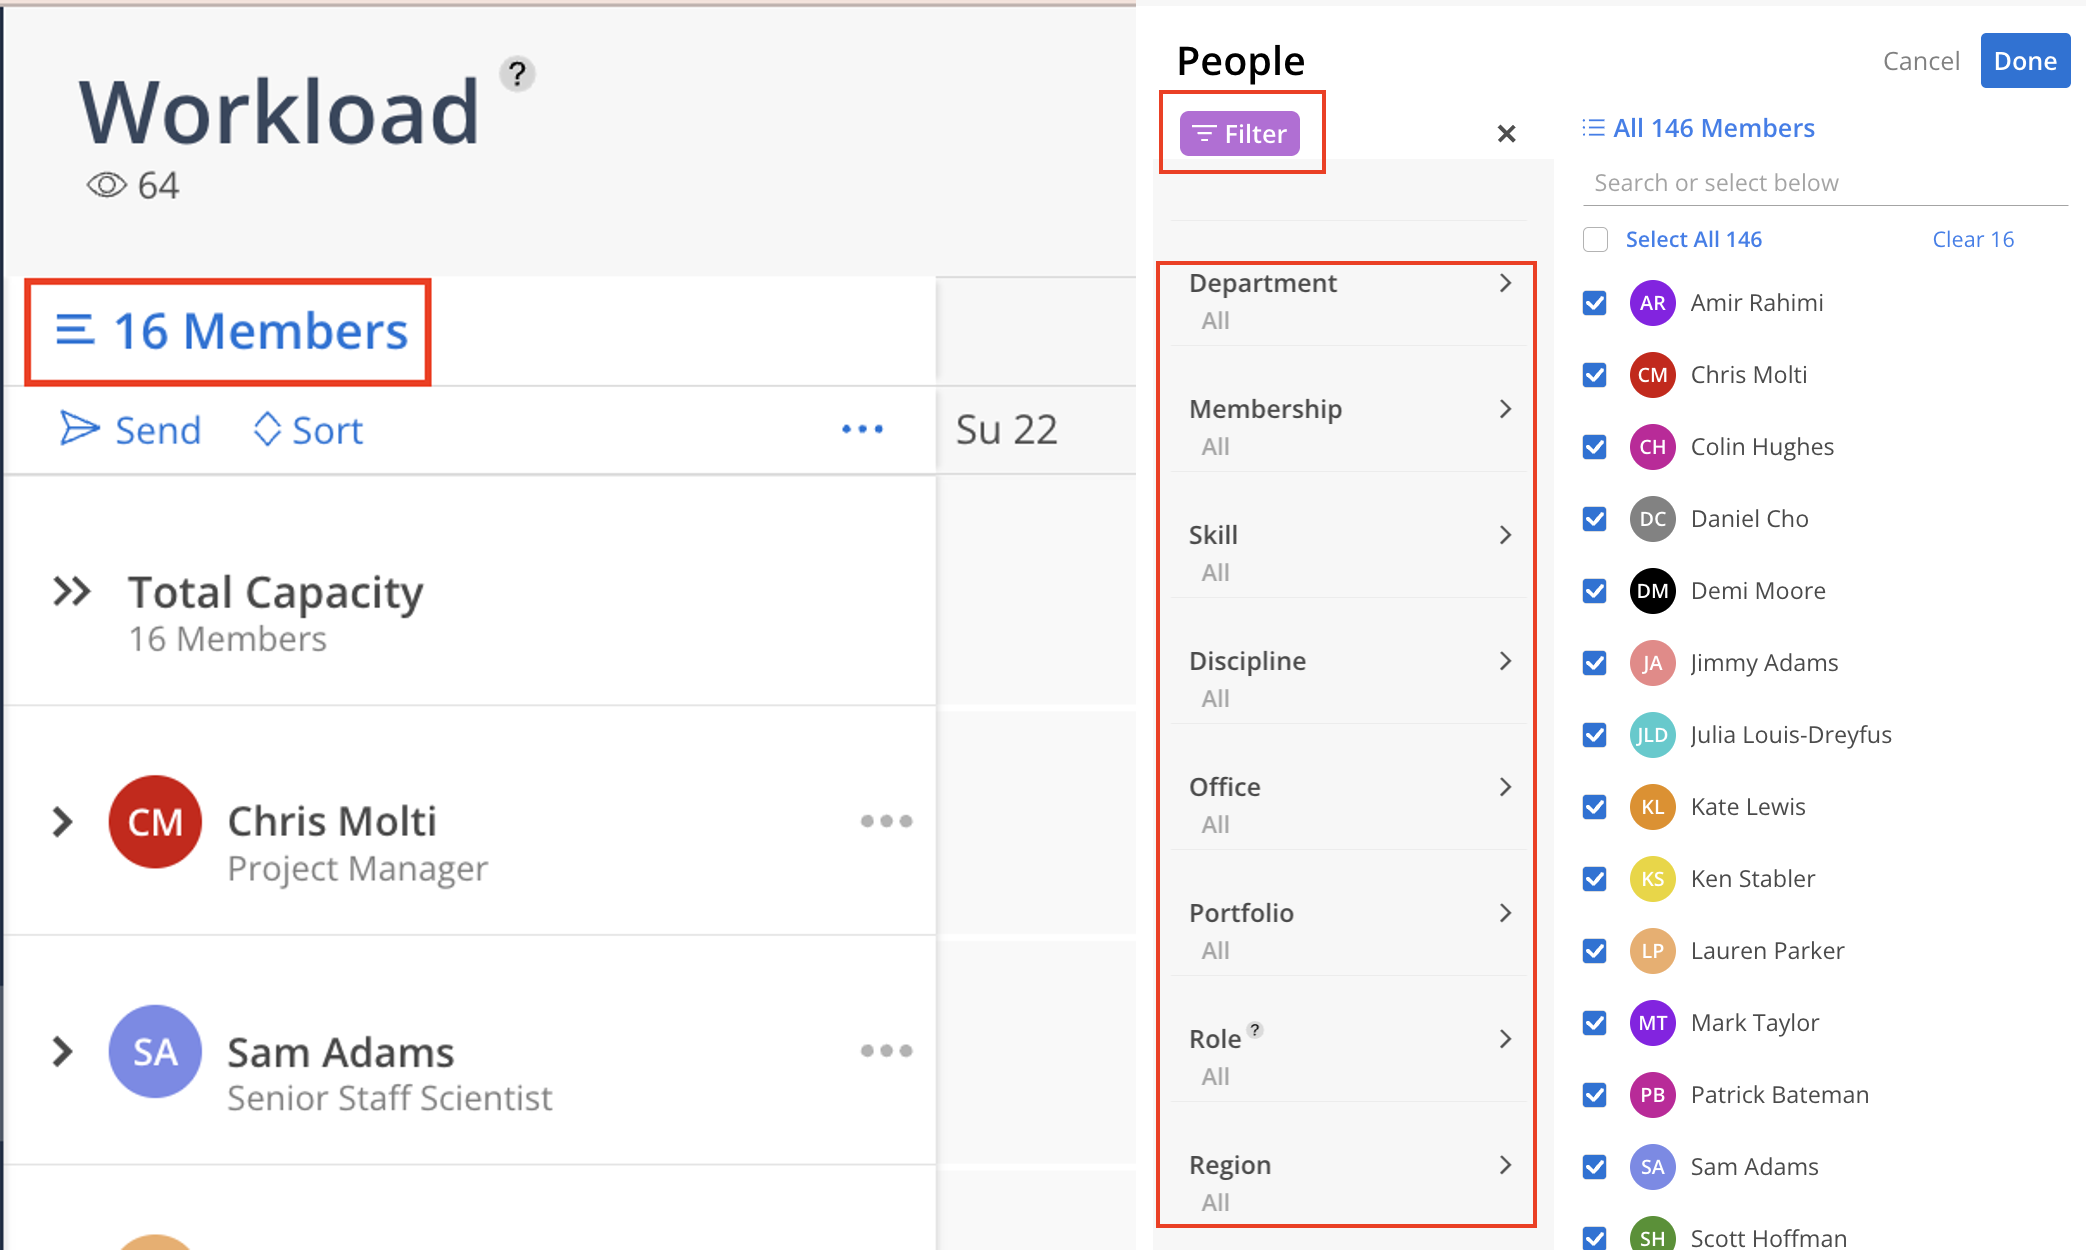
You can select which team members to view, and the calendar will reflect their schedules accordingly.
📸 Add image: Member rows with selected users and populated calendar
👉 Learn more:
Creating a Work Plan in Workload
Viewing Members and Their Workloads
The Workload space provides a calendar view of each team member’s scheduled work, helping you understand how work is distributed across your team.
This allows you to quickly identify where team members have availability or are overbooked.
👉 Learn more:
Viewing Members and Their Workloads
The heat map provides a visual indication of how much of each person’s capacity is being used.
It highlights areas of availability, over-utilization, and scheduled work, allowing you to quickly assess team workload.
💡 Many teams use percentage views for a high-level understanding of capacity and hours-based views for more detailed planning.
📸 Add image: Heat map with varying utilization levels
👉 Learn more:
Total Capacity vs. Individual Capacity
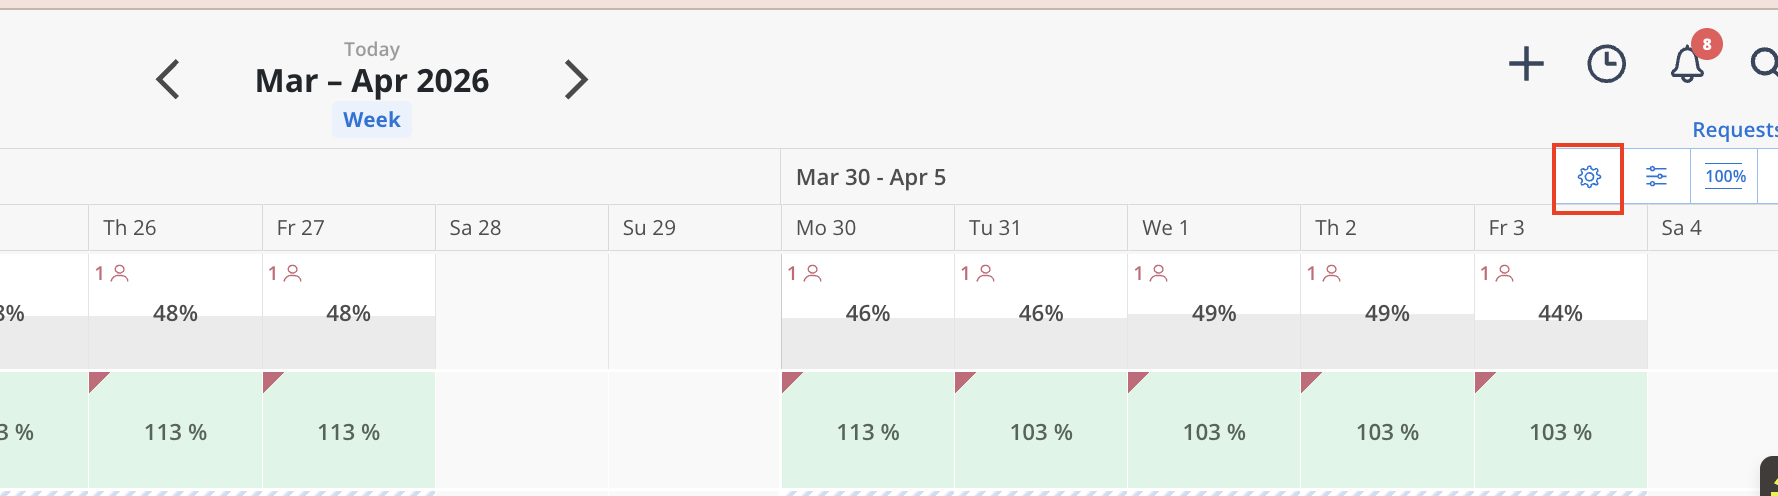
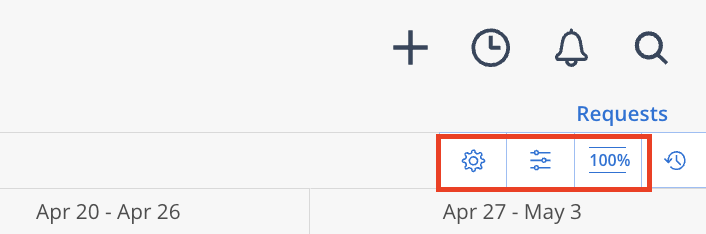
You can customize how workload and capacity are displayed using Workload settings.
These settings allow you to adjust how data is viewed, including display preferences and capacity metrics.
📸 Add image: Workload settings panel
👉 Learn more:
Workload Settings
Workload Display Settings
Workload Space Controls
Create and manage work plans
Understand team capacity and availability
Identify overbooked or underutilized team members
Adjust schedules as priorities change
👉 Start here:
Creating a Work Plan in Workload
Work plans represent the time a person is scheduled to spend on a project or phase and are the primary way to plan and manage work in this space.
As work plans are created and updated, they directly impact how capacity is displayed.
👉 Learn more:
Creating a Work Plan in Workload
Sharing Work Plans with the Team
View Unassigned Work Plans
Private Project Work Plans
Workplan Configurations
Work plans can be created using different planning methods depending on how your team prefers to plan work.
👉 Learn more:
Workplan Configurations
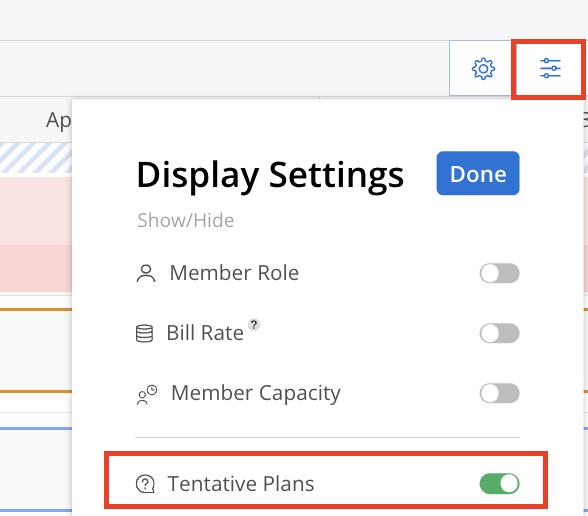
Work plans can be marked as tentative to represent work that is not yet confirmed.
👉 Learn more:
Private Project Work Plans
Time off and company holidays are displayed directly in the Workload schedule and impact available capacity.
👉 Learn more:
Workplan Configurations
You can control which team members are visible in the Workload space using selection and filtering options.
👉 Learn more:
Workload Member Menu
Managing Member Access in the Workload Space
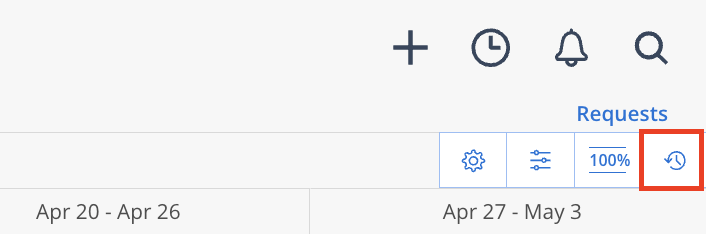
The Workload space includes an activity log that provides visibility into updates made to work plans.
💡 Start by building work plans for the next two weeks to establish an initial view of capacity.
💡 Focus on active projects before planning further into the future.
💡 Add upcoming time off early to ensure capacity is accurate.
💡 Review the heat map regularly to identify overbooked or underutilized team members.
Getting Started with Workload
Planner
Staffing
Projects
Need help?
For common questions about Workload, see the Workload FAQ.
When you first open the Workload space, begin by selecting the team members you want to view from the left sidebar.
You can:
Select everyone
Search for a specific person
Filter by saved member attributes, such as role, department, or discipline
Once members are selected, the calendar will load their schedules.
The Workload heat map helps you understand how much of each person’s capacity is already being used.
Depending on your settings, you can view workload by:
Percent of capacity
Percent of Availability
Planned hours
Available hours
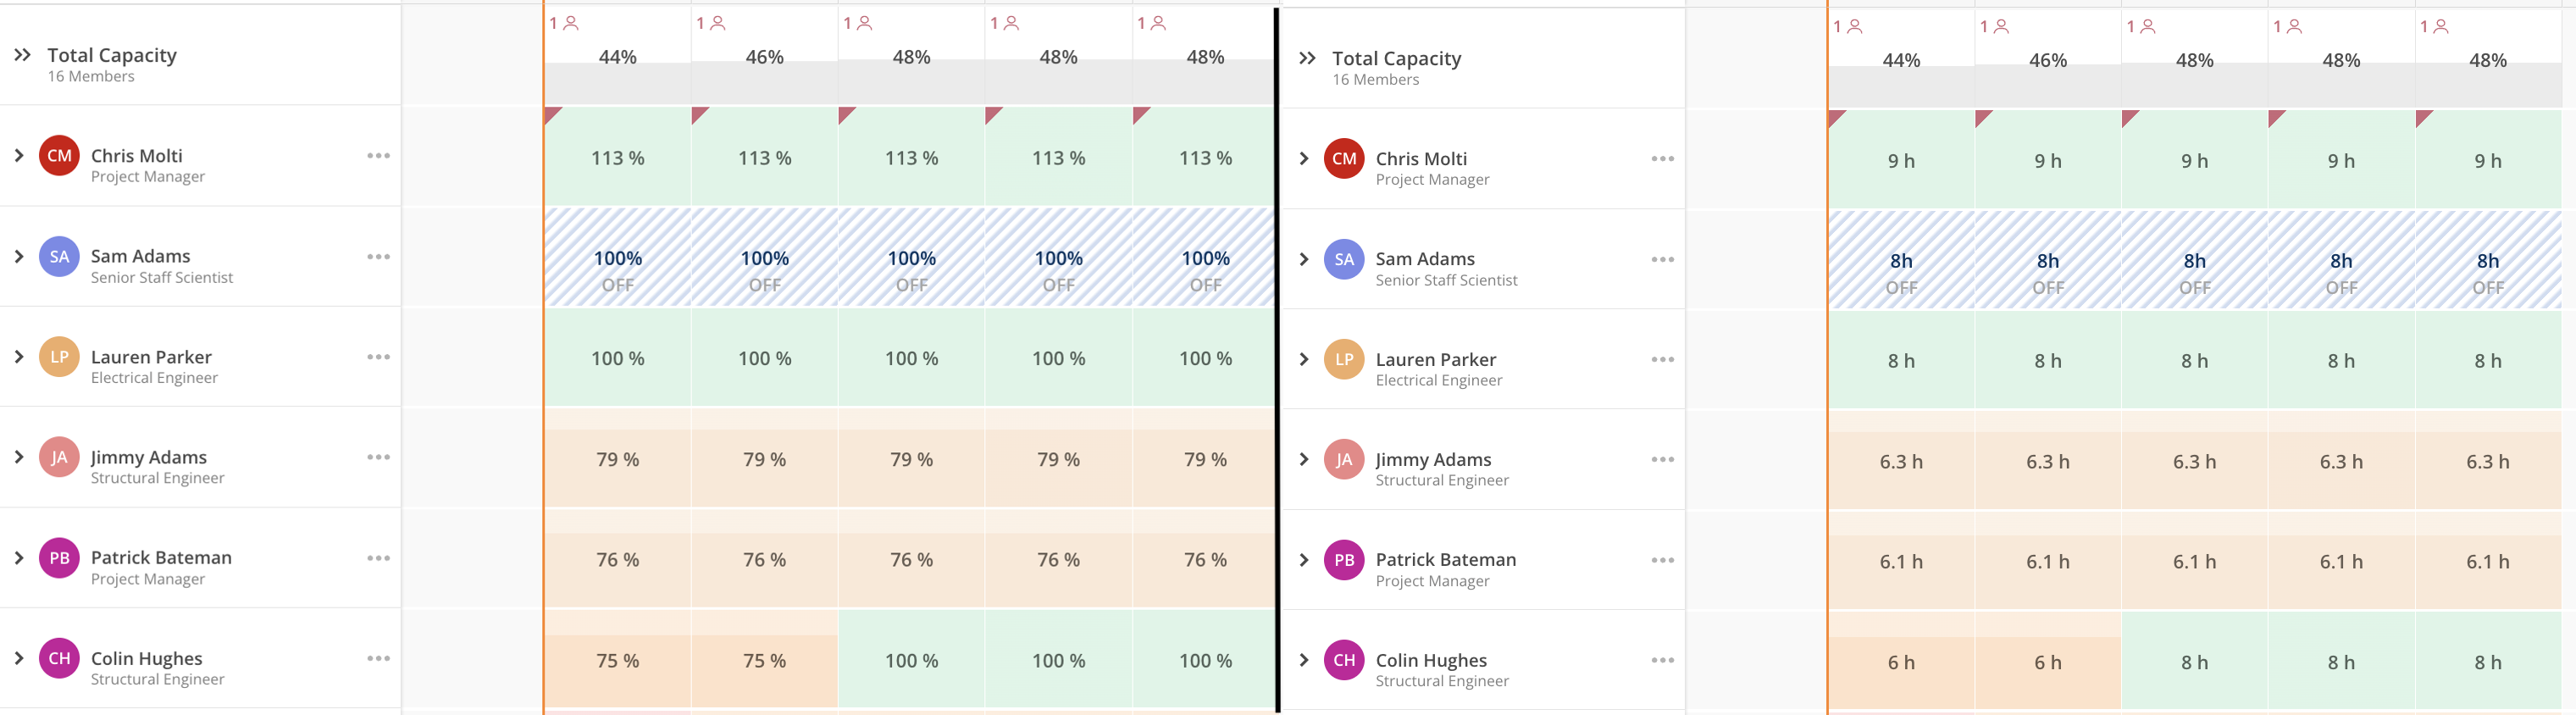
💡 Many leaders prefer to view the heat map as a percentage, while project managers often prefer to see actual hours.
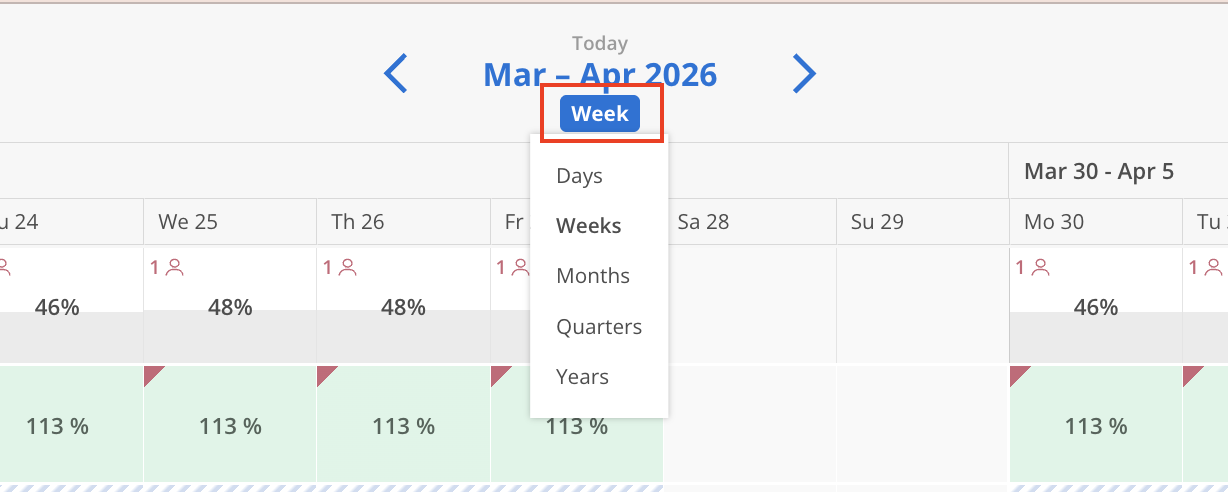
You can also adjust the calendar view to zoom in or out depending on whether you want to review daily, weekly, or monthly capacity.
Work plans are the foundation of both the Workload and Planner spaces. A work plan is the scheduled amount of time a person is expected to spend on a project or phase.
To create a work plan in Workload:
Open a member’s row
Click on an open area of the calendar
Select the project
Choose the phase
Enter how you want to plan the work
Set the start and end dates
Save the work plan
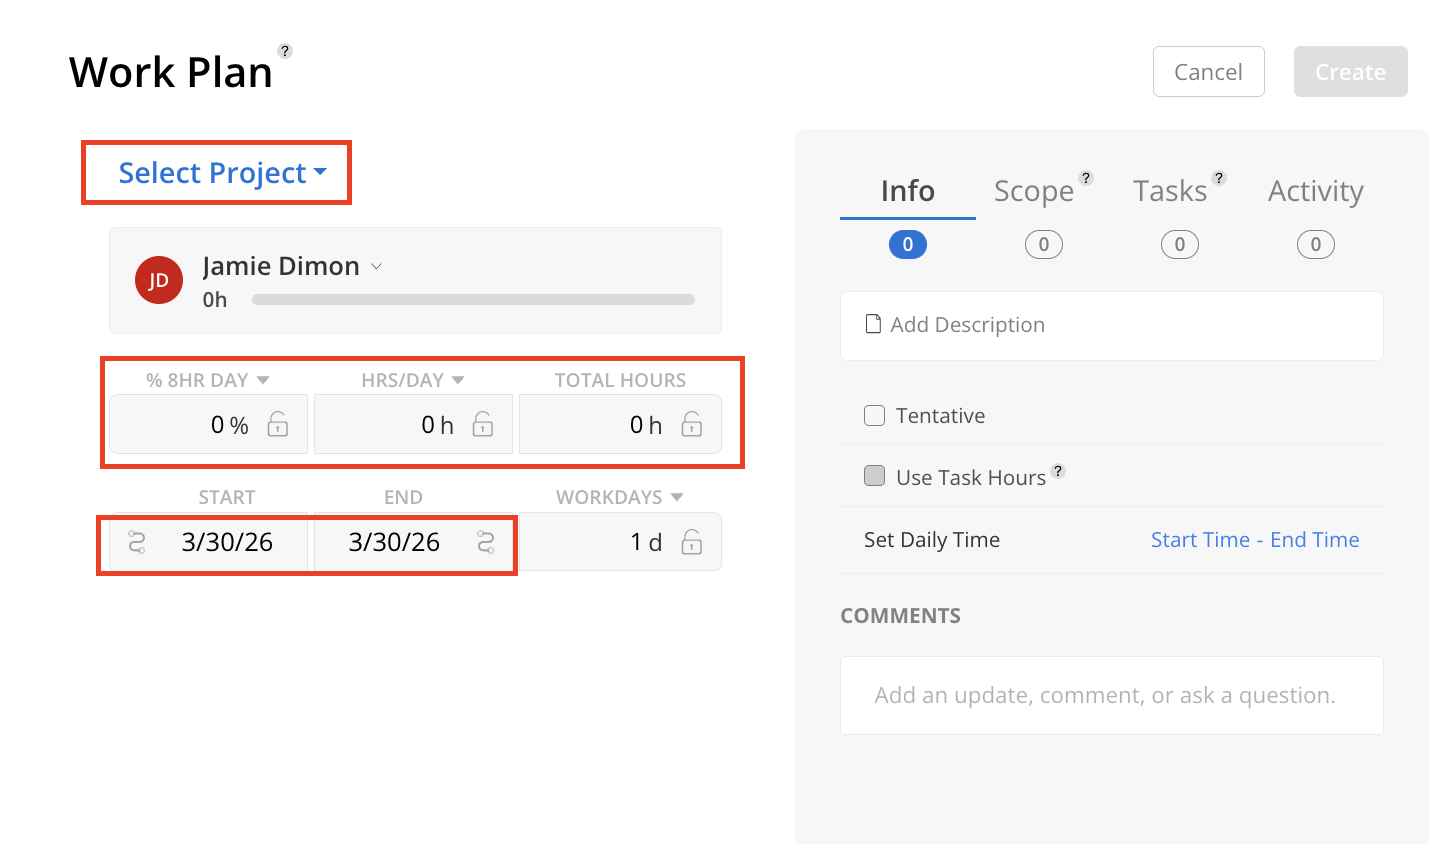
Mosaic gives you flexibility in how you build work plans. You can plan using:
Percent of day
Percent of week
Hours per day
Hours per week
Total hours
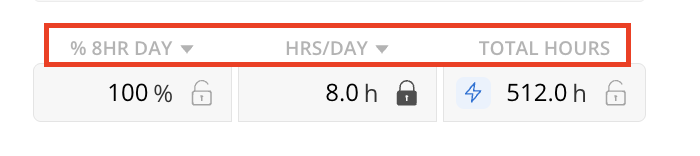
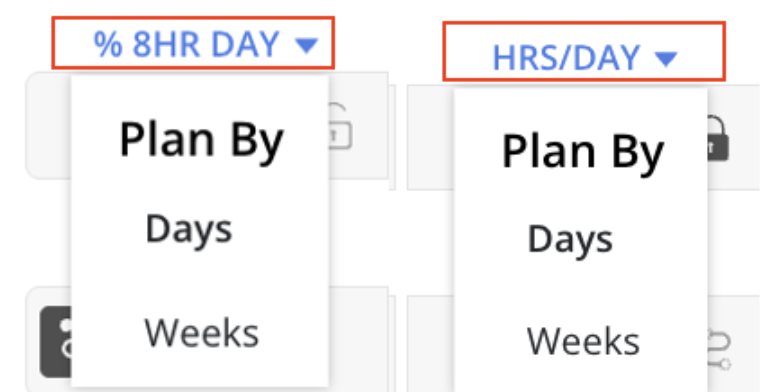
The lock icon indicates which planning source is currently active.
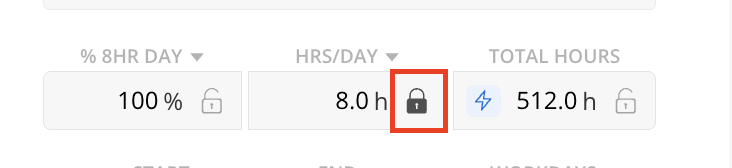
💡 For teams that typically plan at a higher level, hours per week or total hours is often the simplest way to get started.
For example, if someone is expected to spend 4 hours per week on a project, you can create a weekly work plan and schedule it across a date range.
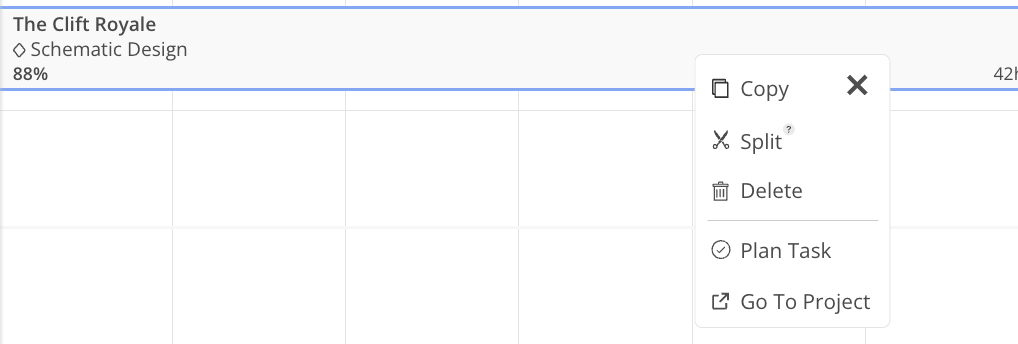
Once a work plan is created, it is easy to update.
You can:
Drag and drop the plan to a new date
Extend or shorten the plan
Move the plan to another team member
Copy the plan to multiple team members
Split the plan into separate time periods
Add comments for collaboration
Mark the plan as tentative
This makes it easy to adjust staffing as schedules shift.
If you are planning proposal projects or not ready to fully commit work to someone’s schedule, you can mark a work plan as tentative.
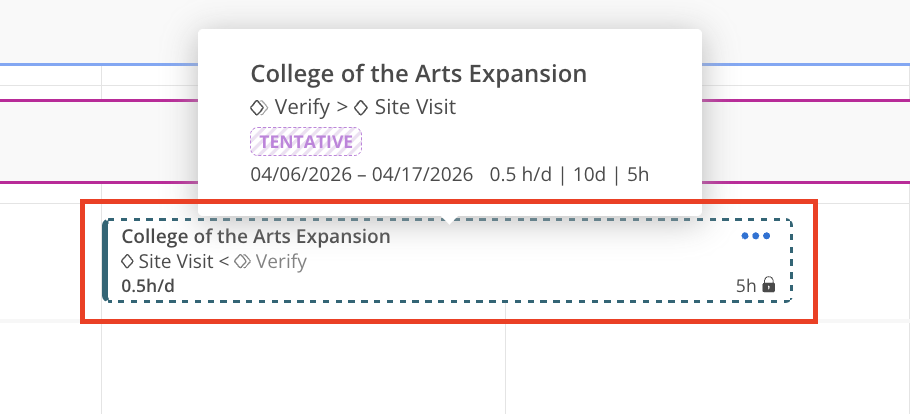
Tentative plans are useful when:
Planning a proposal project
A person may take on future work, but it is not final
You want to test the impact of upcoming assignments before committing them
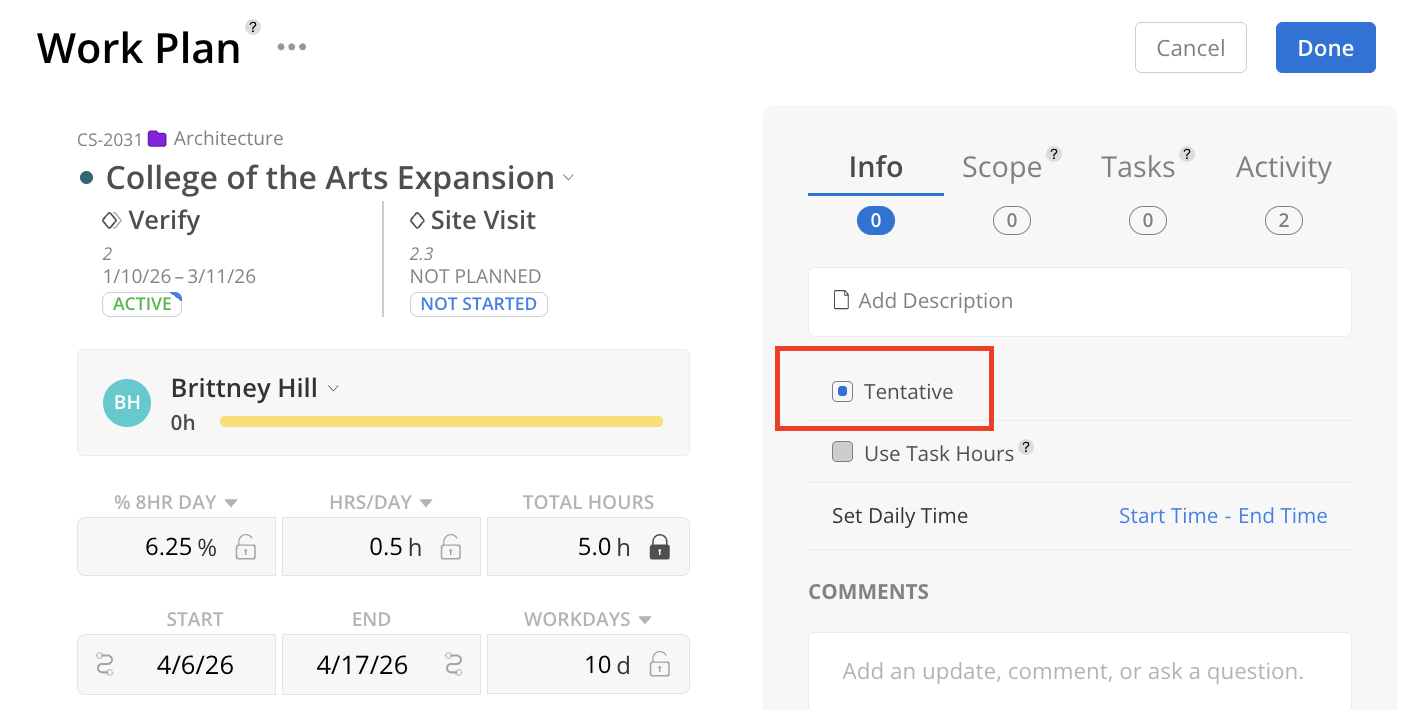
You can then show or hide tentative plans to understand how they affect capacity.
The Workload space also helps you account for team availability by showing time off directly on the schedule.
To add time off:
Create a new work plan
Select the system created Time Off project
Choose whether it is a full day or partial day
Save the entry
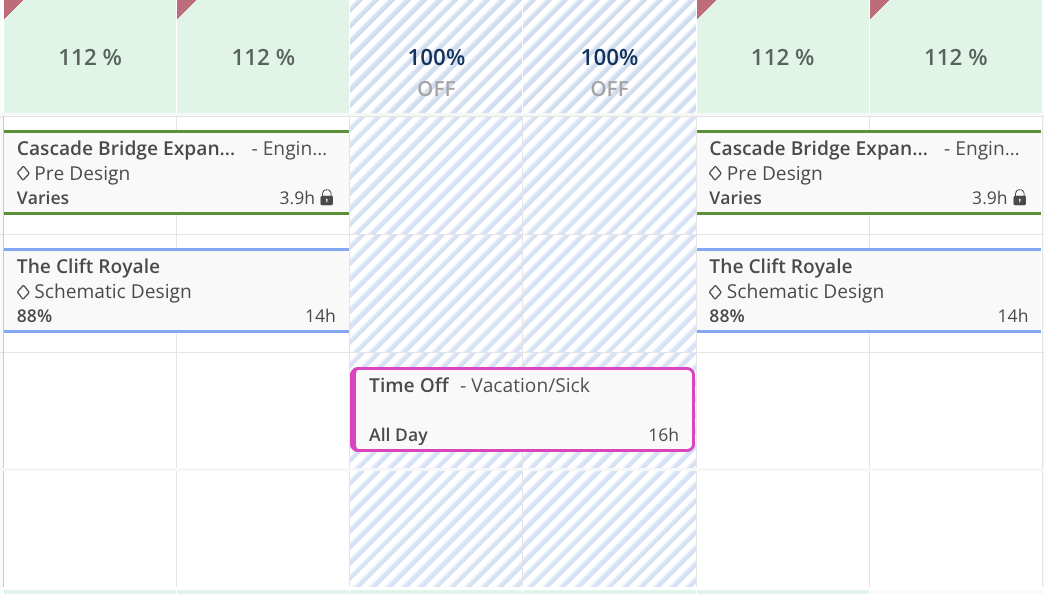
In addition to individual time off, company holidays can also be added at the organization level so they automatically appear for everyone.
Each user can adjust their own Workload settings without affecting anyone else.
Common view options include:
Switching between percent and hours
Showing or hiding timesheet data
Turning on default weekly planning
Adjusting row height
Showing or hiding details like role and capacity
Updating heat map colors
This allows each person to tailor the space to the way they prefer to plan.
The Workload space includes an activity log so you can see updates to work plans over time, including who created or changed a plan.
This is especially helpful when multiple people are collaborating on staffing and scheduling.
When your team is first adopting Mosaic, start simple.
A good first step is to:
Build plans for the next two weeks
Focus on active projects
Add upcoming time off
Use weekly hours if daily planning feels too detailed
Review the heat map regularly to identify overbooked or underutilized team members
As more plans are added, the Workload space becomes a much stronger tool for proactive resource management.
