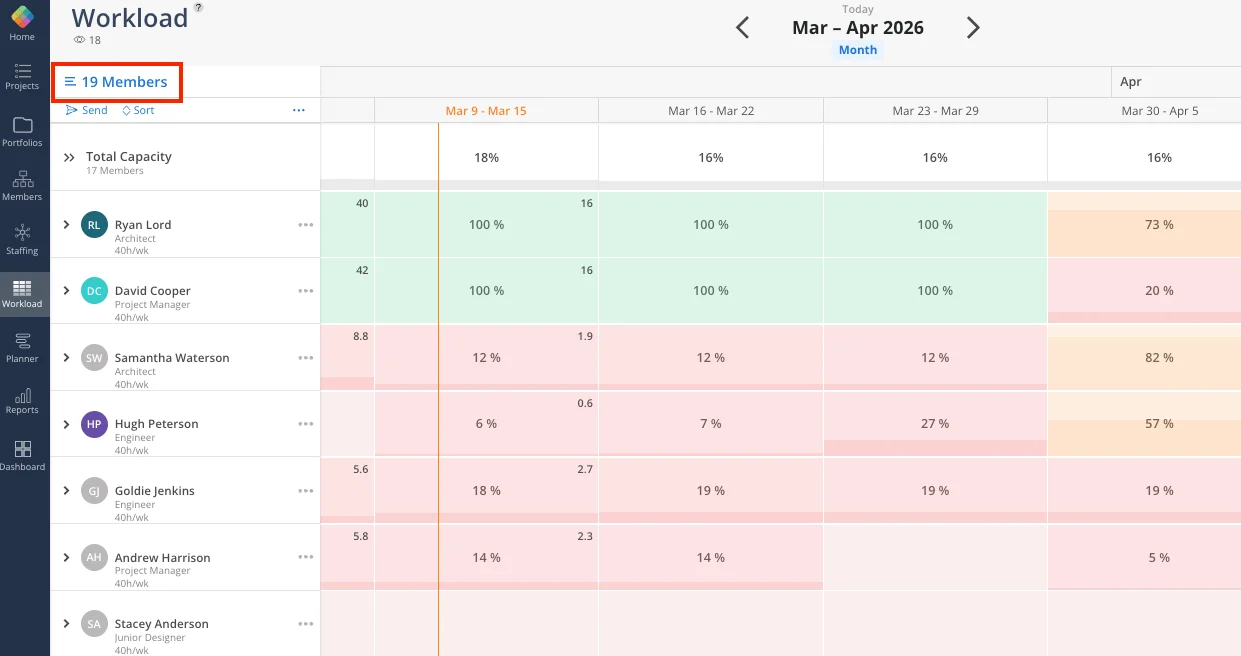
The left side of the Workload space displays a list of team members. When you first enter the space, it will be blank. You select which members to show, and your selection is saved for your next visit. Each user has their own independent selection.
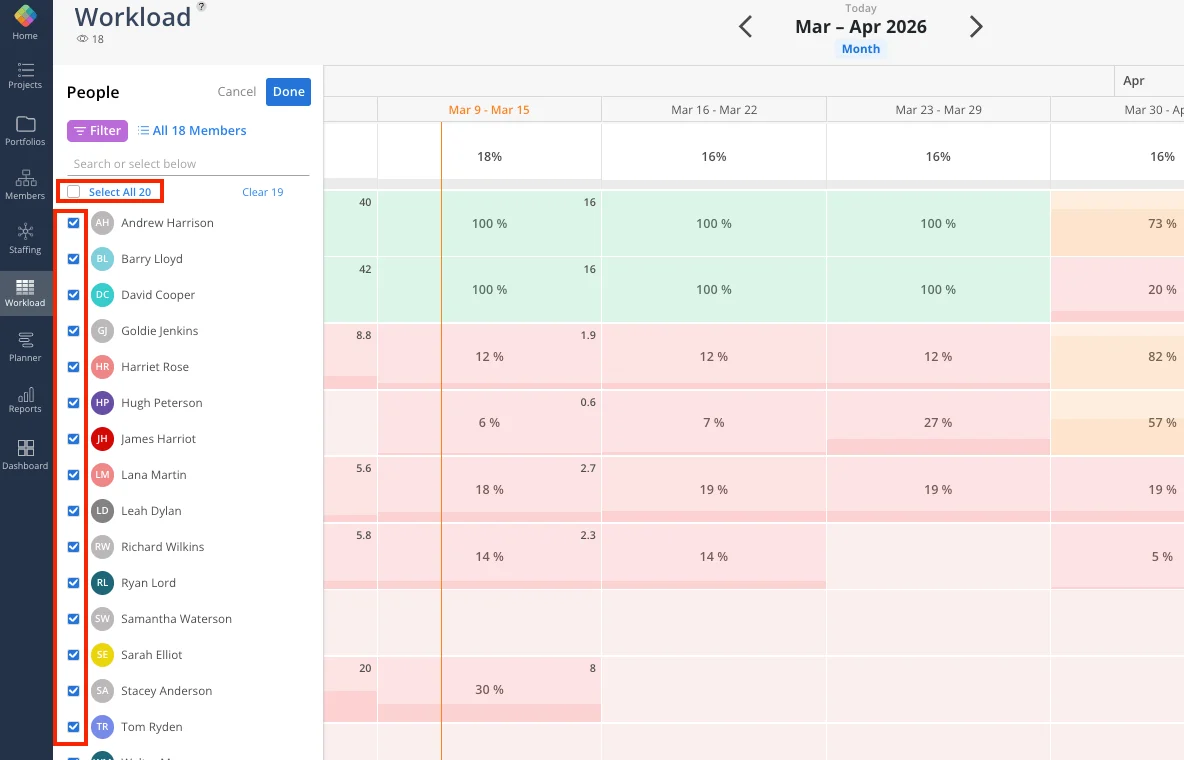
Select Members button — Opens the full member list at the top of the left panel
Search bar — Type a name to quickly find a specific member
Filter button — Narrow the member list by attributes set by your admin
Member rows — Each selected member appears as a row with their name, role, and capacity displayed underneath
Click Select Members in the top left of the Workload space.
Use the checkboxes to select individual members, or click Select All to include everyone.
Click Done to populate the view.
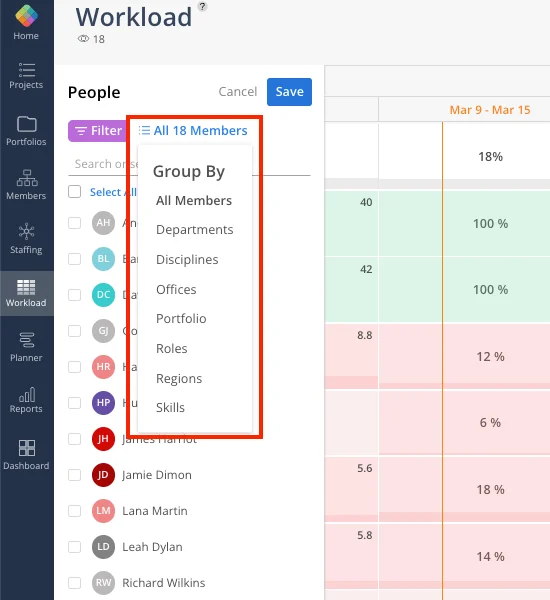
Click the Filter button at the top of the member list.
Select a filter category: Department, Role, Office, Skills, or other attributes configured by your Account Admin.
Choose one or more values within that category.
Layer additional filters as needed — filters stack on top of each other.
Click Done to apply.
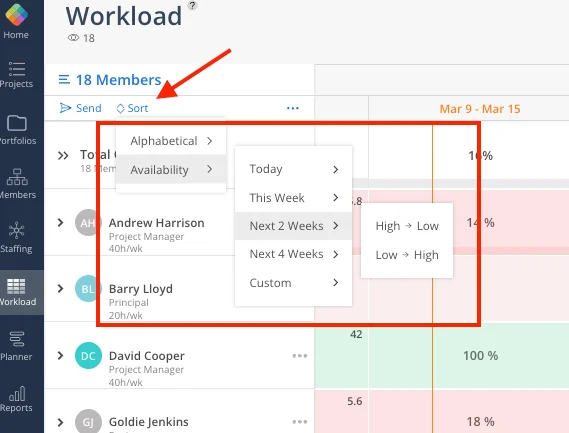
Once members are selected, sort them to quickly find who you need.
Alphabetical — Sort A to Z or Z to A by first name
Availability — Sort by availability for today, this week, next 2 weeks, or next 4 weeks, from high to low or low to high
Click the total capacity summary row at the top of the timeline to expand every member's row simultaneously. Click it again to collapse all rows. This is faster than clicking into each member individually.
Use skills filters for staffing — If you need someone with a specific skill (e.g., AutoCAD), filter by that skill and proficiency level to find the right person
Your selections are saved — You do not need to re-select members each time you visit the Workload space
Layer filters for precision — Combine department + role + office to narrow down exactly the group you need
