This guide walks you through the recommended steps to start using Planner effectively. Each step links to a detailed article if you want to go deeper.
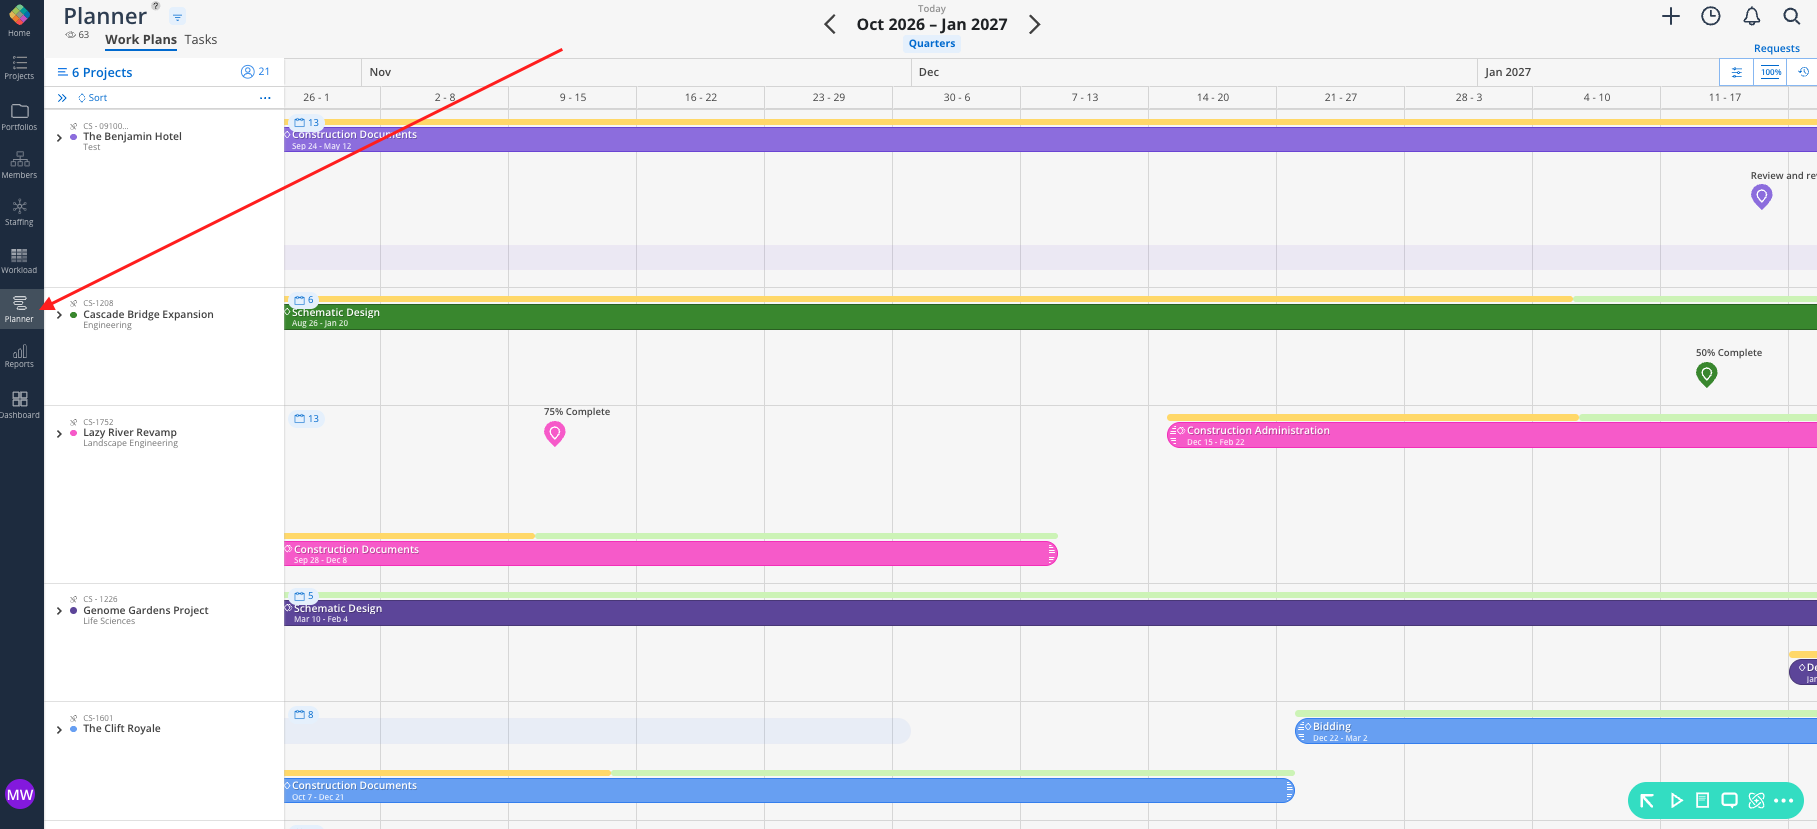
Navigate to the Planner space from the left side menu. Use the project list to search, filter, or browse for your active projects. Select the ones you want to work on.
Star your most-used projects so they always appear at the top of the list in your personal starred portfolio.
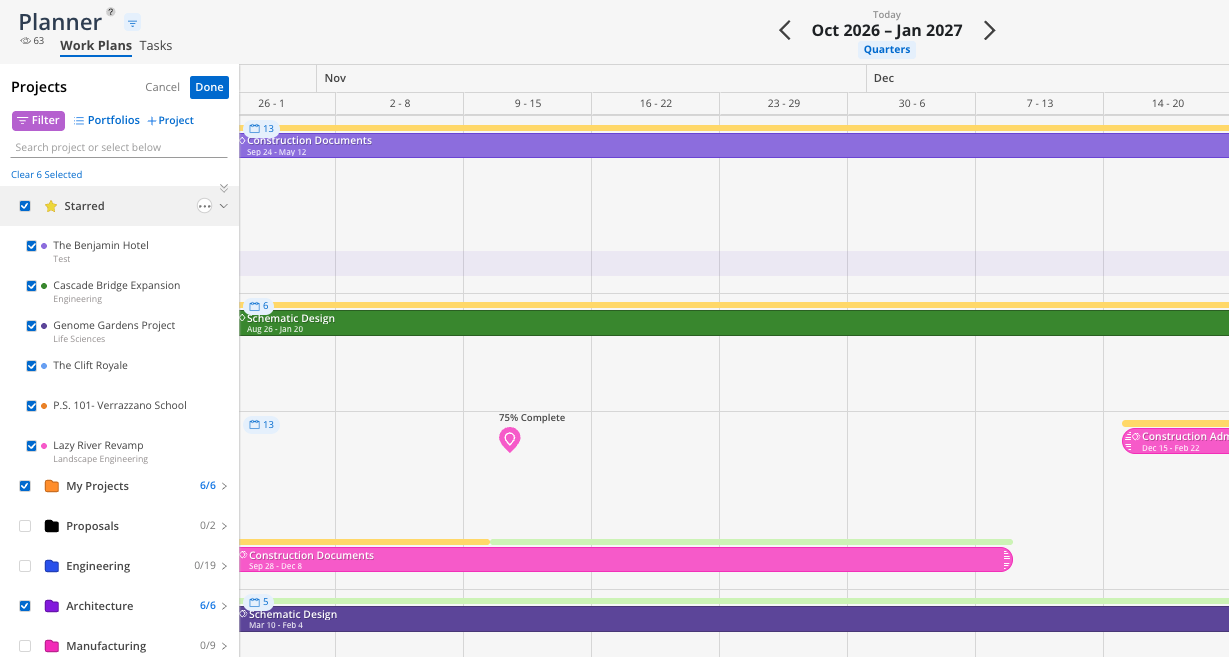
👉 For full details, see Selecting and Filtering Projects
For each project, open the schedule panel and set start and end dates on each phase. This creates the phase bars on the calendar timeline and establishes your schedule.
If dates already synced from your ERP, review them and adjust as needed on the Mosaic side.
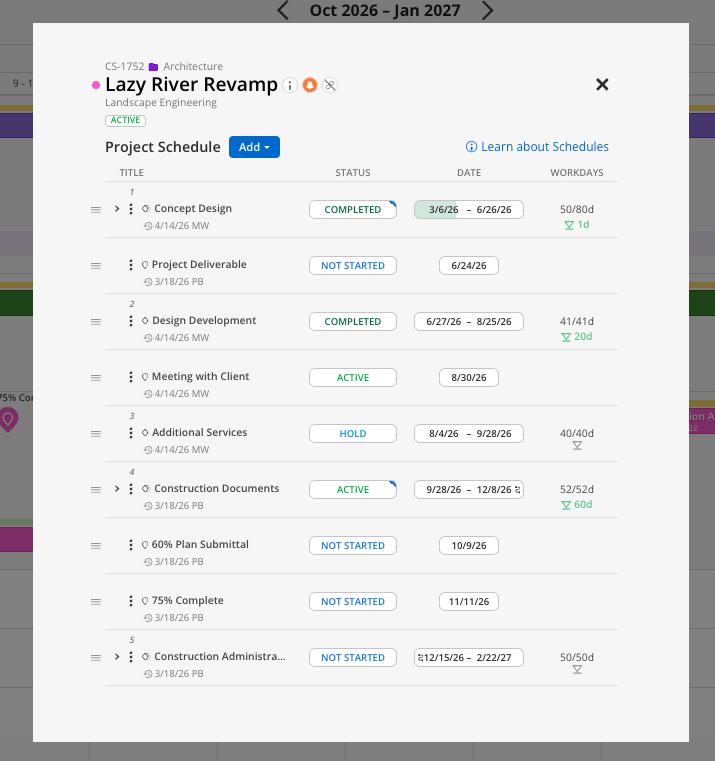
👉 For full details, see Project Schedule Management
Link phases together so the schedule adjusts automatically when dates shift. Use "Matching" for phases that start immediately after the prior one, "Waiting" to add buffer days or “Blocking” to set up prerequisites.
This is especially valuable for projects with sequential phases — change one date, and the rest follow.
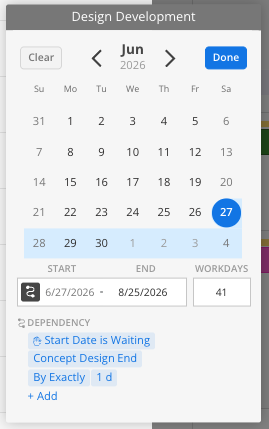
👉 For full details, see Project Schedule Management
Add key deliverables, presentations, or submissions as milestones on the schedule. These appear as markers on the timeline and help you track deadlines at a glance.
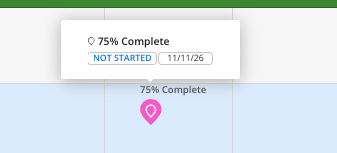
👉 For full details, see Milestones
Start assigning hours to team members on specific phases. Choose how to schedule (hours per week is the most common), set the date range, and lock in the constant.
Begin with your most active projects and the next 30 days. The goal is to get to 75% planned out for the firm by the end of onboarding.
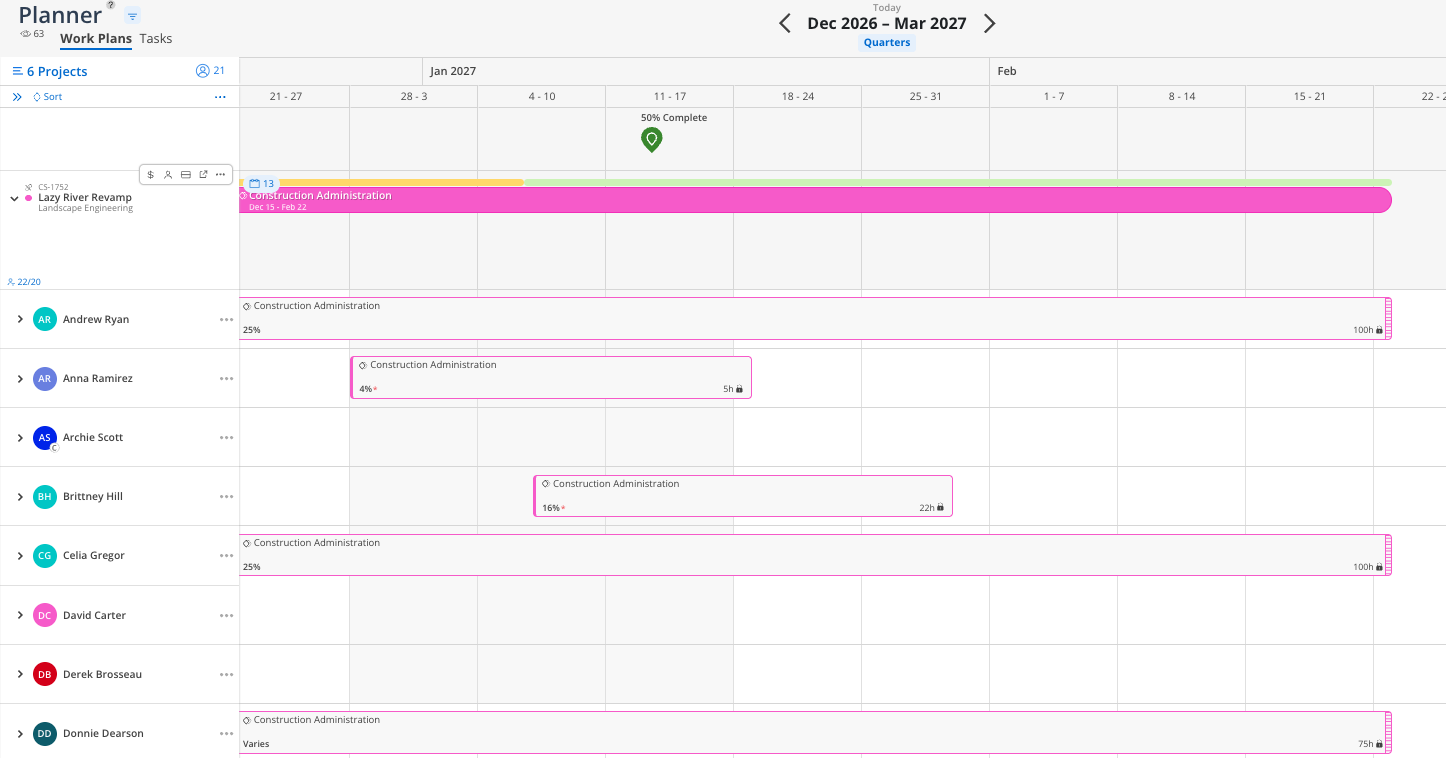
👉 For full details, see Work Plans in Planner
For work that needs to happen but you do not know who will do it yet, add an open role and plan the hours. Assign it to a real person when you are ready.
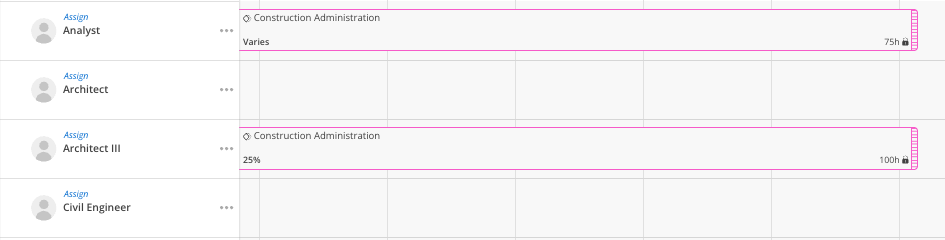
👉 For full details, see Open Roles and Generic Resources
Before assigning more work, open the member availability split view to see who has bandwidth. This helps you avoid overbooking team members.
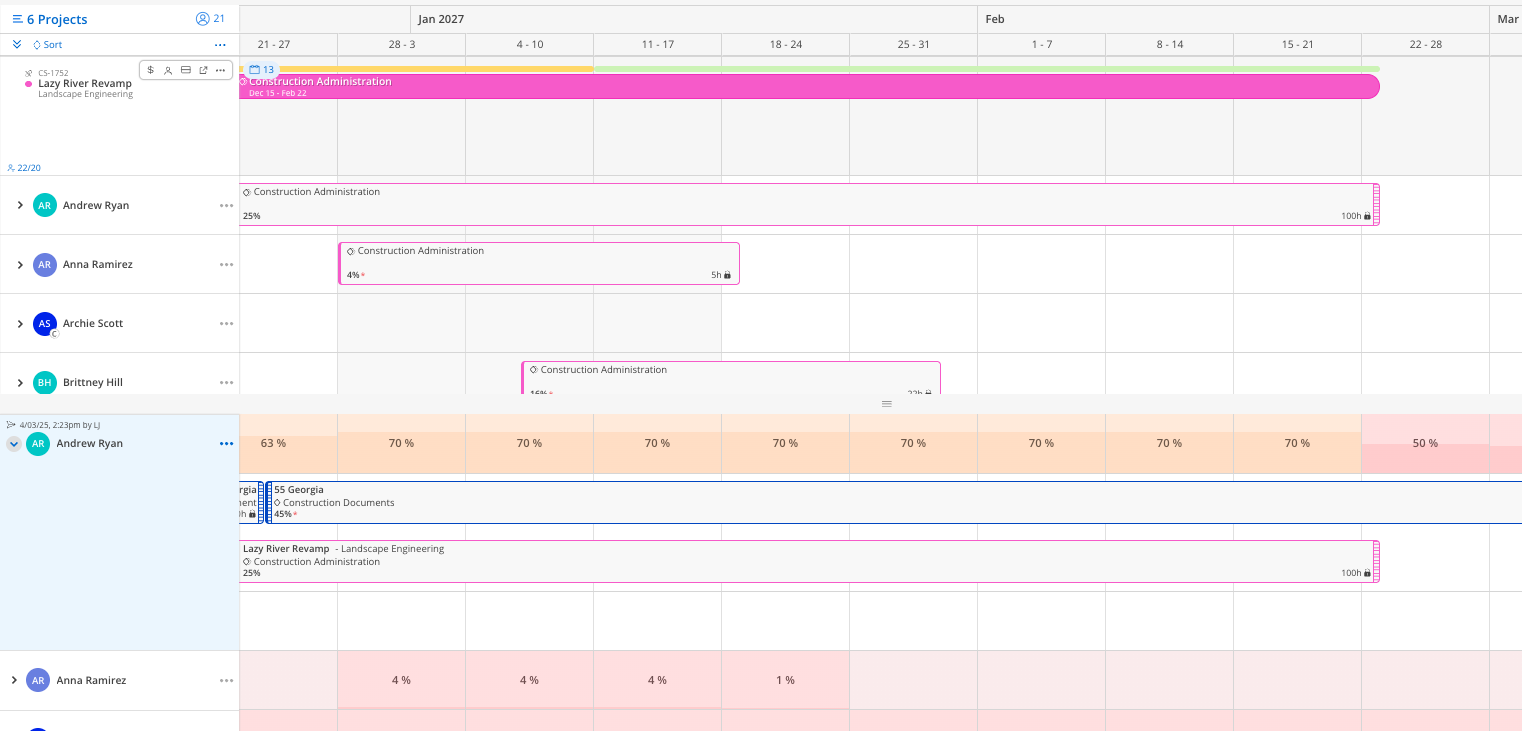
👉 For full details, see Member Availability Split View
Adjust your personal display settings — condense row heights, toggle sub phases, turn on default weekly planning — to make the Planner work best for how you plan.
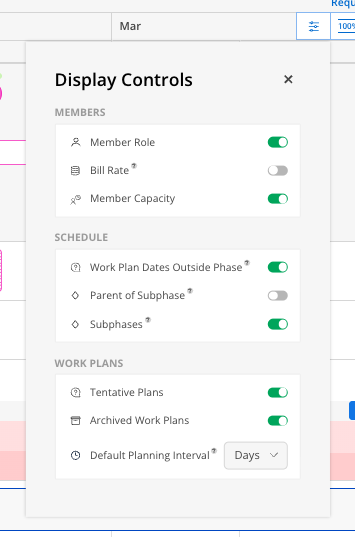
👉 For full details, see Planner Display Controls
Once your projects are set up in the Planner with schedules, work plans, and milestones, the next training covers the Budget space. You will learn how planned time and spent time impact the project budget in real time.
Start incorporating Mosaic into your weekly planning meetings — pull up the Planner to review schedules and make adjustments live.
Explore the Workload space to see how your Planner work impacts team member capacity across all projects.
Start with what you know. Pick 2–3 active projects and plan those first. Do not try to do everything at once.
Remember, it is a plan. Plans can change. Drag, drop, split, extend, and reassign as things shift week to week.
Aim for 75% planned out. The onboarding goal is to have the team at 75% or higher planned out for the next 30 days.
Use the built-in resources. The help center, video tutorials, how-to guides, and chat support are all available from the bottom-right resource bar in Mosaic.
Ask questions early. Reach out to your Customer Success Manager or use the in-app chat if anything is unclear.
