The member availability button opens a split screen in the Planner. The top half shows your project schedule and work plans. The bottom half shows the Workload space heat map for the members on your project. This lets you see at a glance who is available to take on new work and who is already booked out.
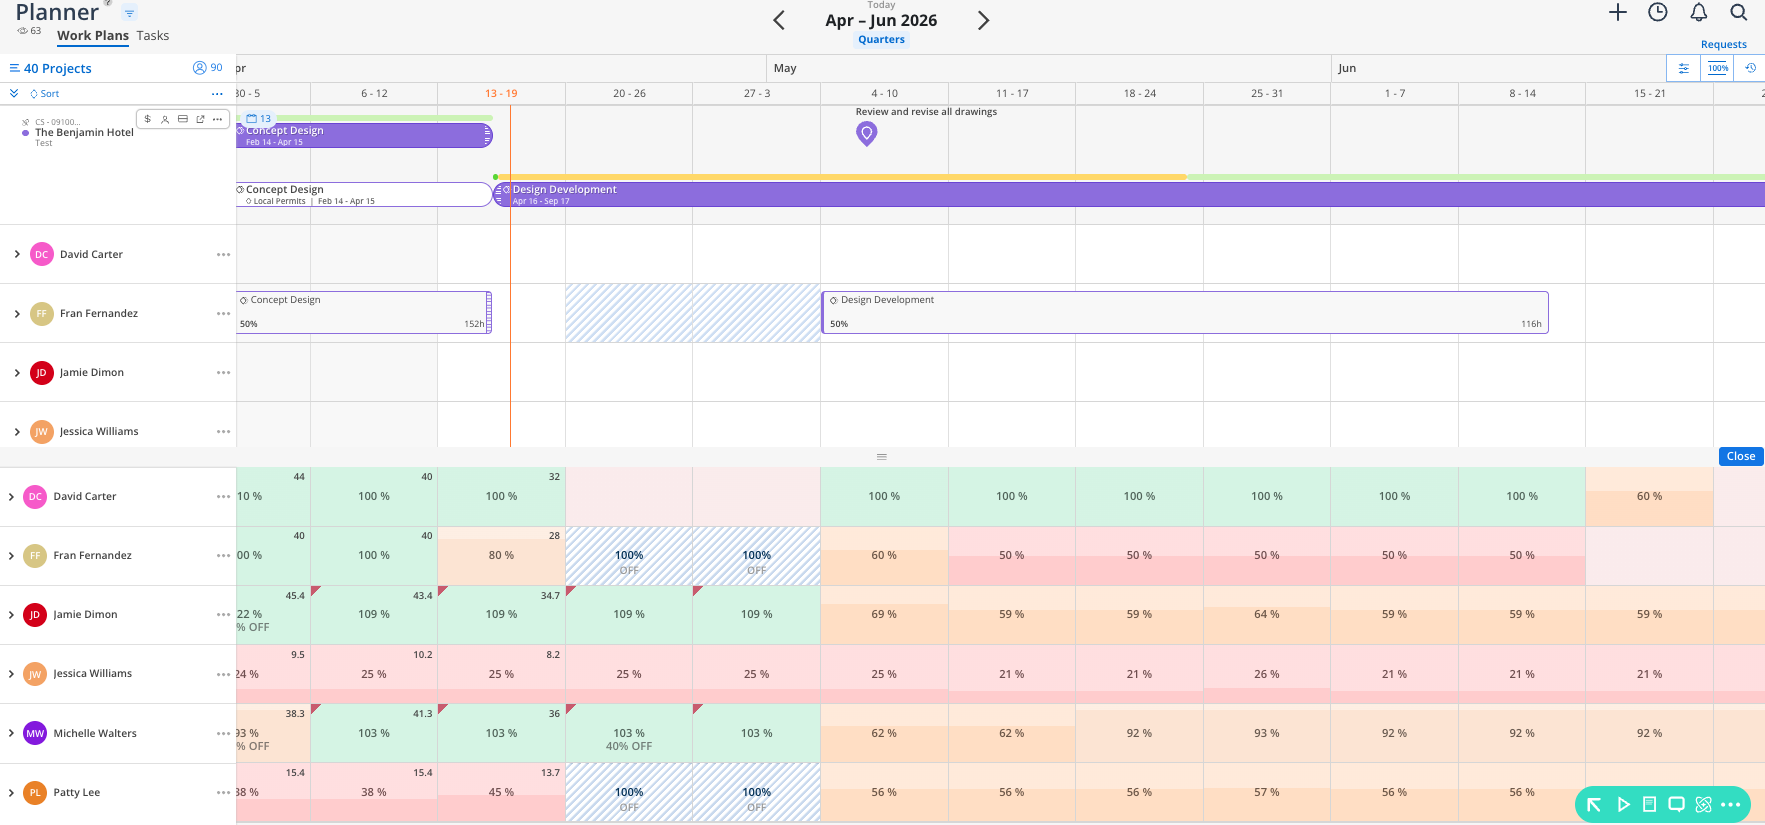
Top panel — the Planner view with your project, phases, and work plans
Bottom panel — the Workload heat map showing member capacity
Heat map colors — Default colors are usually; green (available), yellow/orange (partially booked), red (at or over capacity) - but your Organization Admin may change these
Condensed rows — recommended when using the split view to see more members
In the Planner, expand a project.
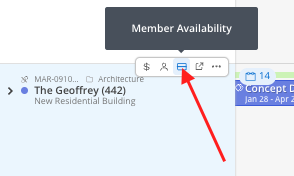
Click the View Availability button — it looks like a split rectangle, located in the row of project-level buttons.
The screen splits. The bottom half loads the Workload space for the members on your project.
Condense the row height using the percentage slider for a better overview.
Review capacity: members with green cells have availability. Red cells indicate they are at or over capacity.
Use this view to decide who should receive new work plans or open role assignments.
Always condense rows in split view. With two panels open, space is limited. Condensing rows lets you see more members at once.
Look at the next 2–4 weeks. Focus on near-term availability when making staffing decisions. Longer-term plans are more likely to change.
