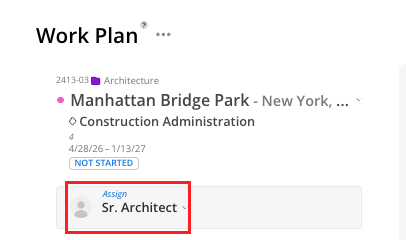
Open roles let you create placeholder resources on a project when you do not yet know who will do the work. You can add a role by type (e.g., Architect, Designer), create work plans for it, and later assign it to a specific person. When you assign the role, the team member inherits all of the work plans attached to that open role.

Open role row — appears at the bottom of the member list for a project, labeled with the role name
Work plan bars — work plans attached to the open role, displayed the same as named member work plans
Action bar — appears when you hover the open role row, giving one-click access to the actions you use most often
Smart suggestion icon — appears in the action bar on open role rows. Shows how many member matches were found and opens the Assign Role View.
Assign button — allows you to assign the role to a specific team member
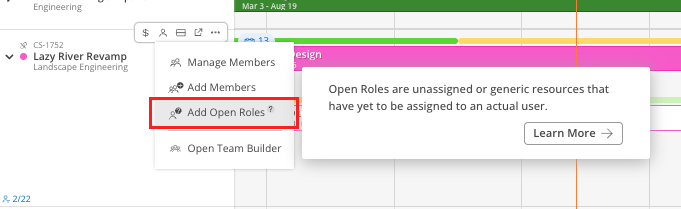
In the Planner, expand a project and click the Manage Members button (person icon).
Click Add Open Role.
Select a role type from the list (e.g., Designer, Architect).
The open role appears in the member list for that project.
Create work plans for the open role the same way you would for a named member.
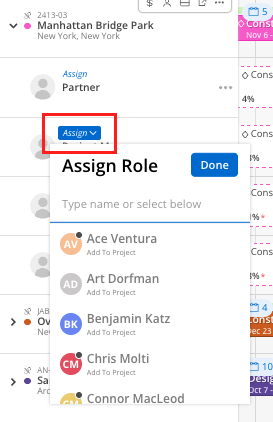
Click the Assign option on the open role row.
Select the team member from the list.
The member inherits all work plans from the open role.
The open role is replaced by the named member in the project view.
In the Planner, hover over the open role row to reveal the action bar.
Click the smart suggestion icon. The number displayed on the icon is how many member matches Mosaic found.
The Assign Role View opens, showing recommended members grouped into matches and alternatives.
Each suggestion shows the member's availability across the open role's date range, which requirements they meet, and the estimated spend if you assign them.
Turn on the Plan Time toggle to preview how the assignment would affect that member's capacity before you commit.
Suggestions get more precise the more requirements you add to the open role. Add skill, office, department, and discipline requirements before opening the view.
👉 For the full breakdown of how suggestions are generated, see Assign Role View
Use open roles to plan ahead: Even if you do not know who will do the work, you can plan the hours and timeline. This keeps your schedule and budget projections accurate.
Combine with the split view: Open the member availability split view to see who on the team has capacity before assigning the open role.
Assign a single work plan: If you don’t need to assign the entire row of a open role, you can open up a single work plan and select the desired member to assign it to by using the assign button.