The Planner space is accessed from the left sidebar. It is available to users with Work Planner permissions or higher. If you do not see Planner in your navigation, contact your admin about your permission level. The Planner has a project list on the left, a timeline calendar on the right, and a set of controls along the top. This guide walks through each area so you know what you are looking at.
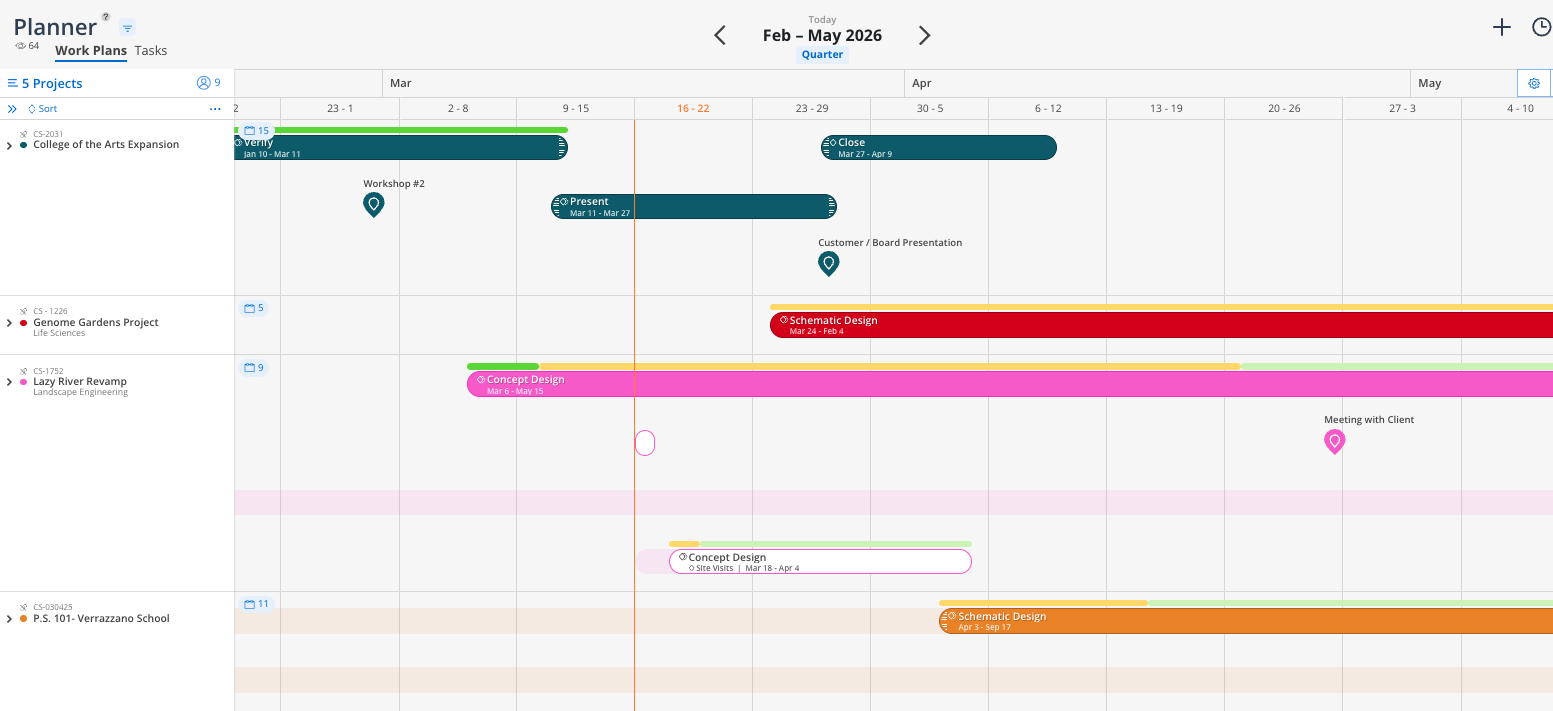
The Planner has two main areas: the project list on the left and the timeline calendar on the right. Projects are listed vertically. Each project can be expanded to show its team members, open roles, and their work plans on the timeline. Phase schedule bars, milestones, and budget indicators appear on the timeline above the member rows.
[Add image: Full Planner page layout showing project list on left and timeline on right]
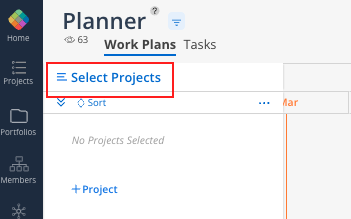
This is where you choose which projects to view. Click "Select Projects" in the top-left corner to open the selection modal.
Search bar — type a project name or number to find it
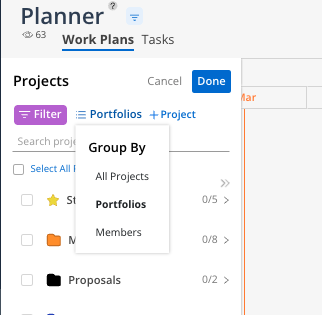
Portfolios — browse by portfolio. The default view groups projects by portfolio. Click the caret next to a portfolio name to see and select individual projects.
Starred portfolio — your personal shortcut list, always at the top. Star projects from any space to add them here. Starring does not move the project — it creates a shortcut.
My Projects — auto-populated with projects where you have spent time or have future plans
Grouping options — click the Portfolios icon to switch between grouping by Portfolios (default), Members, or All Projects
You can view a maximum of 400 projects at a time in the Planner.
When in the Select Projects modal, click the purple Filter button to narrow your list using project attributes. Filters can be layered — multiple filters stack on top of each other.
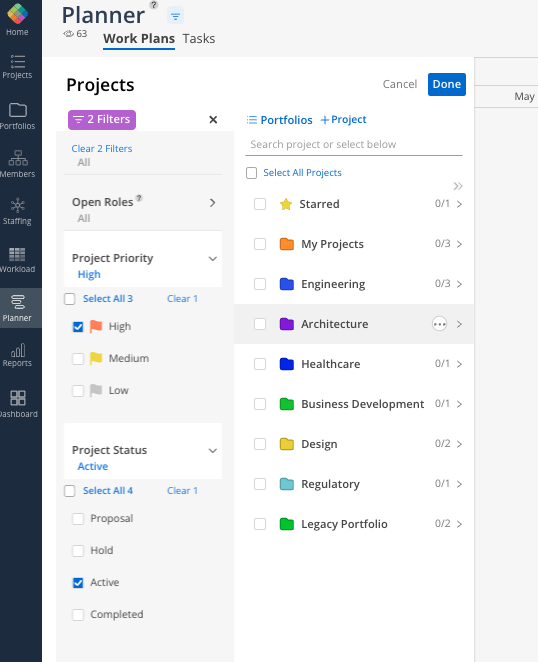
By default, Mosaic collapses Archived Projects from view. Use the "Archived Projects" filter to include them if needed.
Click Done once you have found all desired projects.
Once your projects are selected, you can sort them further using the sort options:
Project Title — alphabetical A to Z or Z to A
Project Number — by reference number, Low to High or High to Low
Phase Date — by the earliest start or end date among all phases within each project
Active Work Plans — by the sum of remaining days across all work plans. Projects with more remaining days appear first.

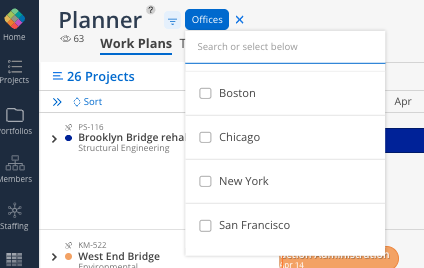
To filter what you see by member attributes, click the three-line icon at the top of the Planner. A member attribute filter menu appears. You can filter by:
Departments
Disciplines
Offices
Open Roles
People
Roles
You can add multiple filters at once. Each selected filter appears as a chip next to the three-line icon. Click a chip to open its attribute options.
The main area showing your project data over time.
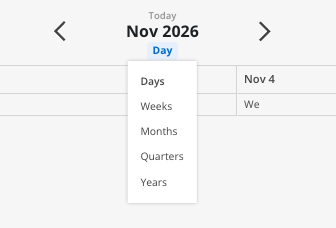
Date range controls — at the top, zoom in (daily view) or out (monthly/yearly) using the controls
Today button — click to jump back to the current date if you have scrolled far
Orange indicator — the current date or week is always highlighted in orange
Navigate — use your mouse or the arrows to scroll left/right through the calendar
Several types of bars and icons appear on the timeline:
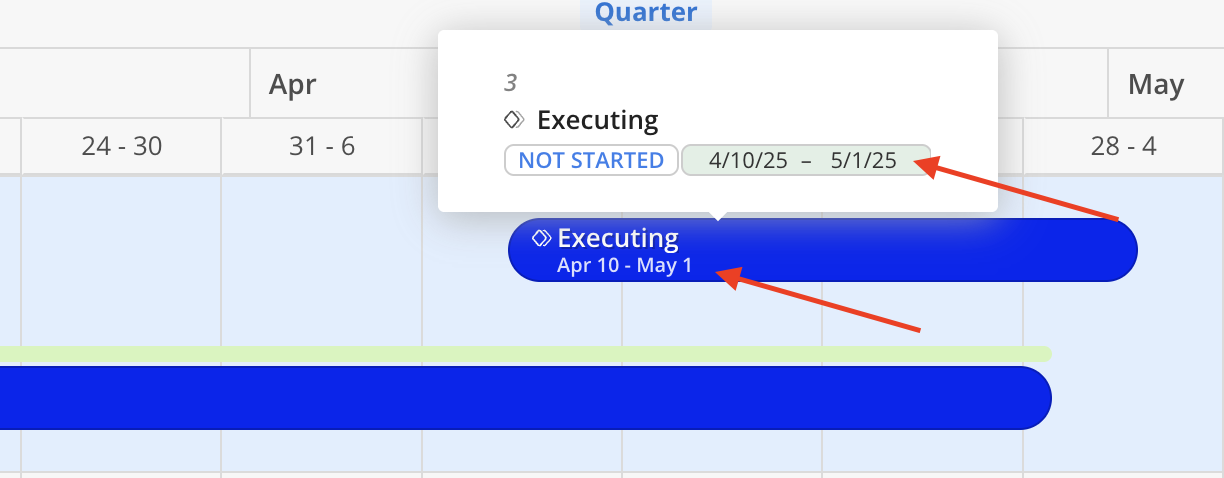
Phases and Sub-phases — solid color bars. A single diamond icon means no sub-phases underneath. A double diamond icon means sub-phases are present.
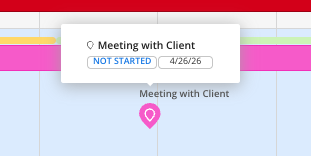
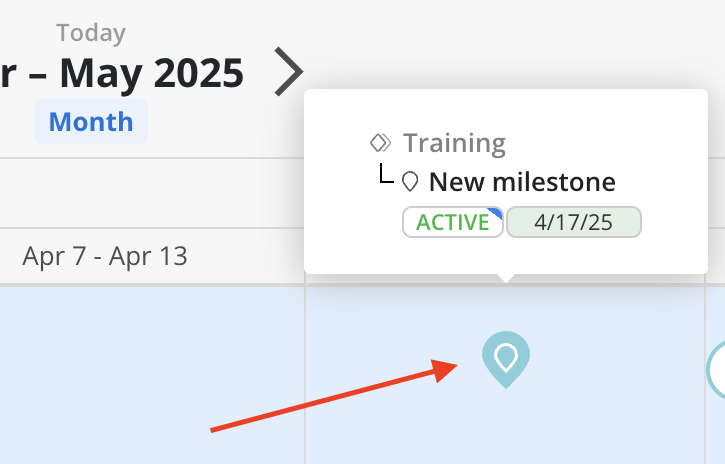
Milestones — solid color location pin icons on the timeline
Work Categories — solid color outlined bars showing the phase/sub-phase name with the work category name underneath (only applicable for some organizations)
Work Plans — individual member work plan bars shown within expanded project rows
Budget bar — a thin color bar on top of phase bars showing spent (green), planned (yellow), remaining (light green), and over-budget (red)
Faded bars — when the "Work Plan Dates Outside Phase" setting is enabled, faded phase and work plan bars appear for assignments that fall outside the phase's scheduled dates
A phase, sub-phase, or milestone must have dates assigned for it to appear in the Planner.
Hovering over items in the timeline reveals context about the project's structure, schedule, and progress.
Hover over a Phase bar (no budget) — displays the status, dates, and hierarchical position. Completed phases show the date tag with a green background.
Hover over a Phase bar (with budget) — displays phase name, status, dates, completion percentage, budget, spent time, planned time, and remaining budget in both currency and hours.
Hover over a Work Category bar — displays the parent phase, status, and date range. Ongoing items show the date tag with a gray background.
Hover over a Milestone — displays the parent phase, current status, and date range.
When you click on a project, it expands to show:
Phase schedule — bars on the timeline showing when each phase is scheduled
Team members — all members assigned to the project, with their work plans on the timeline
Open roles — generic resource placeholders for unfilled positions, listed at the bottom of the member list
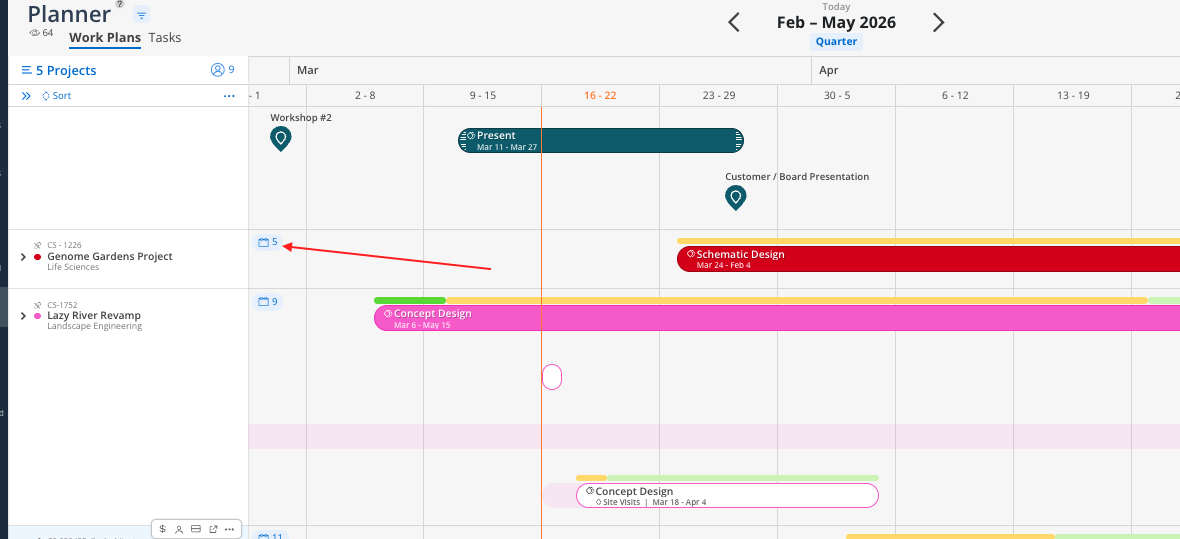
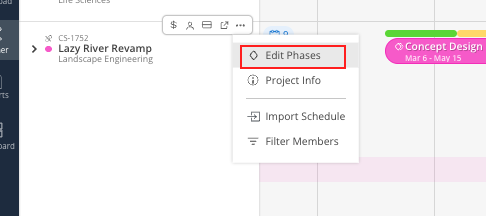
Hover over a project name row to reveal the Project Action Bar. This provides quick access to:
Calendar icon — opens the Project Schedule modal for managing phase dates, dependencies, and milestones
Select Phases — choose which phases to display in the Planner view
Manage Members icon — add/remove members, add open roles, or open Team Builder
The top-right corner of the Planner contains your space controls:
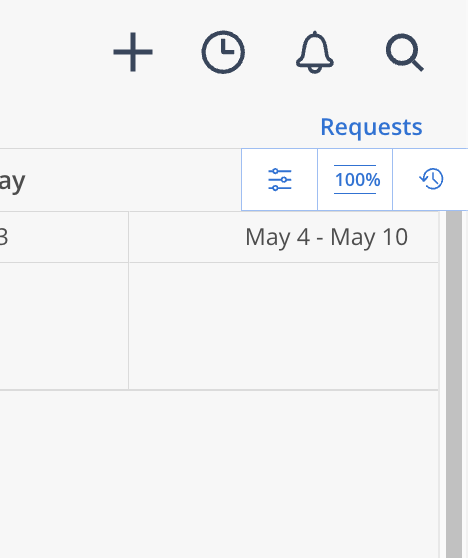
Cogwheel icon — opens Planner Settings (work plan defaults, display preferences)
Three-dot/line icon — opens Display Settings (member info, schedule toggles, work plan toggles)
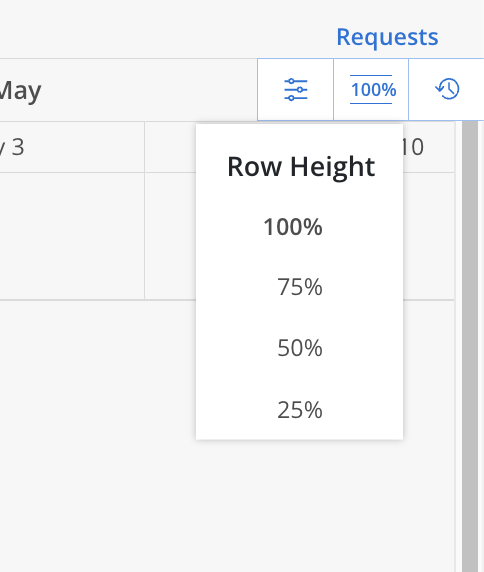
Percentage icon — expand or condense the row height to see more or fewer projects on screen
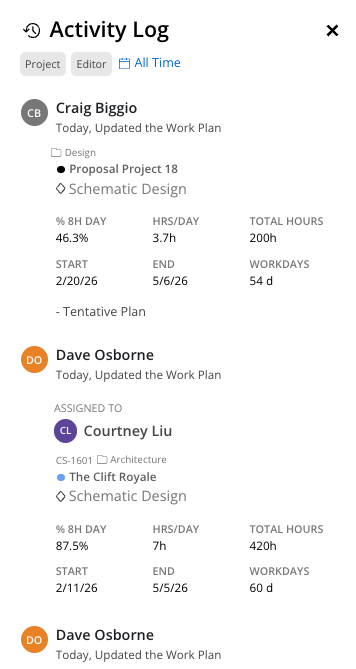
Clock icon — opens the Space Activity Log showing all work plan activity (created, edited, deleted). Can be filtered by project, member, and time period.
Member availability button (split rectangle icon) — opens a split screen with the Workload view below the Planner for side-by-side capacity checking
Your filters, sort orders, display settings, and project selections all auto-save. The next time you access the Planner or log in, your view will be exactly where you left it.
