This report calculates each member's utilization rate by comparing billable hours to total hours worked. It uses the same color-coded project toggle as other reports.
Use the Utilization Report when you need to answer: "What percentage of each person's time was billable, and which projects drove their utilization?" This is the go-to report for measuring team productivity against billable targets. Use it weekly or monthly to track utilization trends and identify members who may be spending too much time on non-billable work.
The Bars
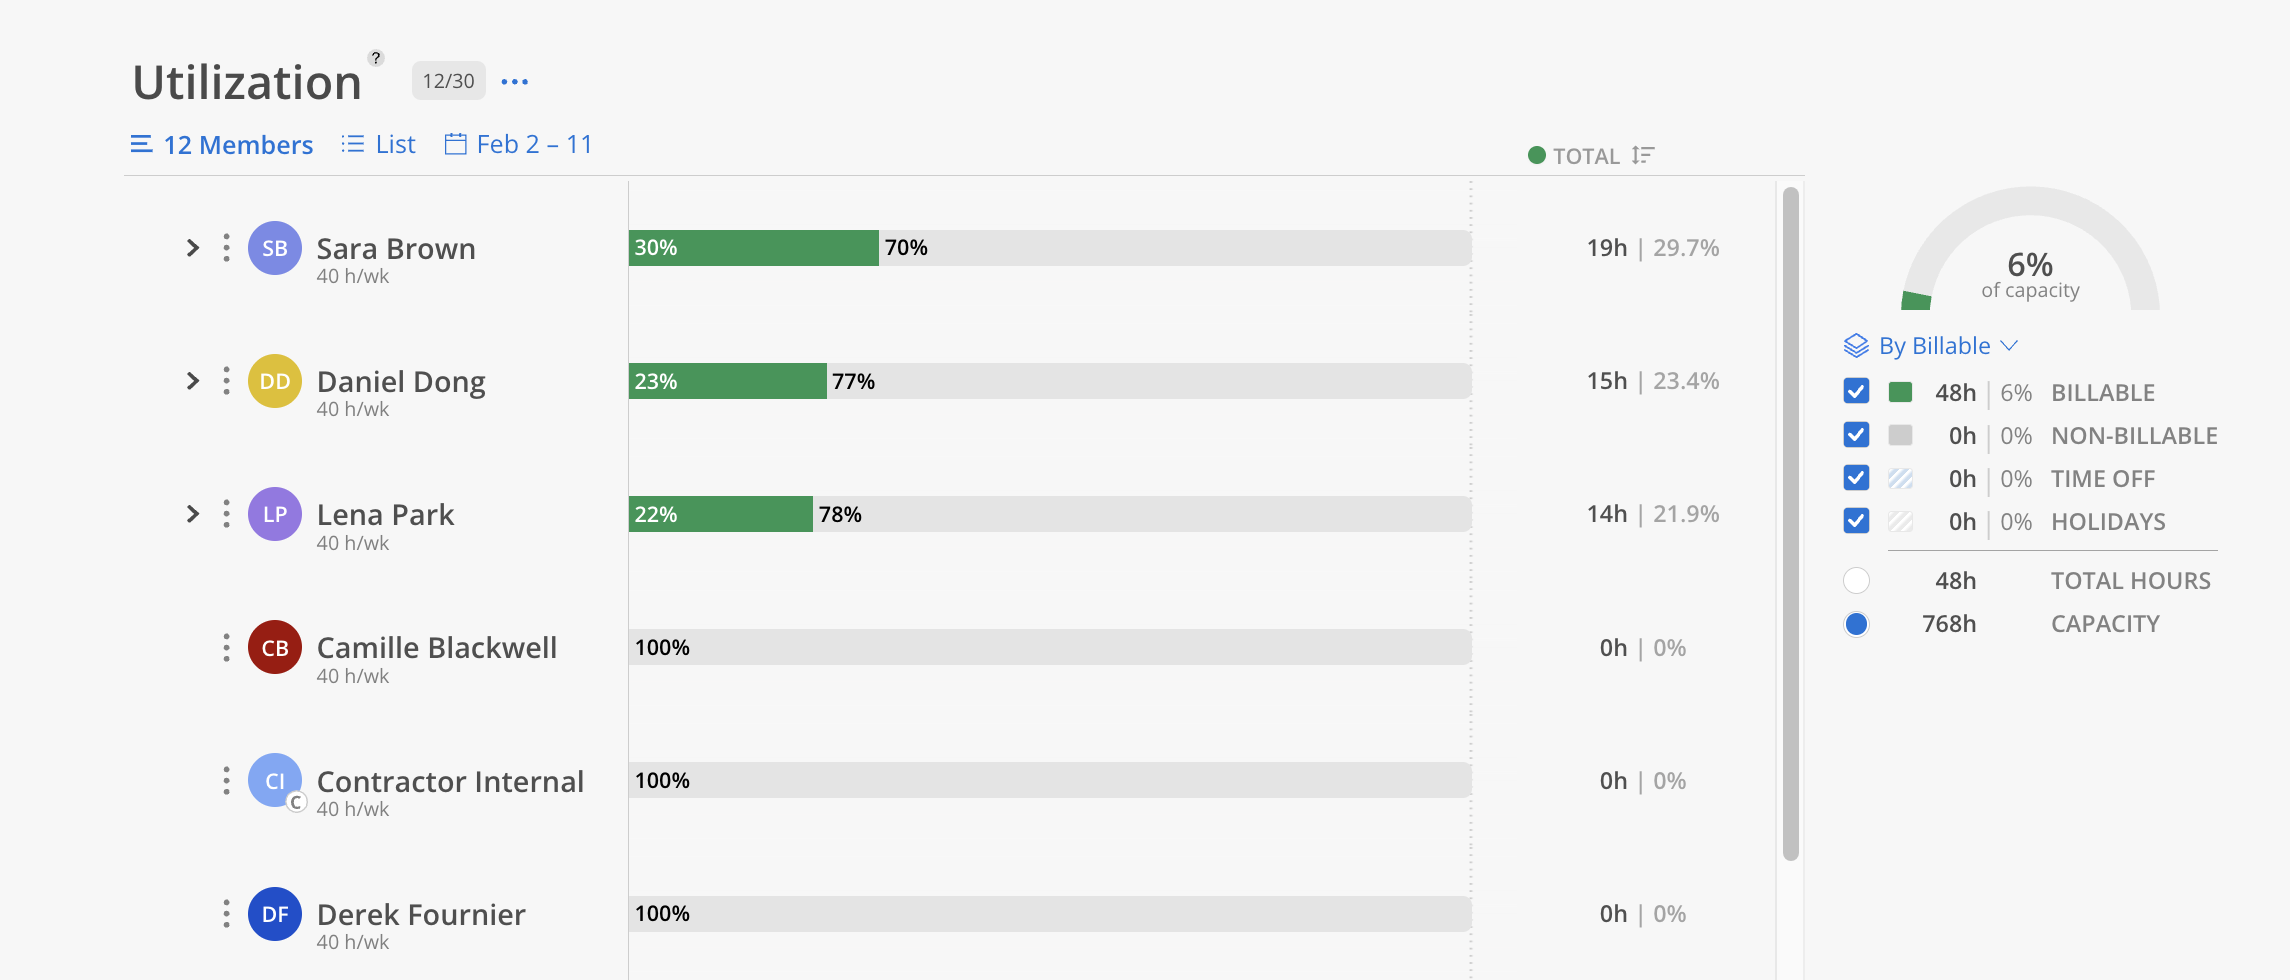
Green = billable hours as a percentage of total capacity
Percentage label on the bar = utilization rate
Summary & Controls
Summary bar — aggregate utilization for all selected members
Breakdown by — a dropdown in the summary card that switches the bars between By Billable (billable vs. non-billable) and By Project (one coloured segment per project). Available on the Member view. Set Breakdown by to Project to see how each member's time is distributed across projects.
Date range selector — compare utilization across different periods
This report has 2 views: Member, Team (Chart). Each view shows the same underlying data organized from a different starting point.
The Member view shows utilization per team member.
Click the Member tab at the top.
Select members or filter by department/role.
Choose a date range (e.g., last week, last month).
Review each member's utilization percentage.
Each member row shows a bar split into billable (dark green) and non-billable (gray) segments, with the billable percentage displayed on the bar. The right side shows total hours and the utilization percentage. Expand a member to see which projects and phases contributed to their billable and non-billable time.
The summary gauge in the top right shows overall team utilization as a percentage of total capacity.
Each member row has a three-dot menu with shortcuts for digging into that person's data.
View Member Profile — opens the Member Modal to the Schedule page, where you can see capacity and a calendar of time off and holidays. Only Admins can edit capacity.
Edit Work Schedule — opens the Member Modal to the yearly capacity calendar, showing daily hours alongside remote work, holidays, and time off.
View Timesheet — opens the Timesheet Report in a new tab, pre-filtered to that member and the date range currently set on the Utilization Report.
How To Check the Time Entries Behind a Utilization Number
Set your date range on the Utilization Report.
Find the member whose number you want to verify.
Click the three-dot menu on their row.
Select View Timesheet.
The Timesheet Report opens in a new tab, already filtered to that member and date range. Your Utilization Report stays open in the original tab.
This is the quickest way to answer "why is this person's utilization low?" — the entries either aren't there or are coded to a non-billable work category.
Compare week over week — Review utilization across multiple weeks to spot trends rather than reacting to a single week.
Use alongside the Workload Report — Utilization looks backward (what happened). The Workload Report looks forward (what is planned). Together they give a complete picture.
Clean up sample data — Sample project data will inflate utilization numbers. Remove it for accurate results.
Verify before you escalate — if a utilization number looks wrong, use the three-dot menu to open that member's timesheet before raising it with them. Missing entries and non-billable work category coding are the two most common causes.
