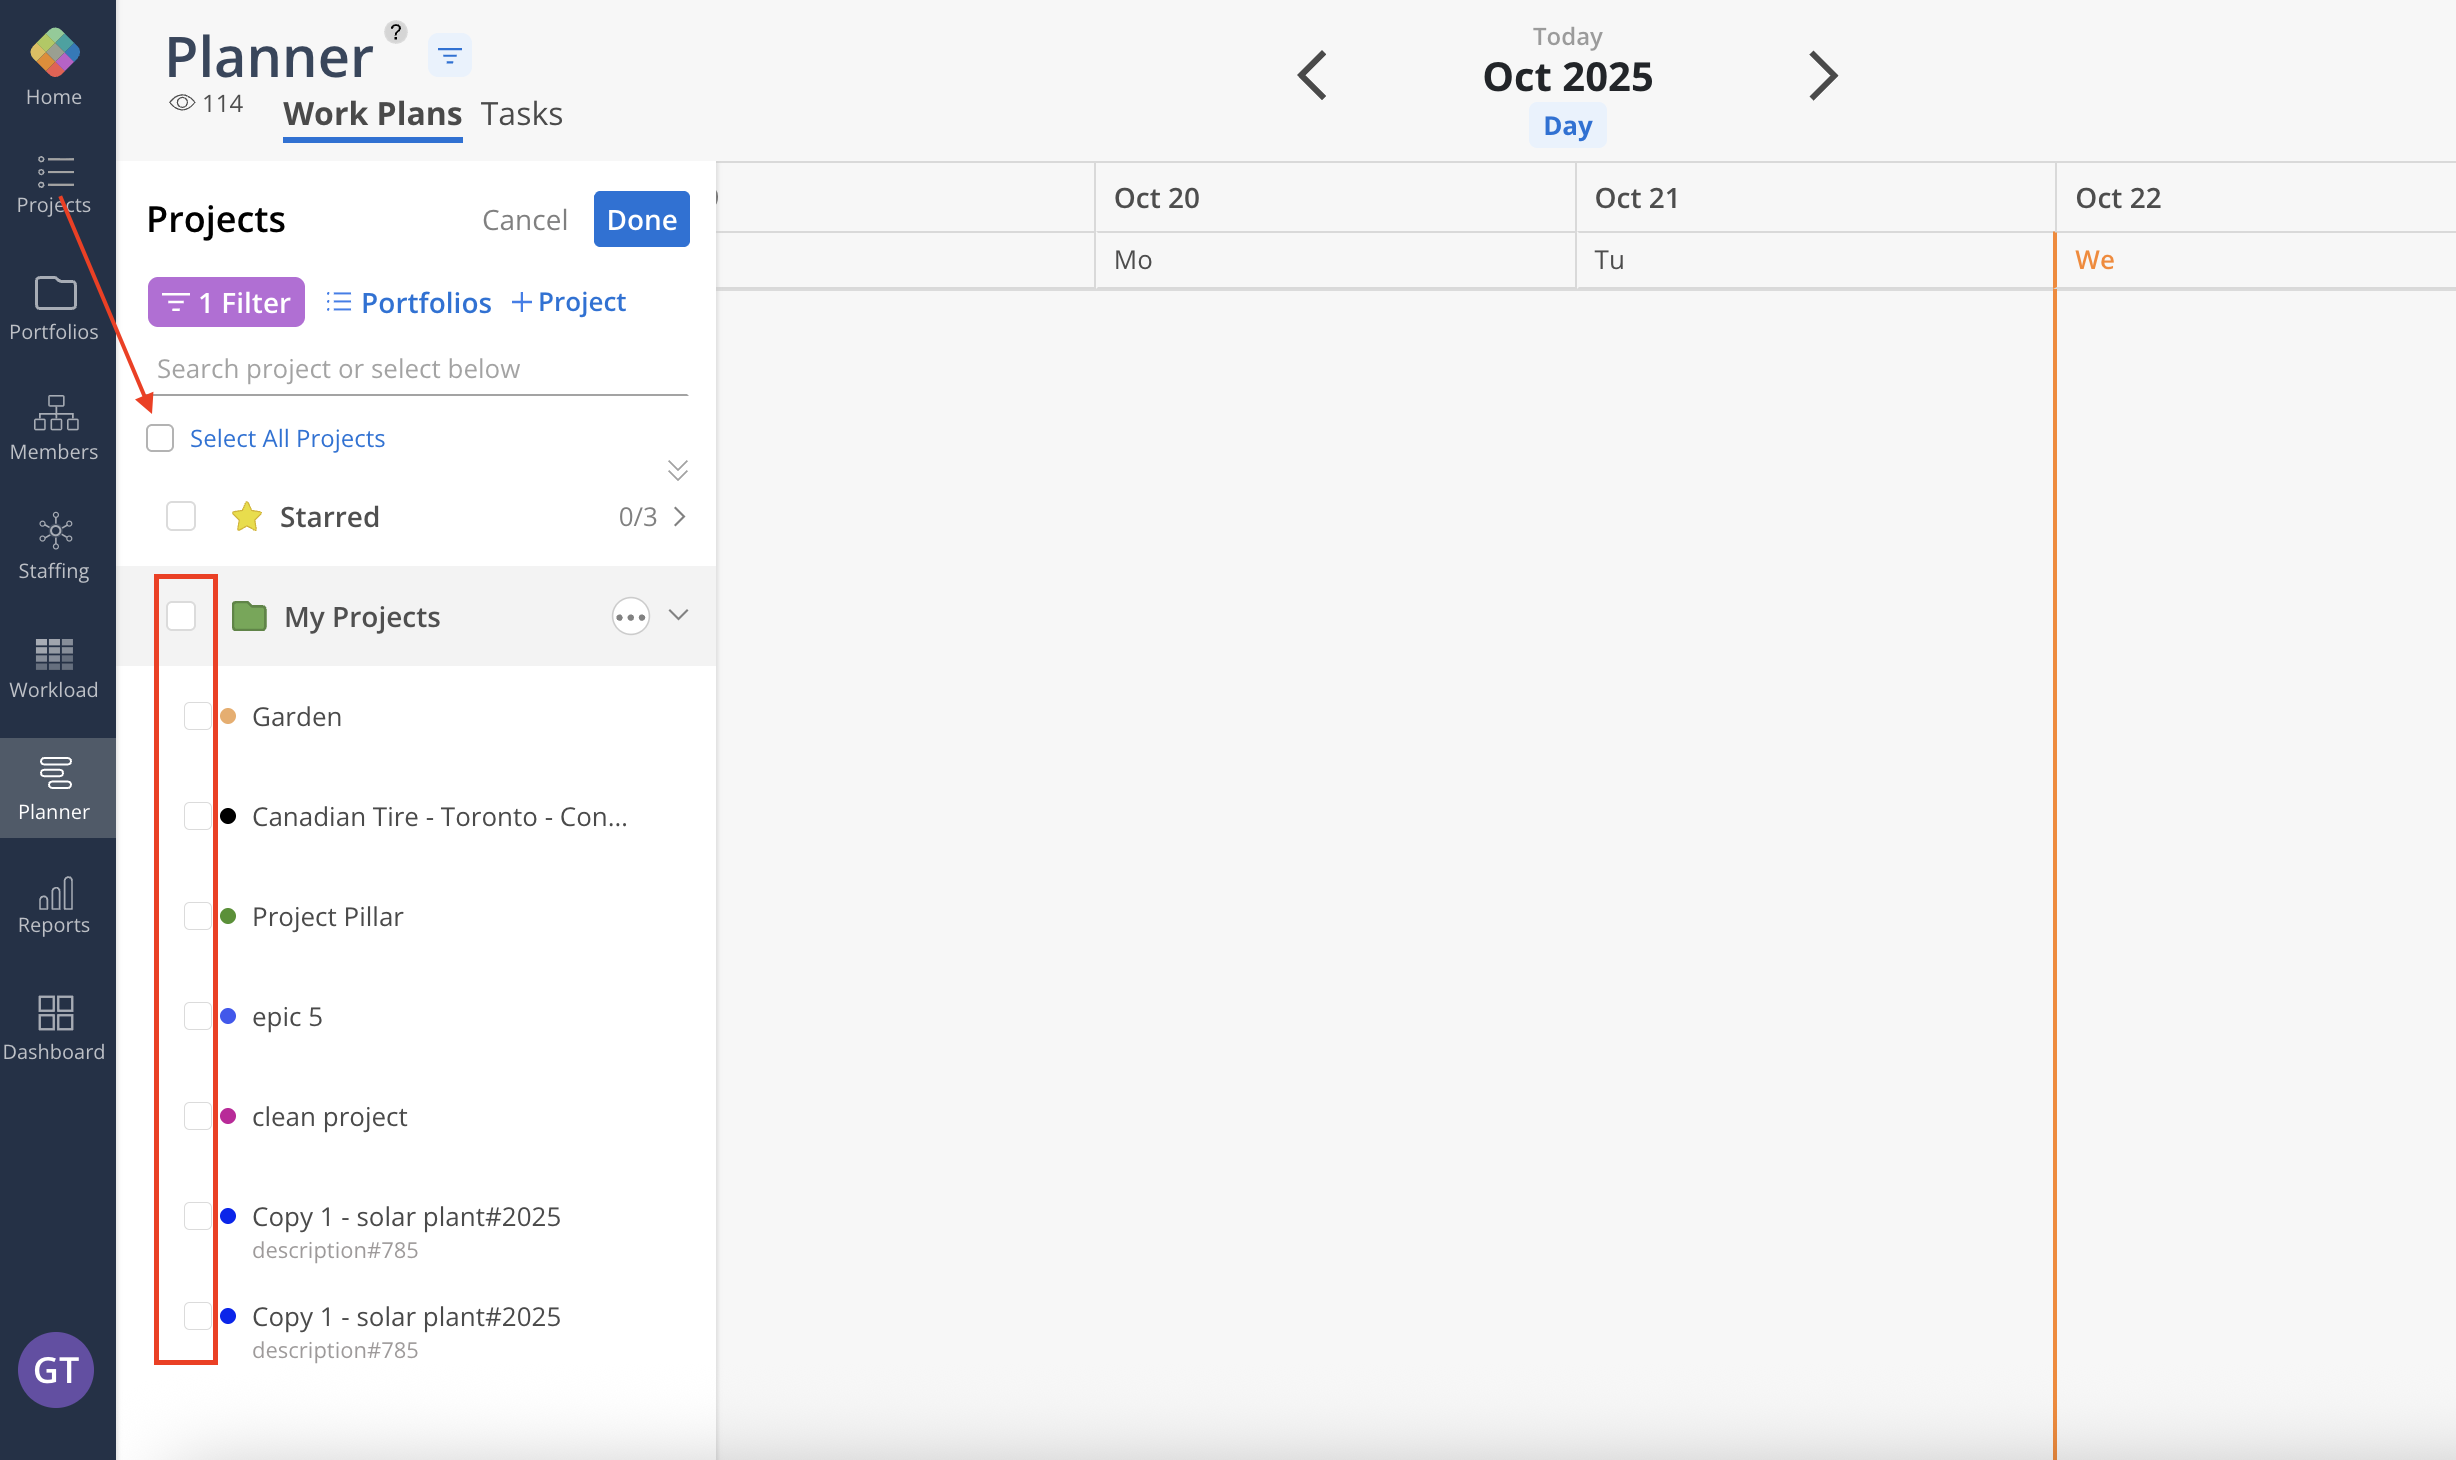
Click "Select Projects" in the top left corner to populate projects in the Planner Space.

Expand the portfolio to see individual projects. Use the checkboxes to select desired projects or all projects in a portfolio. Click Select All Projects on the top to select all existing projects.
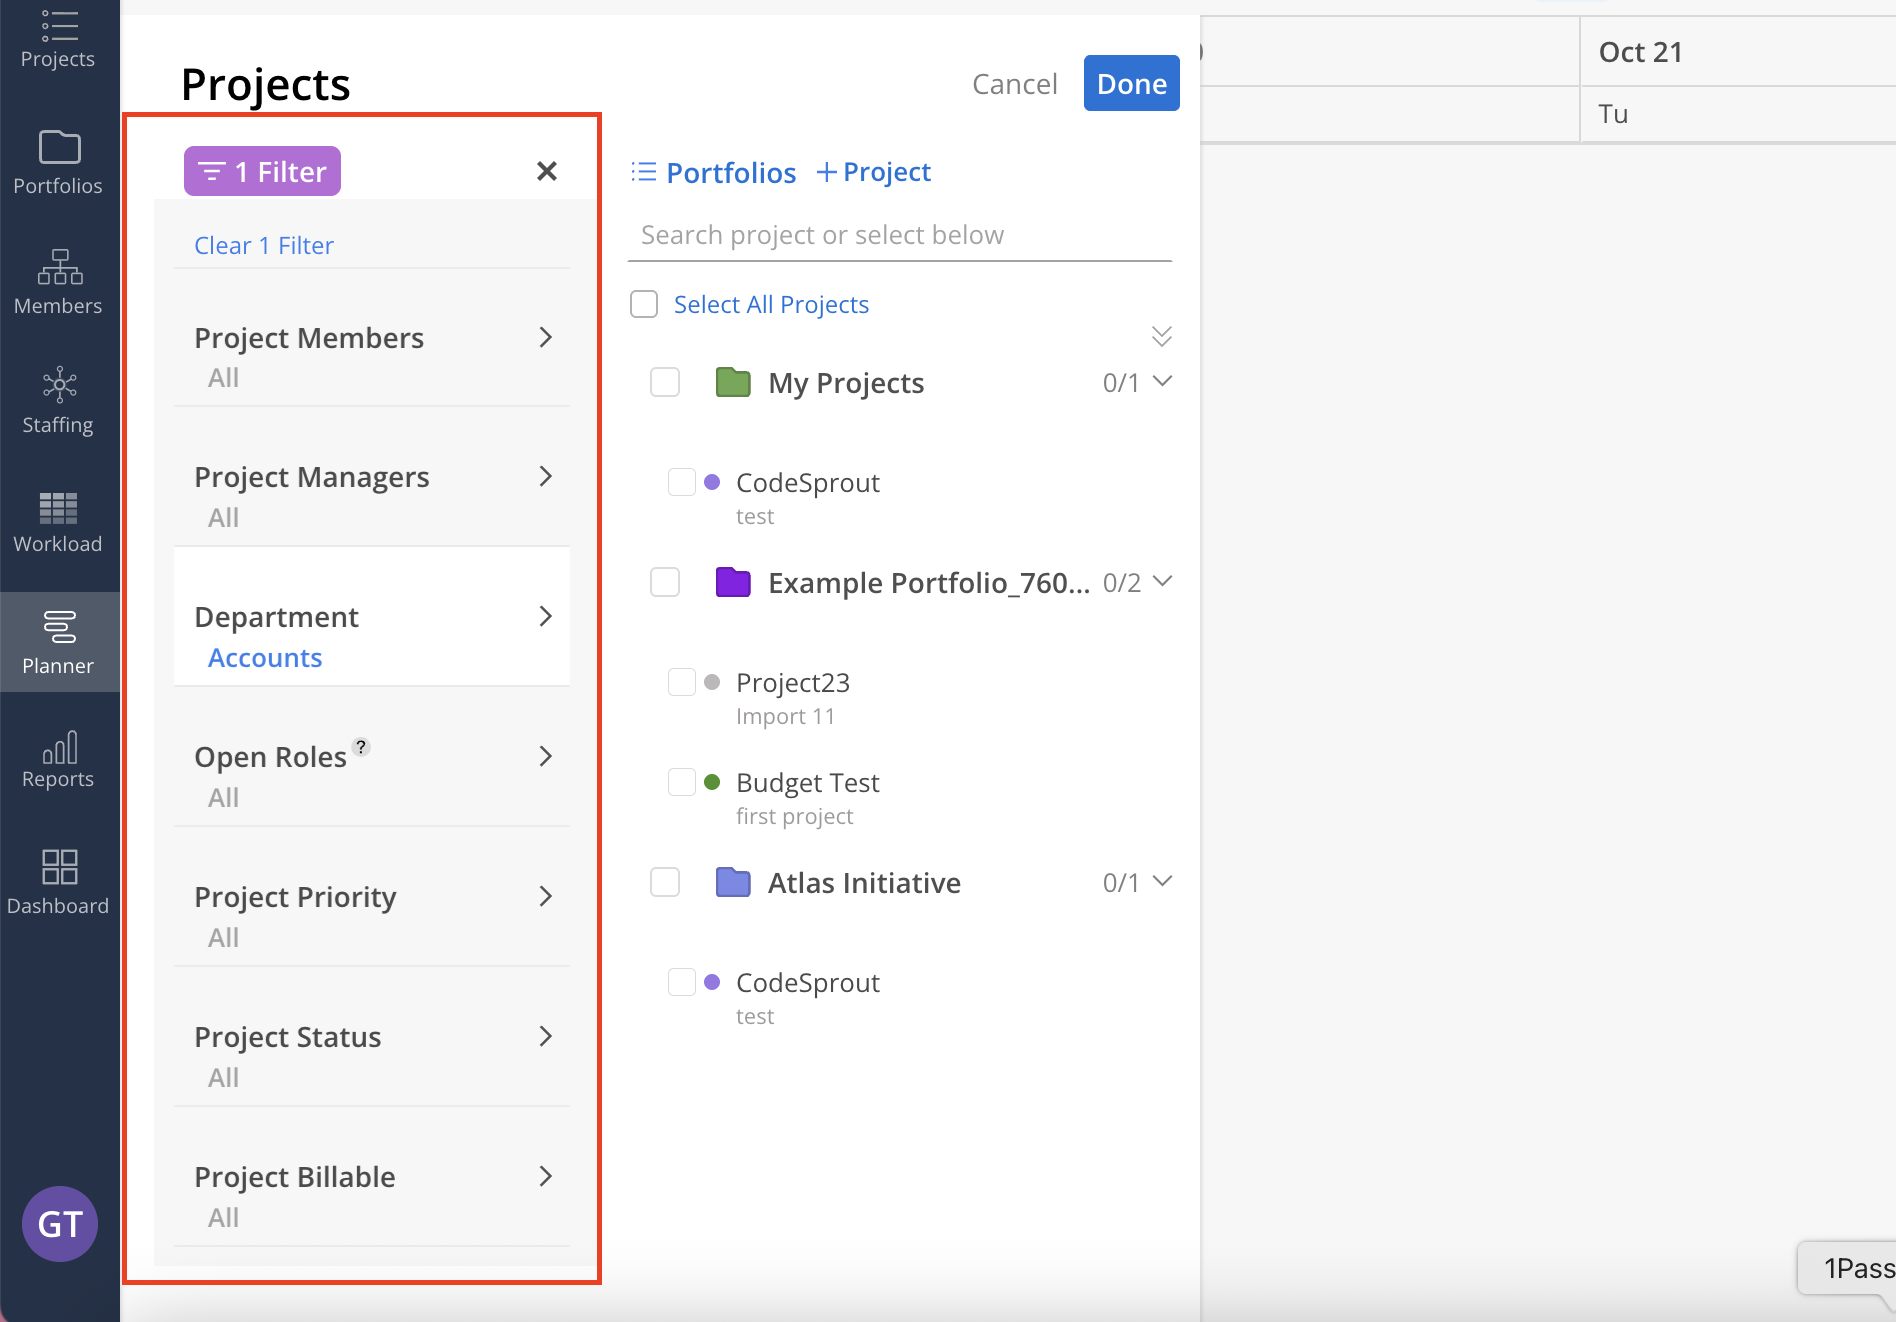
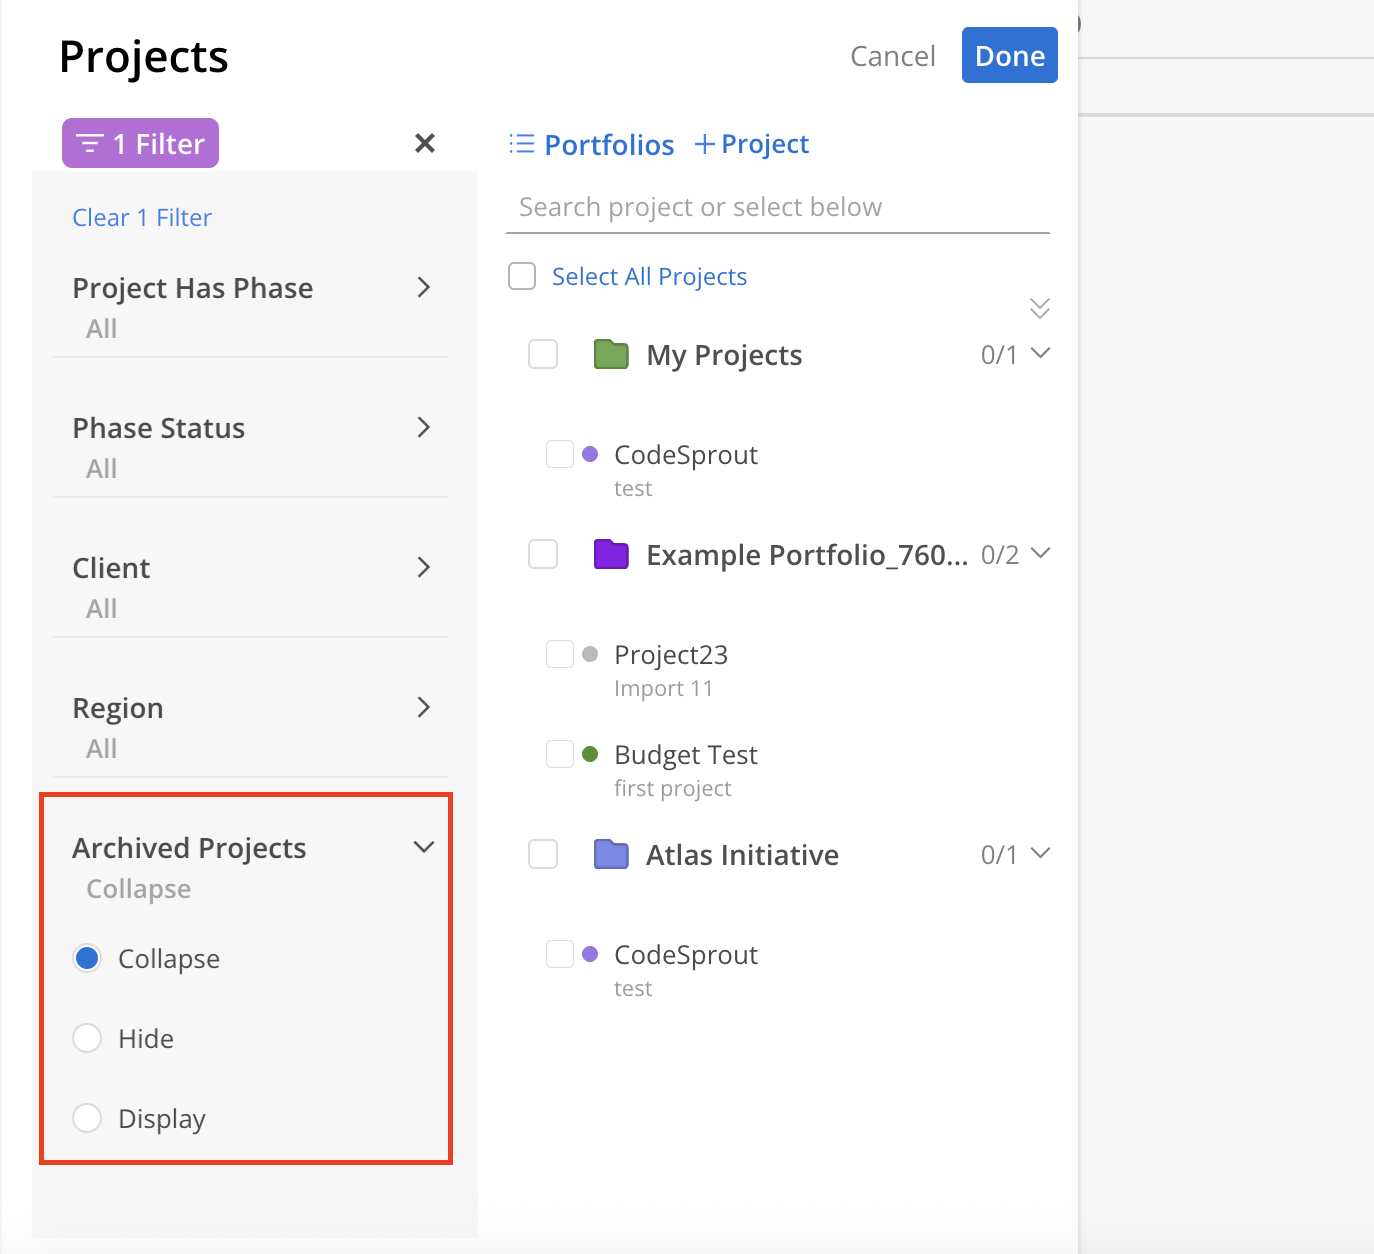
Projects can be filtered using various criteria to help narrow down results and locate specific records. These filters allow for refinement based on project attributes, status, team composition, and organizational details.
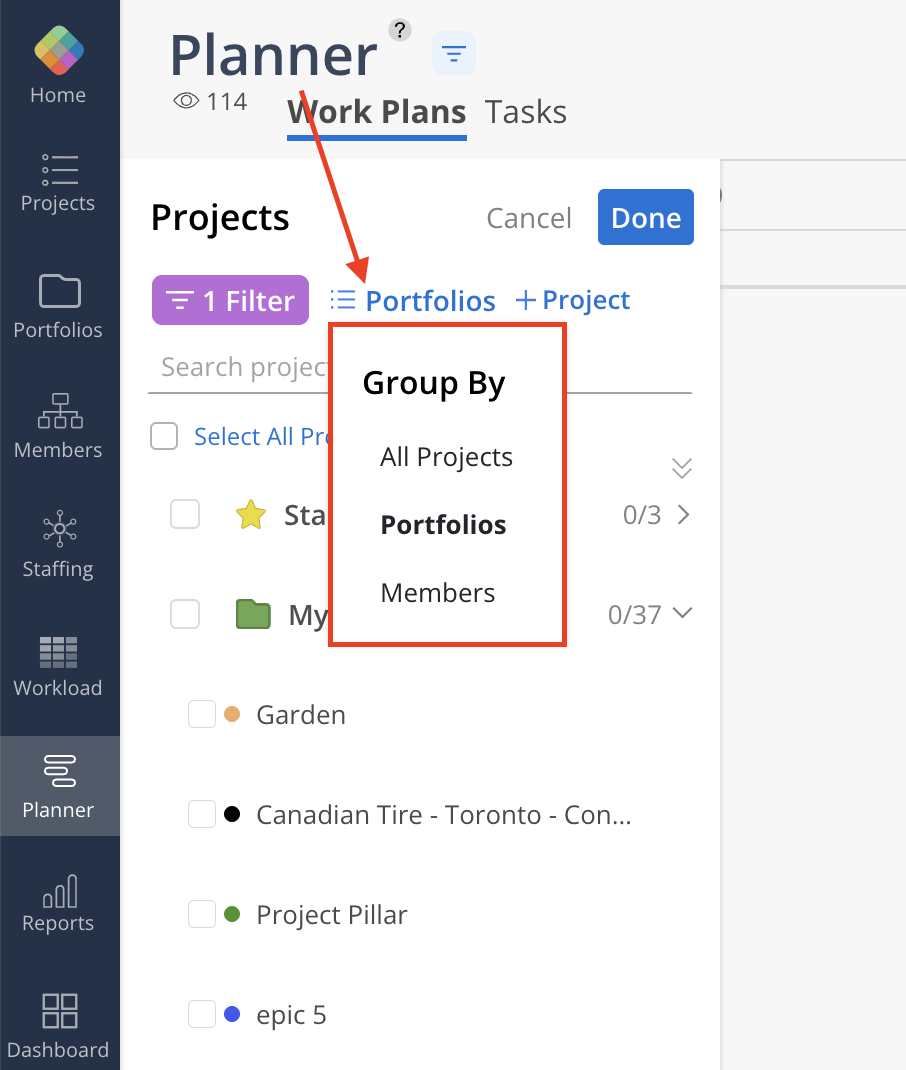
You can group the projects by All Projects, Portfolios or All Members.
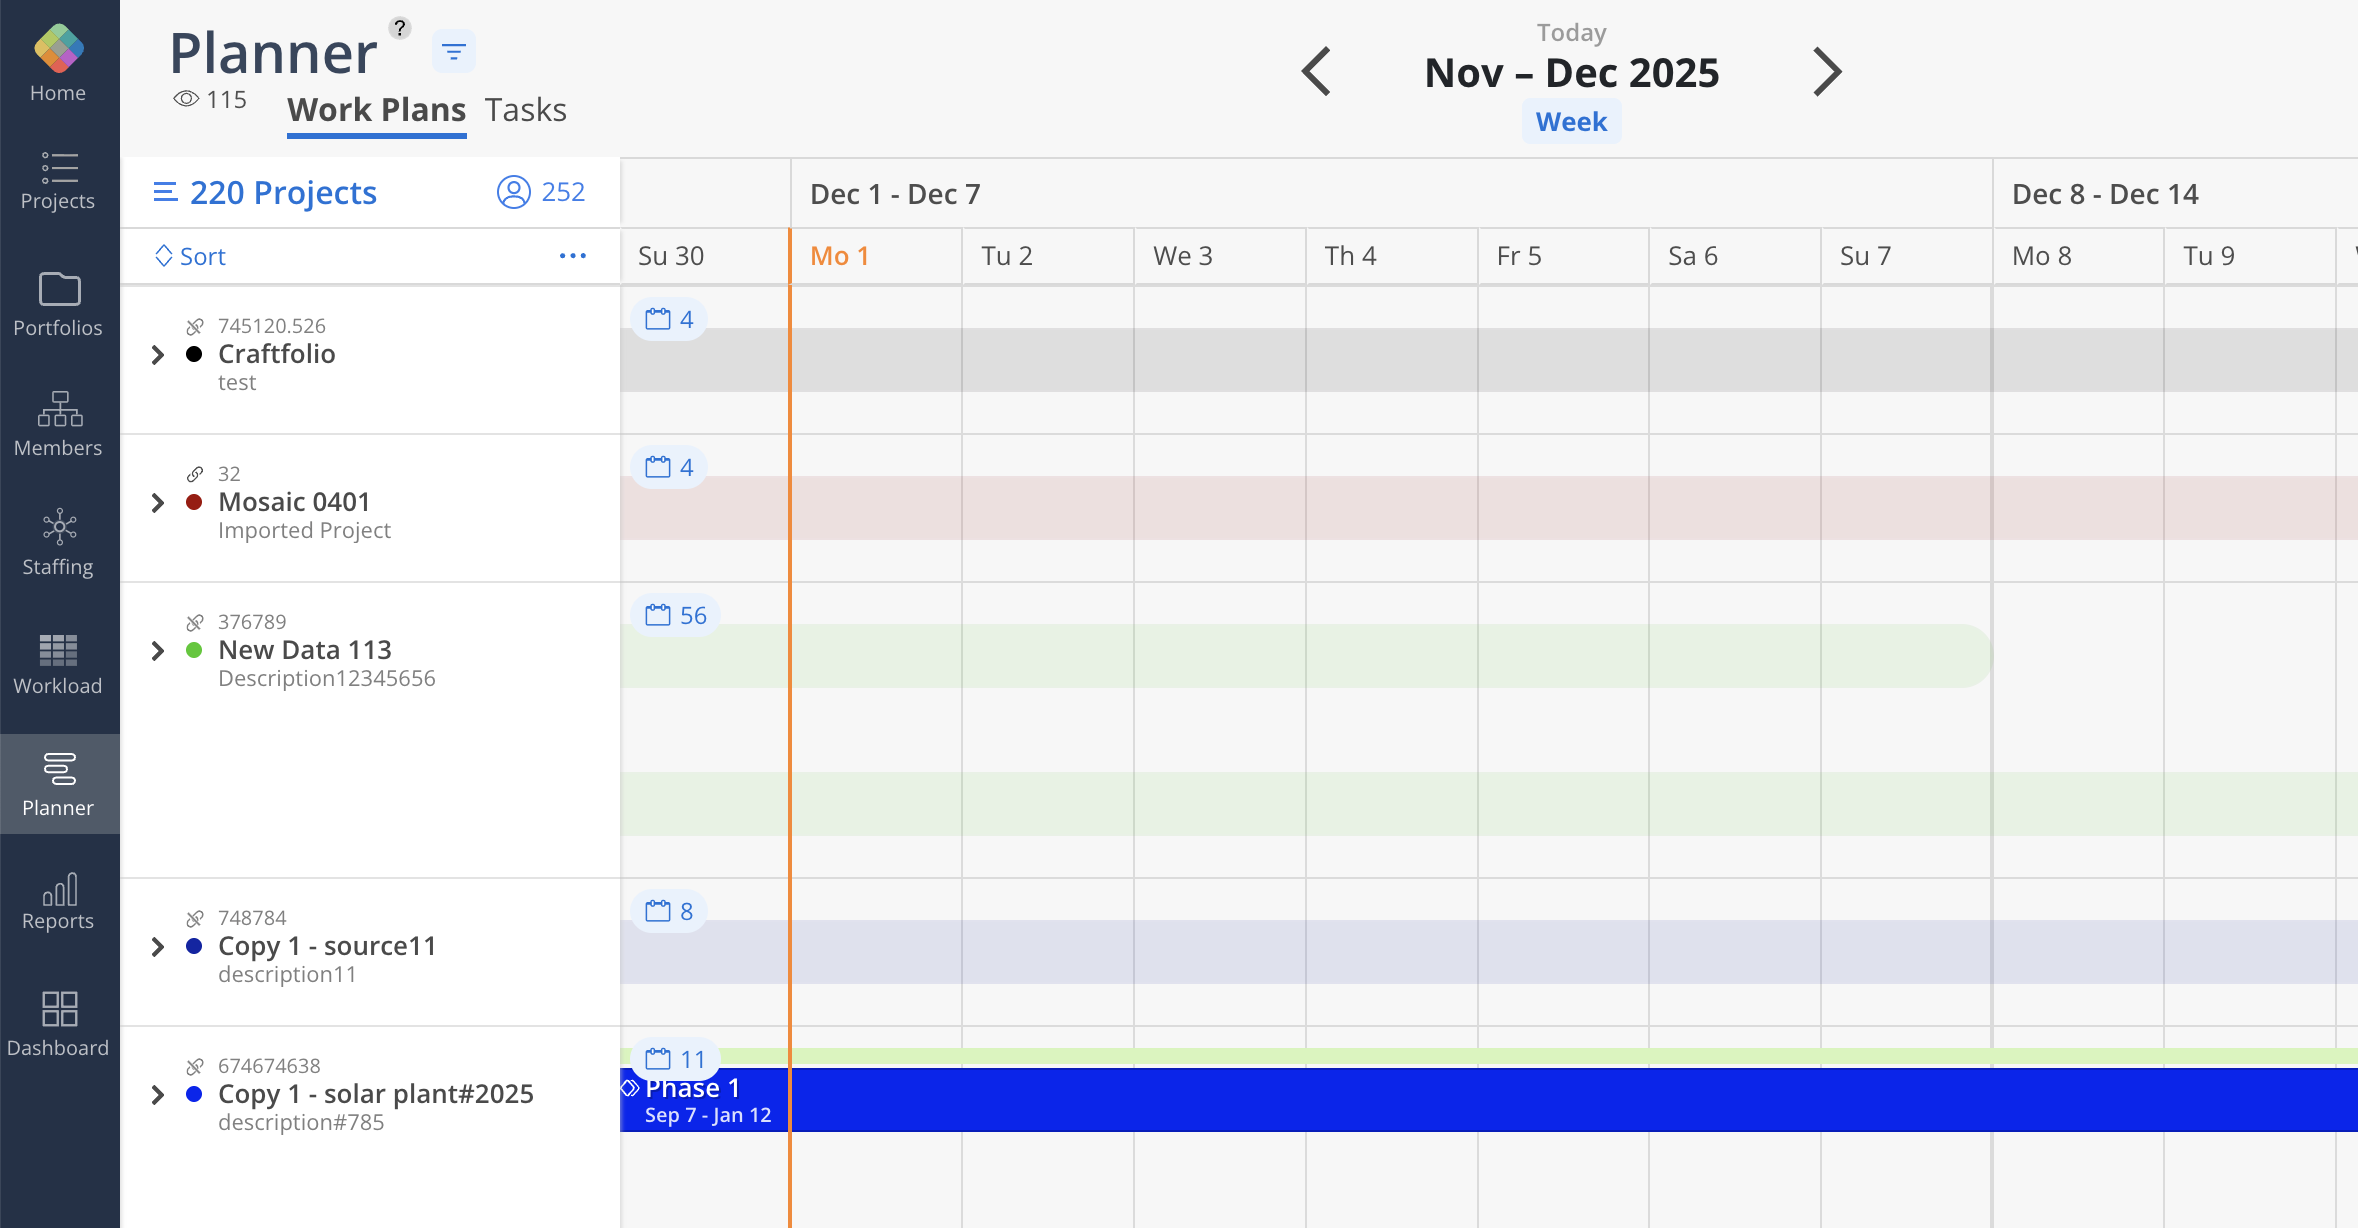
Now, it's possible to view schedules for Phases, Subphases, Work Categories, and Milestones from multiple Projects—all in one place.
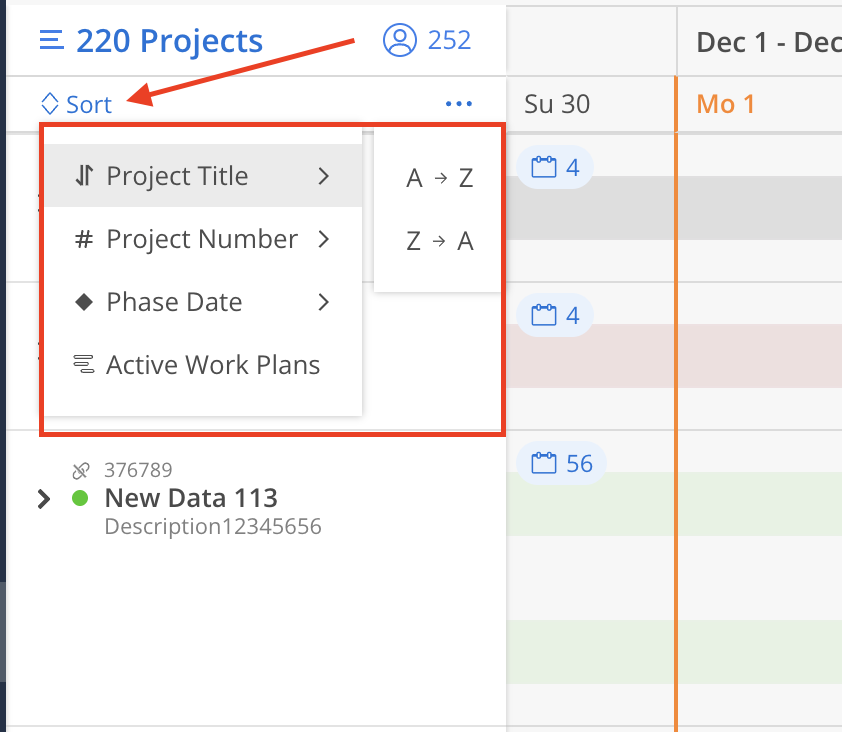
Once projects are selected, you can sort them by the following:
Project Title: Can be sorted alphabetically in either A to Z or Z to A order.
Project Number: Can be sorted in either Low to High or High to Low order.
Phase Date: Sorts Projects based on the earliest start or end date among all Phases within each Project. Projects with the earliest start or end date appear first.
Active Work Plans: Sorts Projects by the sum of remaining days across all Work Plans within each Project. Projects with more remaining days appear first.
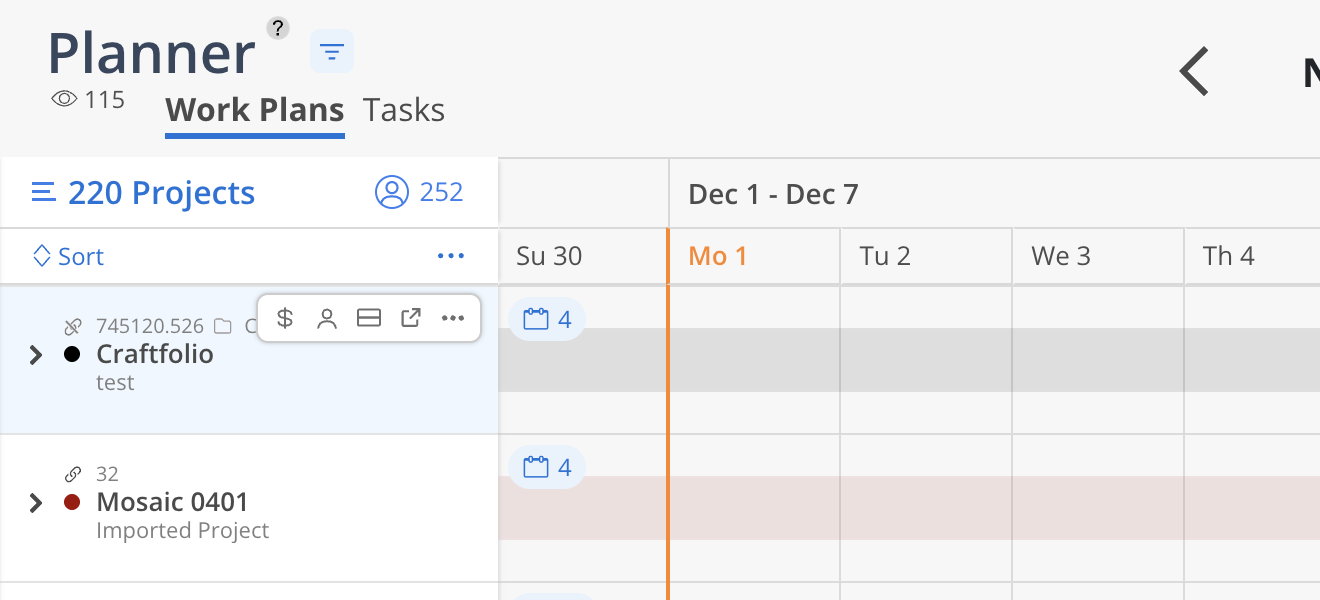
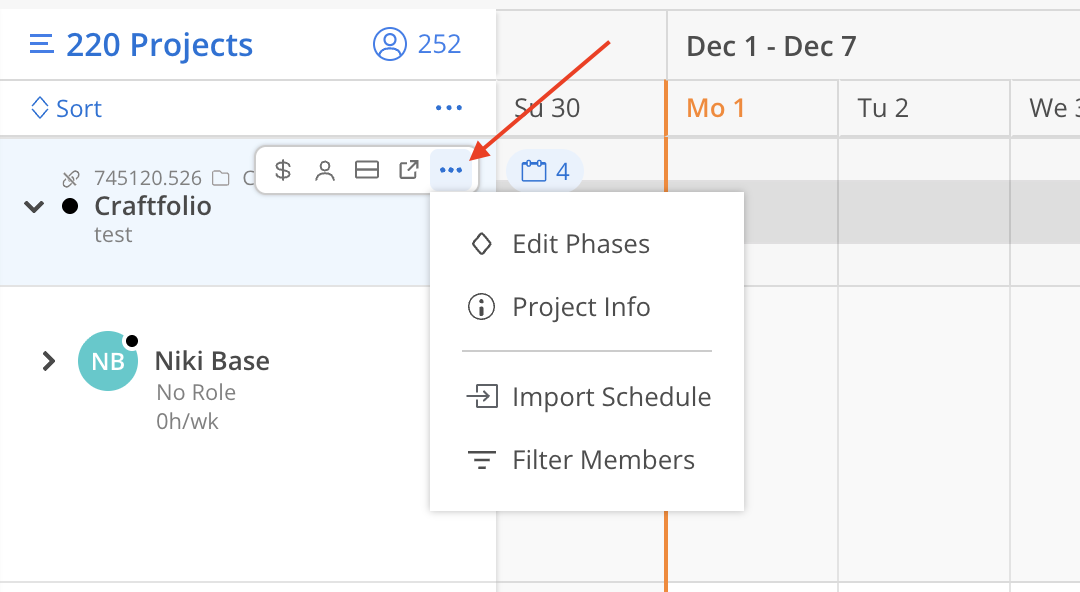
Click on the three-dot menu on the Project, several options are available
Open Project Budget Modal: Allow quick adjustment to budget of the Project.
Manage Members: Open Manage Member Modal, add Members or Open Roles, open team builder.
View Member Availability: Show Member’s Work Plans from other projects in a split screen.
Go To Project: Opens the Project Space in a new tab.
Edit Phases: Accesses the Project Schedule Modal to manage the Phases within the Project.
Project Info: View and Edit Project Information on Project Info Modal.
Import Schedule: Opens the Import Modal to perform a CSV import of Projects/Phases/Work Categories and more.
Filter Members on the Project: Filter to see only Members you want to see.
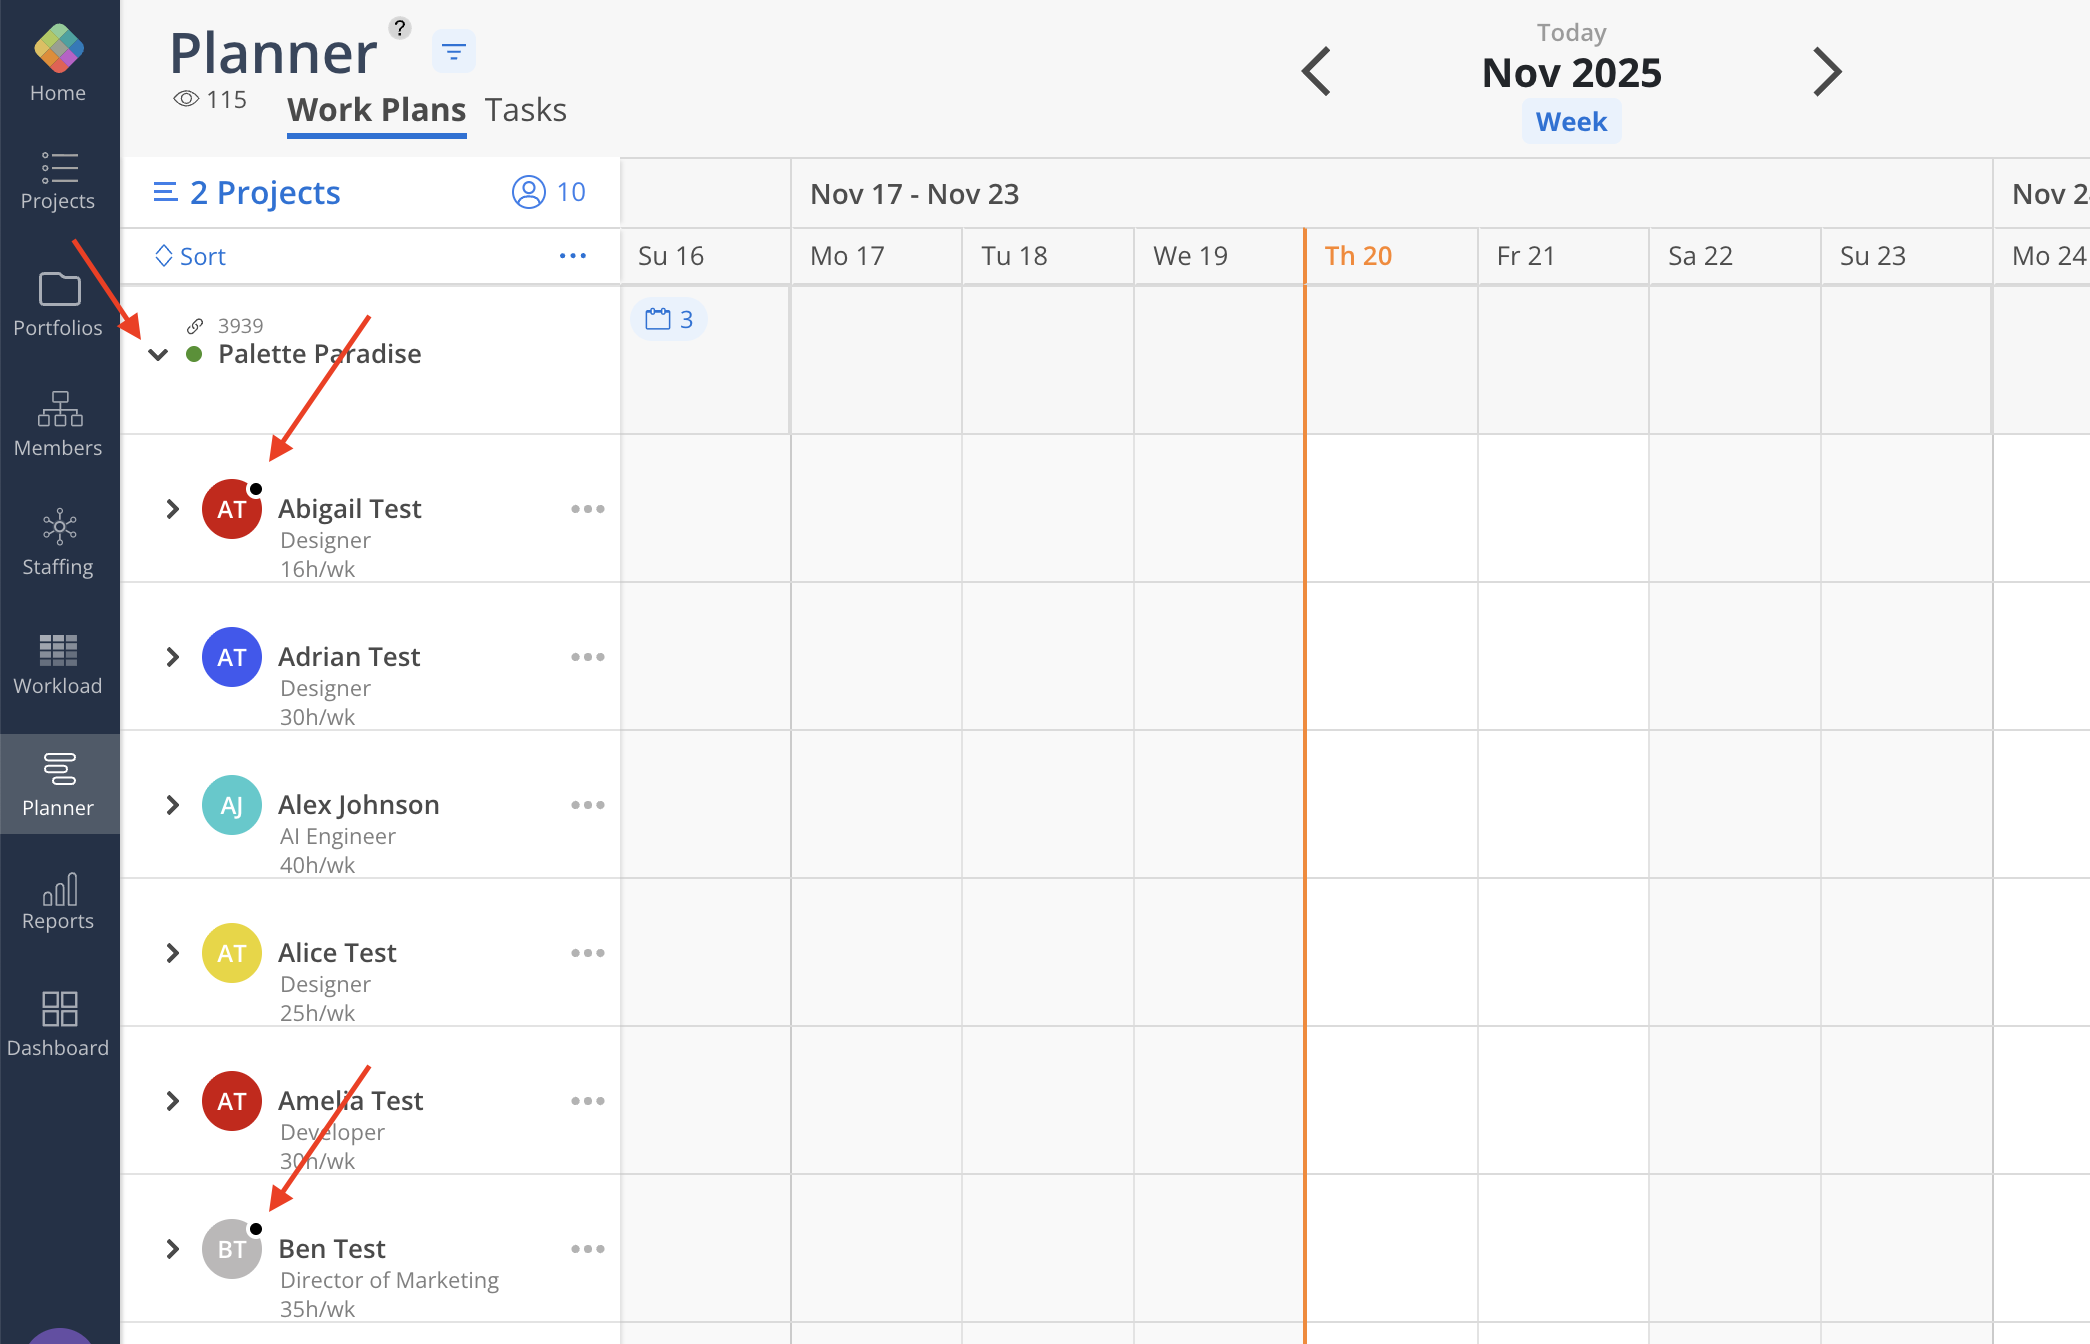
Expanding a Project reveals all active Project Members along with their associated Work Plans.
Members are organized alphabetically.
Project Managers are visually identified by a black dot on their avatar.
Any Open Roles appear at the bottom of the Members list.
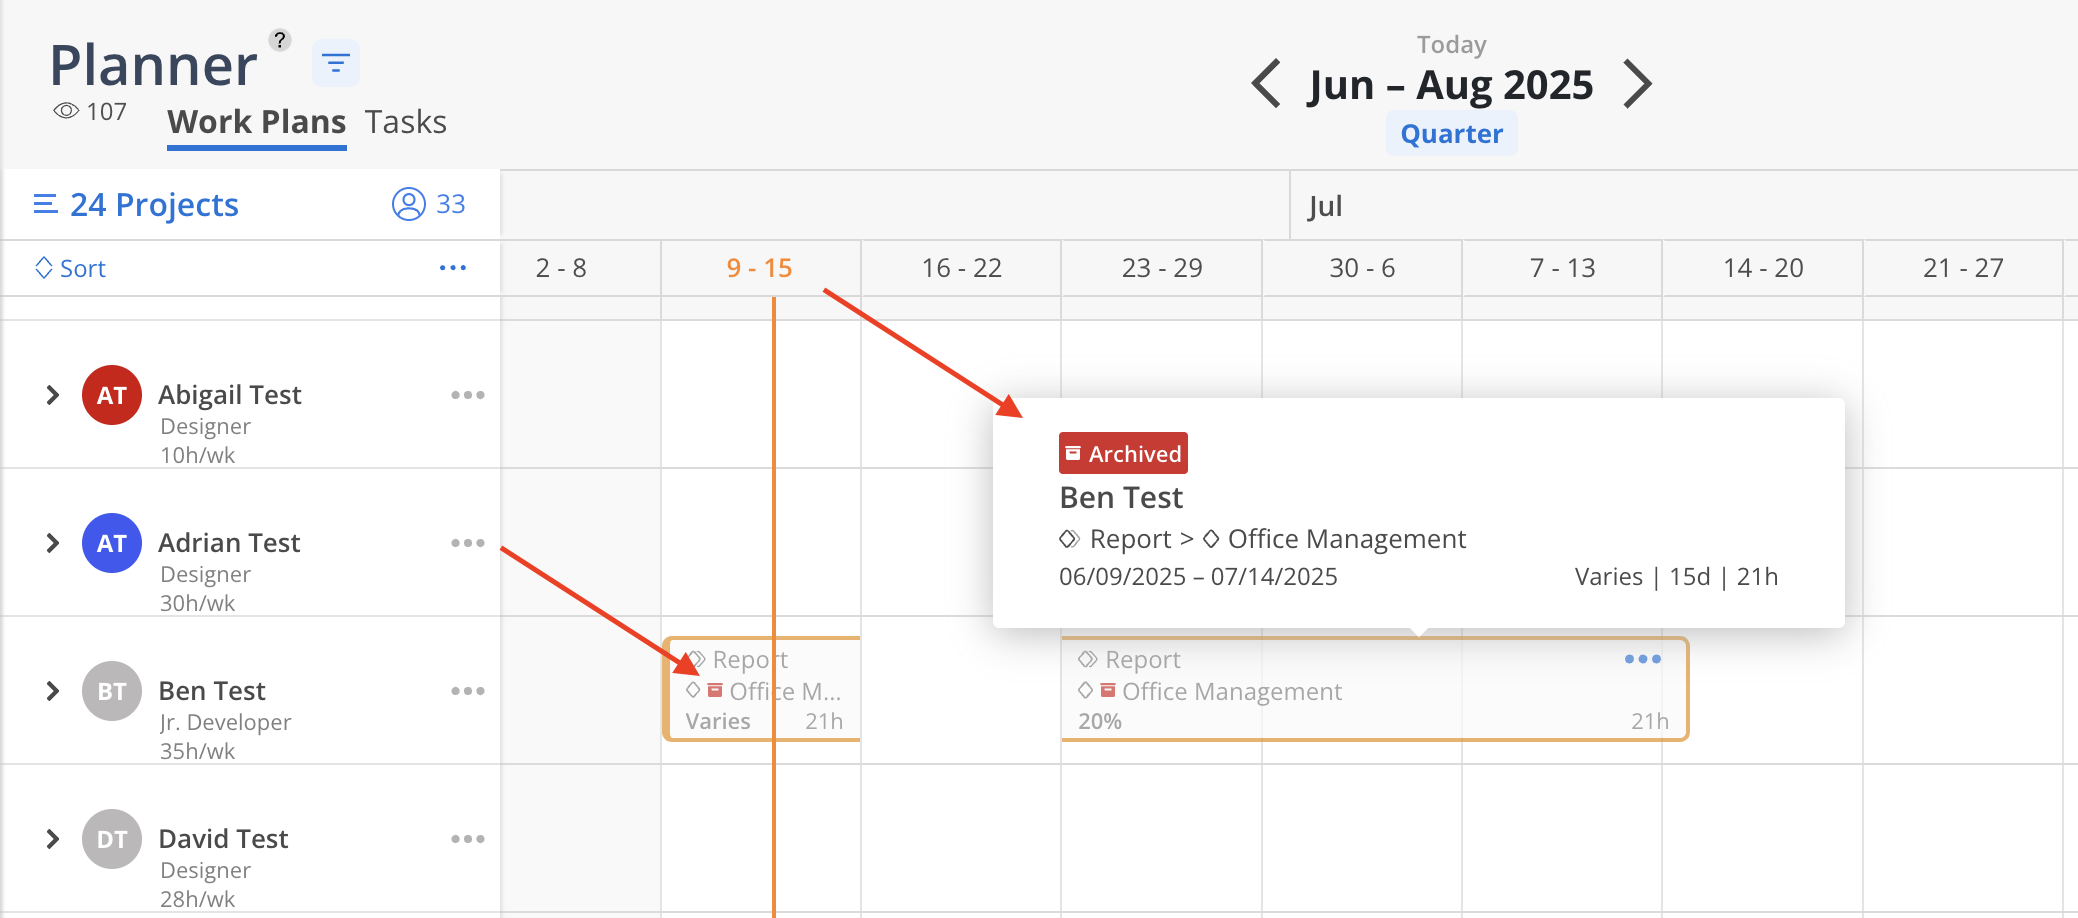
When a Project, Phase, Subphase, or Work Category is archived, all associated Work Plans are archived automatically. Archived Work Plans are marked with a red archive icon. Hovering over the archived bar reveals additional details about the archived item.
