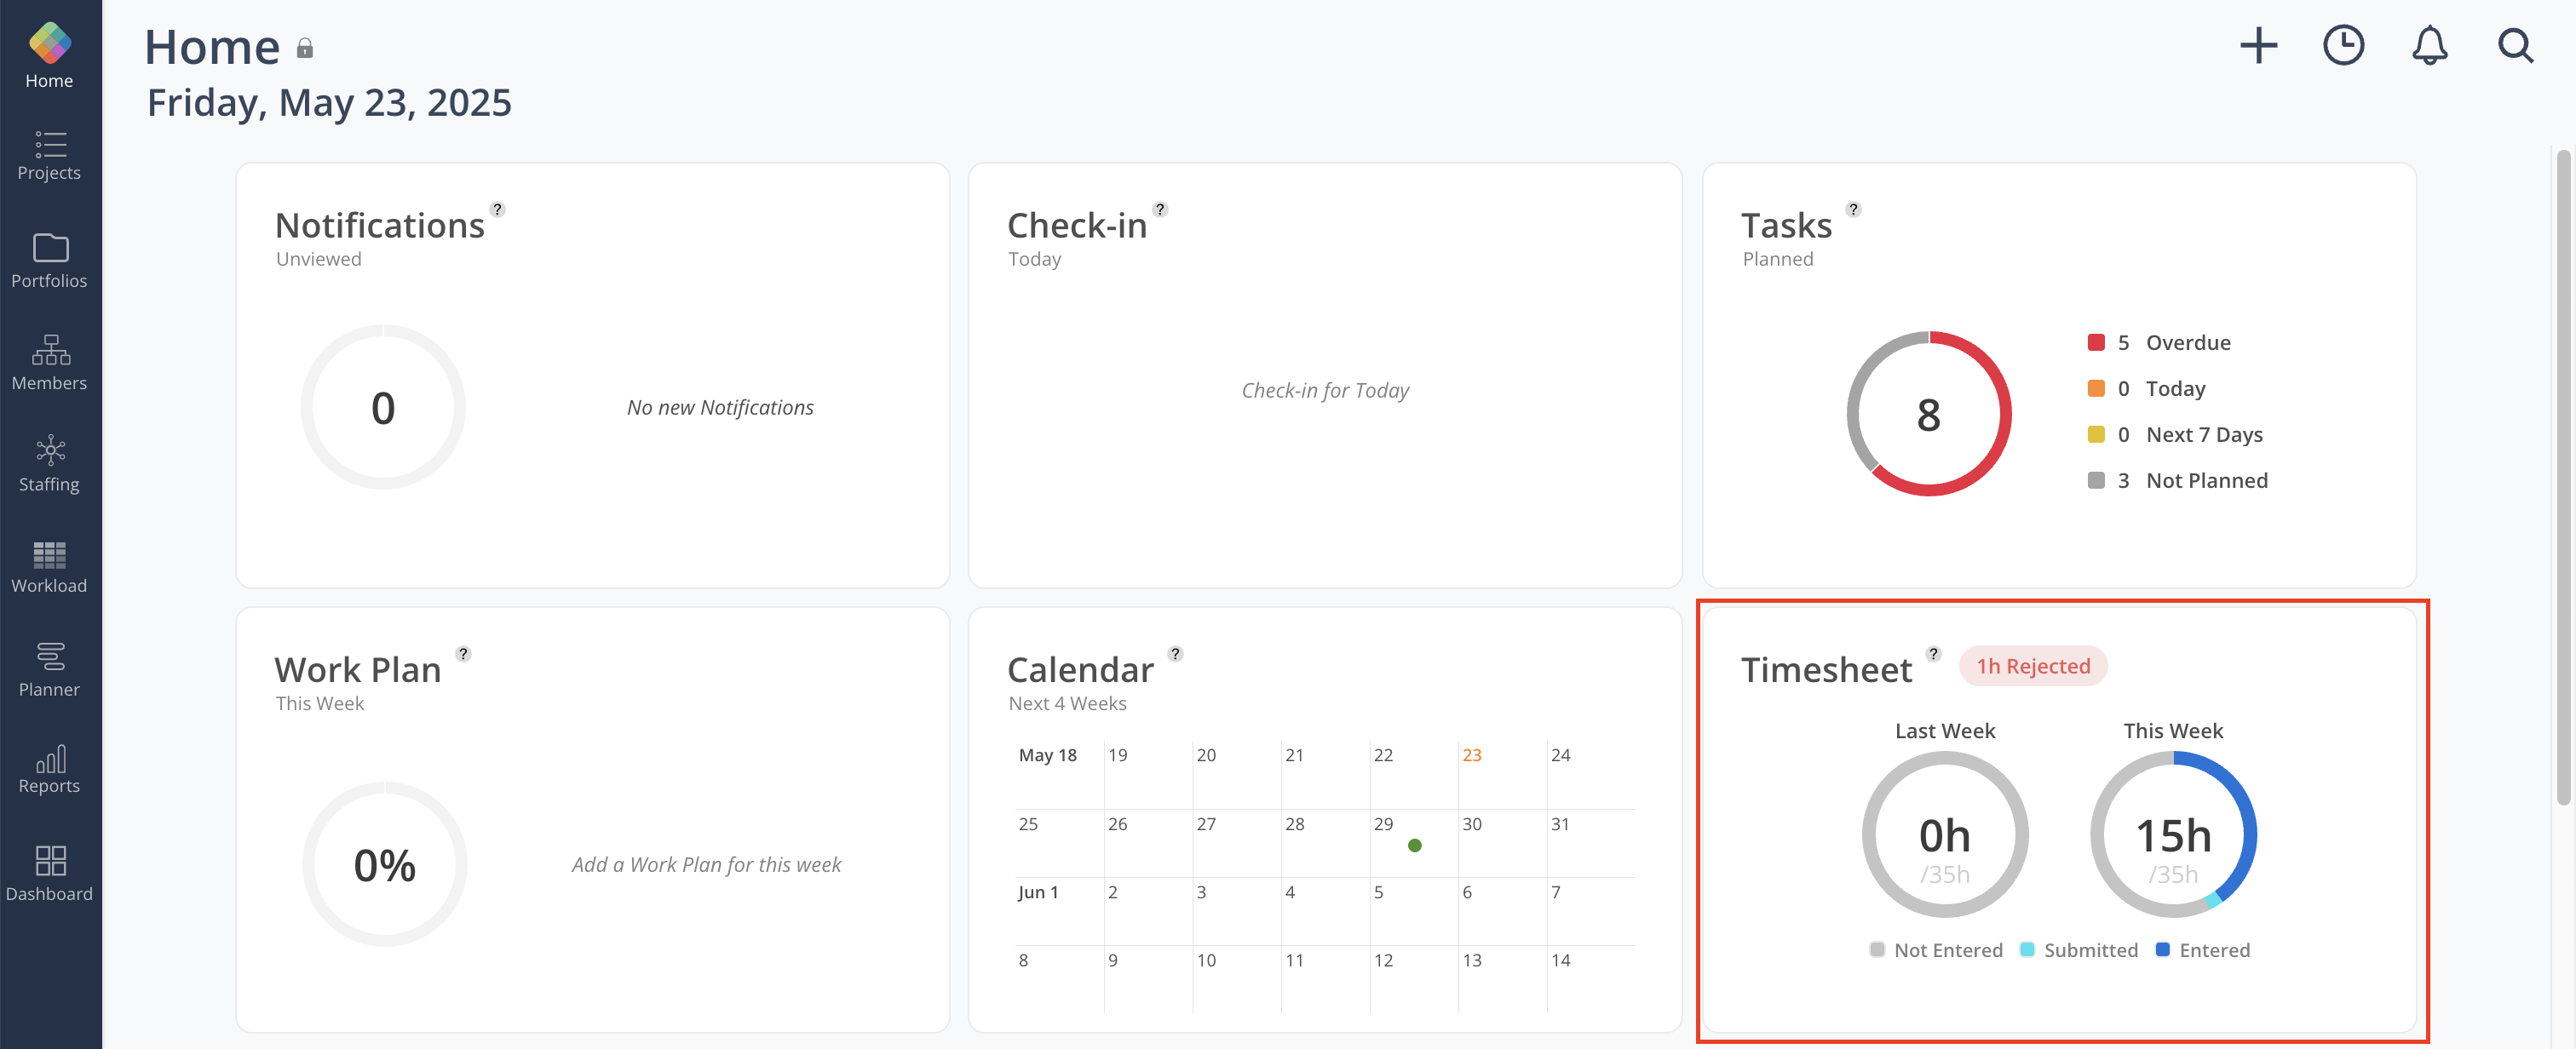
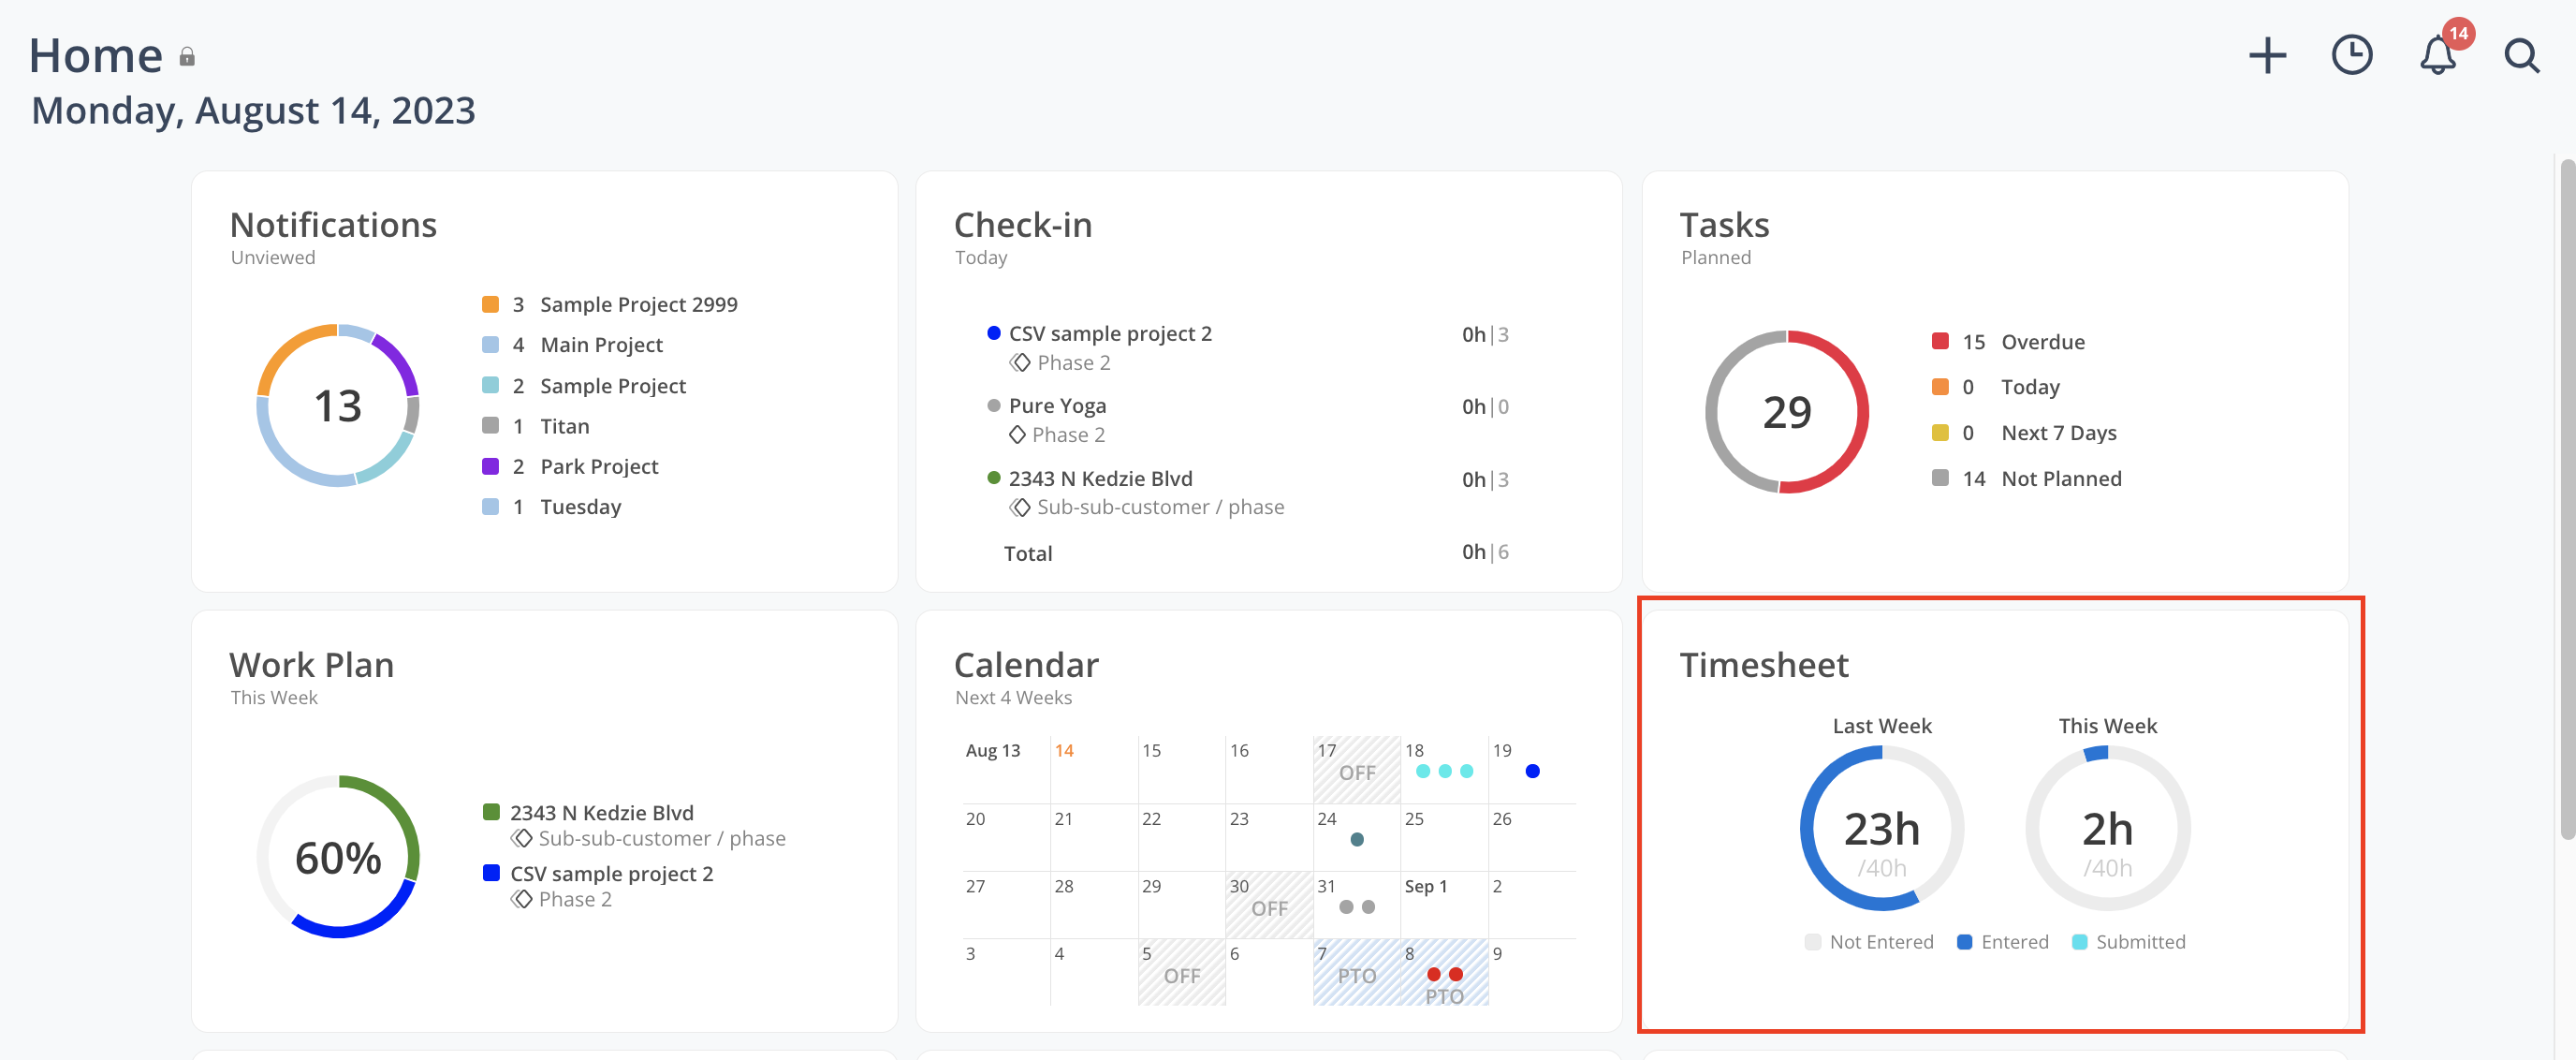
The Home Page's Timesheet widget displays un-entered, entered, and submitted timesheets for both last week and this week, along with your allocated capacity hours.
When any timesheet entries are rejected, a red chip will appear at the top of the widget, displaying the total number of hours that were not approved (e.g., "1h Rejected").
Click on the widget to go to the Timesheet page.
The Timesheets for each project and each day will be displayed, as well as the total hours for the day and the week.
Click the left and right arrows to change to a different week.
If you are not viewing the current week, the Today button will turn orange. Clicking it will take you back to the current week.

Click Add Time Entry. Type the name of the Project into the search field to find the Project, and then select the Phase or Subphase.
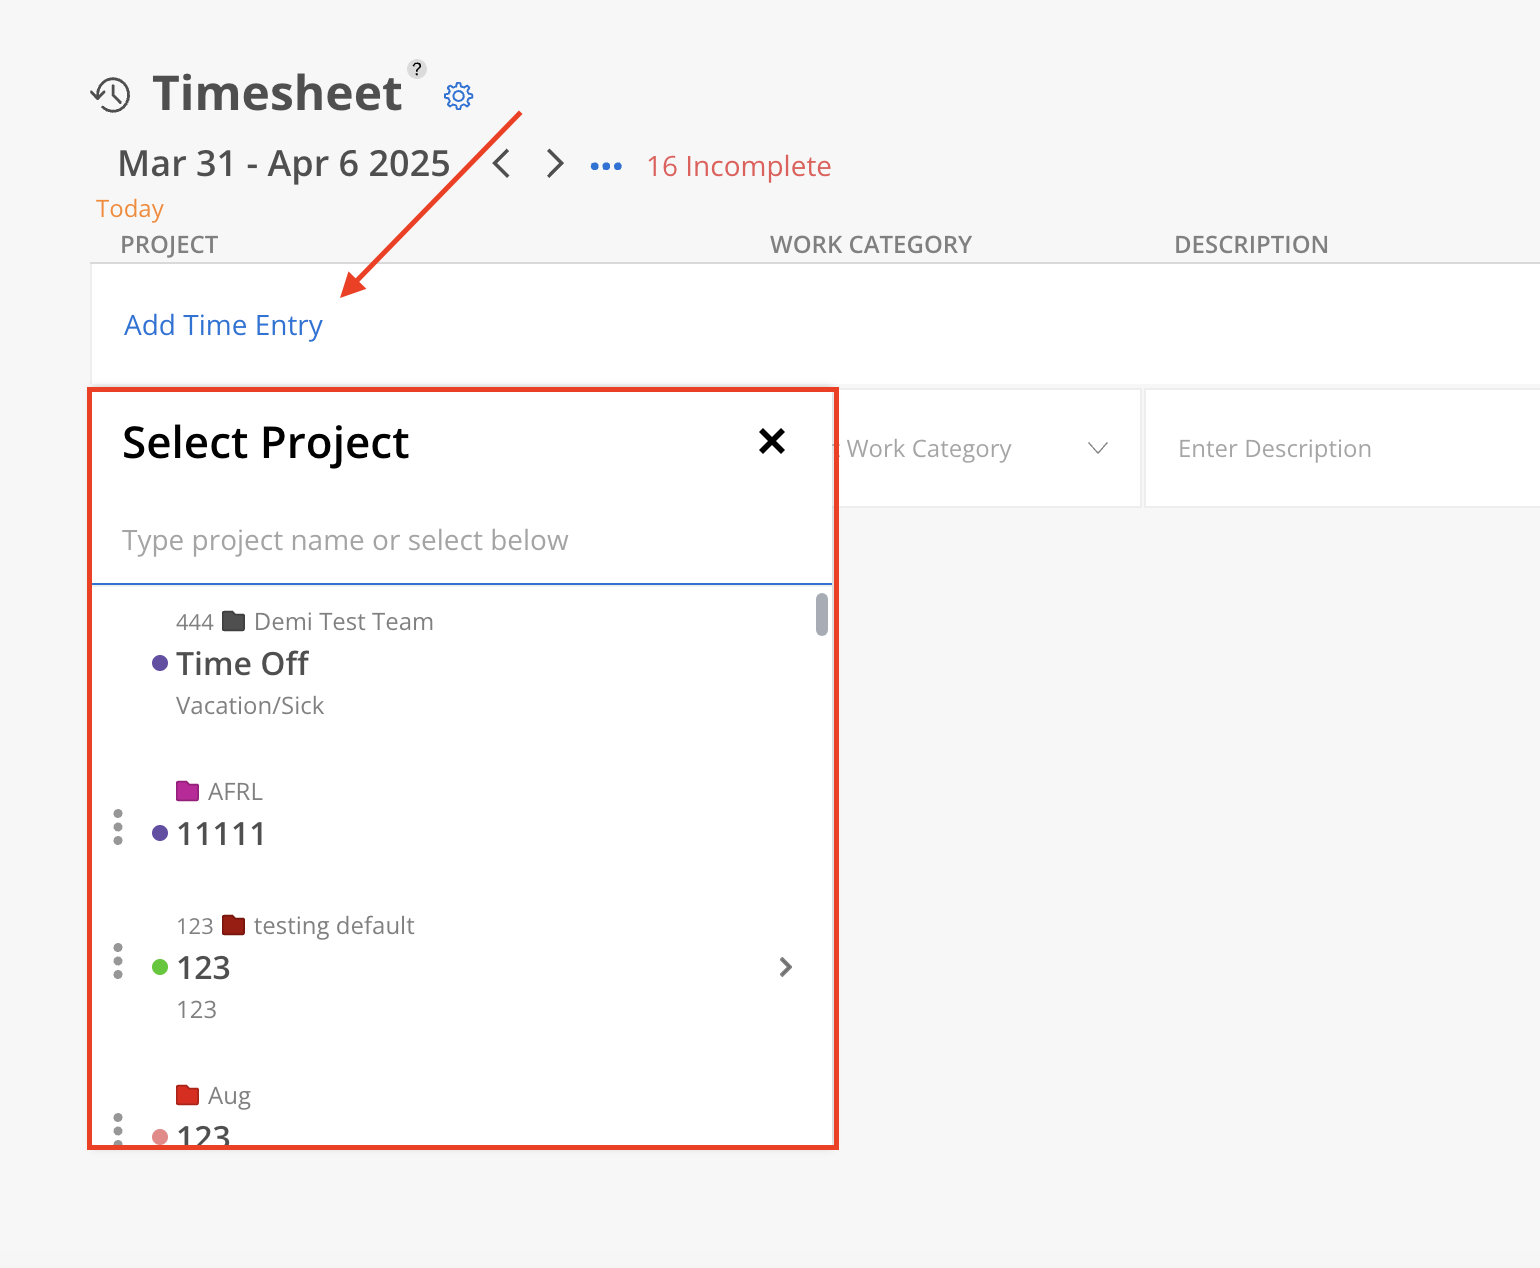
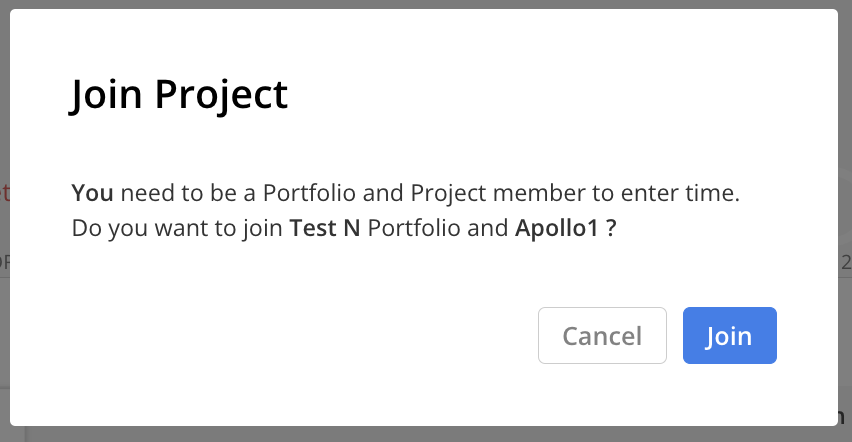
If not already part of the project, a confirmation modal will appear.
Make sure to select the relevant Work Category. It is required for a Time Entry to be created.
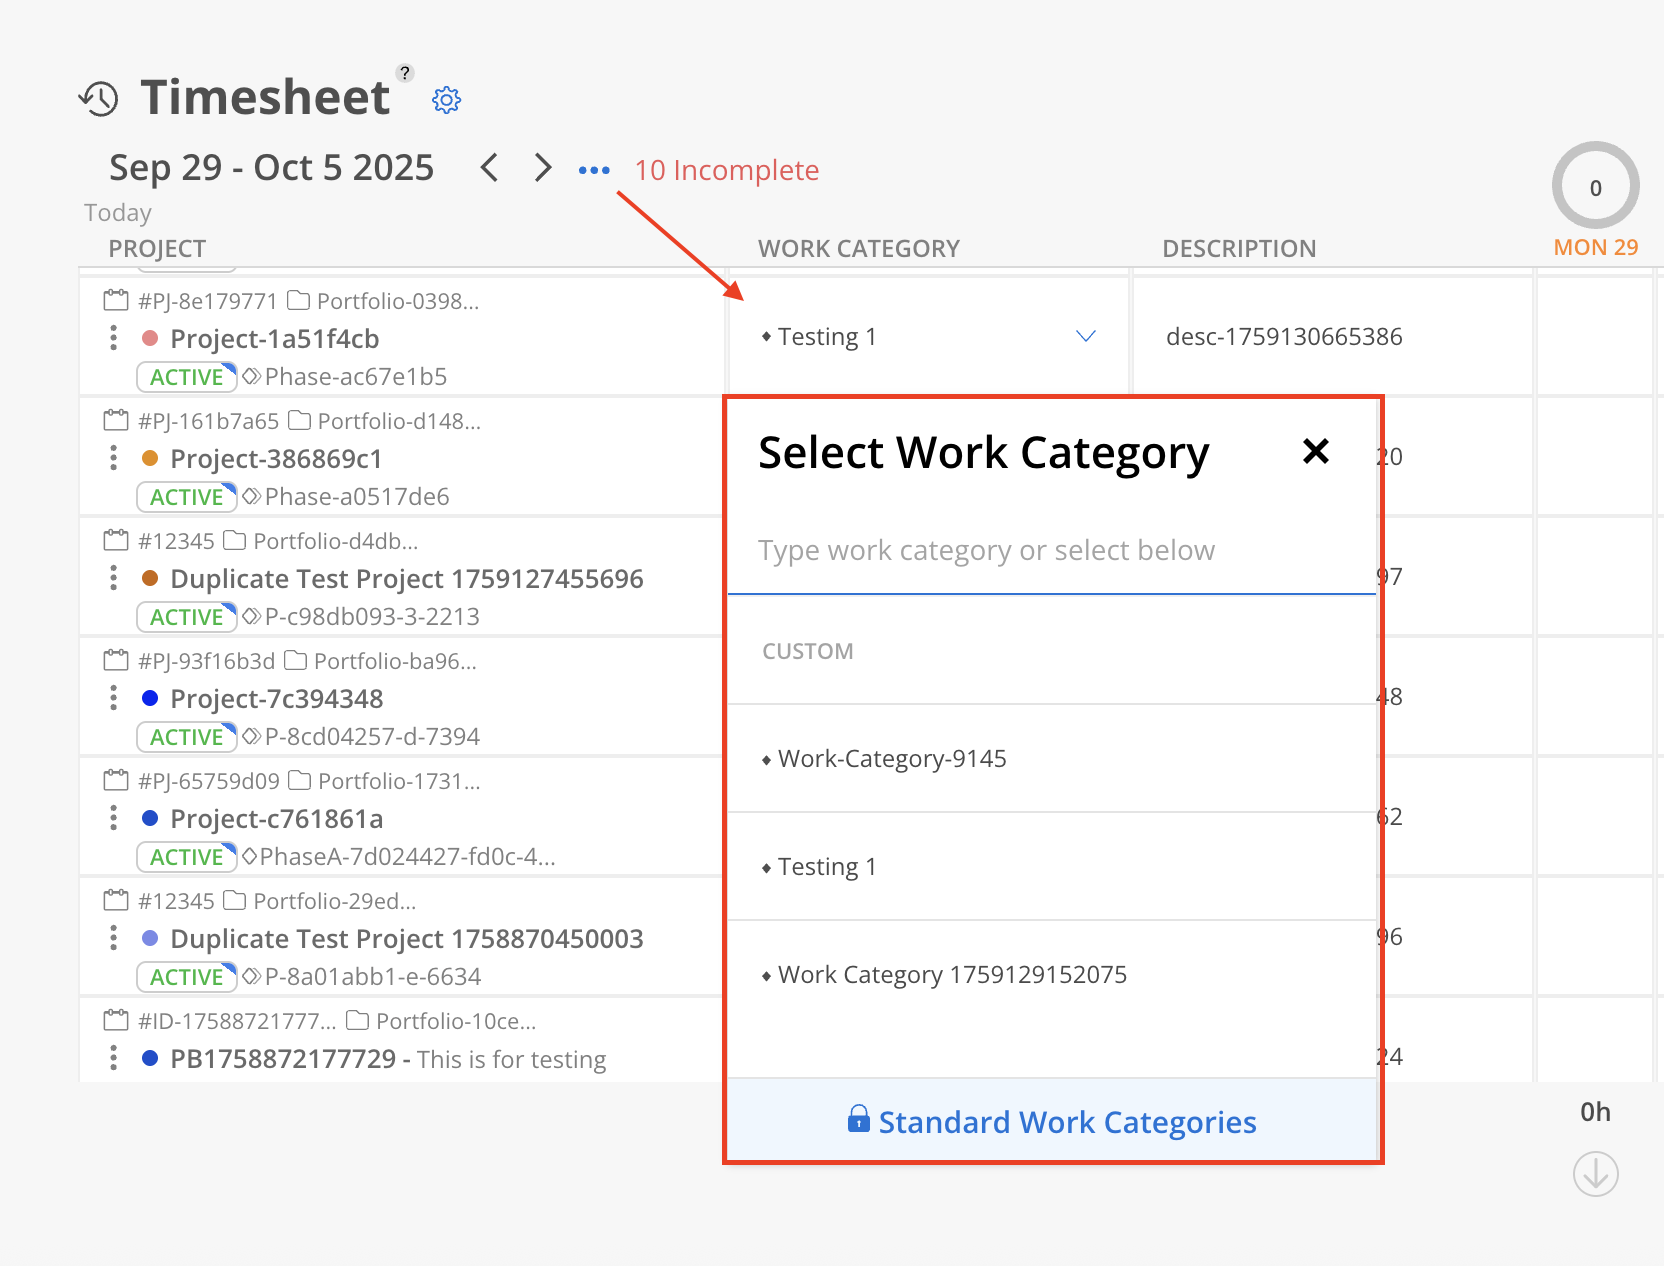
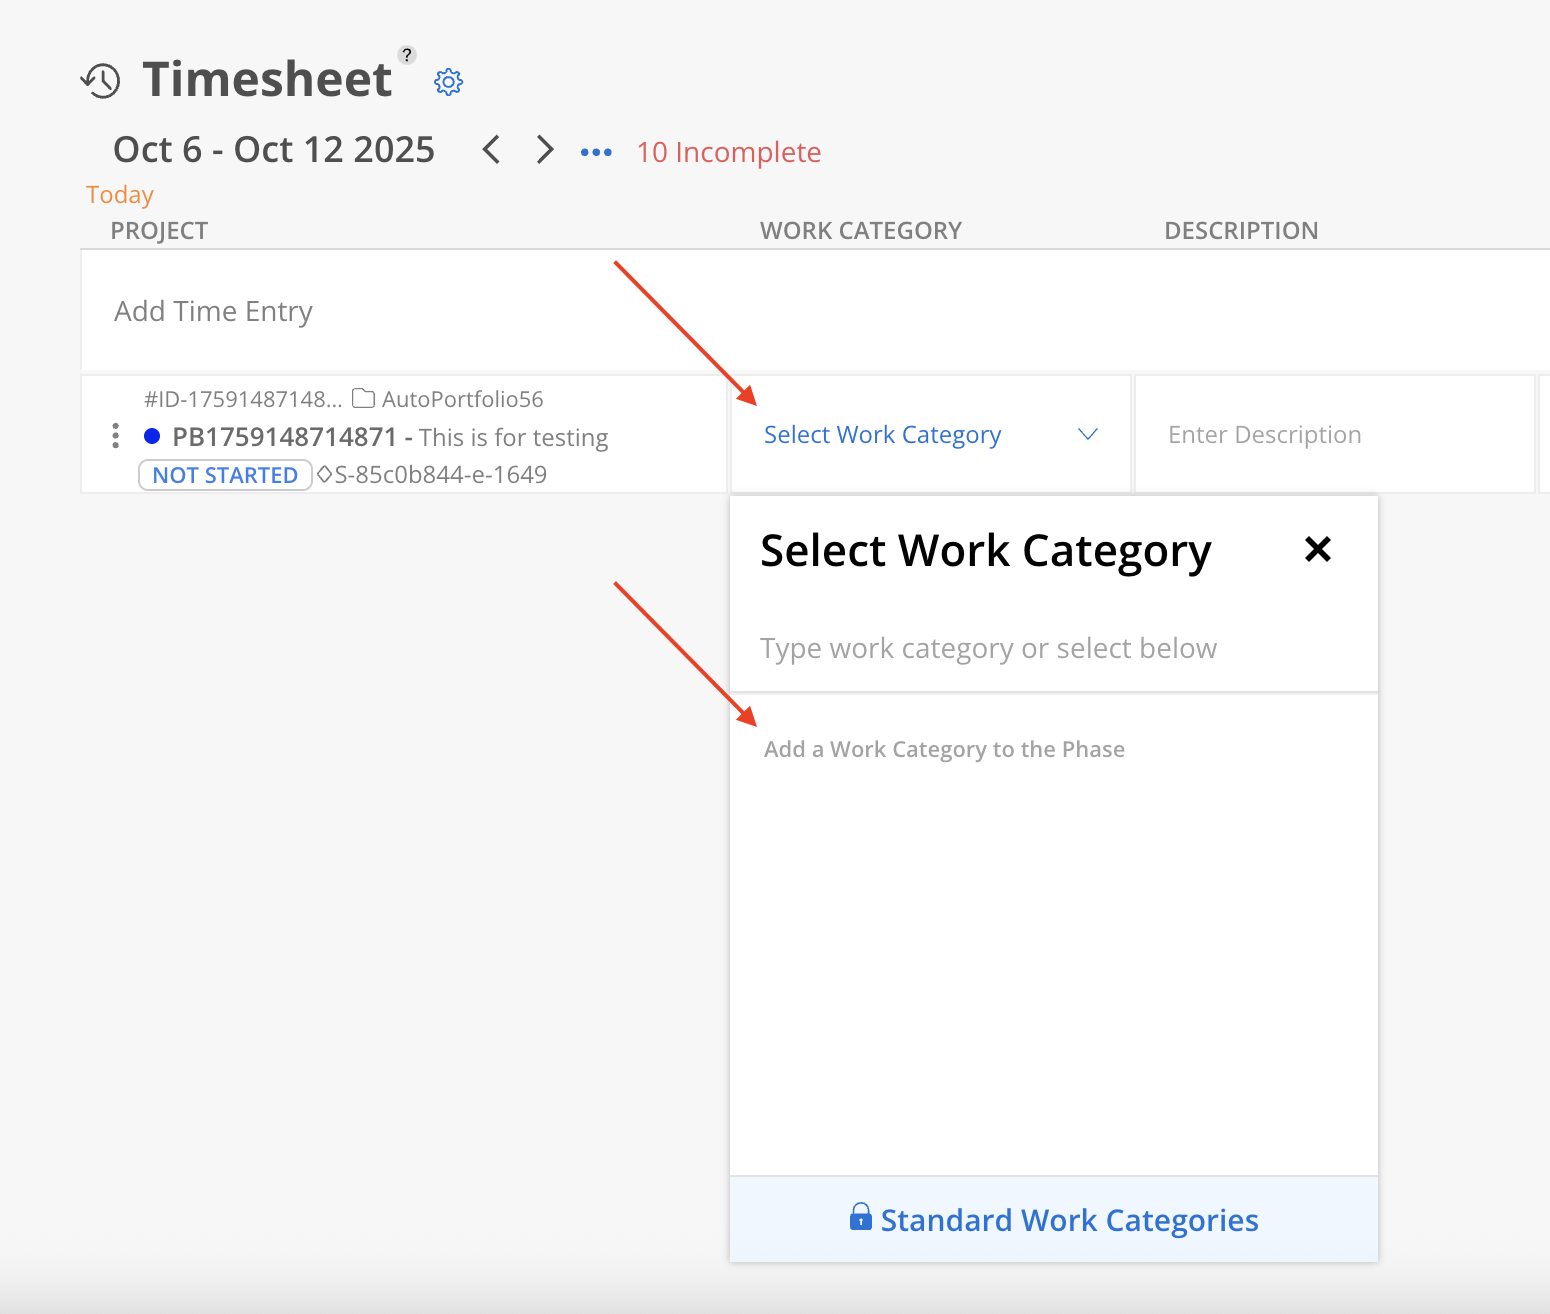
Sometimes, not all Work Categories used by the team appear in the dropdown when tracking time. This behavior depends on the Phase Time Tracking setting. Here are the rules:
If the Phase is set to Track time on Phase
The dropdown will display all standard Work Categories, regardless of Phase. These standard categories are managed in Org Settings > Standards > Work Categories.
If the Phase is set to Track time by Work Category
The dropdown will only show Work Categories that have been added to that specific Phase.
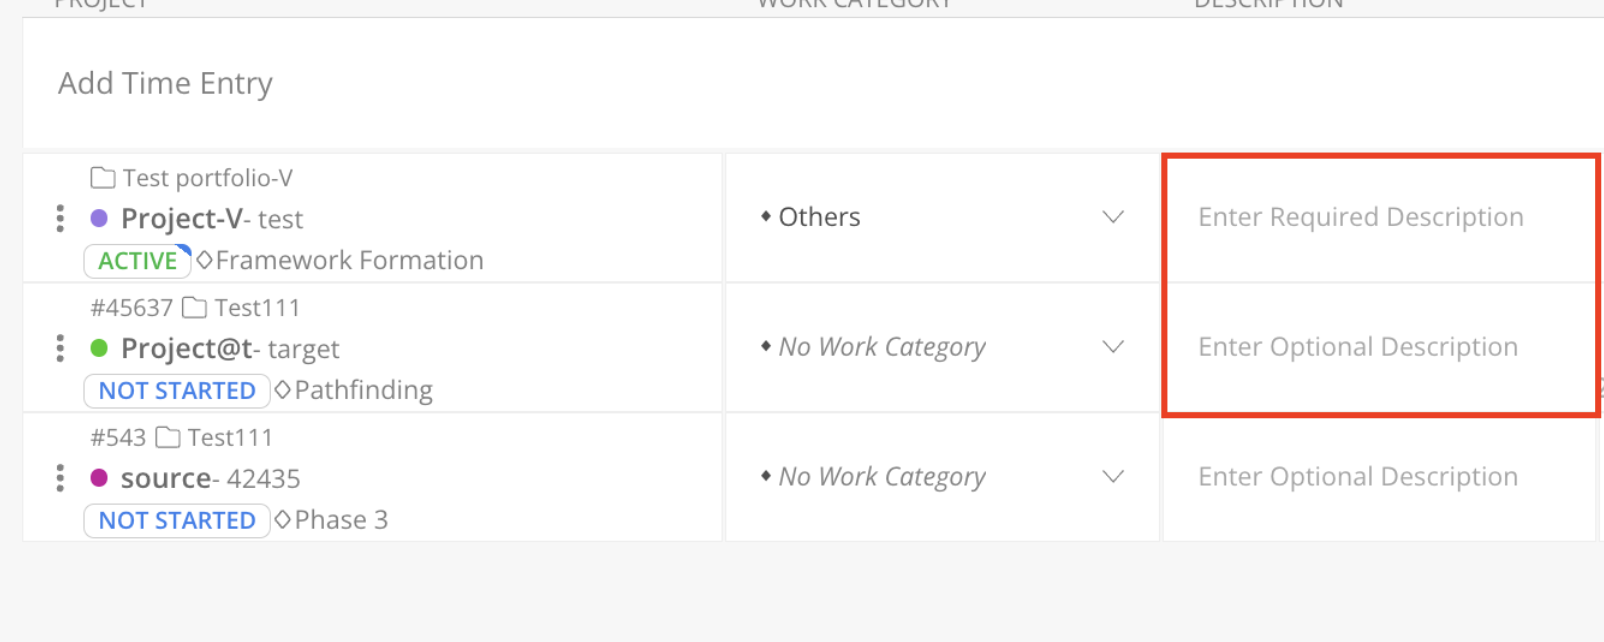
Some Work Categories require a description on Timesheets, depending on settings in Organization Settings. If not required, adding a description is optional.
Enter the hours worked for the day by clicking the box under the day you worked on.

When entering hours in the Timesheets, the system automatically validates whether the Time Entry date falls within the defined Phase dates. If the entry date is outside the Phase's date range, the following indicators will appear:
A red exclamation mark (!) in the time entry cell.
A tooltip message explaining that the Time Entry date is outside of Phase dates, along with the valid Phase date range.

Entering a timesheet for a completed project or phase will trigger a notification. Time entry for these completed projects or phases is still permitted if necessary.


Mosaic's Time Entry Estimation is an efficient tool that assists you in recording time entries accurately. When enabled, estimated hours should display in light gray text when a Work Category is selected on the Time Entry.
By analyzing your project schedules, work plans, and capacity, AI algorithms generate suggestions for your timesheet entry hours. This feature streamlines the time-tracking process, reduces errors, and improves overall productivity.
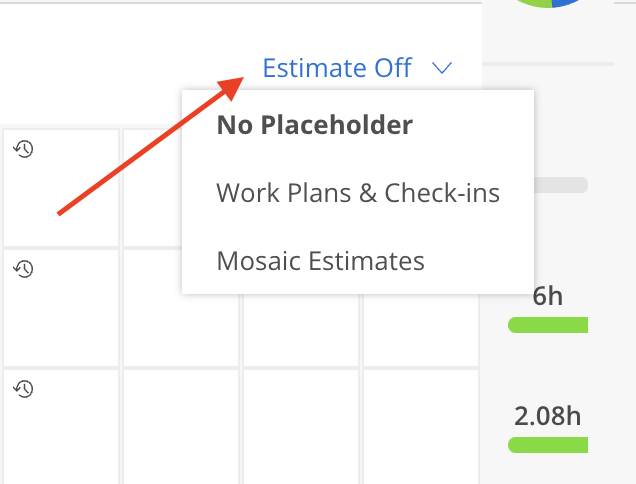
Click the estimate button to turn the estimation placeholder on or off. The estimate can be set to be based on your Work Plans and Check-ins or just Mosaic estimates.
No Placeholder
Work Plans & Check-Ins
Time is estimated in the following order of priority:
Use Timers, if available.
If no Timers exist, use Check-Ins.
If no Check-Ins are present, use Work Plans.
If none are available, no estimate is shown.
Mosaic Estimates
If any Check-Ins, Time Entries, or Work Plans are greater than 0 hours:
The estimate is calculated by dividing the most recent Check-In, Time Entry, and Work Plan totals by the average of the previous three days of those same values.
The system checks up to the last 10 days to find recent non-zero values.
If no data exists for Check-Ins, Time Entries, or Work Plans, the estimate defaults to yesterday’s estimate.
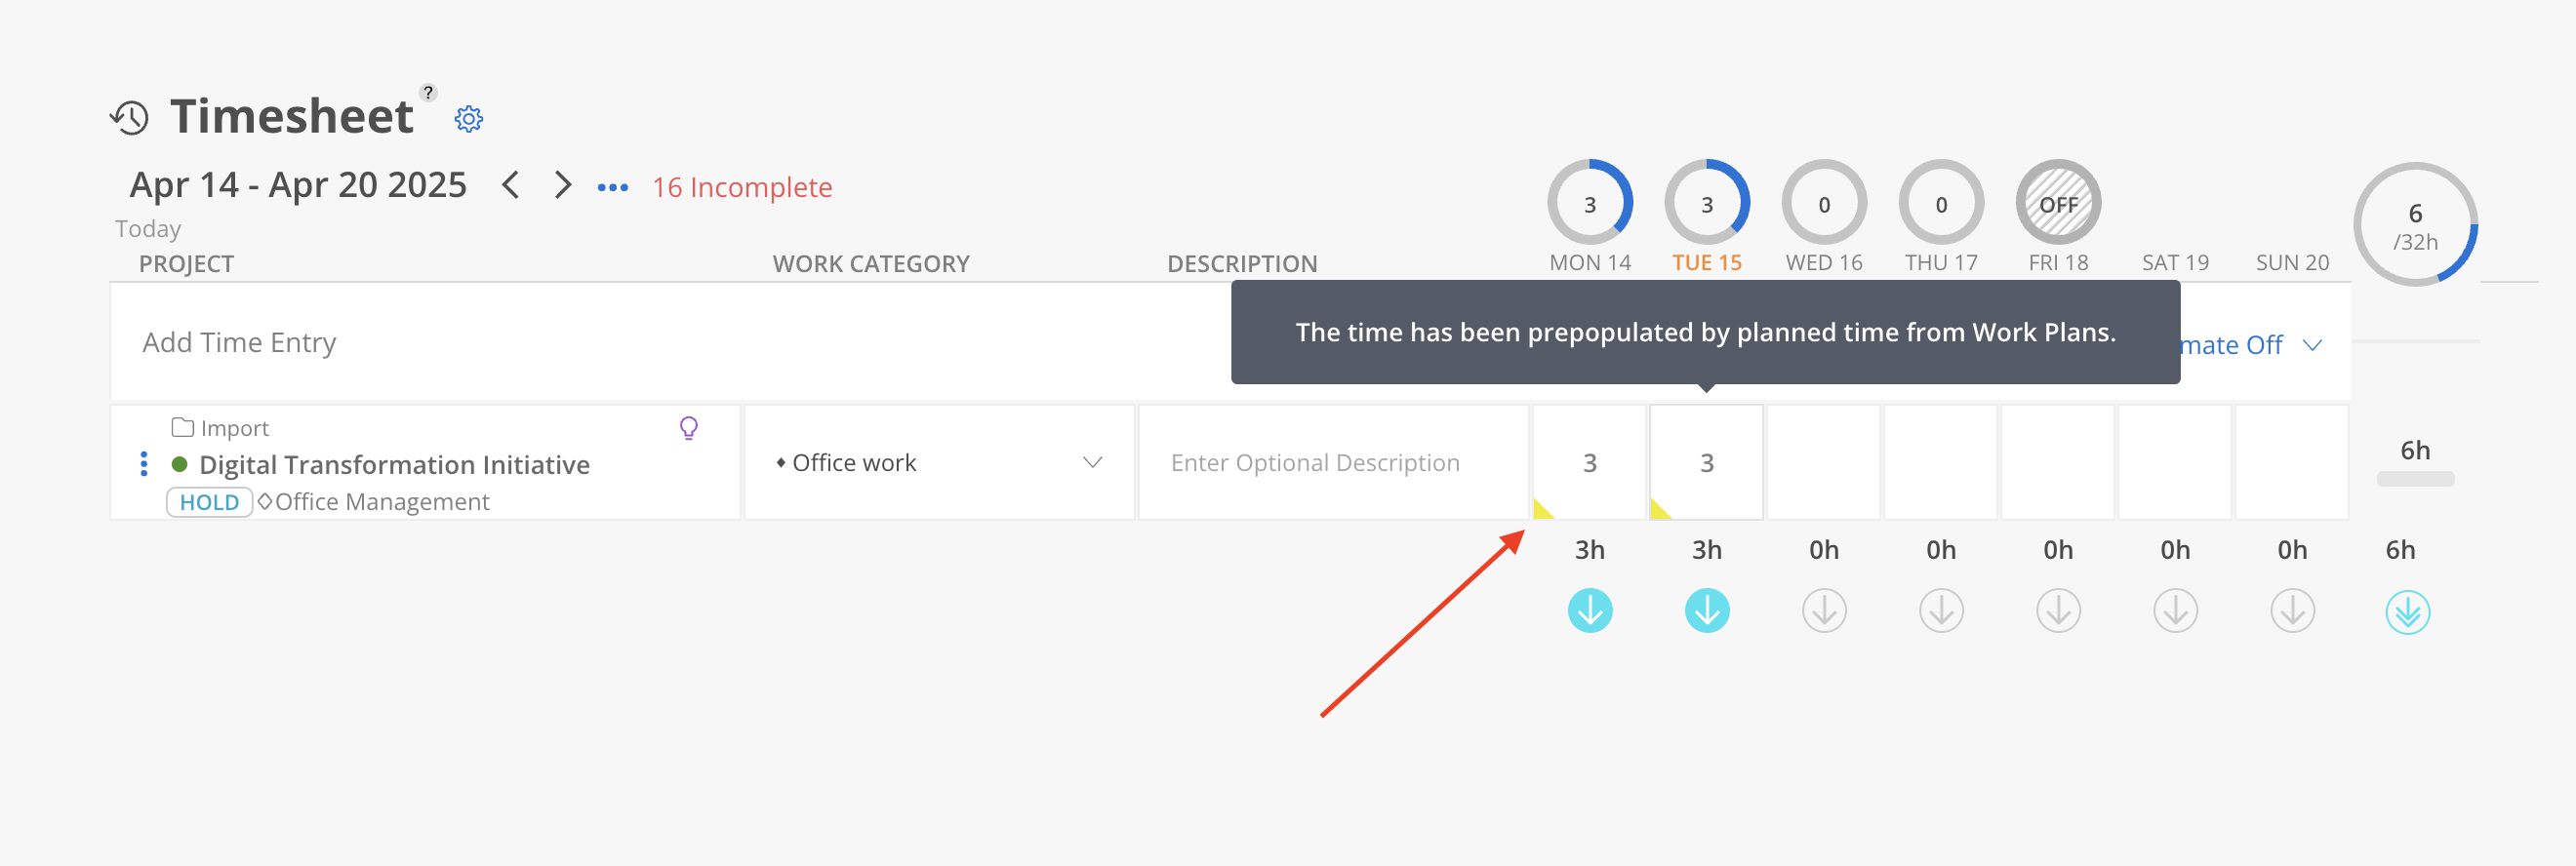
When the Timesheets setting is set to use past planned time for the team by an Admin, and the manually entered hours match the planned hours, a yellow chip will be displayed as an indicator.
Learn more about Organization Settings > Timesheet
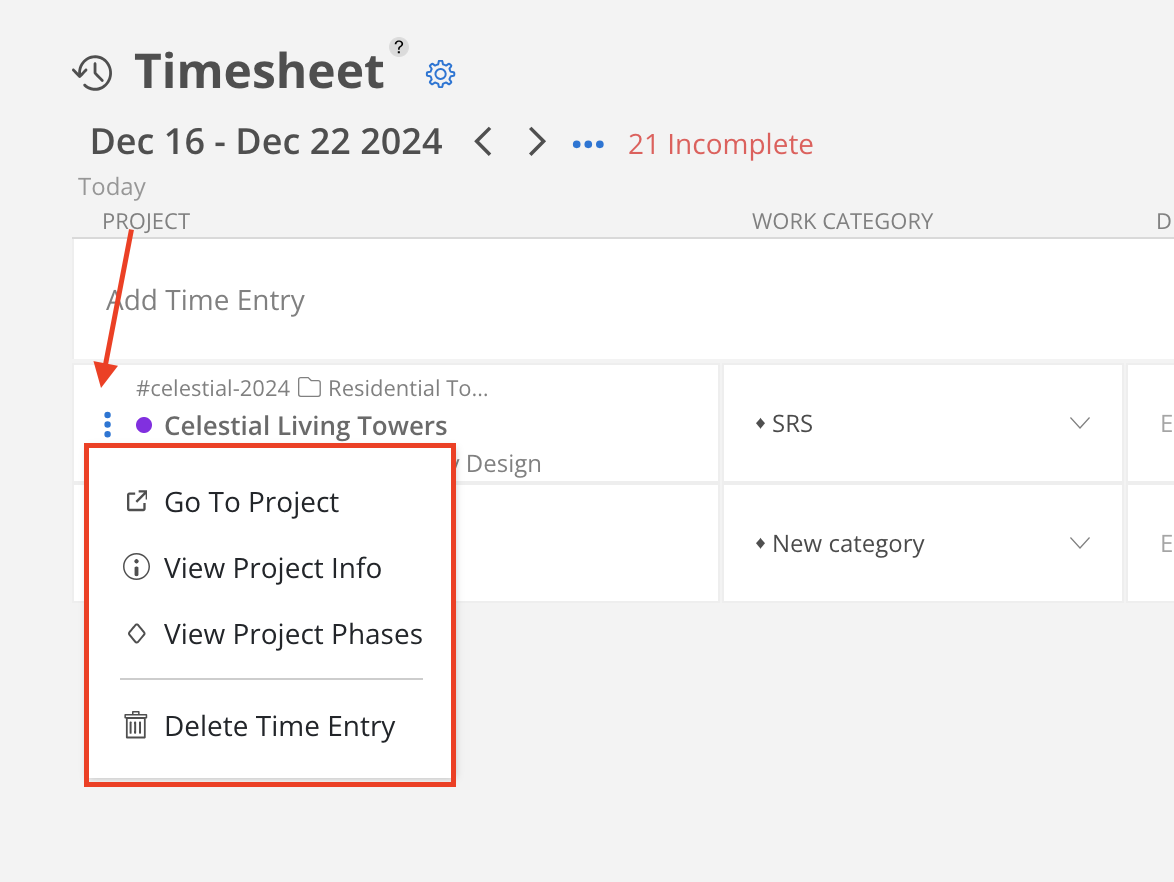
Click the three-dot on the project, you can:
Go to Project: This takes you to the Project details page.
View Project Info: You can view and edit the Portfolio of this Project, Project name, Description, Project ID, Client.
View Project Phases: You can see all phases in this Project and add/remove Phases
Delete Time Entry: Delete the time entry.
The Time Entries are in the wrong project? No worries, you can move it to the correct Project in just one second.
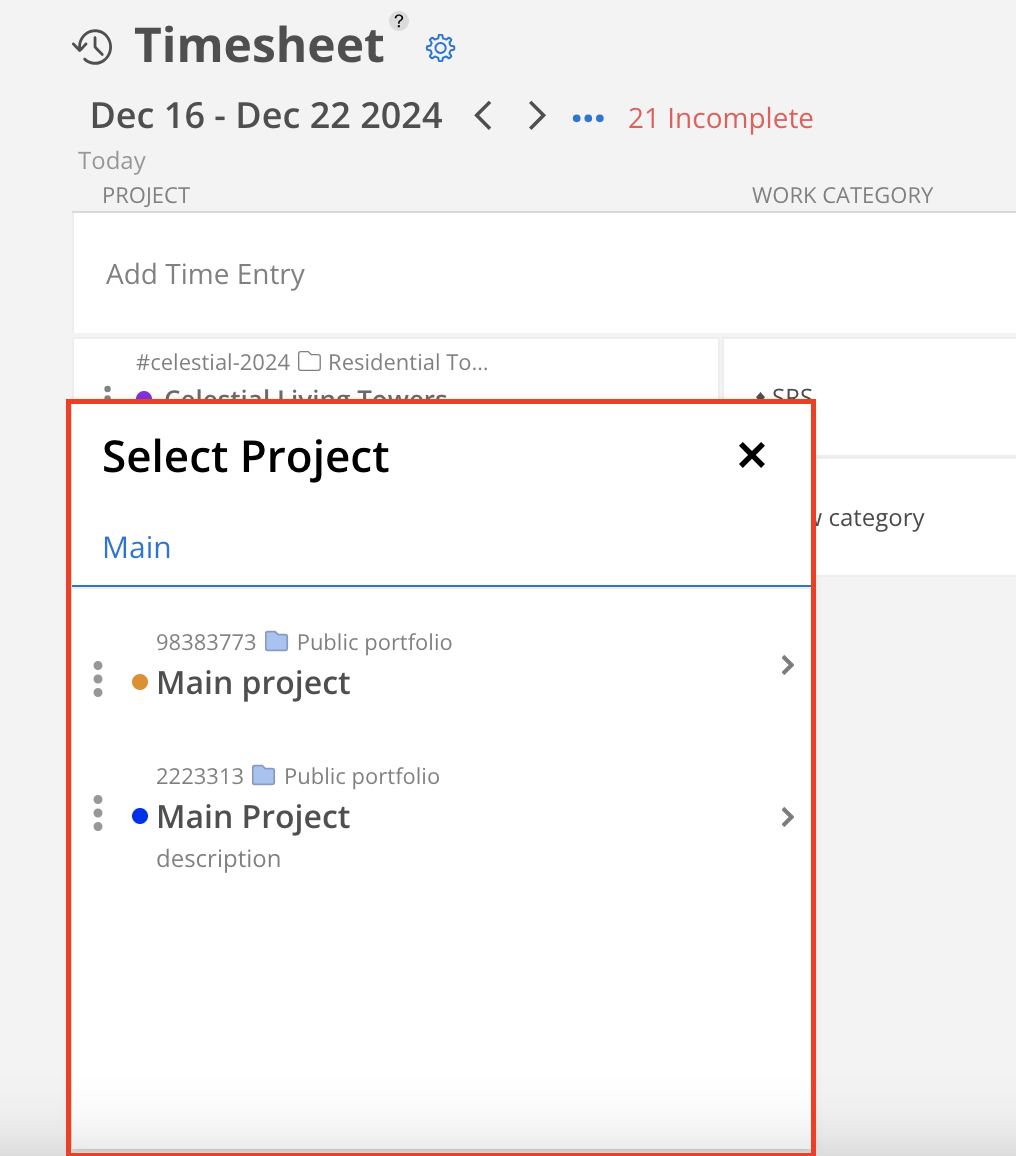
Click the Project name on the Time Entry
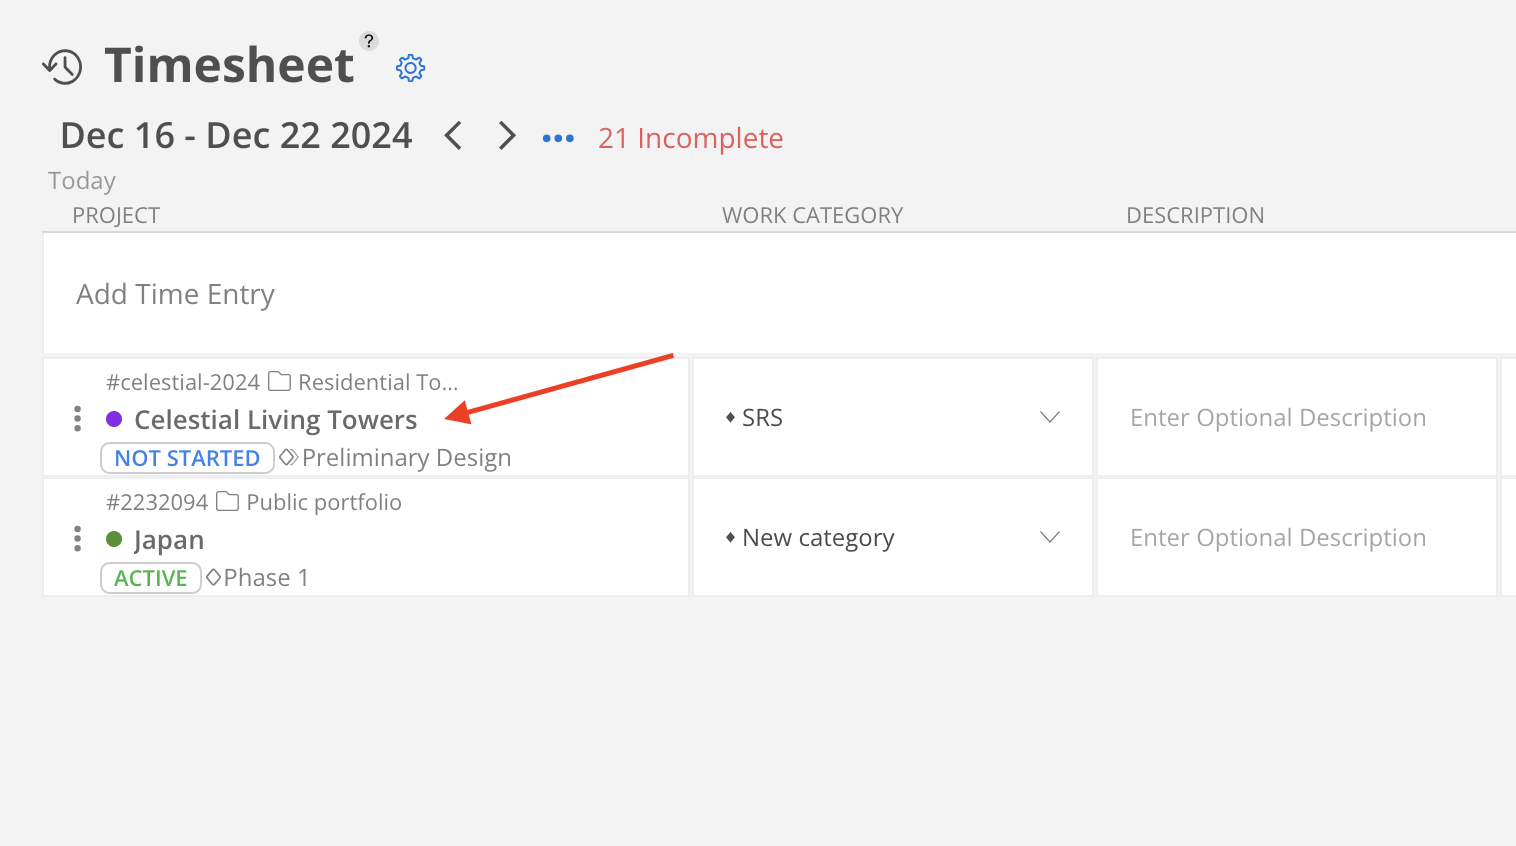
Select the correct Project from the dropdown, then choose the Phase for the Time Entry.
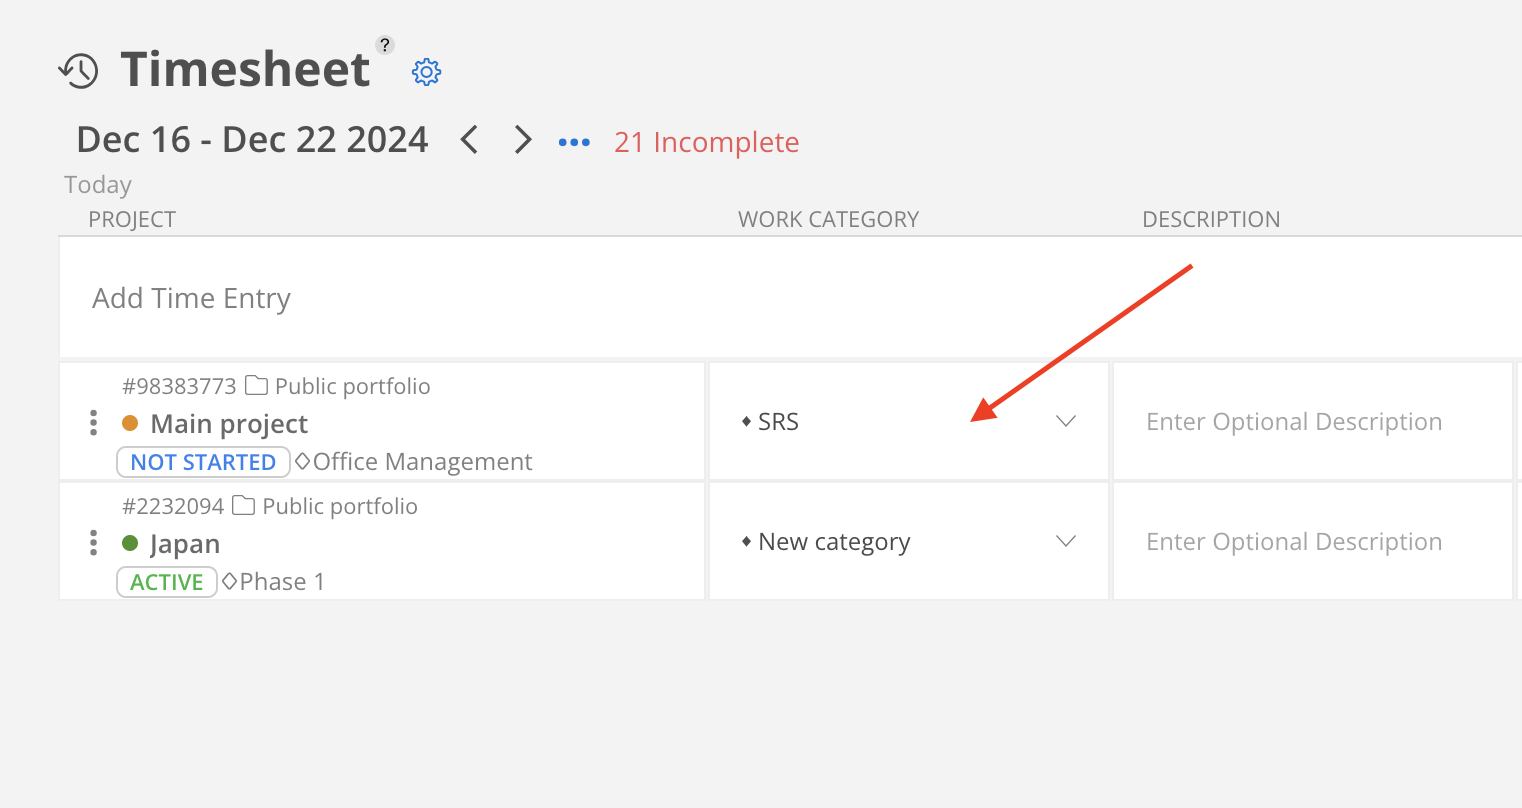
Select the desired Work Category for the Time Entry.
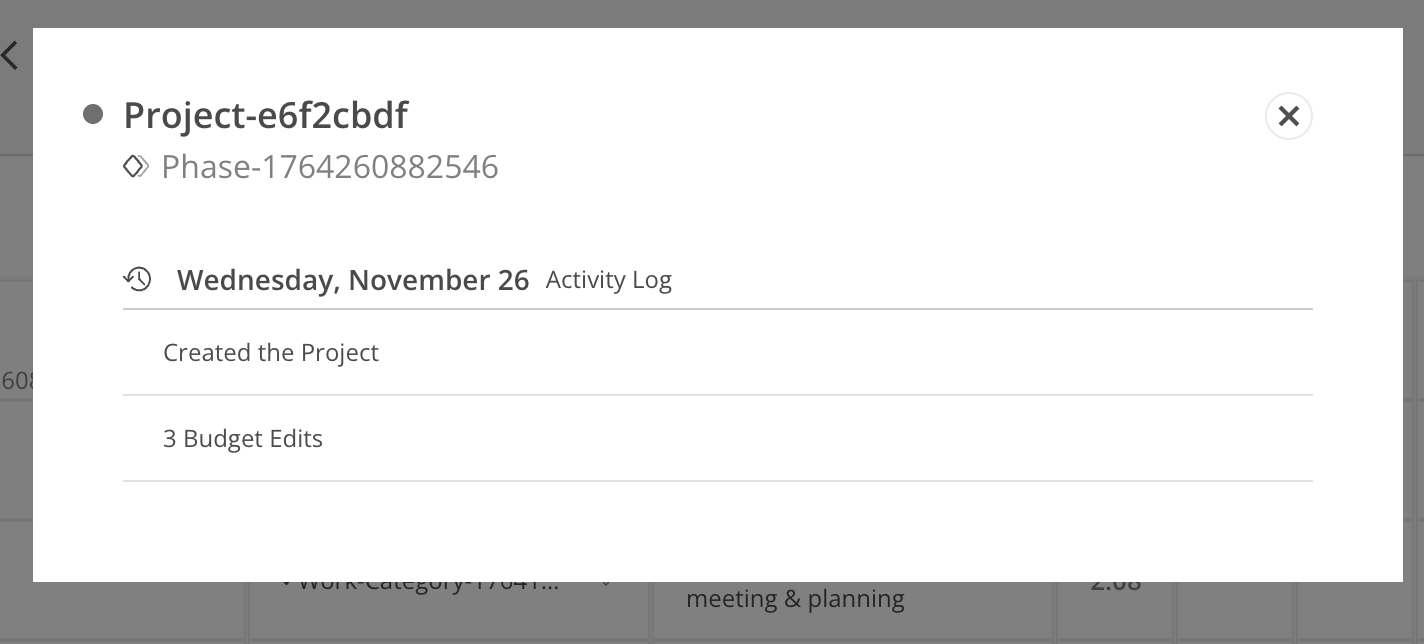
Click the clock on the left-hand corner of the day to view how many hours you were scheduled to work on the project (from the Work Planner) along with any activity you performed.

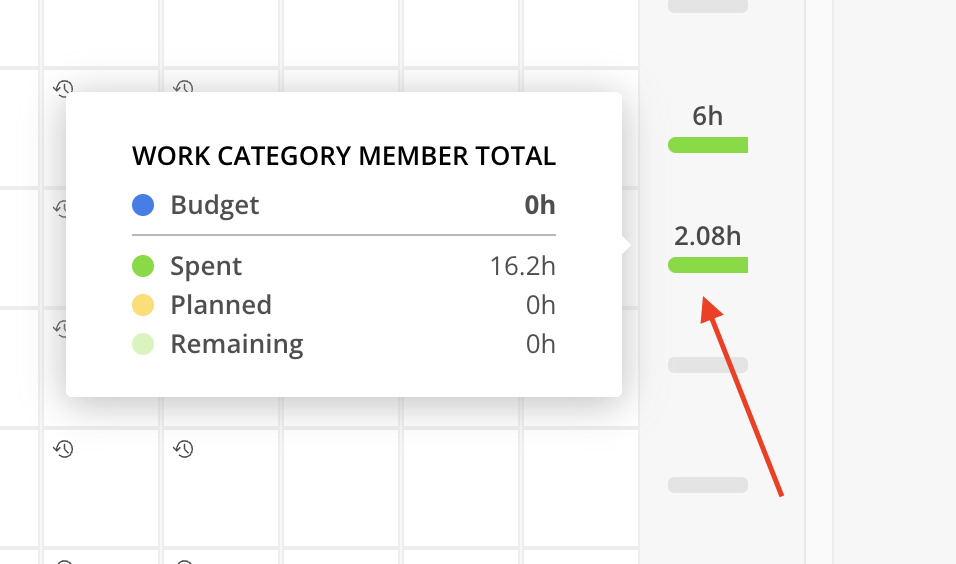
Hover on the Budget bar on the right of the row to see more details
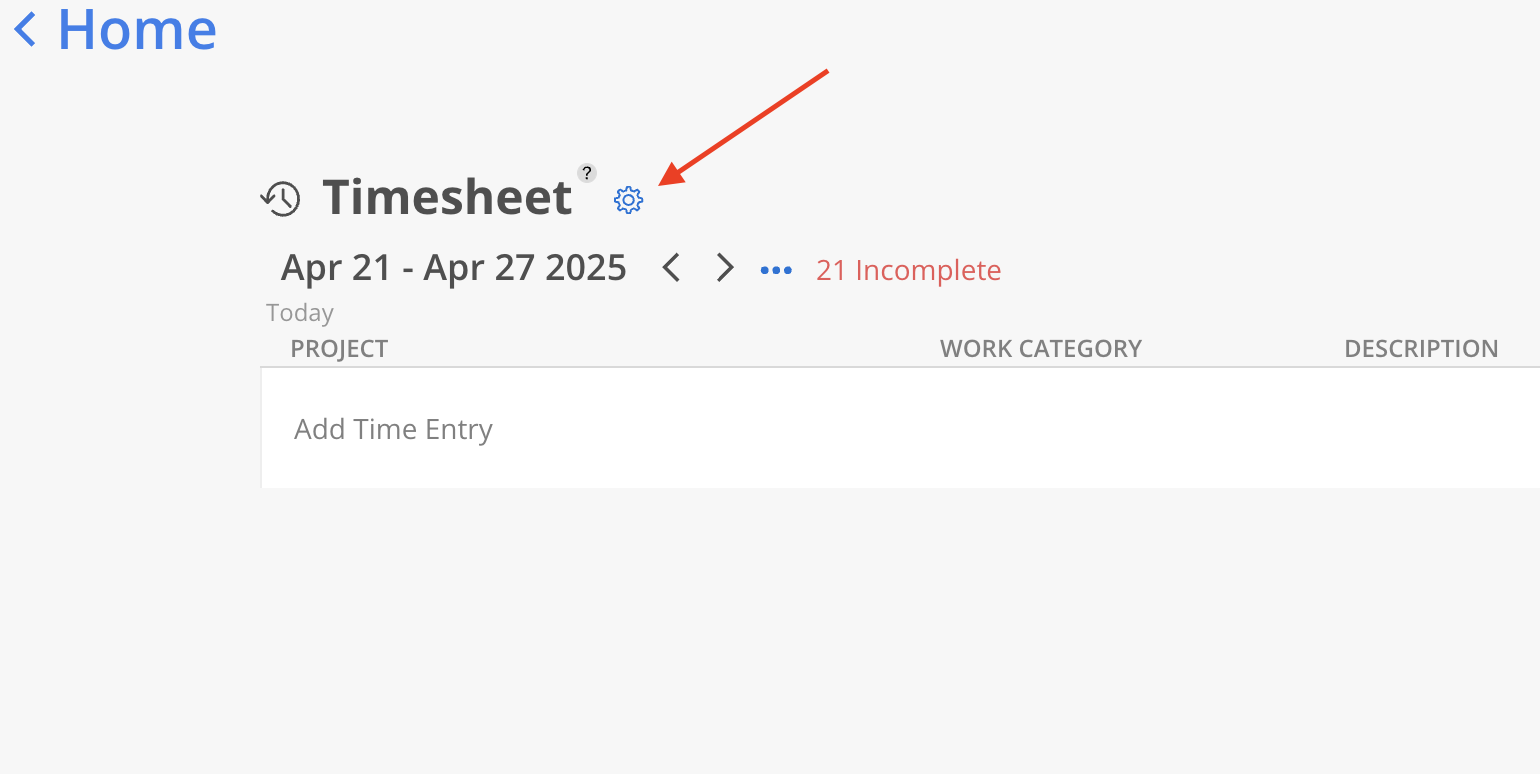
Click the setting icon on the top to open Timesheet Settings.
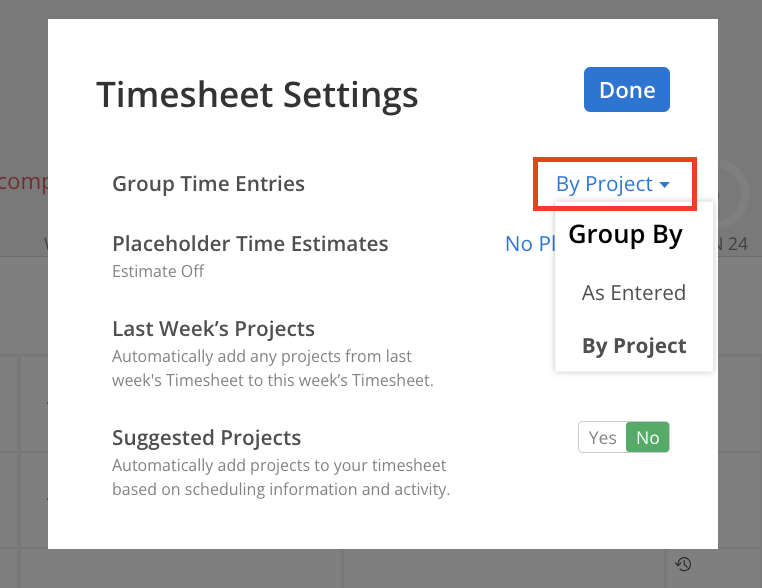
Group Time Entries
You can choose to group your Time Entries by projects or As Entered.
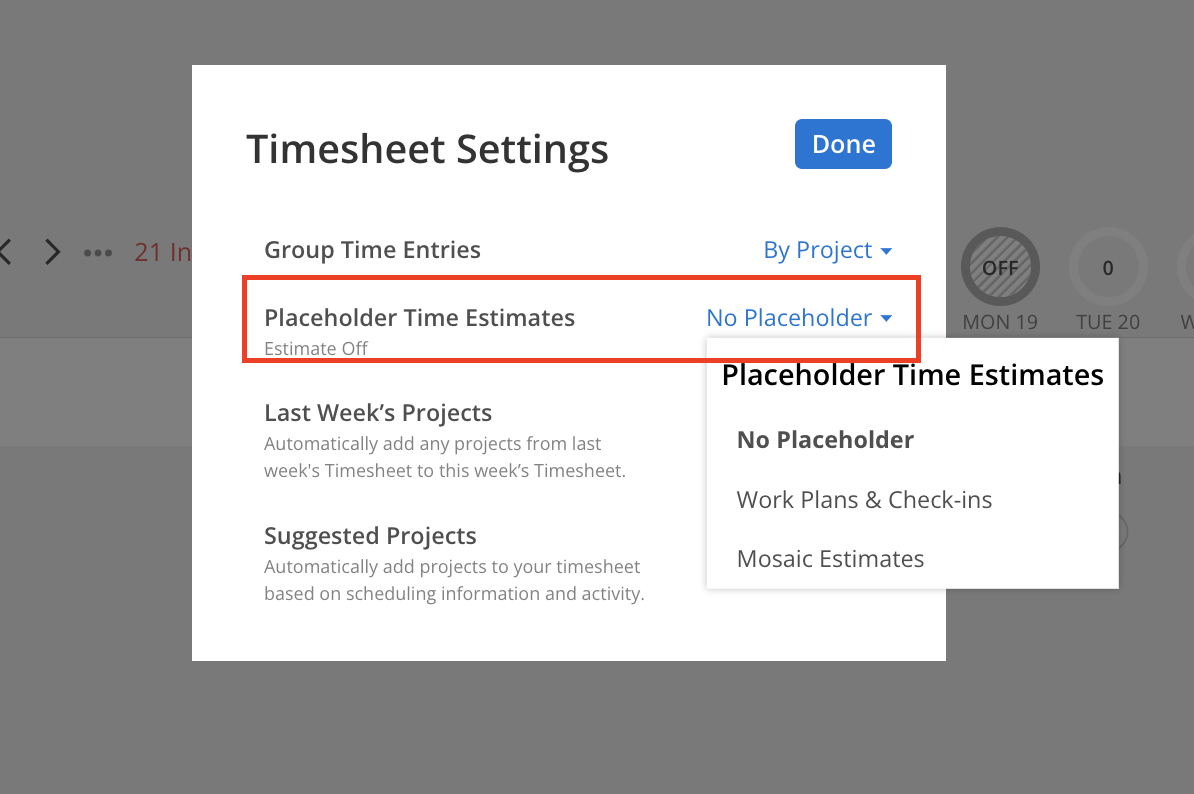
Placeholder Time Estimates
Same setting as the one shows on the Timesheet page.
You still enter time, but estimates from project data and activity display next to the entry field.
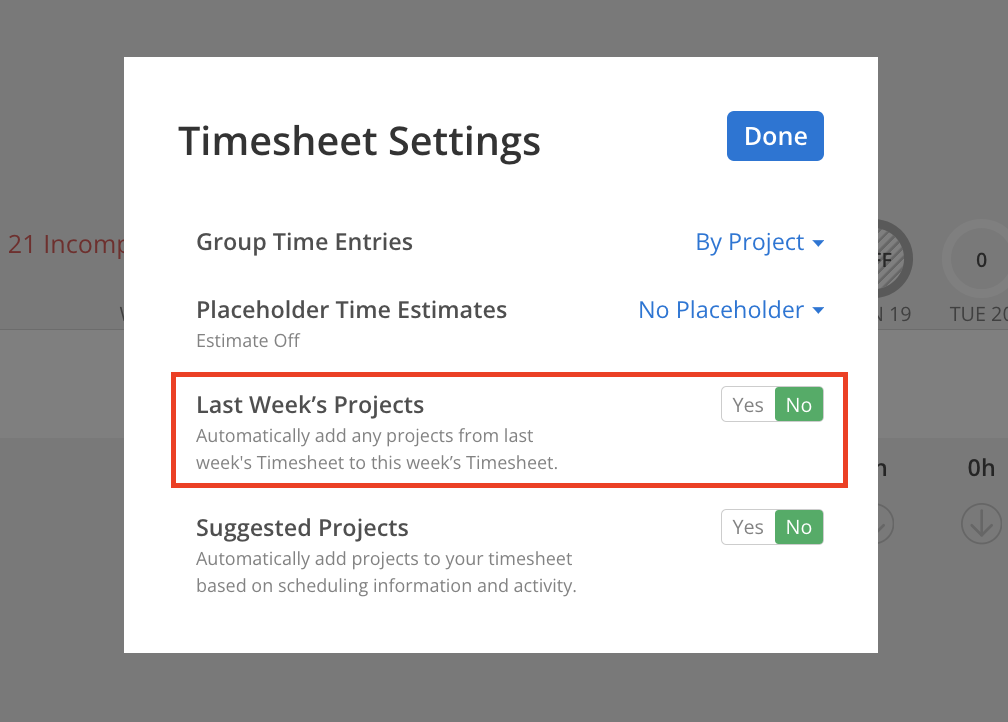
Last Week's Projects
Automatically add any projects from last week's Timesheet to this week's Timesheet
This setting will automatically carry the projects over week to week, which is useful if you are working on the same group of projects every week.
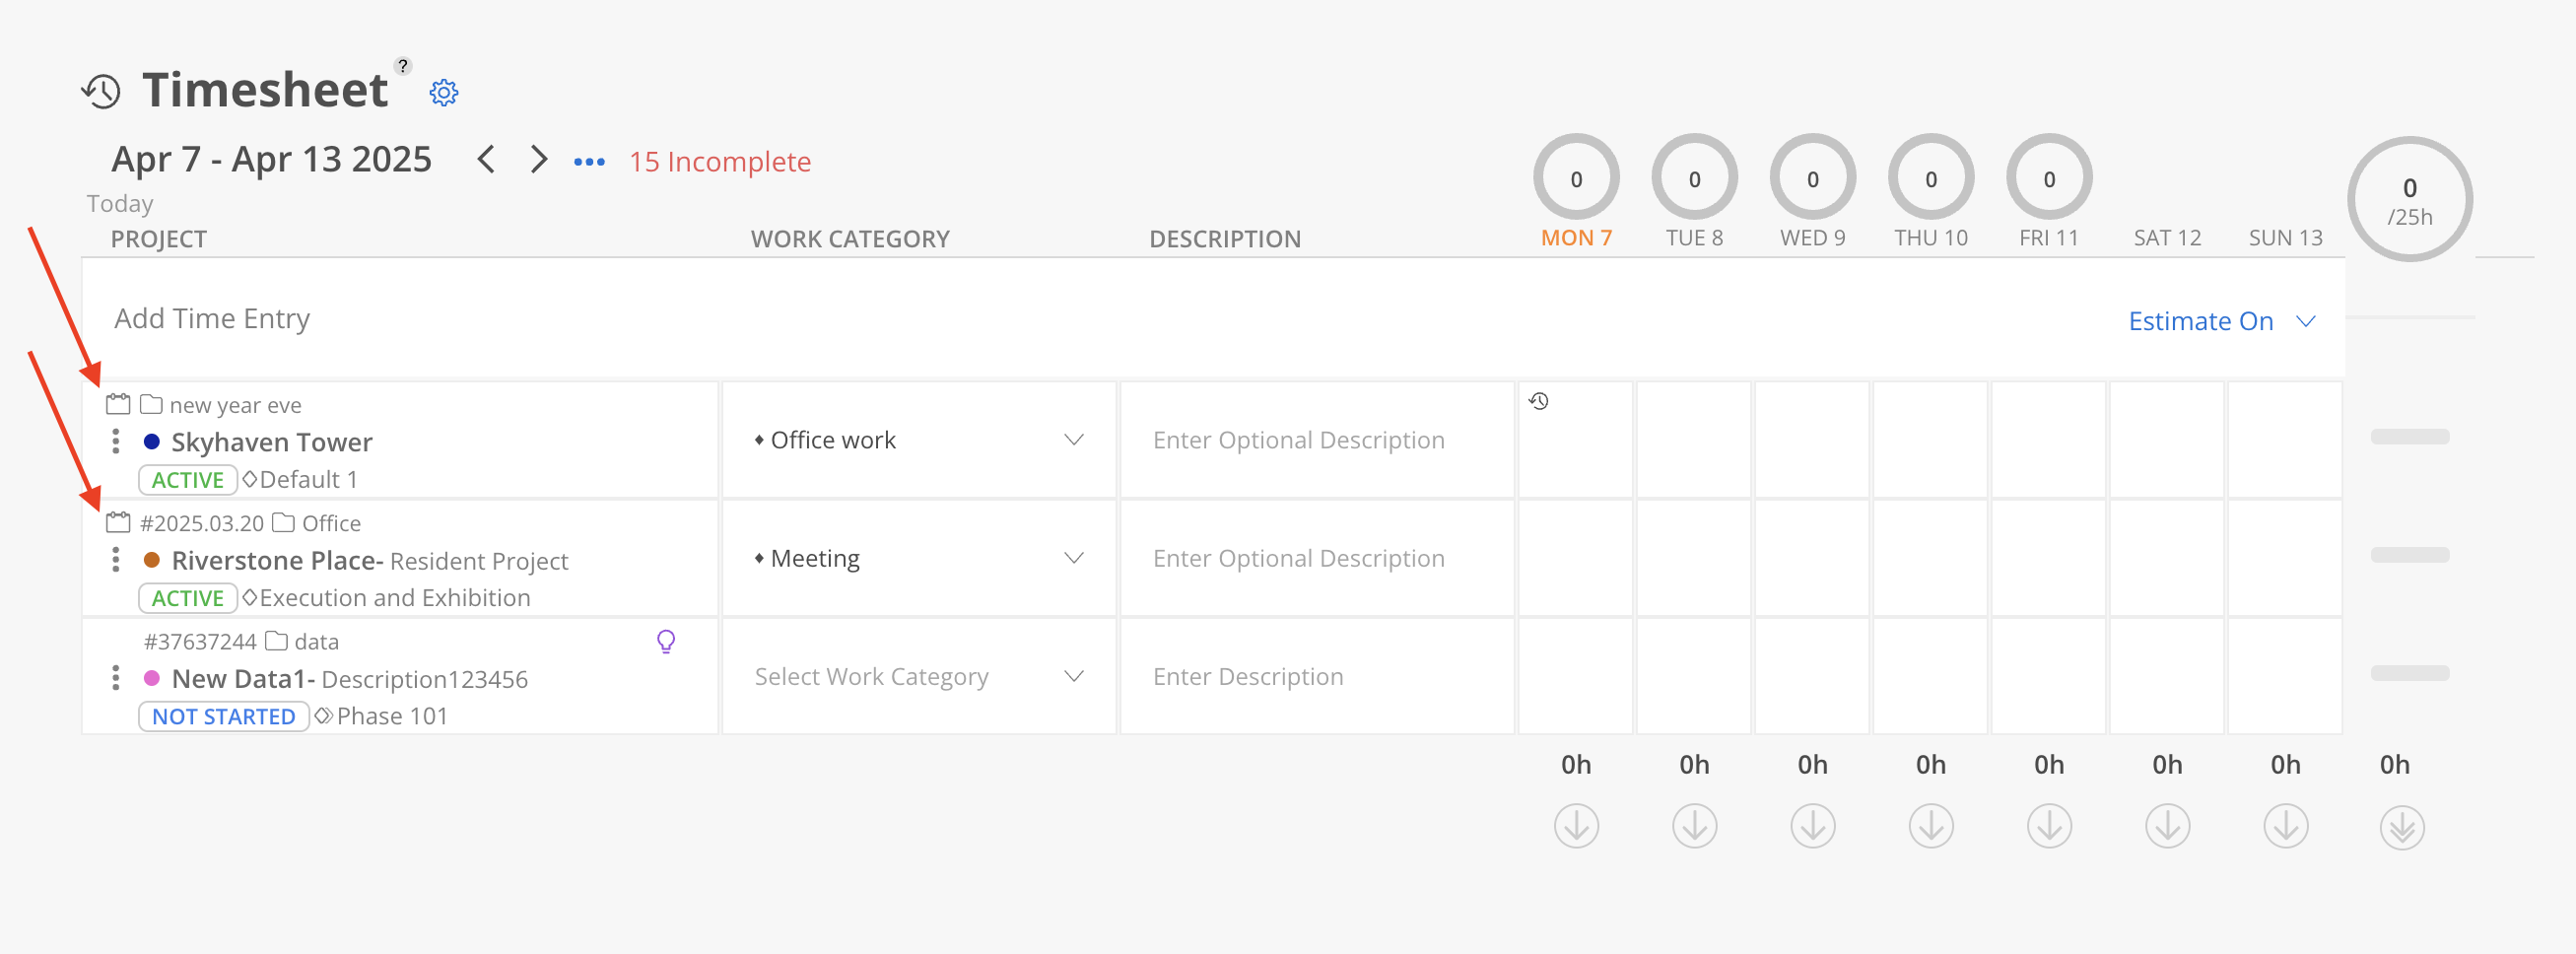
Timesheets that have a calendar icon indicate entries that have been automatically carried over from the previous week.
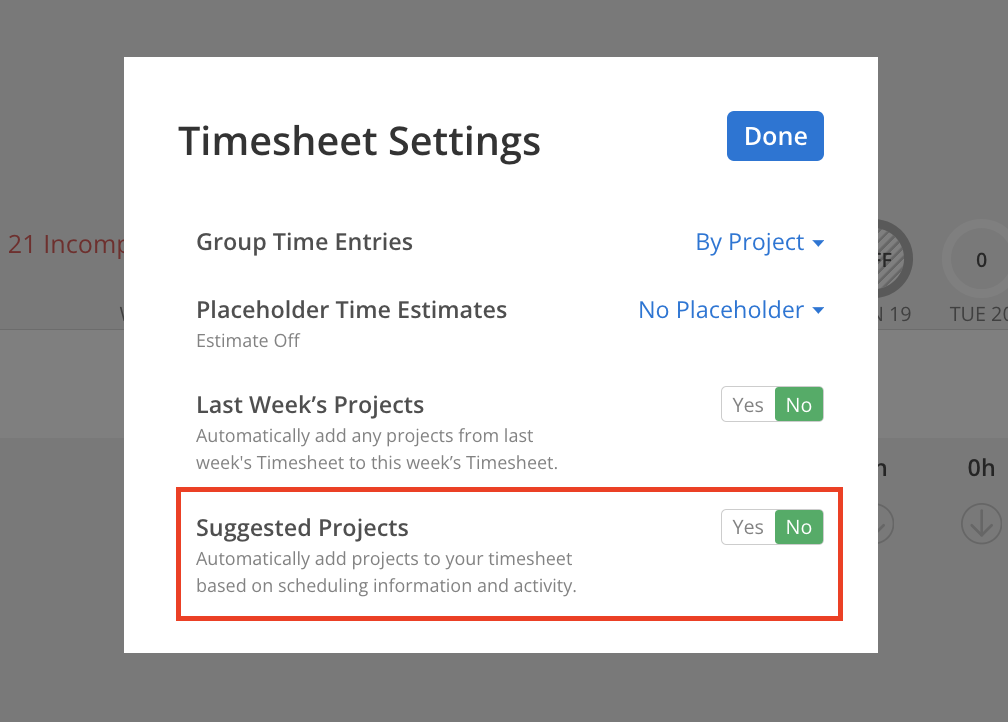
Suggested Projects
Automatically add projects to your timesheet based on scheduling information and activity.
This setting displays suggested Projects for Timesheets based on associated Work Plans, Tasks, and recent actions performed within various Projects.
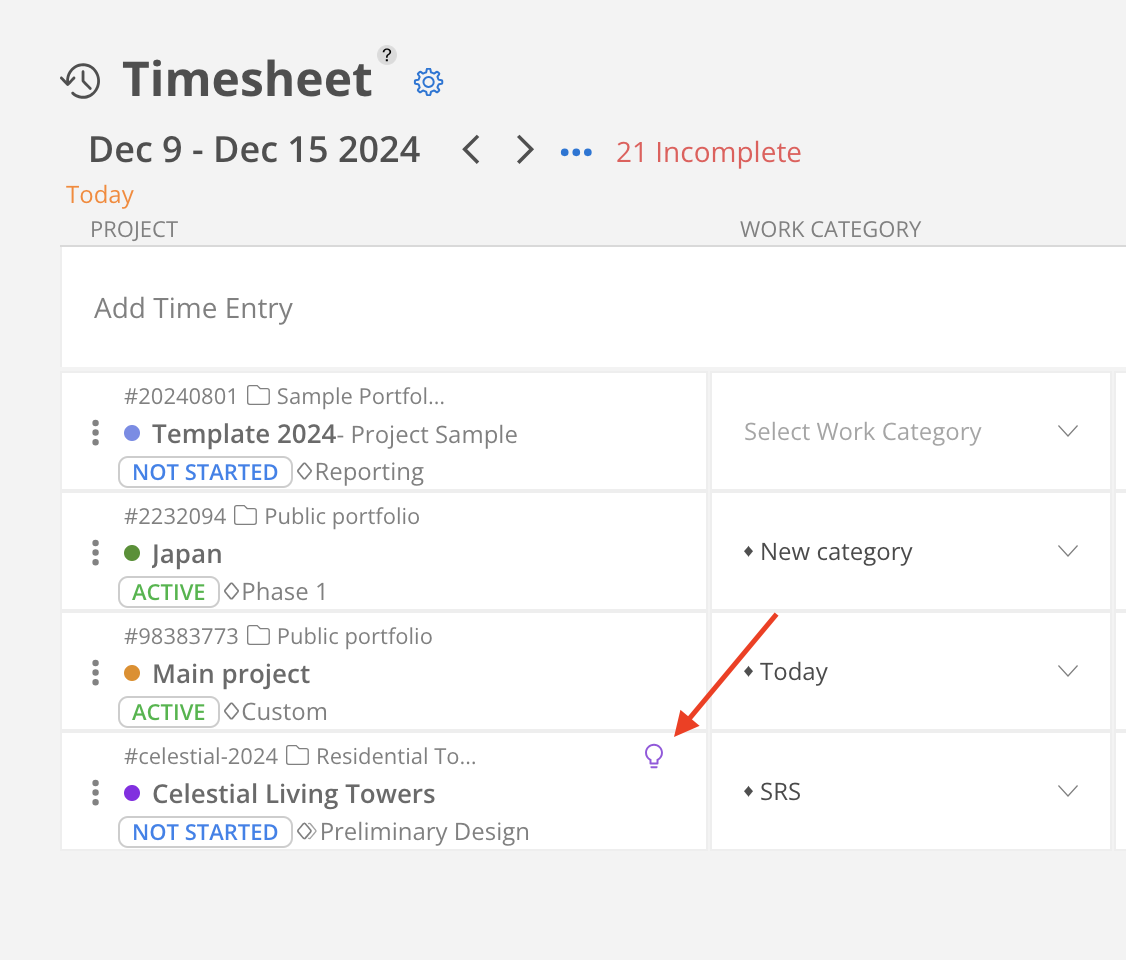
When the setting is enabled, a purple lightbulb icon displayed next to the Project title indicates a suggested Timesheet.
Mosaic has a submit function on Timesheets. Time can often be entered and left incomplete. Submitting is used to communicate that the time for the day is complete.
You can click on the single arrow icon to submit timesheets for that particular day or click the double arrow icon on the right to submit all entered timesheets at once.
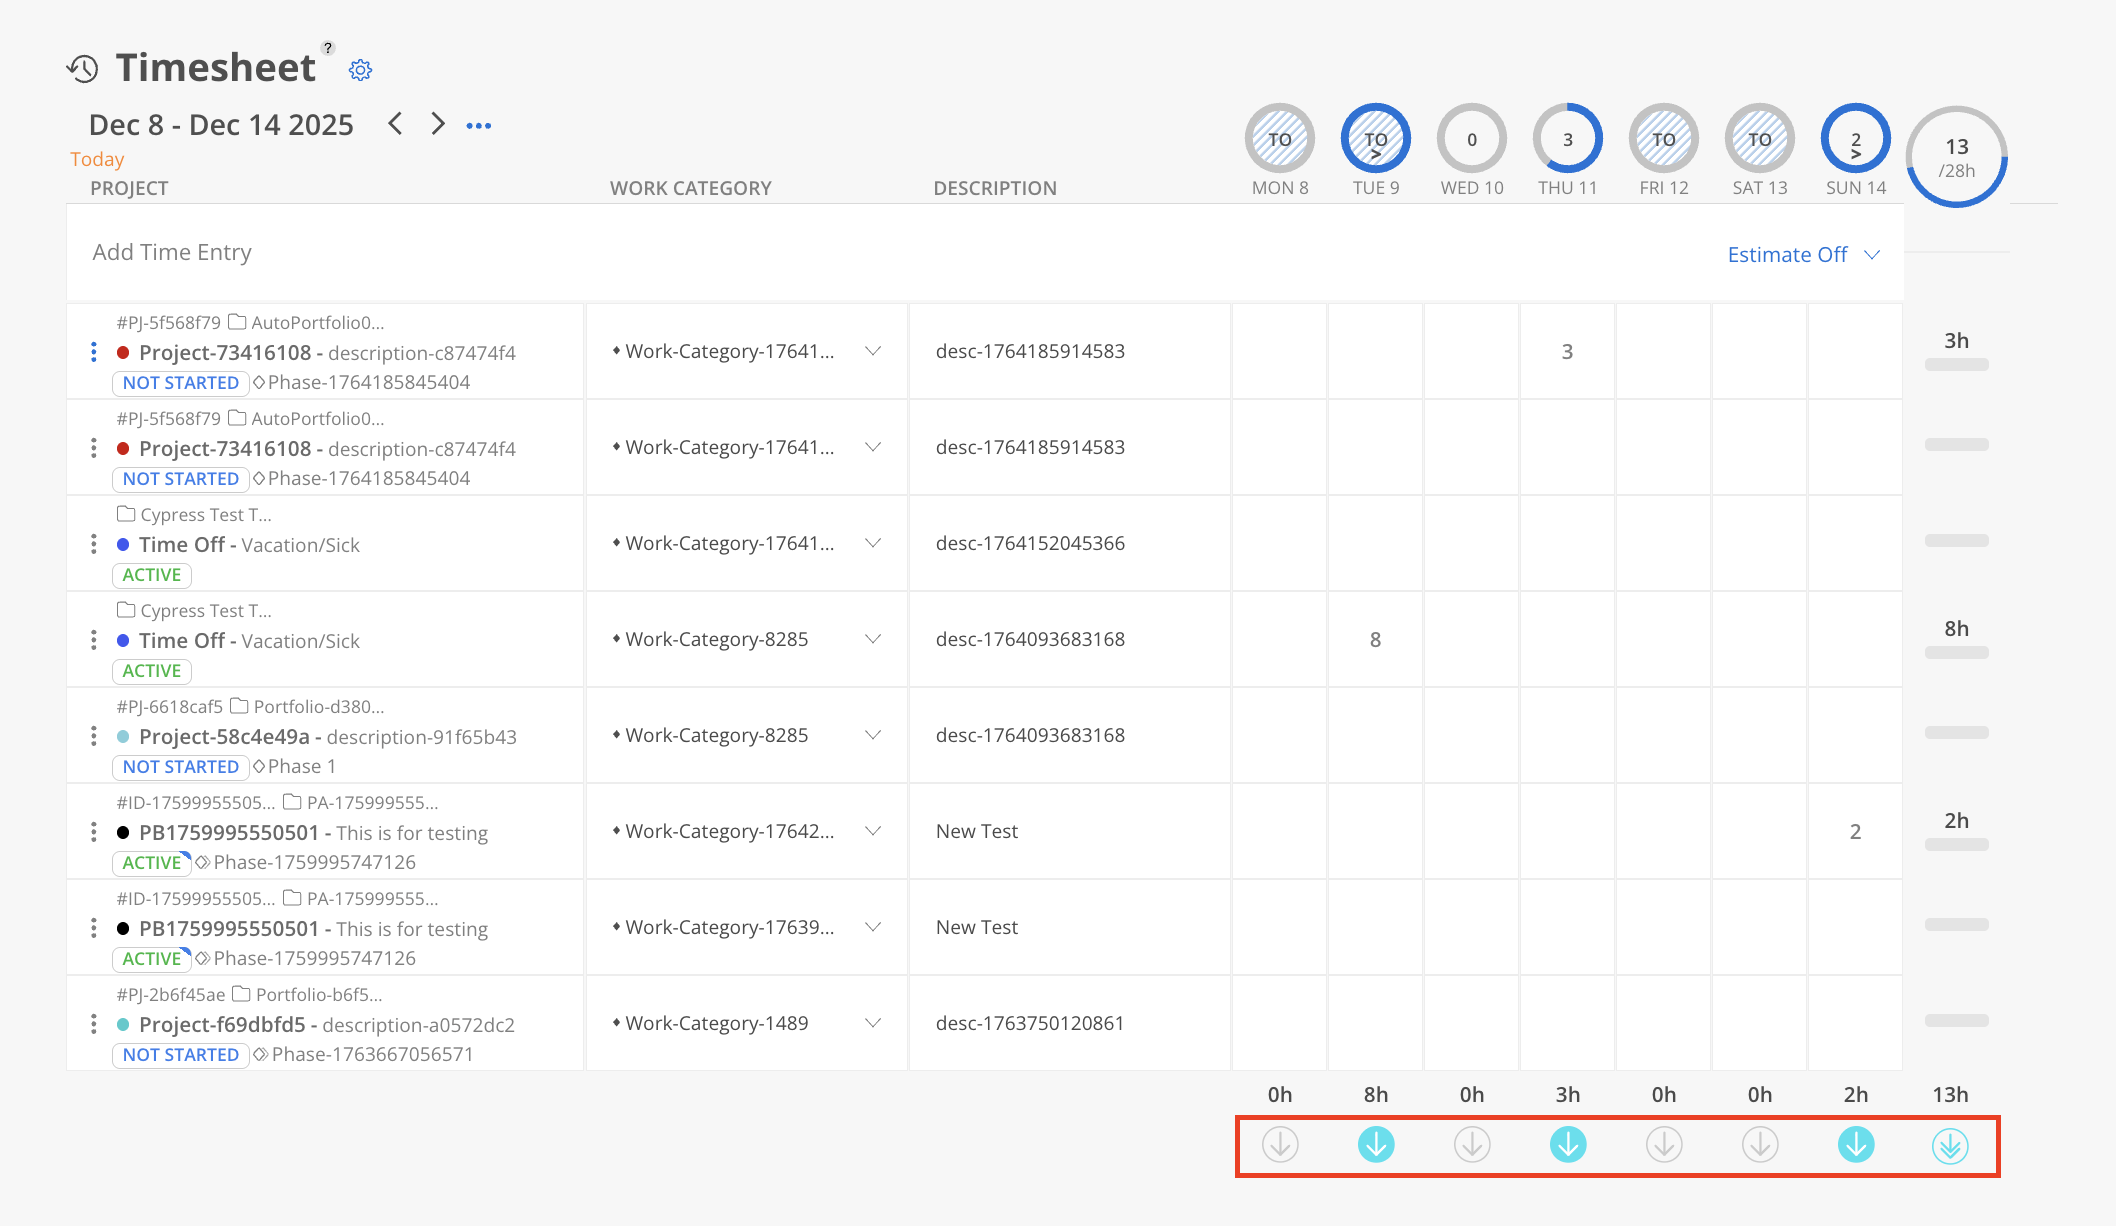
Once submitted, a checkmark will show. Time must be unsubmitted to be adjusted. Simply click the cell of a submitted time entry to unsubmit.

Hover on the gray arrow button you will see "Unsubmit all Time Entries for this day" button. This allows you to unsubmit all submitted Time Entries for the selected day.

Admins can approve or reject members' Timesheets from Timesheet Report. You cannot edit any Timesheets that have been approved or rejected.
Learn more about Timesheet Report
Notifications are not sent when Timesheets are approved or rejected. However, the Timesheet status can be viewed on the Home > Timesheet page.
Red x on the top right corner and red portion on the top chart means the Timesheet has been rejected.
Green check mark on the top right corner means the Timesheet has been approved.

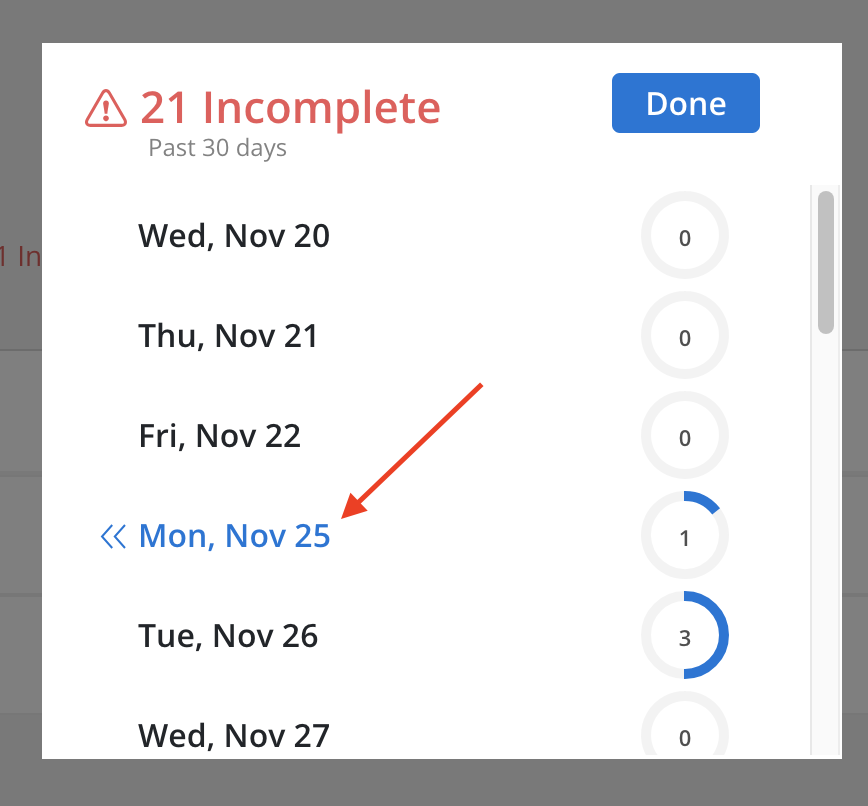
We understand the importance of accurate time tracking and the challenges that incomplete timesheets can pose. With this new functionality, you can now easily identify and address any missing or incomplete entries in timesheets.
Click incomplete button on the top.
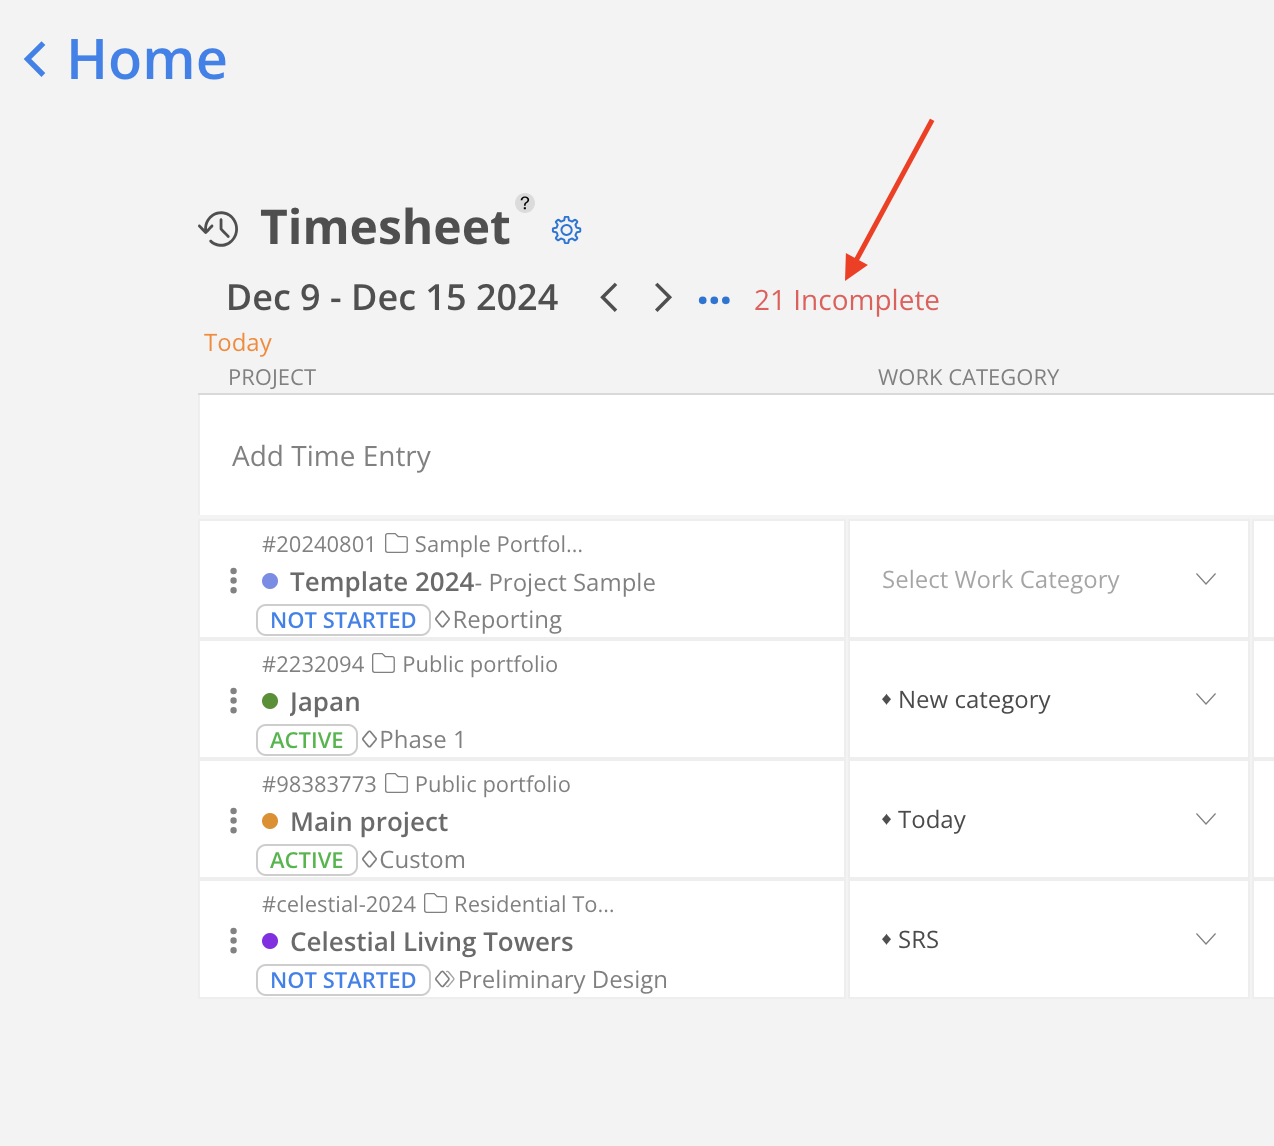
On this modal, you can see all the incomplete timesheets. Incomplete timesheets mean that the entered hours are less than the member's capacity for the day.
You can click on the date to go to that week to complete your timesheets
