The Timesheets report allows review, commenting, and approval or rejection of time entries by Date, Member, and Project.
The report can be viewed by Date, Member, Project, or Activity. All applied filters, selected Members, selected Projects, date range, sorting option, and view settings will be automatically saved with the report.

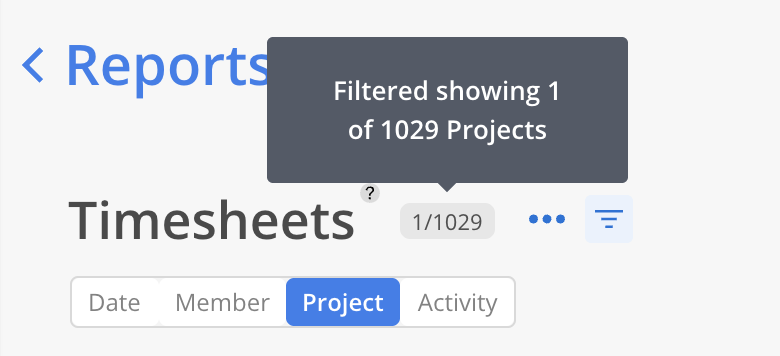
On Project tab and Member tab, next to the Report title, the number of filtered entities will be displayed alongside the total count.

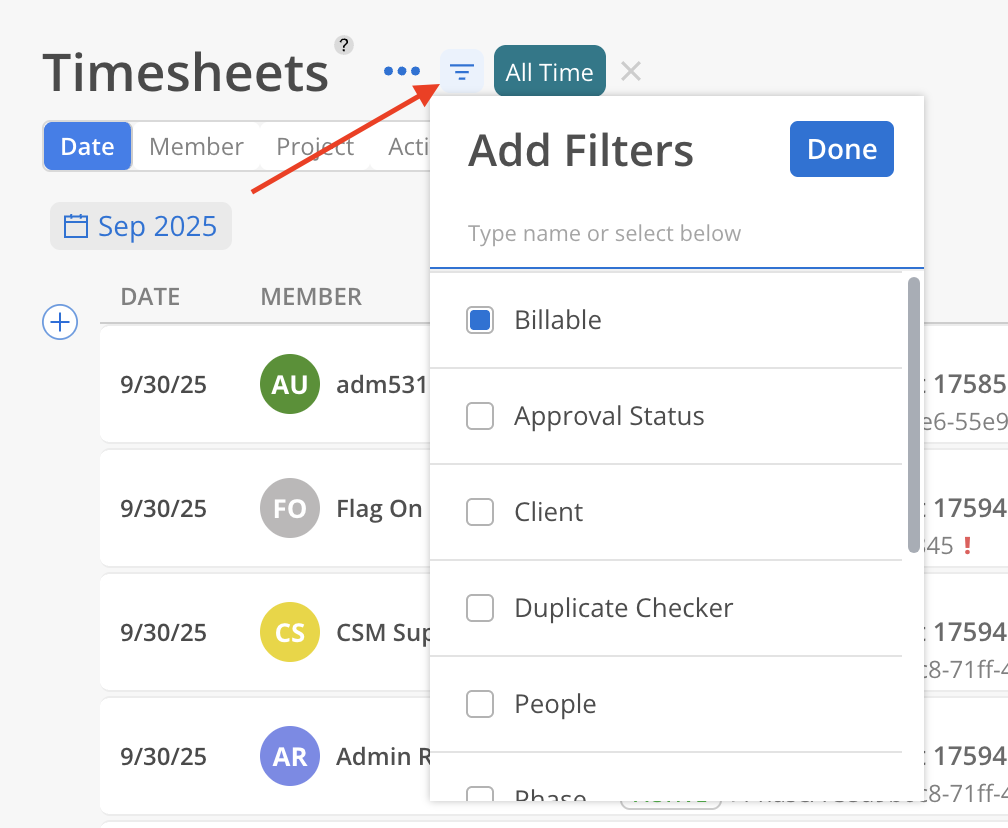
Click the filter icon at the top of the Timesheet Report to adjust the displayed results based on various criteria. Filtering helps refine the view to focus on specific Time Entries relevant to the analysis.

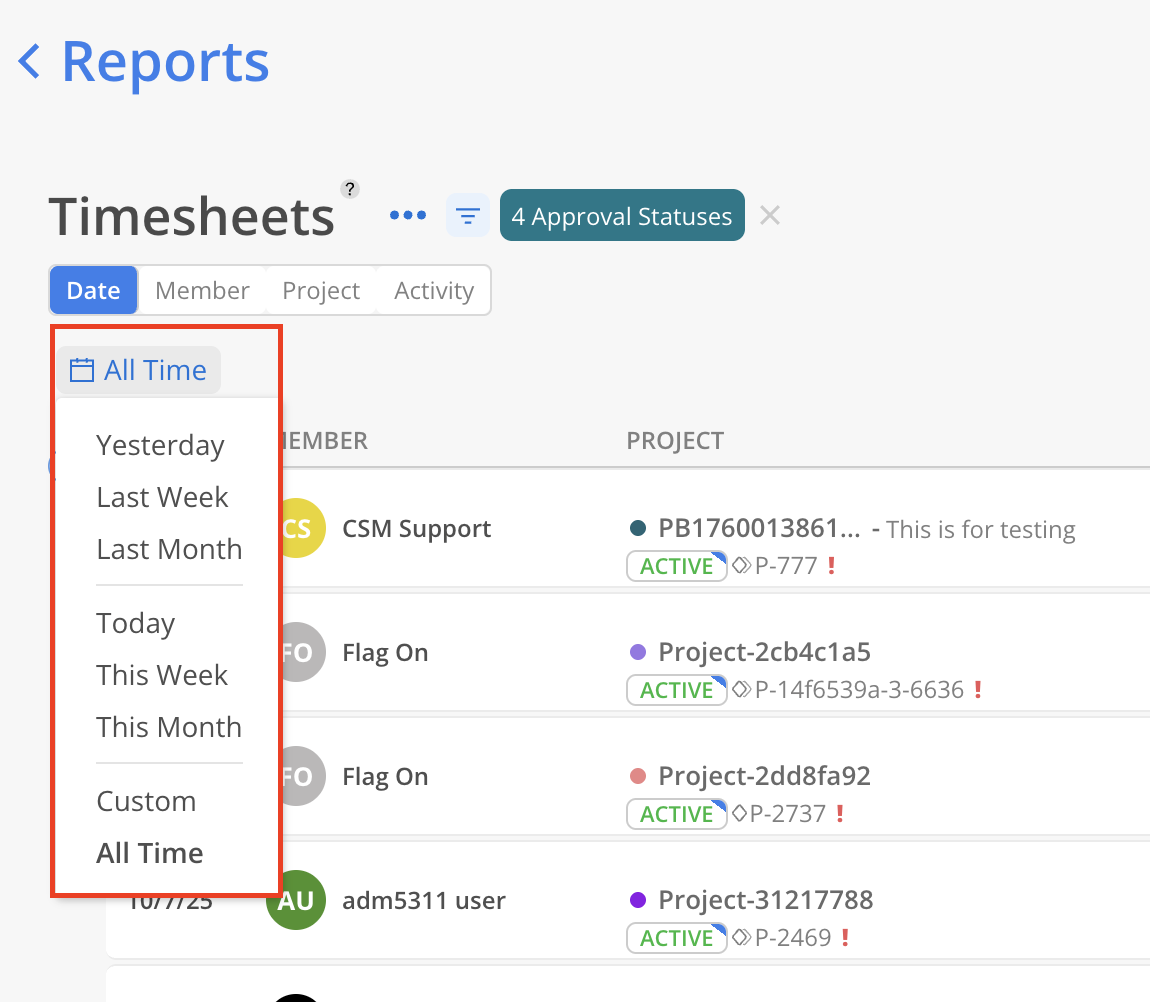
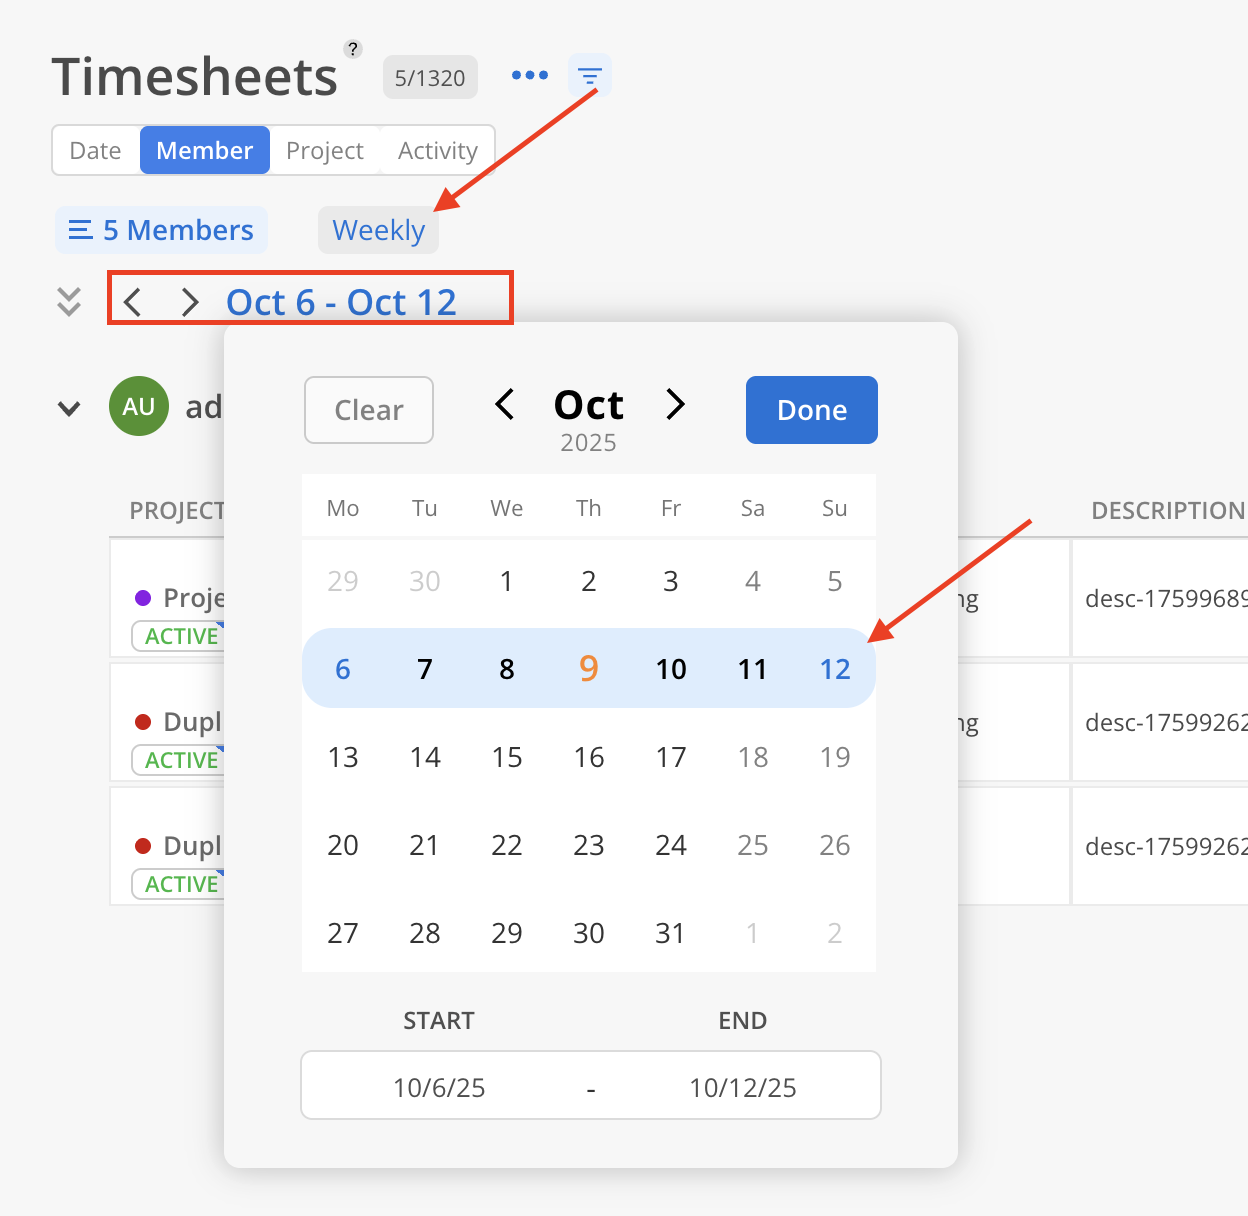
The date range can be adjusted by clicking on the blue date.
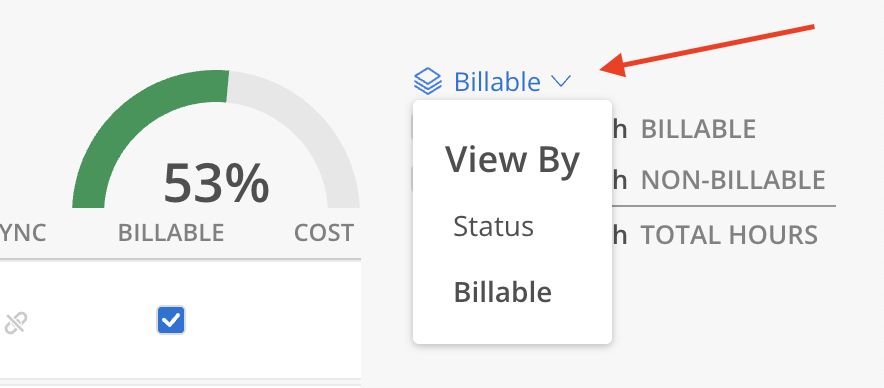
The Summary Chart provides a quick, visual representation of Timesheet data categorized by Status or Billable status, offering an efficient way to filter and view Timesheets based on selected criteria. The chart is available on the Date, Member, and Project tabs, but not the Activity Tab.


Use the dropdown in the top of the chart to switch between Status View and Billable View.
Categories:
Entered (Blue)
Submitted (Light Blue)
Approved (Green)
Rejected (Red)
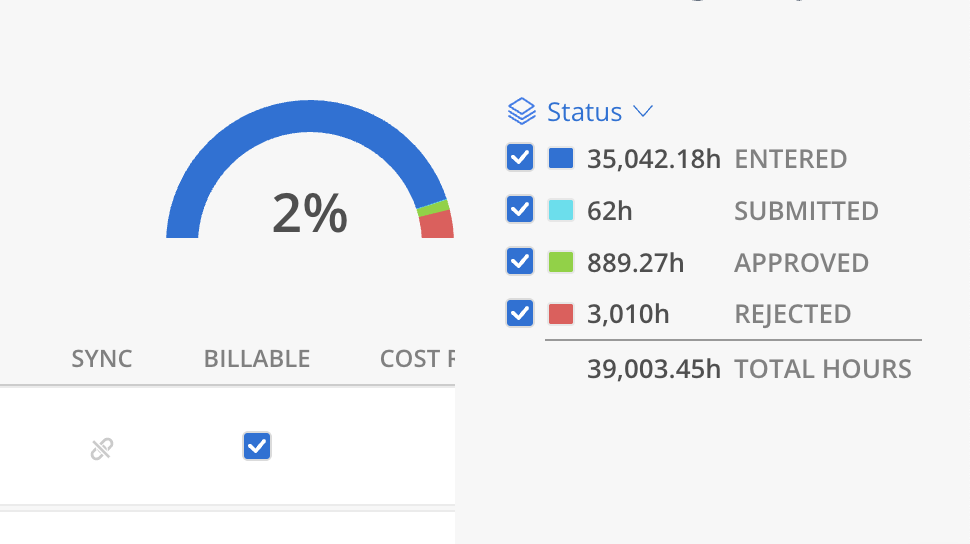
Shows the percentage and total hours.
The percentage is calculated based on which Status categories are selected:
If Approved is checked:
(Approved Hours / Total Checked Status Hours) × 100
If Submitted is checked:
(Submitted Hours / Total Checked Status Hours) × 100
If Entered is checked:
(Entered Hours / Total Checked Status Hours) × 100
If no checkboxes are selected, the displayed percentage is 0%.
Filters Timesheets based on selected statuses.
Tooltip appears when hovering over the percentage and displays only the selected status categories.
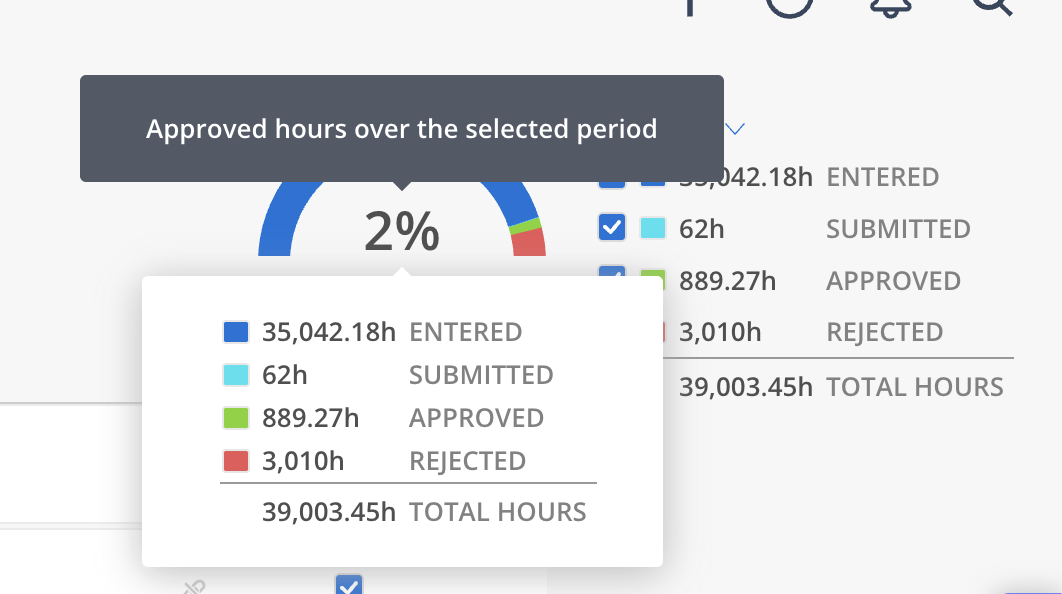
Categories:
Billable (Green)
Non-Billable (Gray)
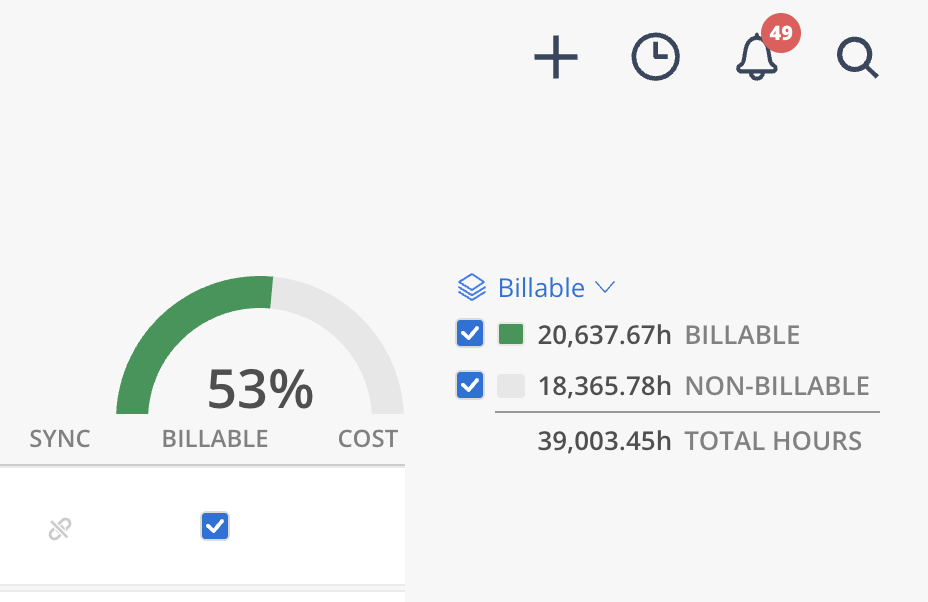
Shows the percentage and total hours.
If Billable is checked:
(Billable Hours / Total Checked Hours) × 100
If no checkboxes are selected or only Non-Billable is checked, the displayed percentage is 0%.
Filters Timesheets based on billability selection.
Tooltip appears when hovering over the percentage and displays only the selected categories.
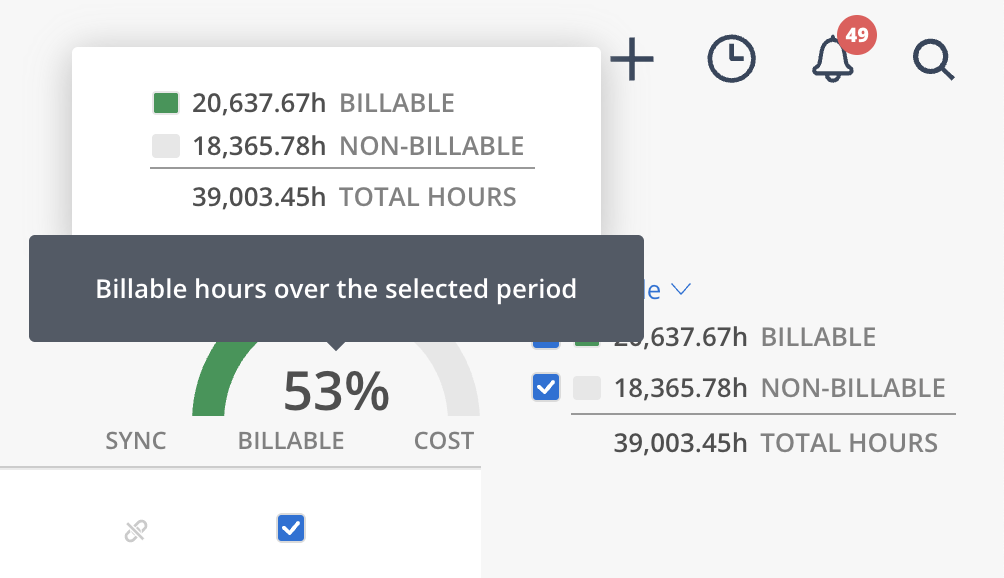
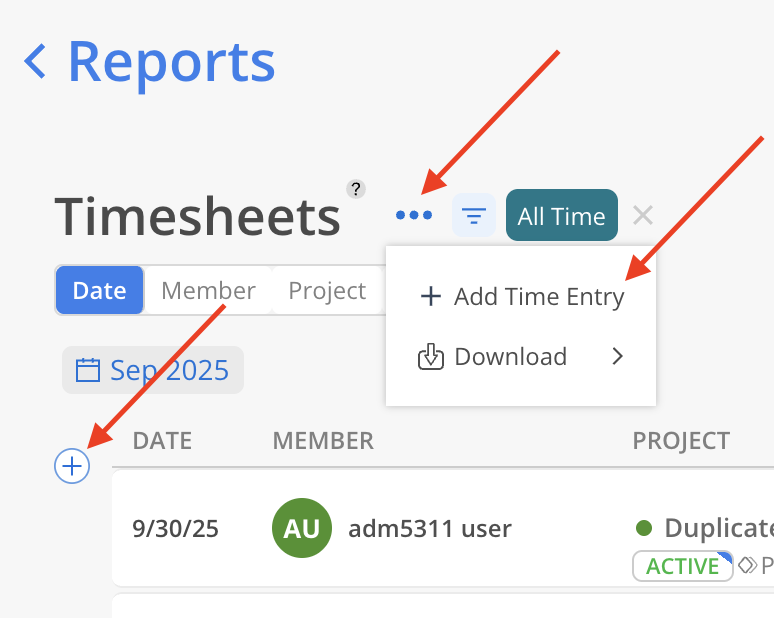
Time Entries can be added to this report for any user and project by clicking the blue plus sign in the top-left corner or using the three-dot menu at the top.
Select the Date, Member, Project, Phase or Subphase, and a Work Category. For some Work Categories, a description is required for the Time Entry; otherwise, it is optional. Enter the hours worked. If applicable, input the invoice hours, then click Add on the very right side.


Sometimes, not all Work Categories used by the team appear in the dropdown when tracking time. This behavior depends on the Phase Time Tracking setting. Here are the rules:
If the Phase is set to Track time on Phase
The dropdown will display all standard Work Categories, regardless of Phase. These standard categories are managed in Org Settings > Standards > Work Categories.
If the Phase is set to Track time by Work Category
The dropdown will only show Work Categories that have been added to that specific Phase.
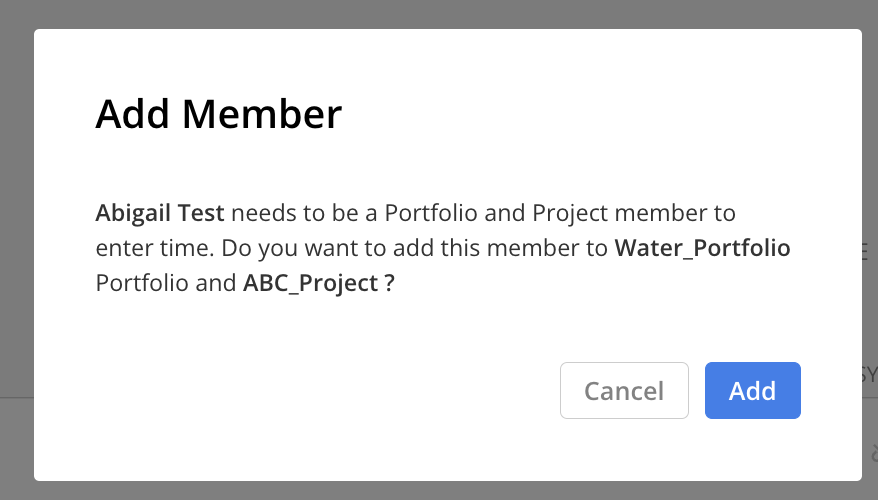
If the Member is not part of the Project yet, an add member confirmation will show.
Learn more about standard Work Category
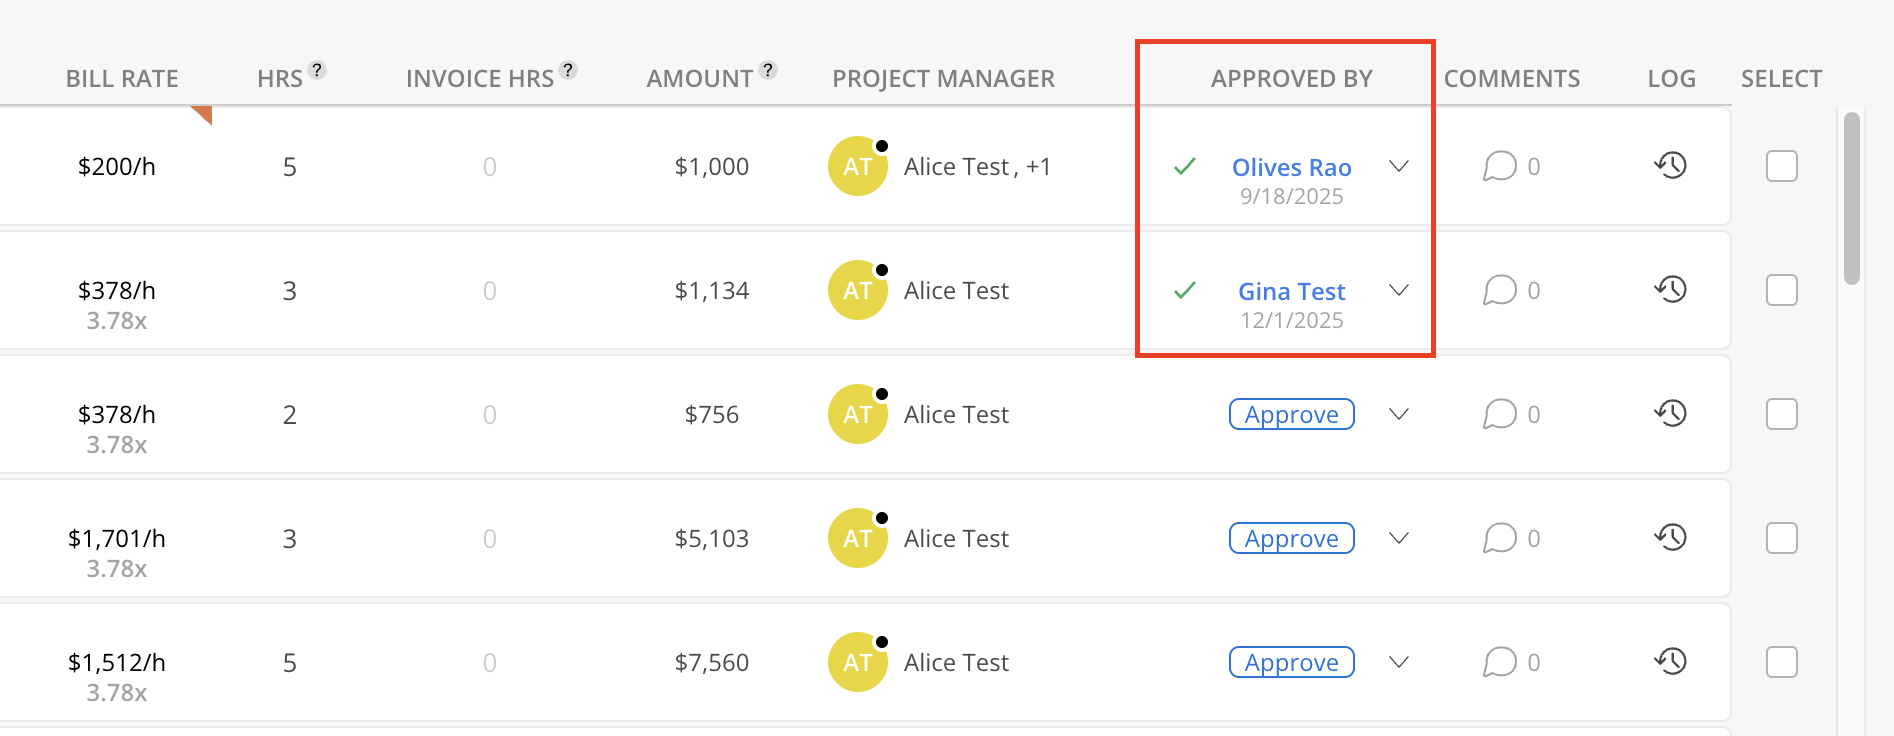
To modify single timesheets, click directly on fields such as date, member, project, work category, description, billable status, rate, hours, or approve/reject to edit them.

When hovering over the Project name and clicking the three-dot menu, the following actions are available:
Go To Project – Opens the Project page in a new tab.
View Project Info – Opens a modal displaying Project details, with options to edit the Project information.
Change Project – Enables selecting a different Project for the Time Entry.

Multiple timesheets can be selected by marking the checkboxes and then clicking the blue "Modify" button.
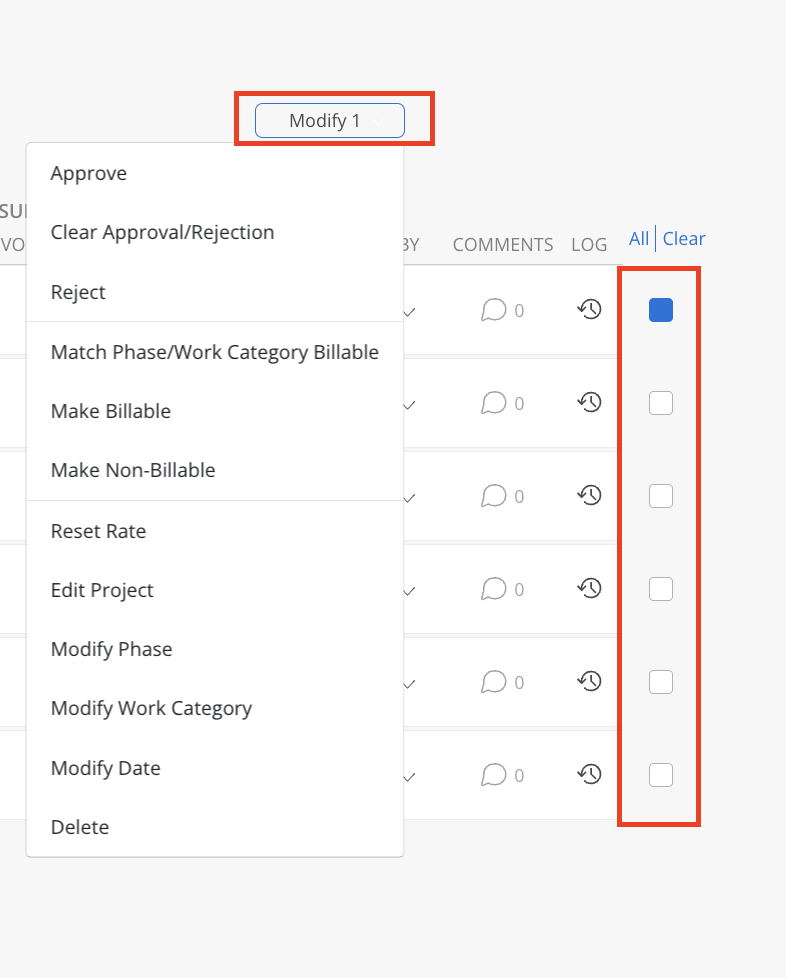
The modify options include:
Approve: Approve the selected time entries.
Approved timesheets cannot be edited again. If you wish to edit the approved timesheets, please change the status to submit first.
Clear Approval/Rejection: Remove the approved or rejected status on selected time entries.
Reject: Reject the selected time entries.
Match Phase/Work Category Billable: Match the billable status of the time entries to the Phase or Work Category.
Make Billable: Make the selected time entries billable, this is consider overriding the billable status of the time entries.
Make Non-Billable: Make the selected time entries non-billable, this is consider overriding the billable status of the time entries.
Reset Rate: Make the rate(s) of the time entries match default project rate.
Edit Project: Move the selected time entries to a different project.
Modify Phase: Move the selected time entries to a different Phase.
Modify Work Category: Move the selected time entries to a different Work Category
Modify Date: Change the dates of the selected time entries
Delete: Delete the selected time entries
Click on the comment icon on the Timesheet.
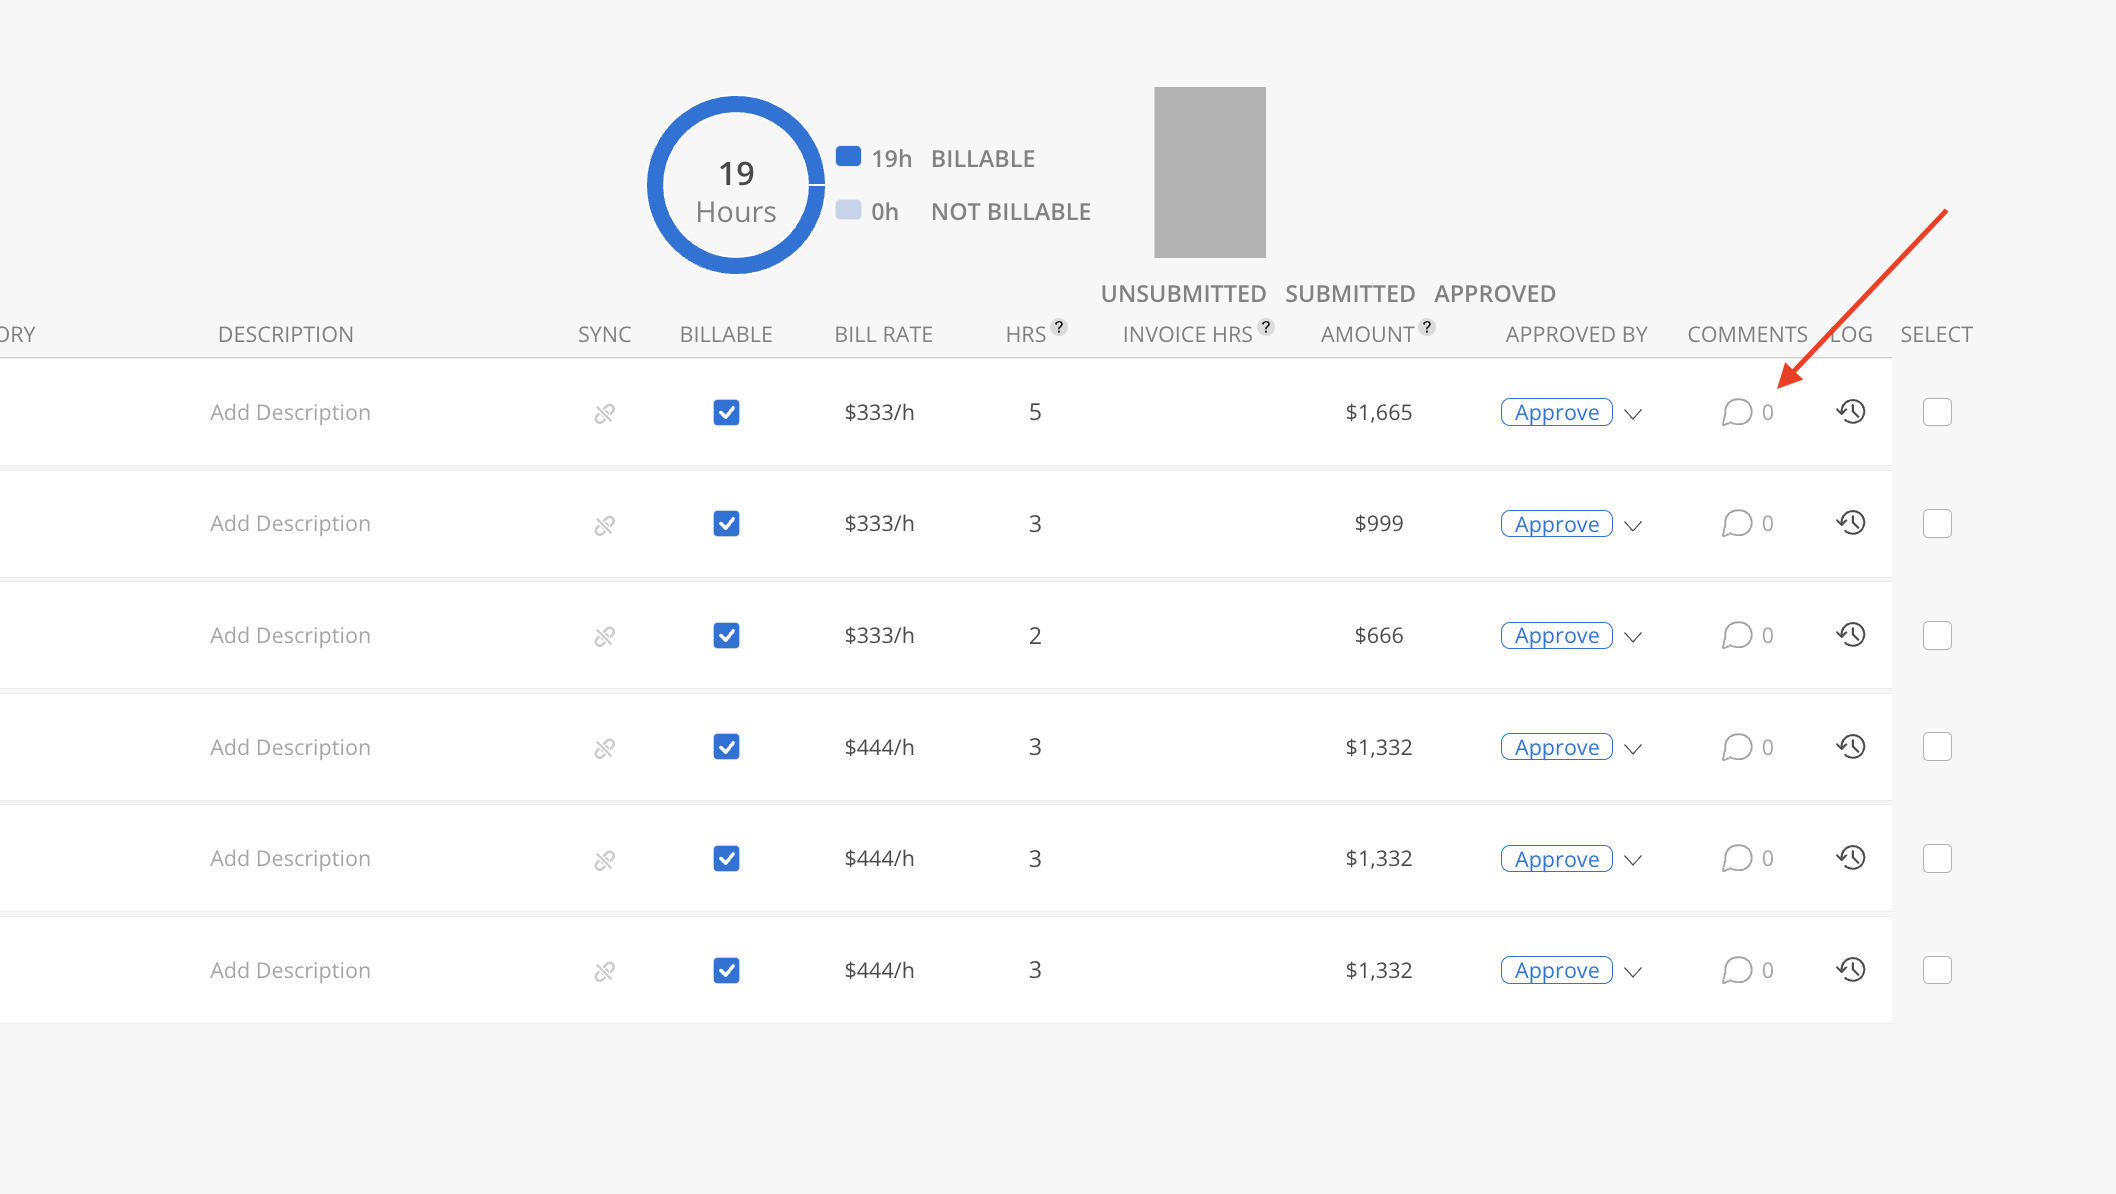
Click Add an update, comment, or ask a question to enter the comment.

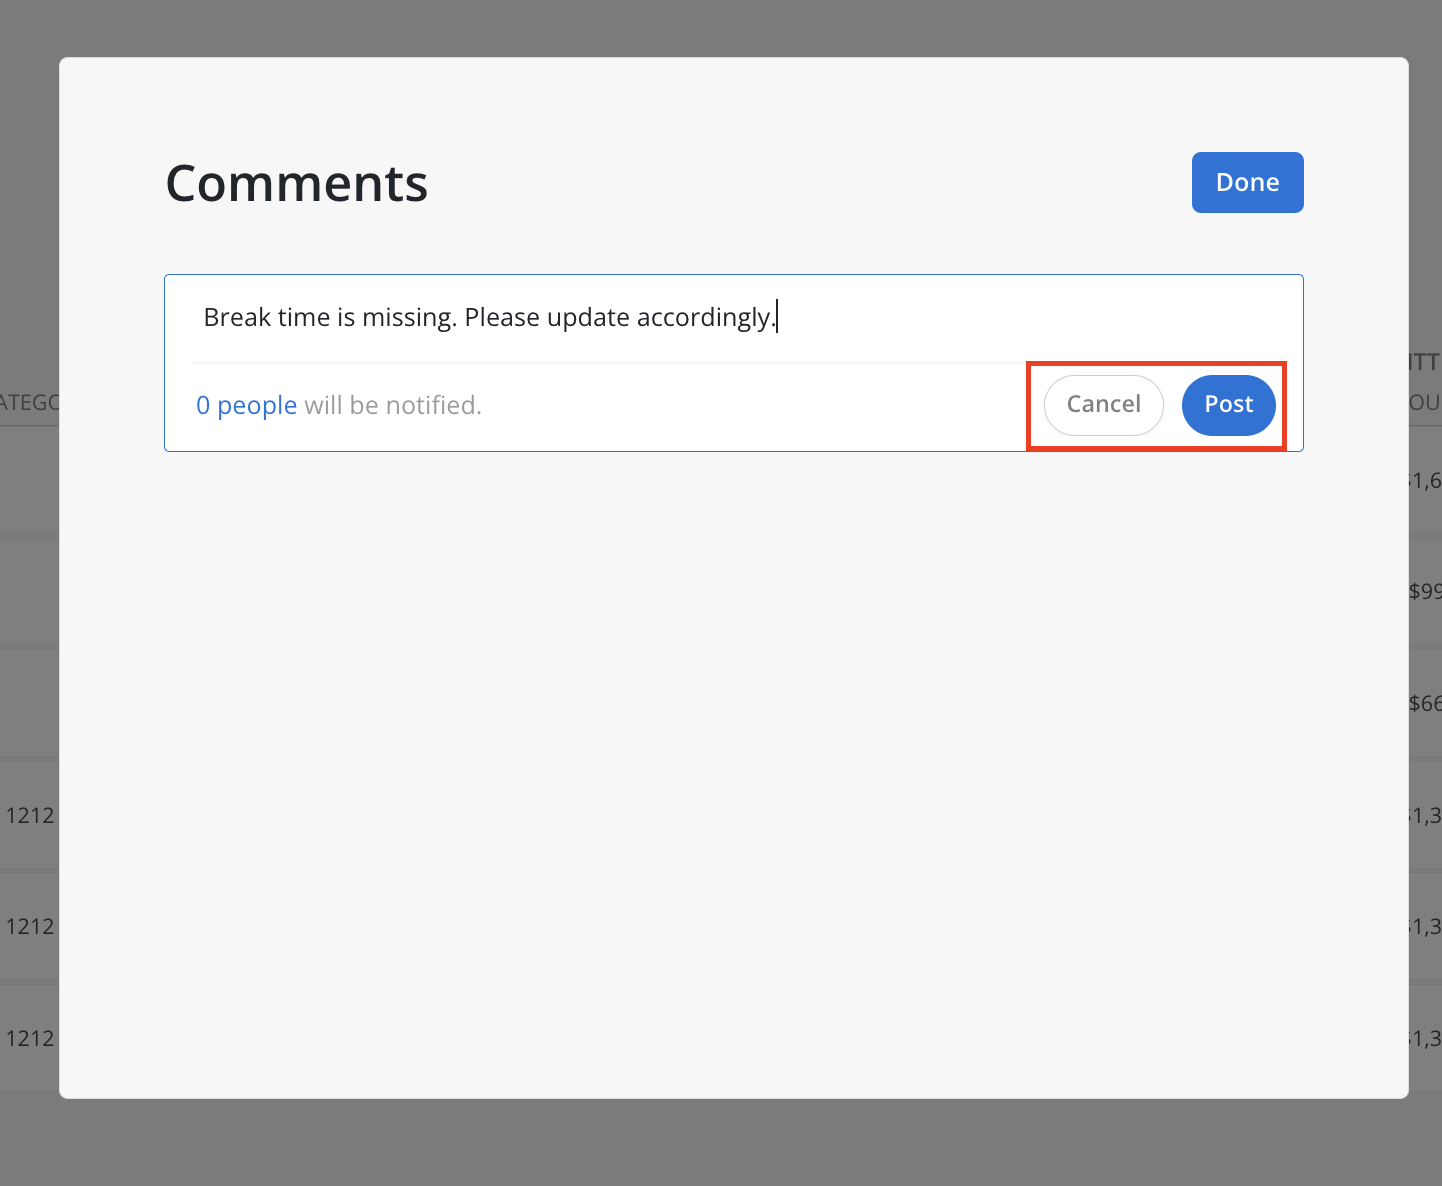
Click Post to submit the comment or Cancel to discard the comment.
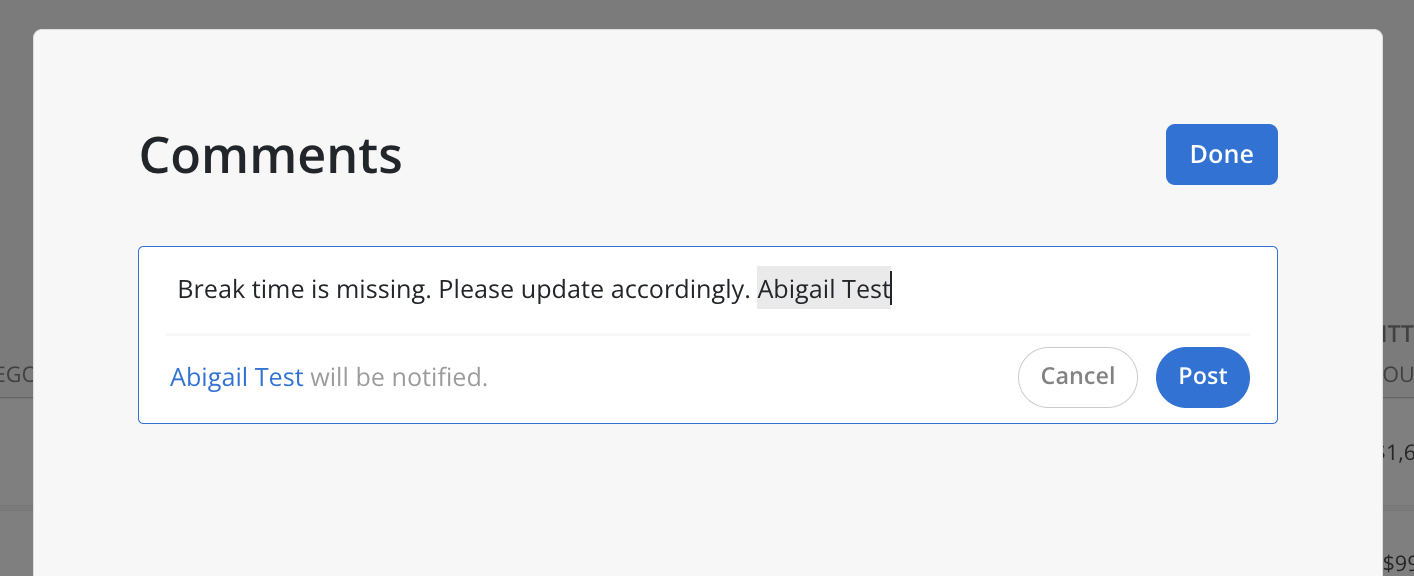
To mention Members in a comment, type "@" followed by their name. A dropdown list will appear, allowing the selection of the desired Member. The Members will be notified upon posting.

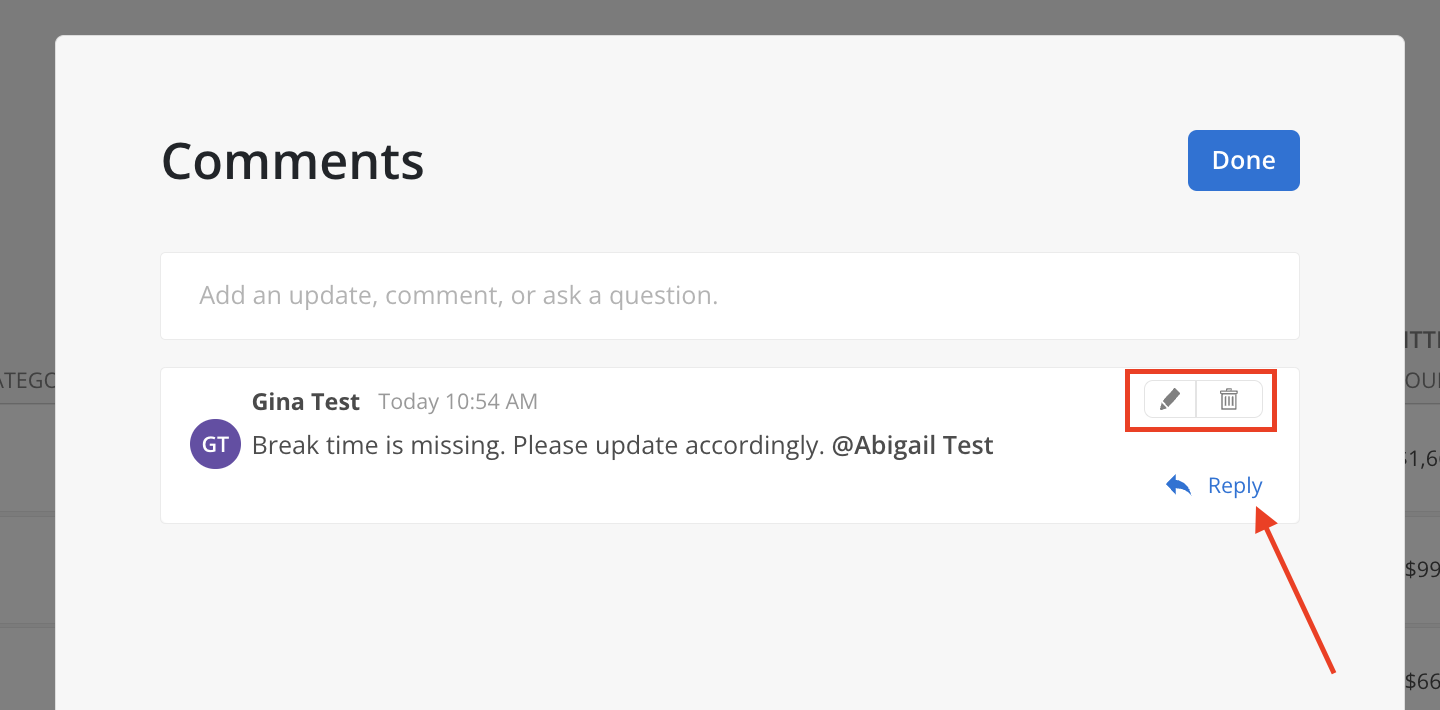
Once the comment is posted, other Members or the comment creator can reply to the comment. The comment creator also has the ability to edit or delete the comment if necessary.
The comment count is displayed in the "Comments" column of the Timesheet.


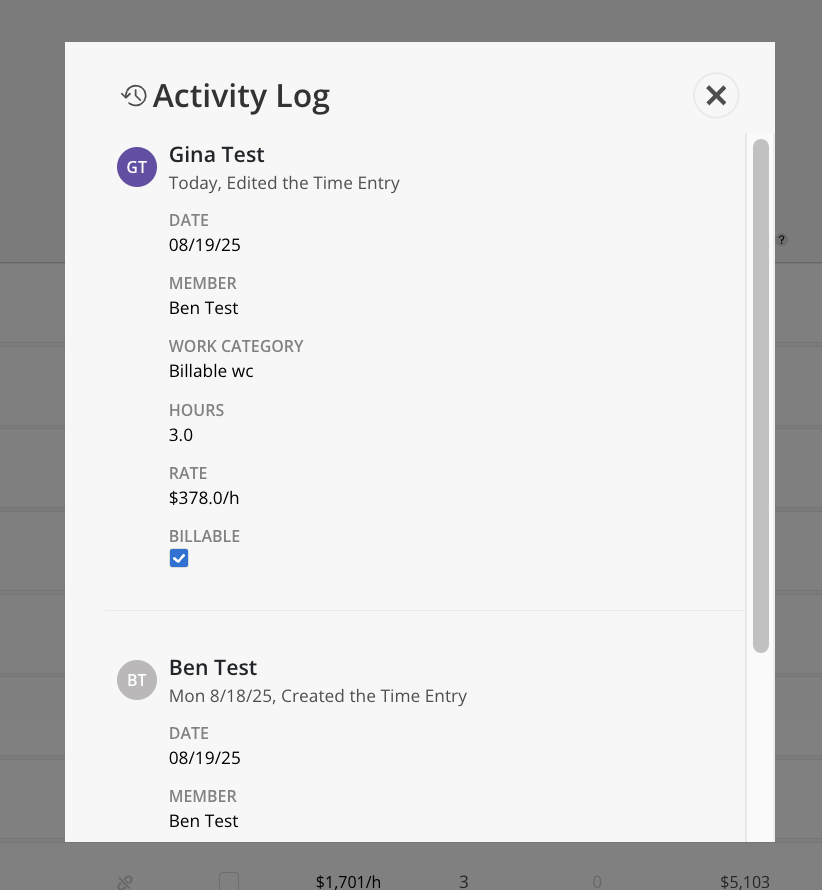
Click the log icon on the Timesheet to view its Activity Log, which includes a detailed history of actions taken—such as who created, edited, submitted, approved, or rejected the Timesheet—along with the date and day each action occurred.

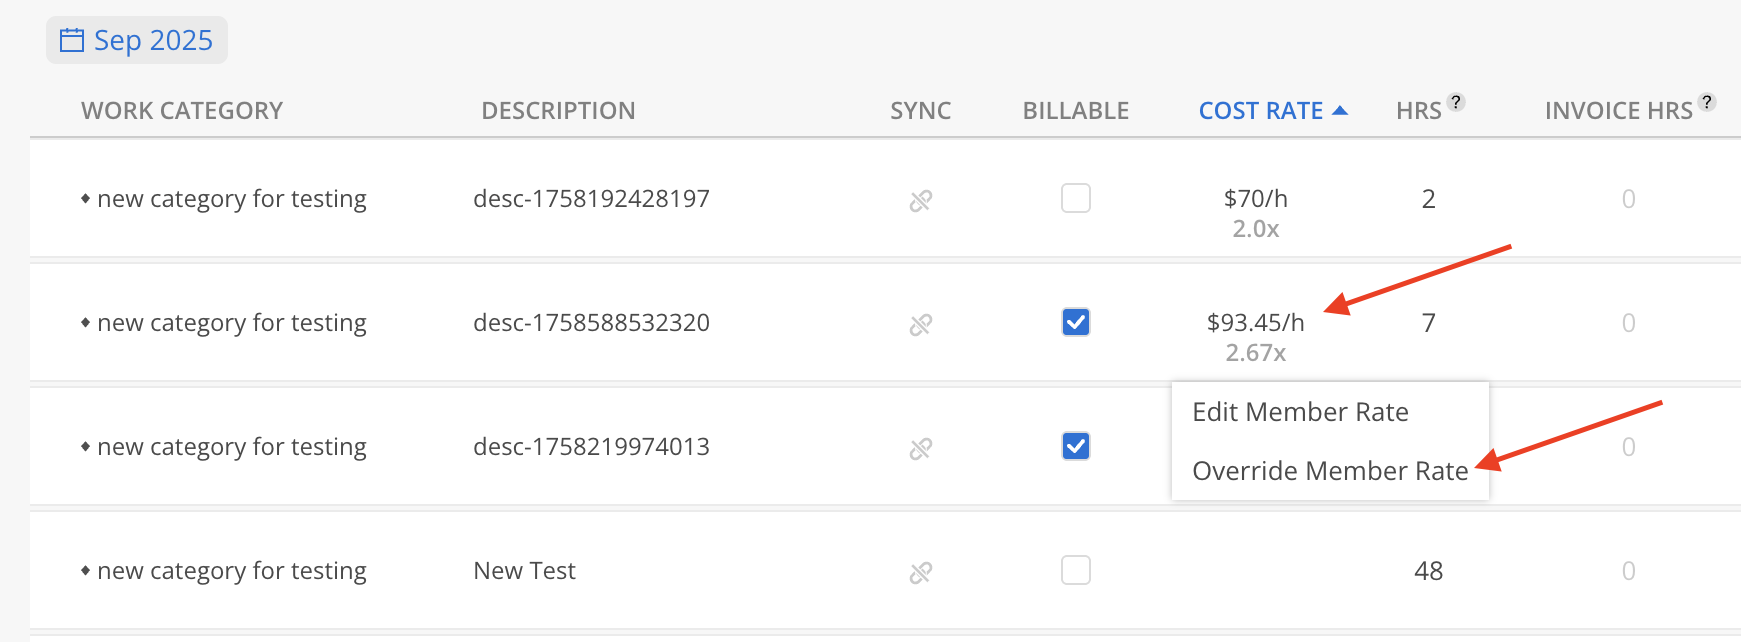
To override a Rate on the Timesheet:
Click the Rate value in the Timesheet that needs to be overridden. Select Override Member Rate from the available options.
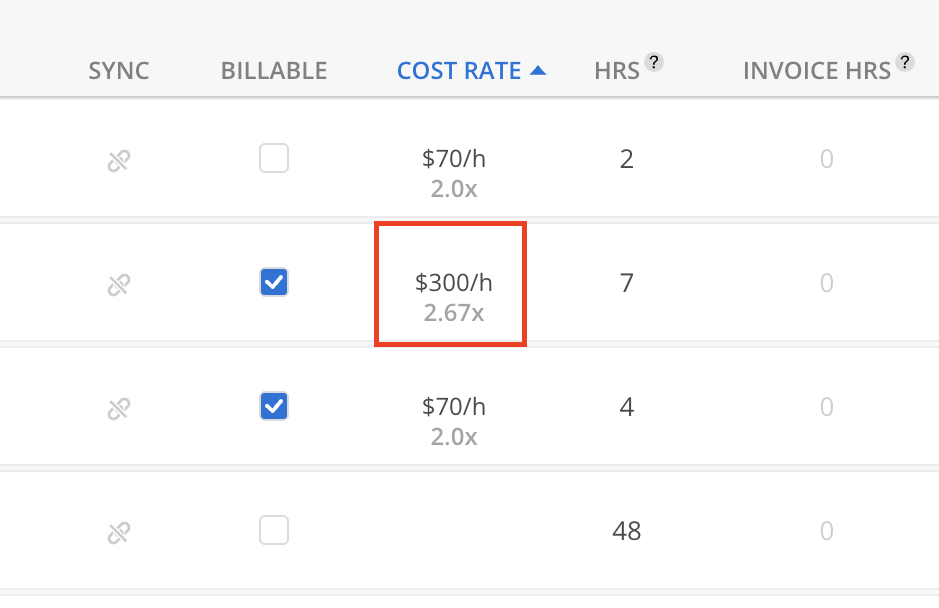
Enter the new Rate and press Enter.
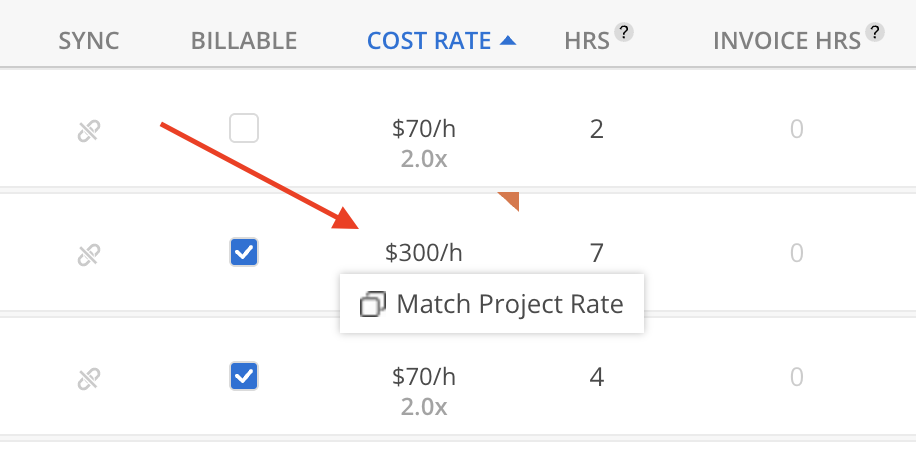
The Rate cell will display a red triangle in the top-right corner, indicating that the Rate has been overridden. The value in the Amount column will automatically update to reflect the new Rate.
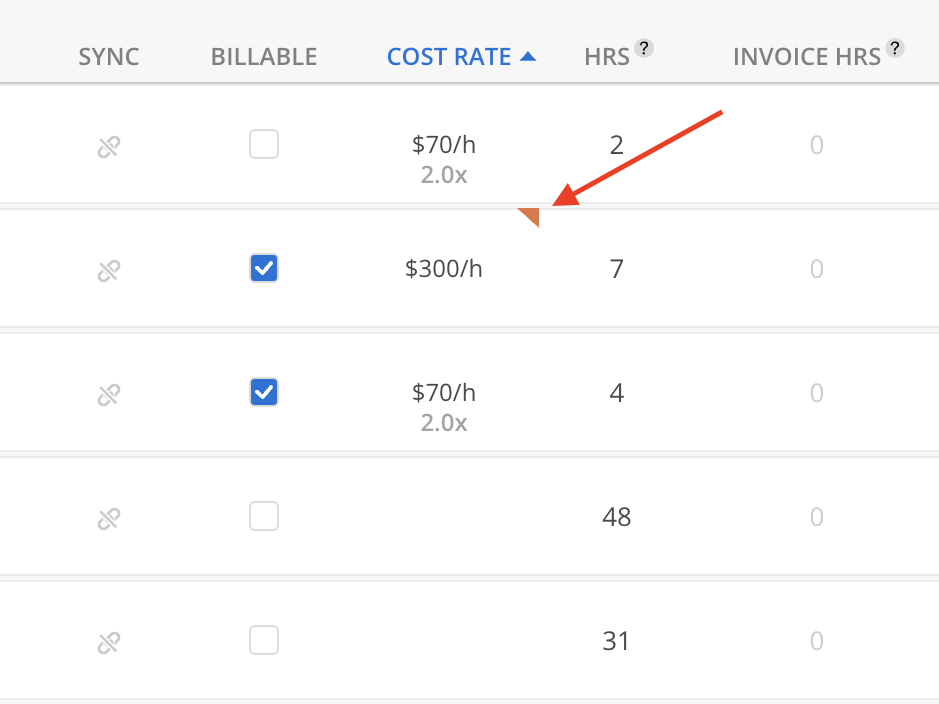
Click the Rate field with a red triangle on a timesheet to update it and match the current Project Rate.
Work Planners with the following permissions:
Work Planner > Can Edit > Projects they are a member of
Work Planner > Can Edit > Projects they are a Project Manager of
can only view projects they have access to (either as a member or as a Project Manager). Any Timesheets that they don't have access to, will show as Private Project and cannot be edited or selected using checkboxes.

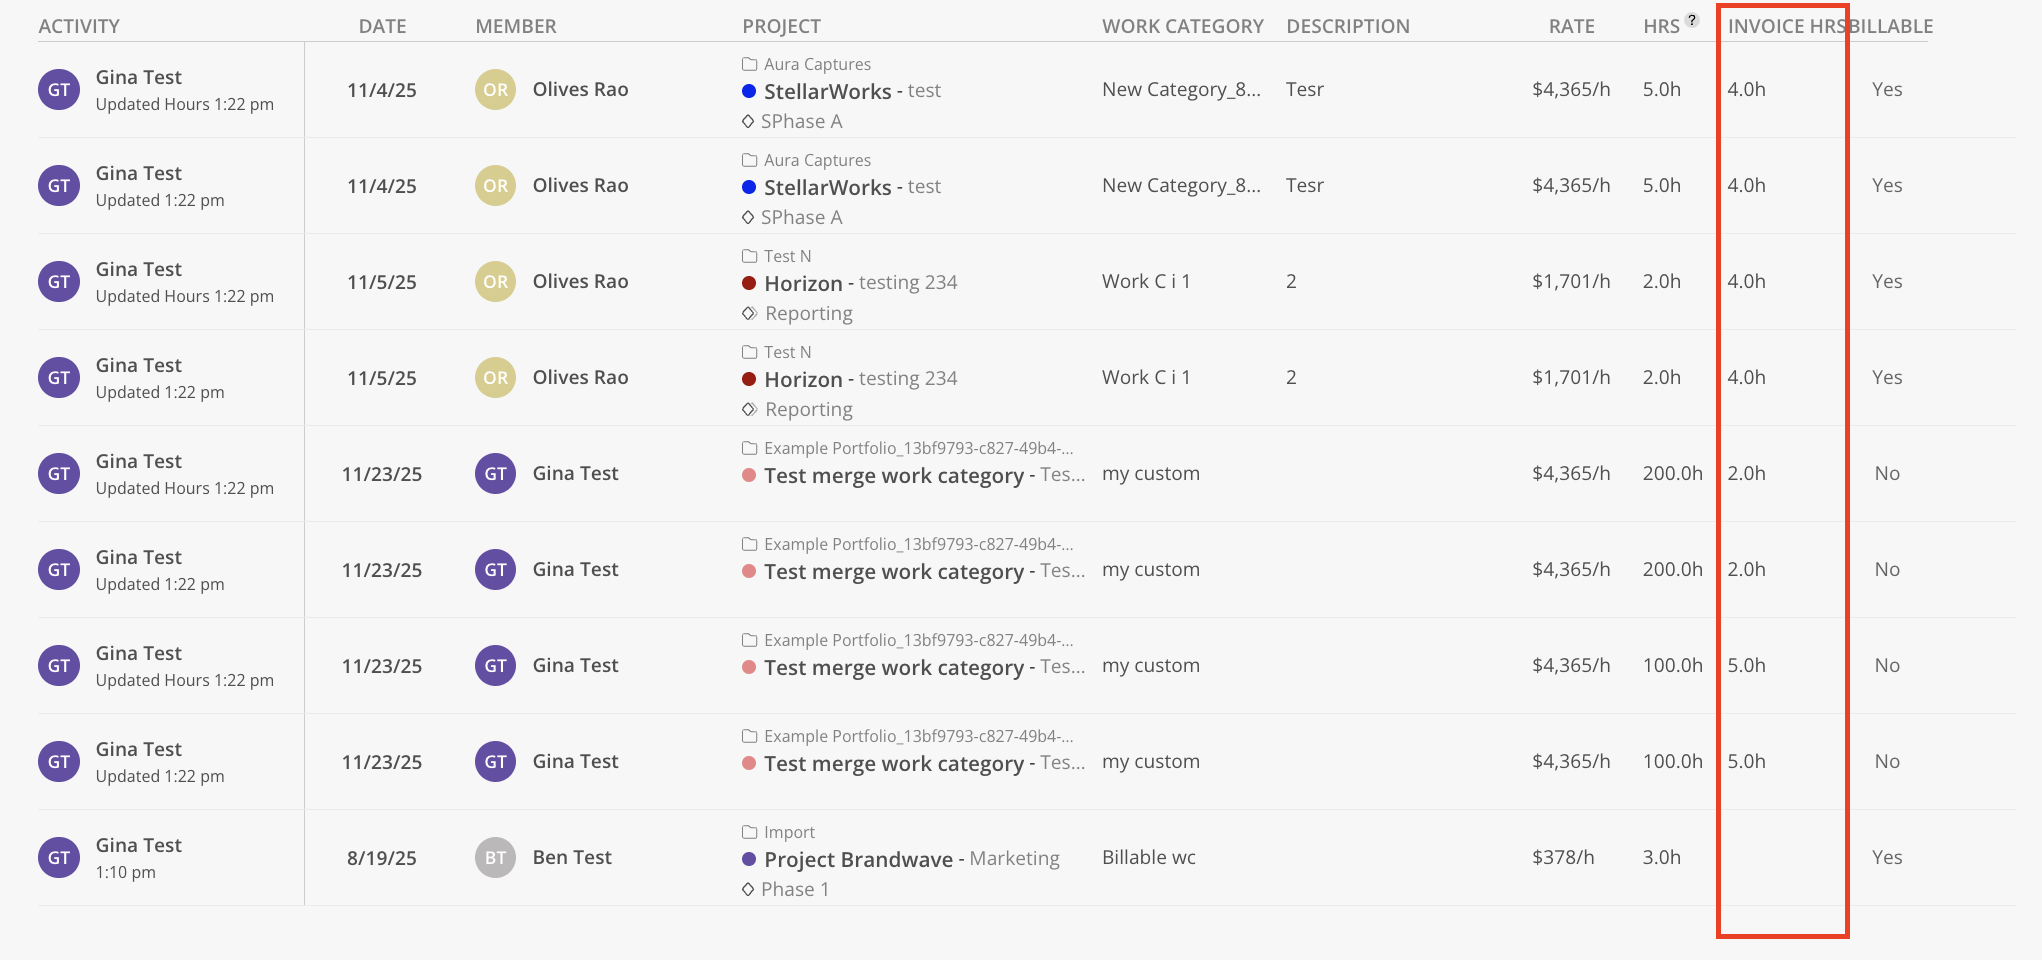
The Invoice Hours feature enables the saving and updating of a dedicated source of hours for time entries, offering enhanced flexibility and accuracy in managing time-related expenses. On Timesheet Report, there are several pages where you can see this column.
On the following pages:
Timesheet Report > Date Tab

Timesheet Report > Members (Daily view)

Timesheet Report > Project Tab

Timesheet Report > Activity Tab
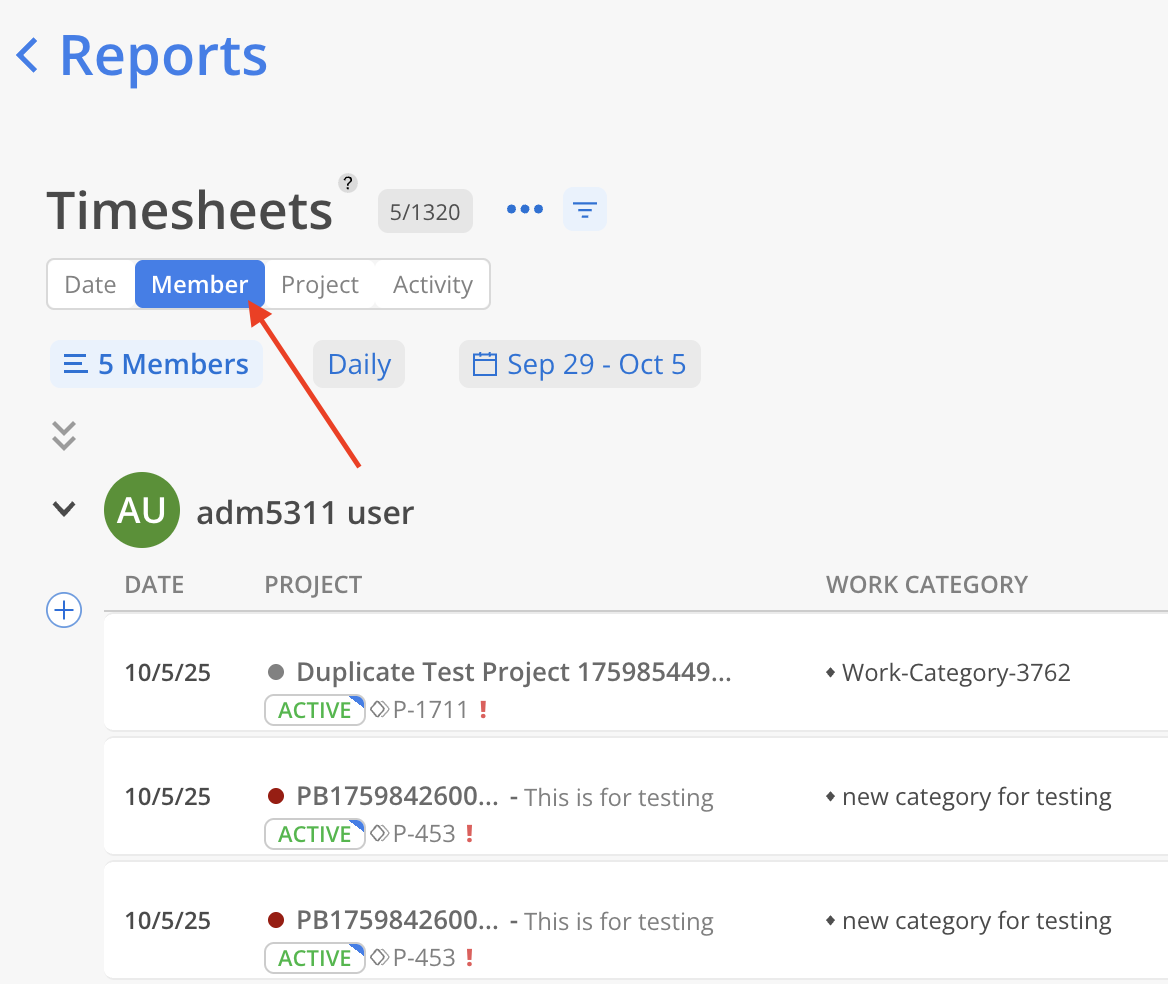
Click on "Members" if you would like to view this report by member.
Select the members you'd like to view.
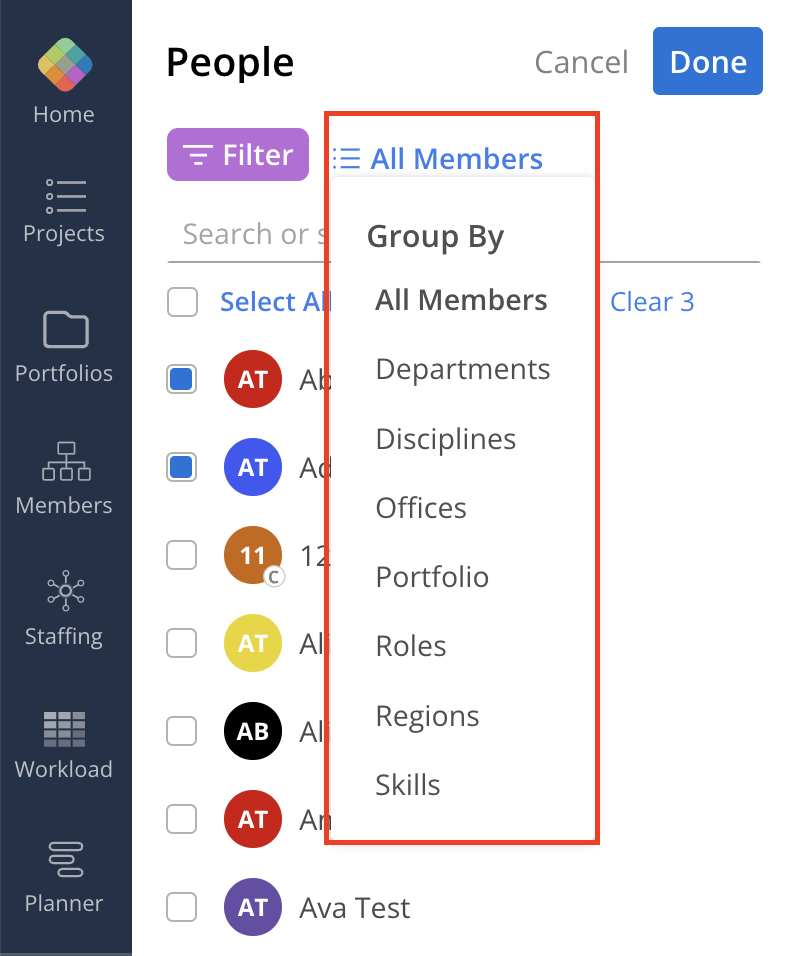
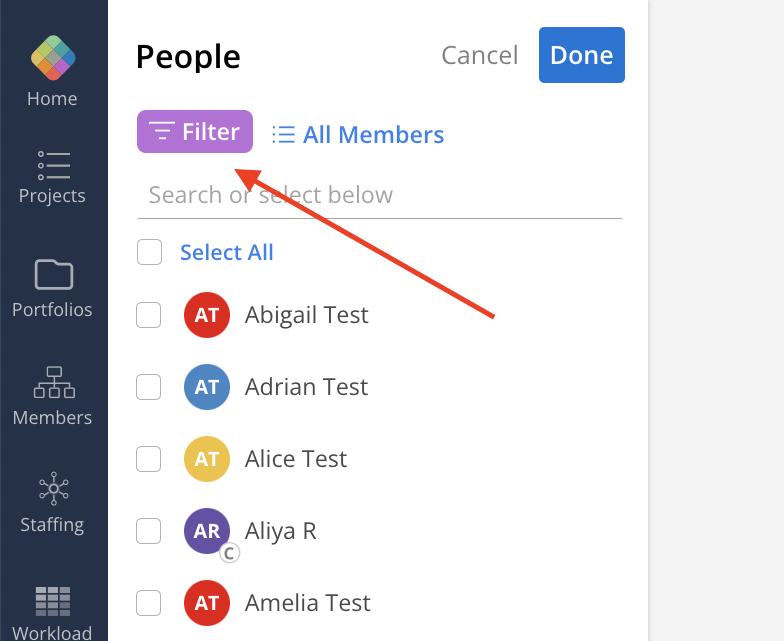
Click All Members to group Members by Departments, Disciplines, Offices, Portfolios, Roles, Regions, and Skills.
Filter your members list by clicking on the Filter button in the top left.
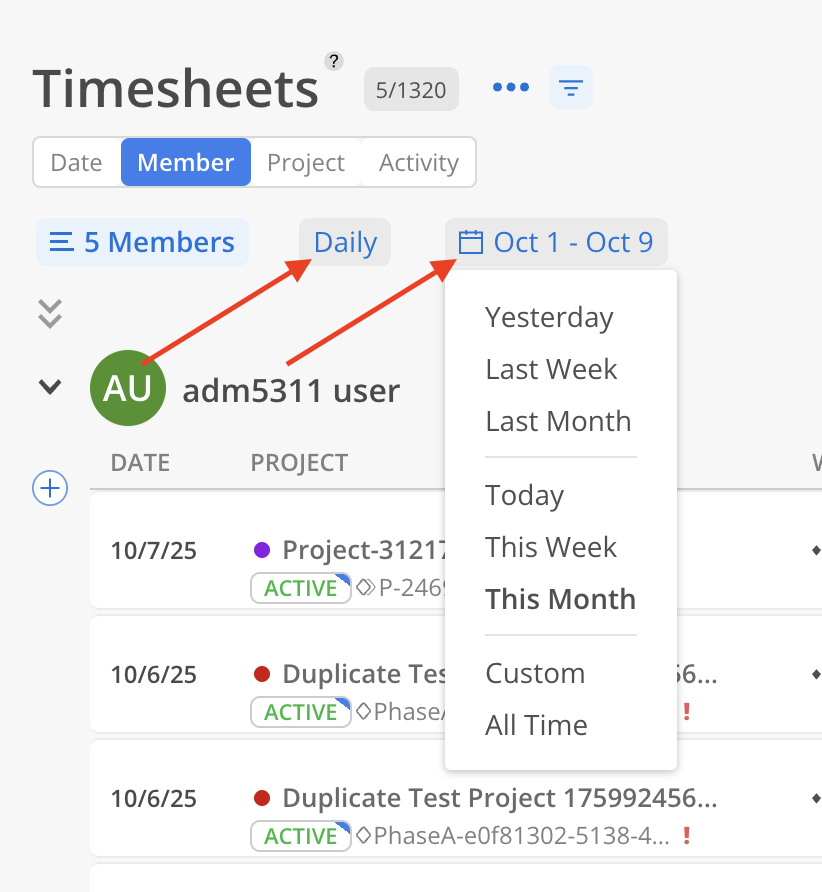
When viewing this report by Member, you can also choose to view the time either Weekly or Daily by selecting the appropriate option to the right of the members that you have selected.
Weekly will lock date to a weekly range.
Daily will allow you to select from a custom range of dates.
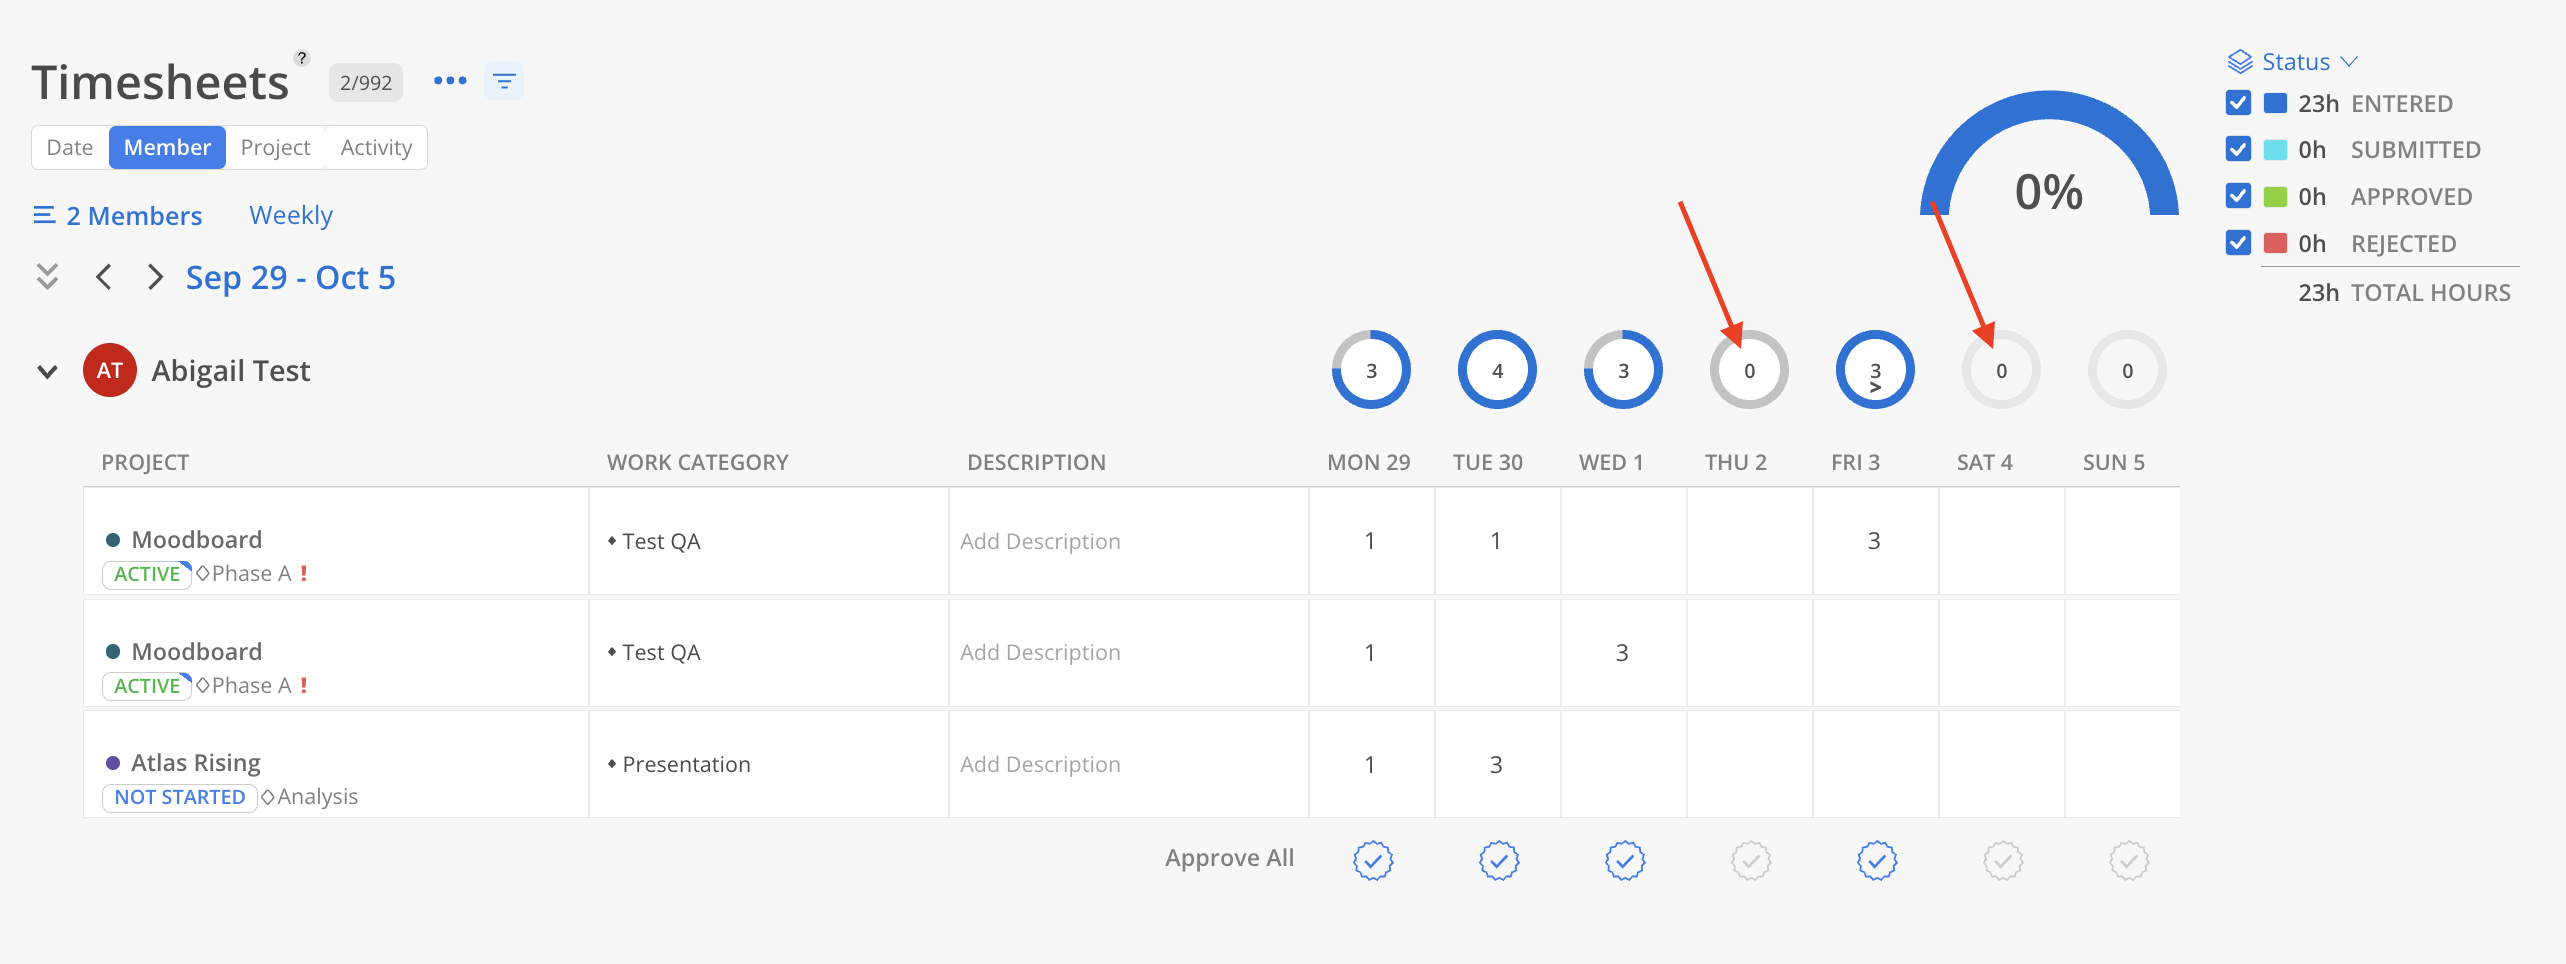
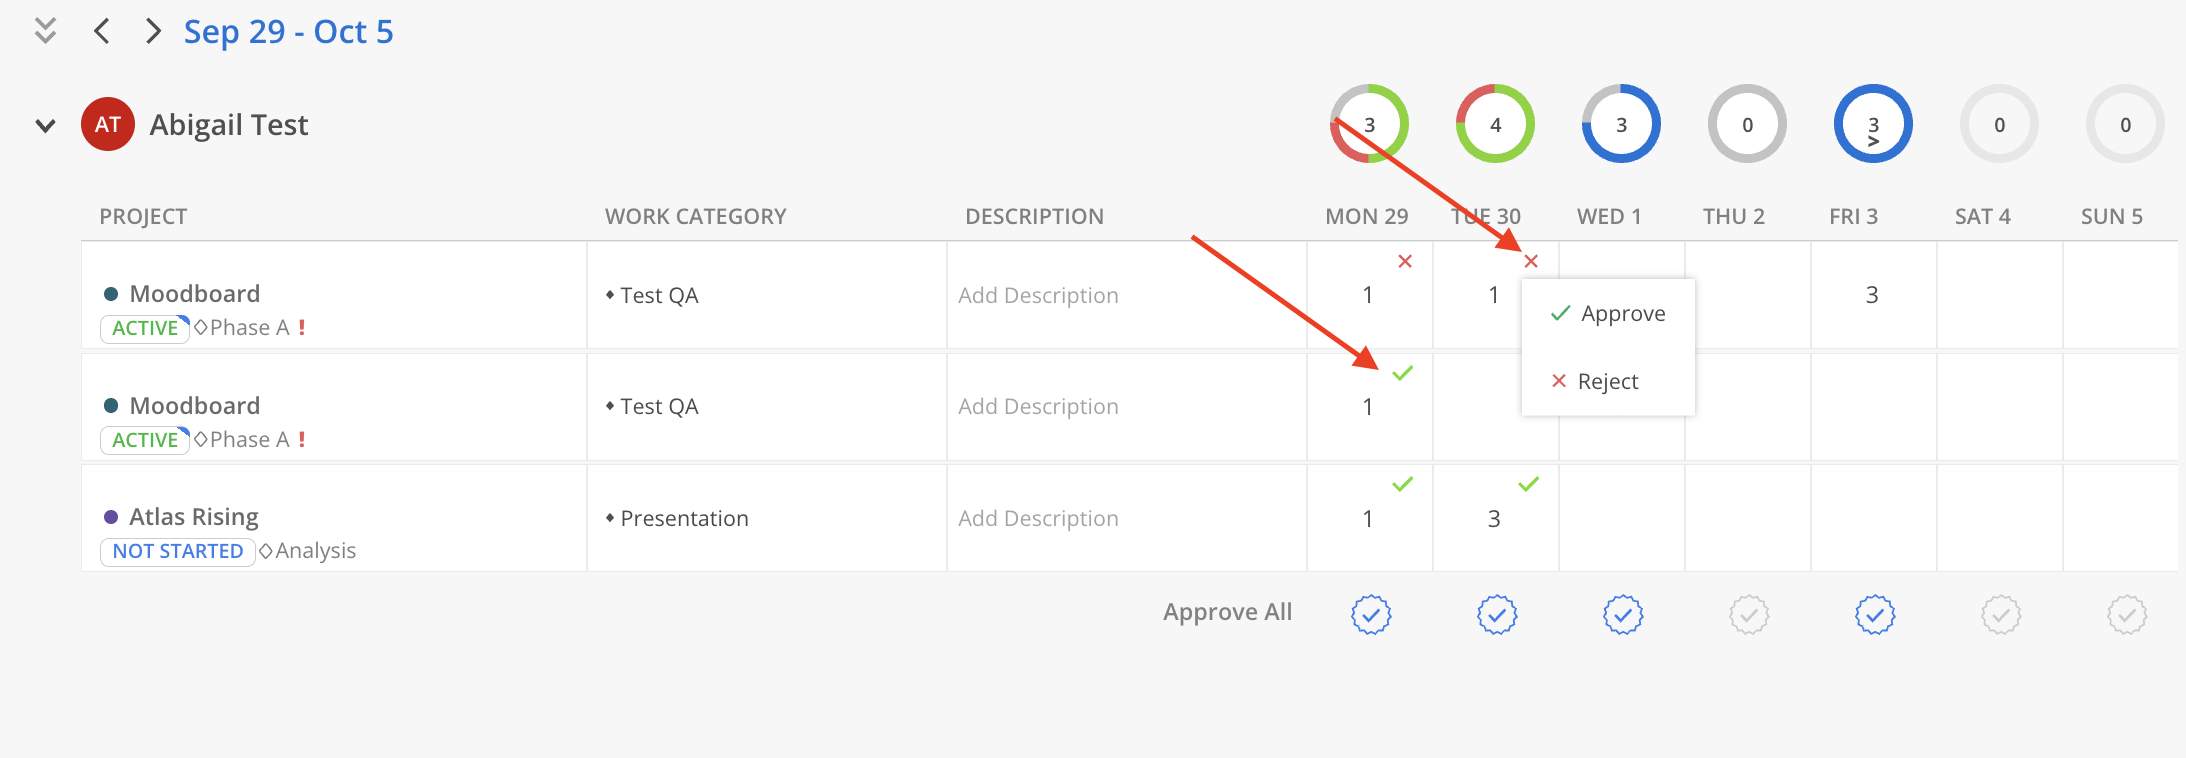
A light gray circle is shown for days when a Member has 0 capacity.
A dark gray ring with a white center is shown for days when the Member has capacity greater than 0.
If the total hours entered exceed the Member’s capacity for the day, a “>” icon appears inside the circle to indicate the overage.
Approve Time
To approve all Timesheet for the Member for the week, click the Approve All button.
To approve all Timesheet for a specific day, click the checkmark icon beneath the corresponding date.

For Timesheets that have been rejected or approved, click on the red x or green check icon on the top right corner to manually change the status.
All tabs include view filters similar to those in the Date tab. The available filters vary depending on the selected view, allowing different information on the timesheets to be displayed.
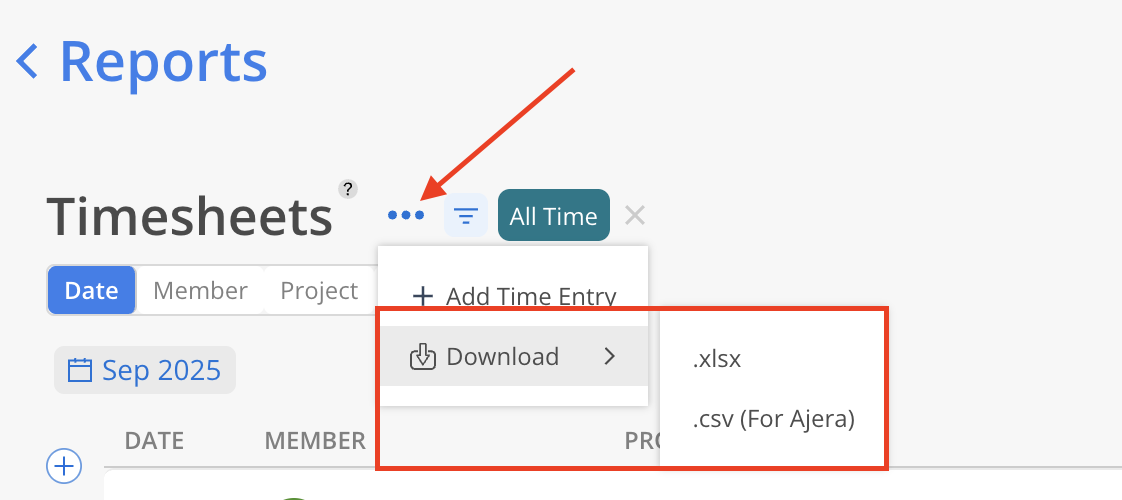
All tabs of the Timesheets Report can be downloaded by clicking the three dots located to the right of the report name on the top of the page.
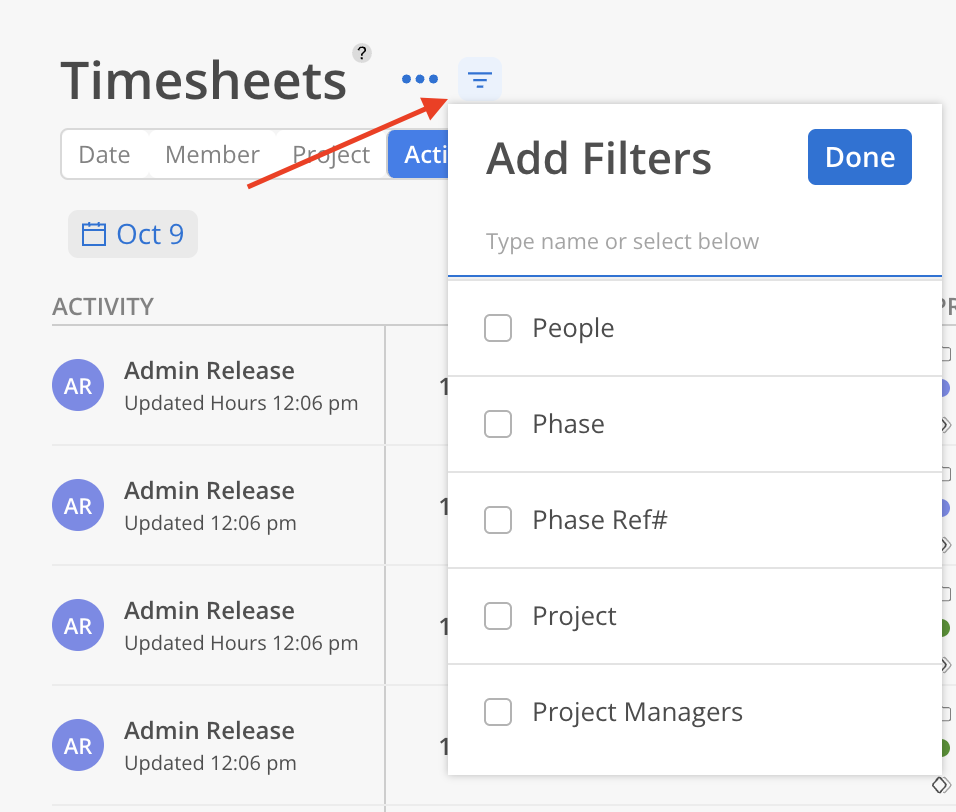
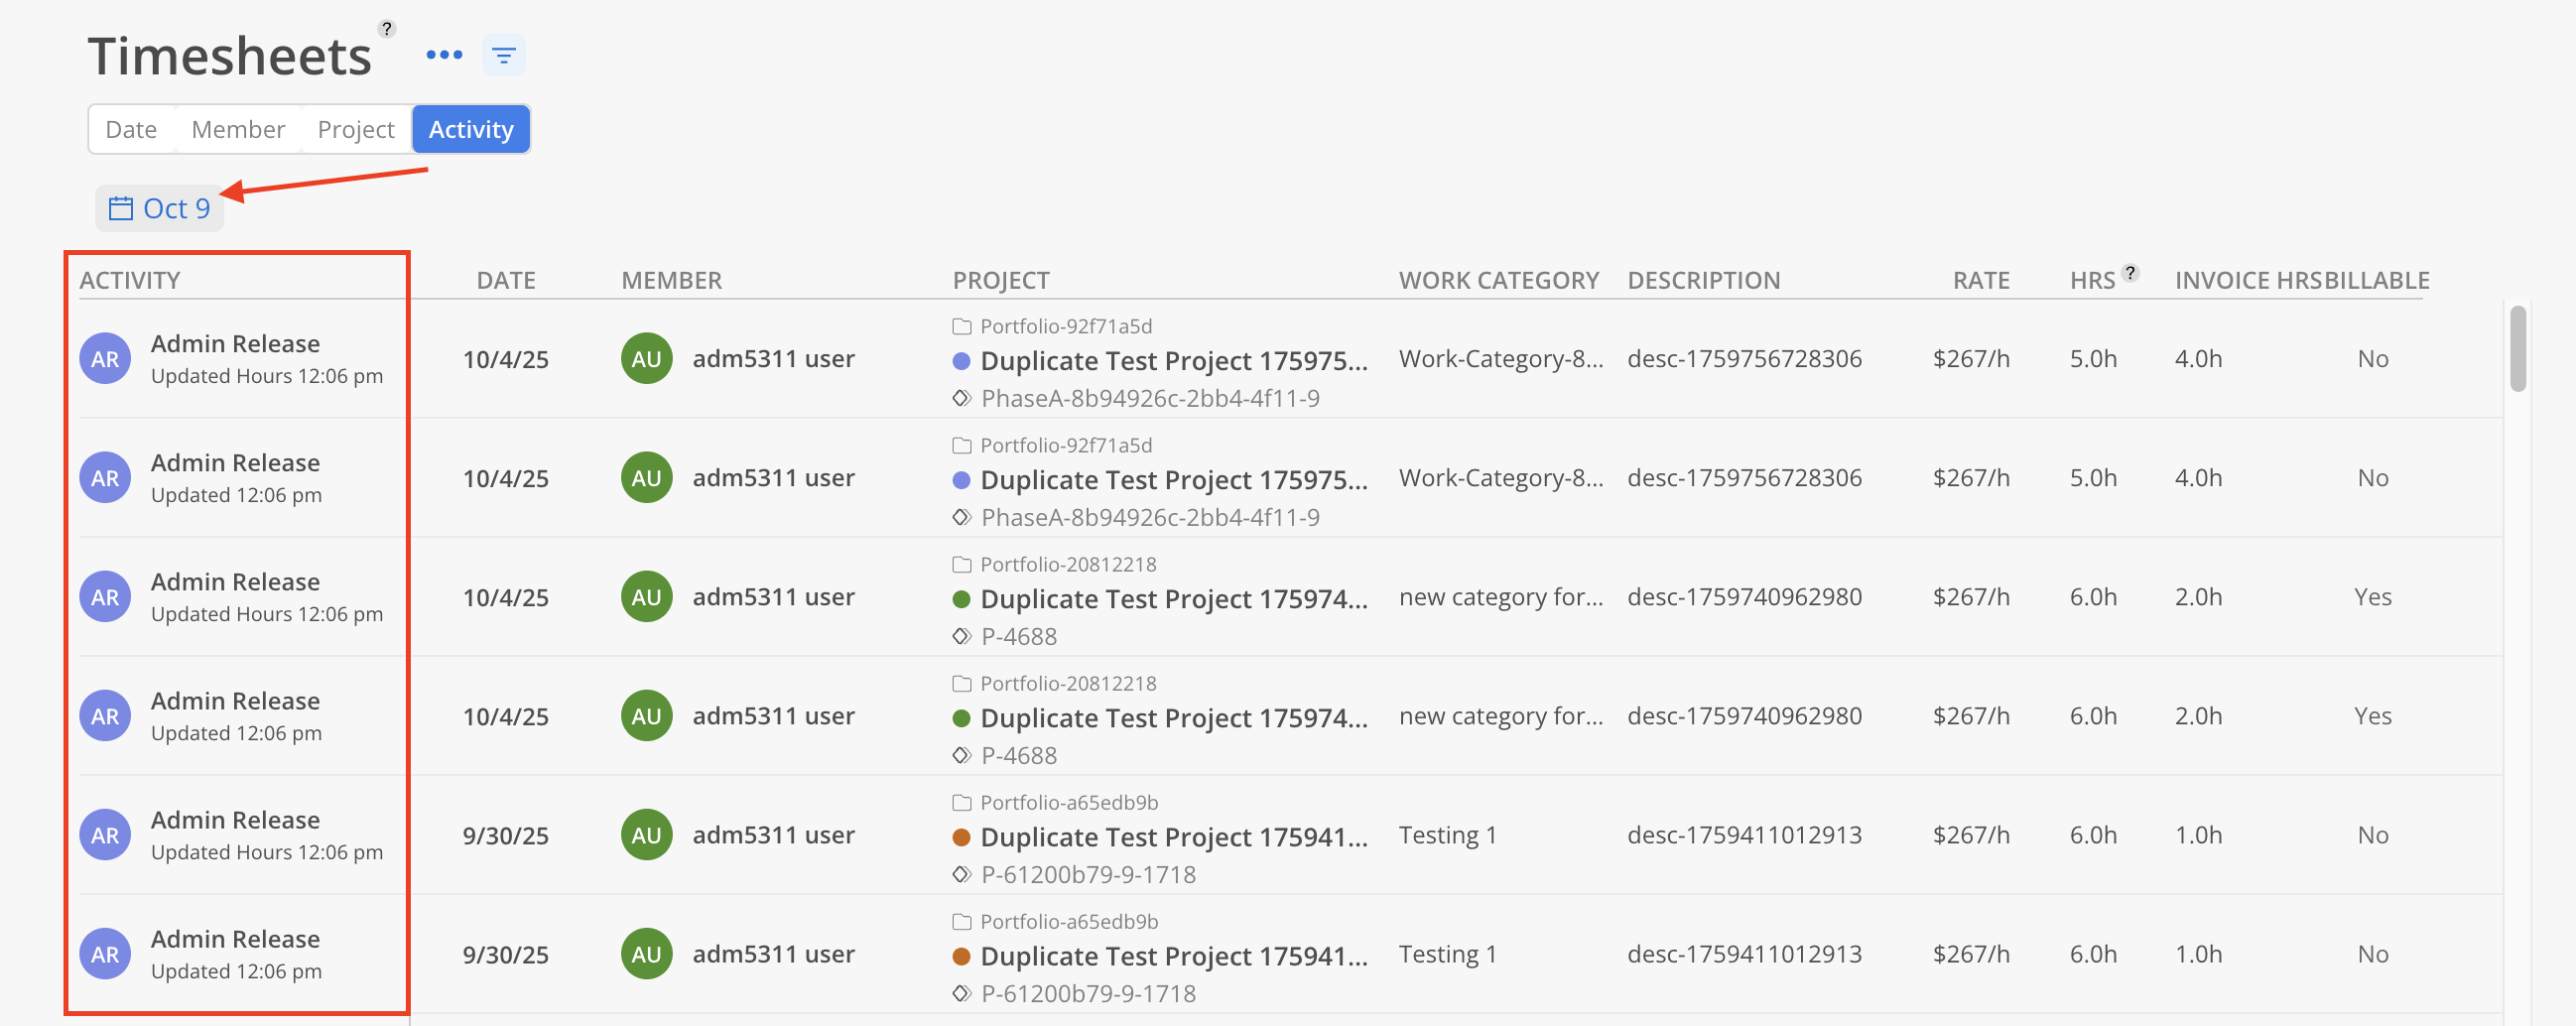
Similar to the Timesheet log, the Activity tab displays a record of changes. The Activity column on the left shows which Member made changes to the Timesheet and when, while the Timesheet details are displayed on the right.
Use the date filter at the top to filter activities by date.
Click the filter icon to filter activities by Members, Phases, Projects, and Projects where a Member is the Project Manager.
