Tasks allow you to assign and prioritize project to-do's. If the Tasks tab is not visible, click + View button to show it.
Learn more about customize views
Learn more about default Project views
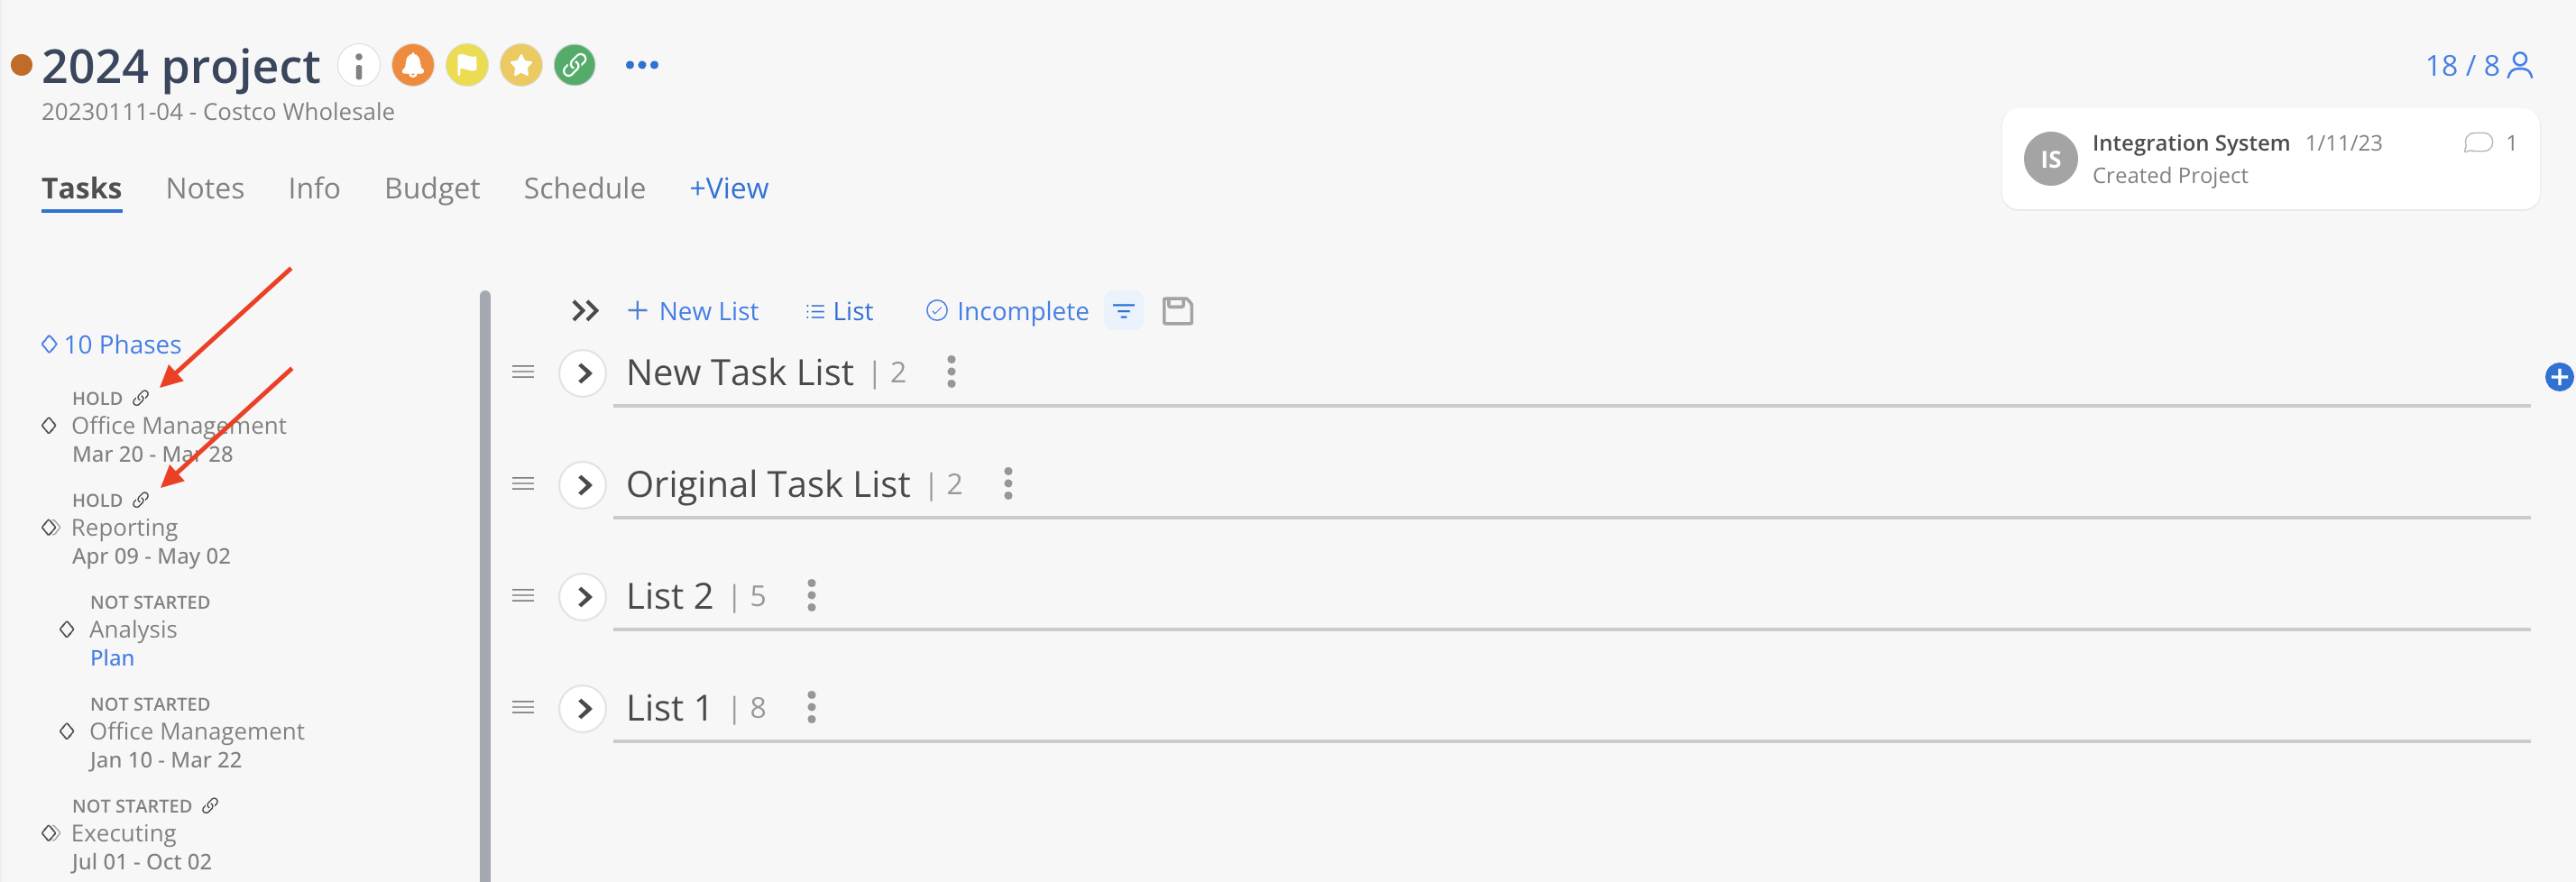
On the Project Tasks tab, you will see a list of Phases, Tasks grouped by Task Lists (if any), Task Management Buttons.
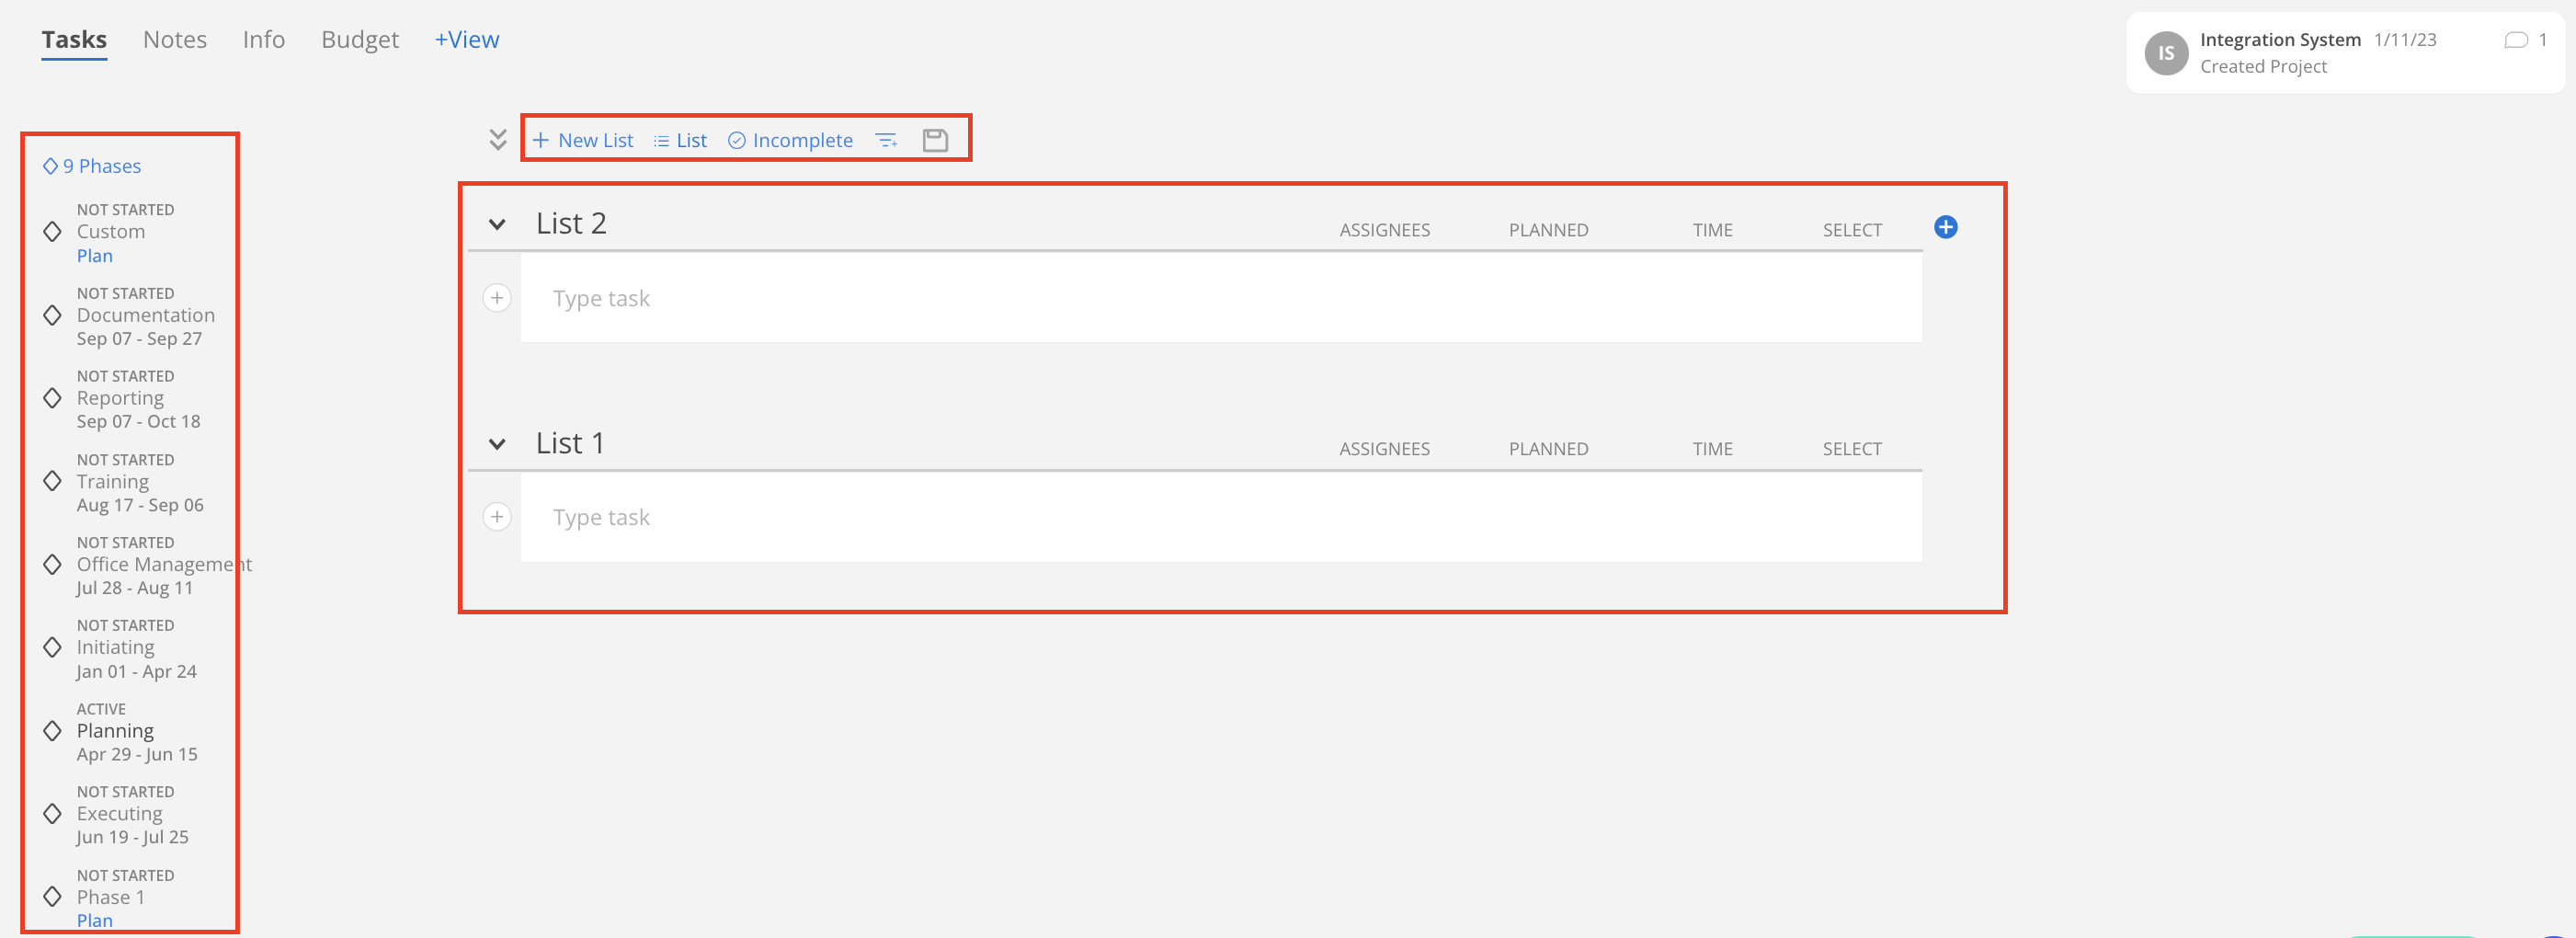

When a Phase is connected to an integration, a link icon is displayed next to the status above the Phase name.
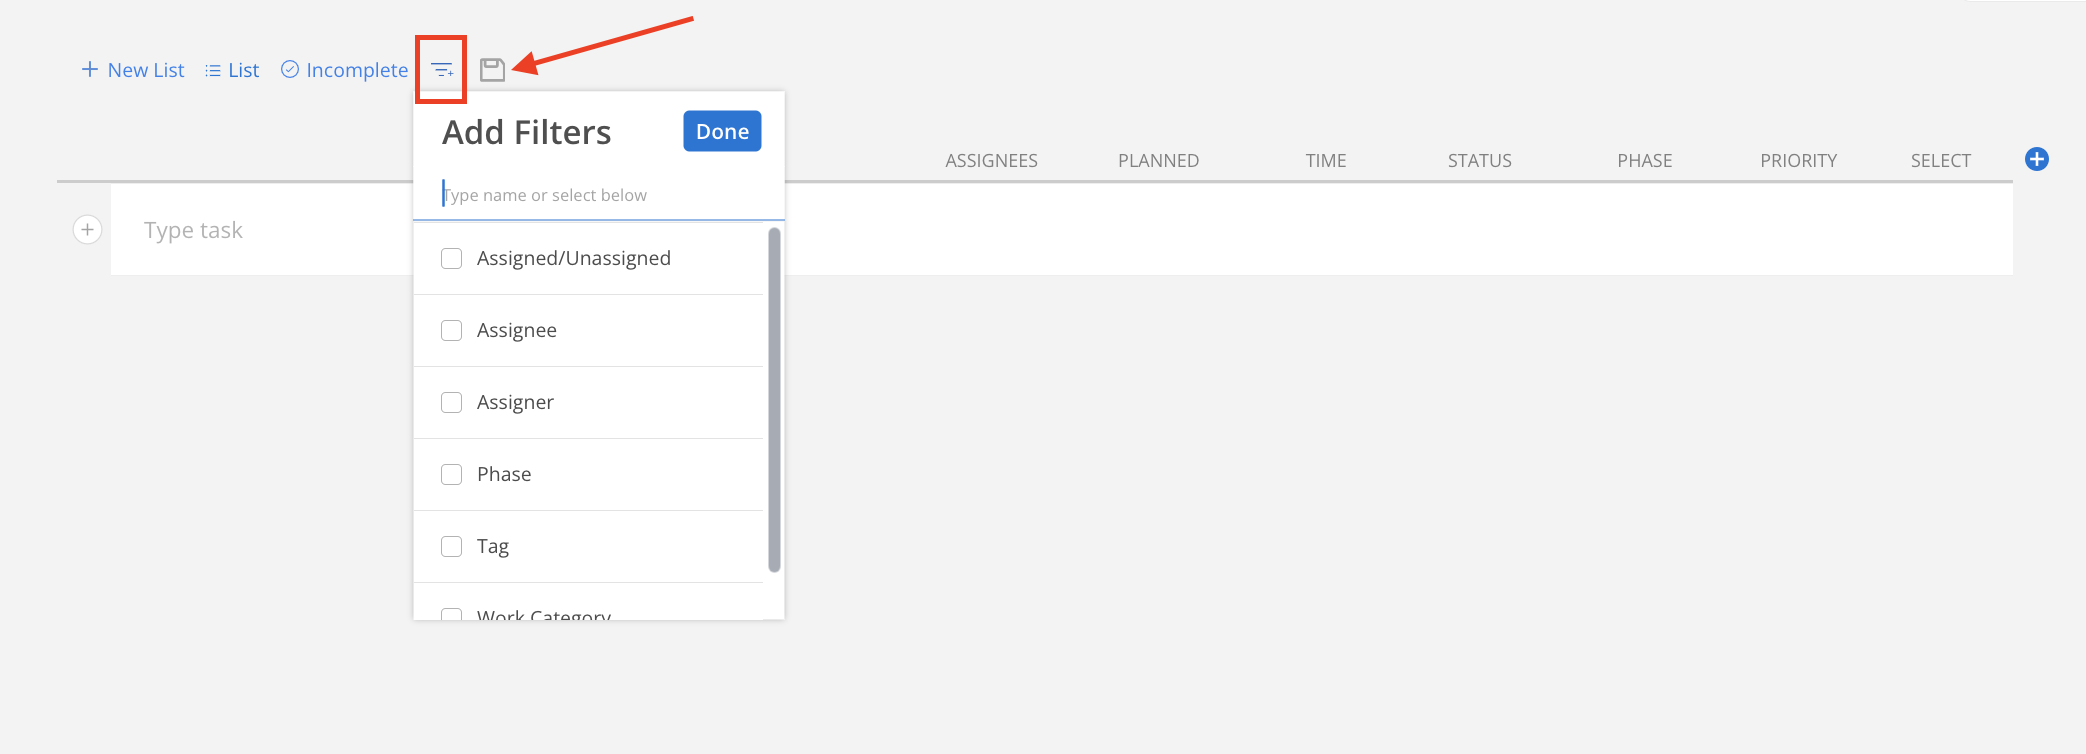
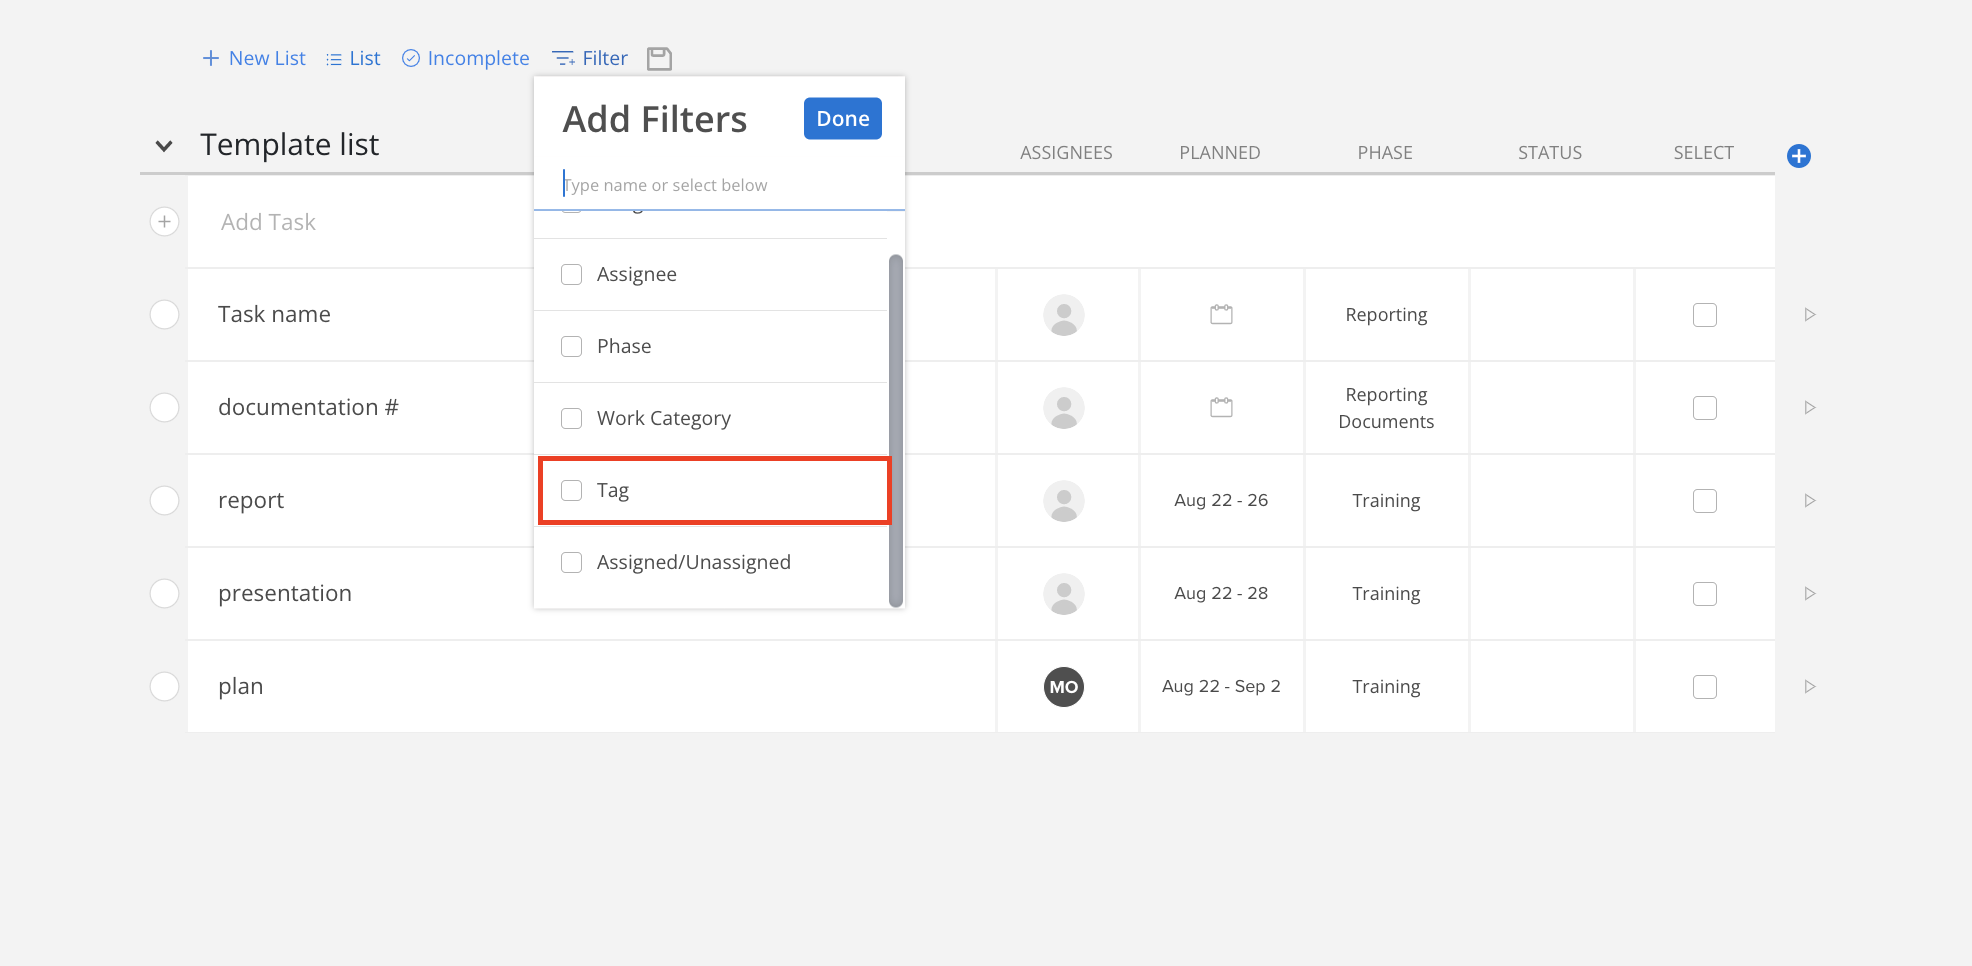
Use the filter on the top of the Task List to filter tasks by Unassigned Tasks, Assigner, Assignee, Phase, Work Category, Tag, or Status.
Click on the save icon to save the filter.
To create a task, navigate to the Tasks tab on Project. Expand the task list (if any) and click Type task.
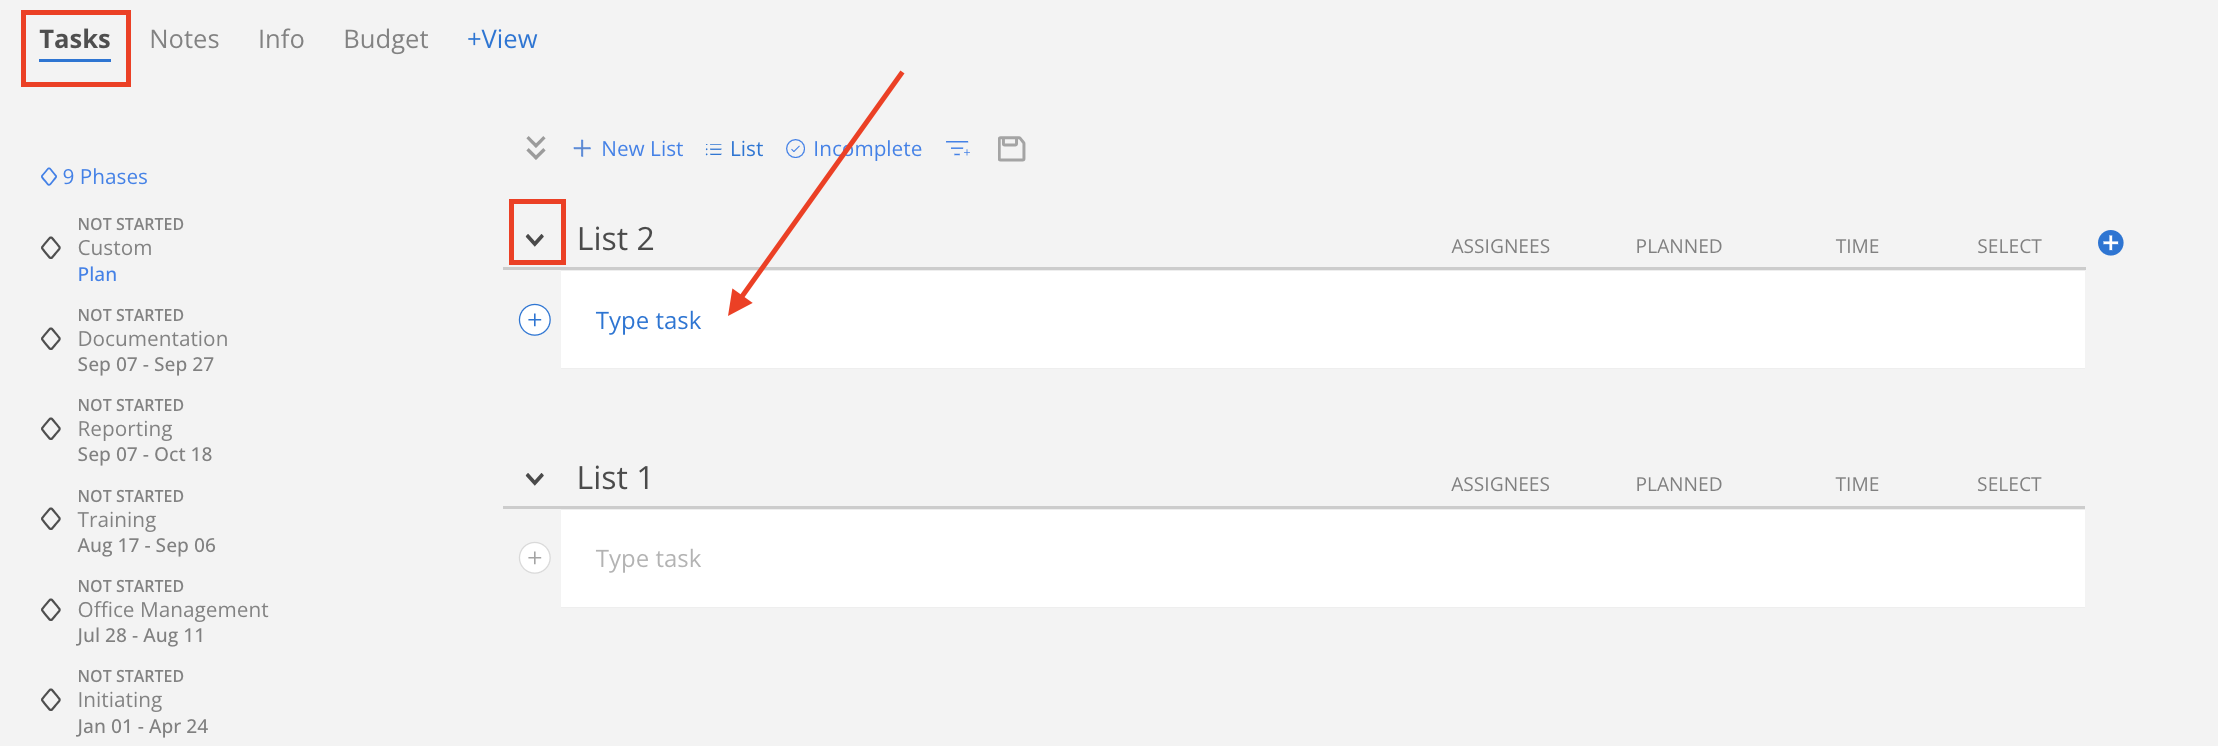
Enter the Task name.

Press enter to create the Task

Tasks created on the My Tasks page will be assigned to the current Member by default. You can leave a Task unassigned in the Project view or click on the value in the Assignees column.
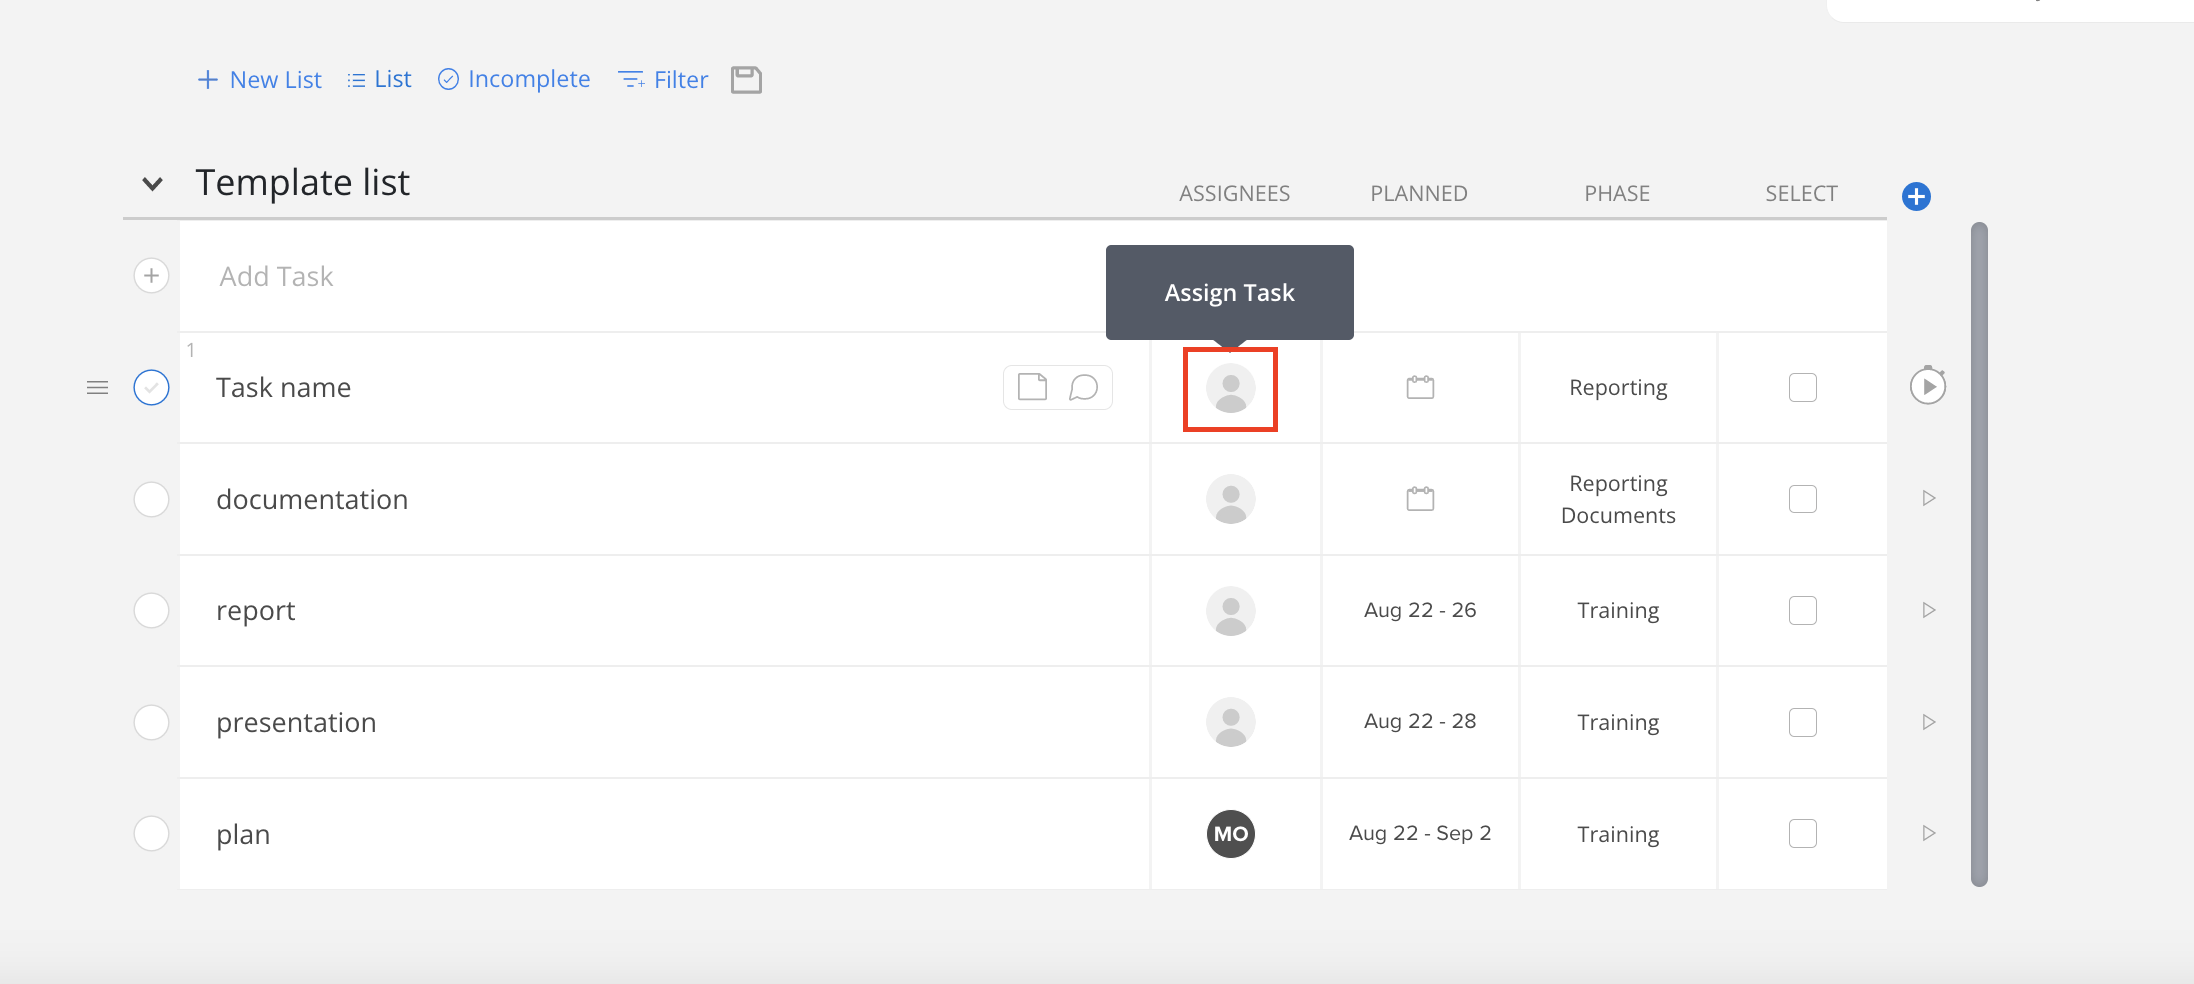
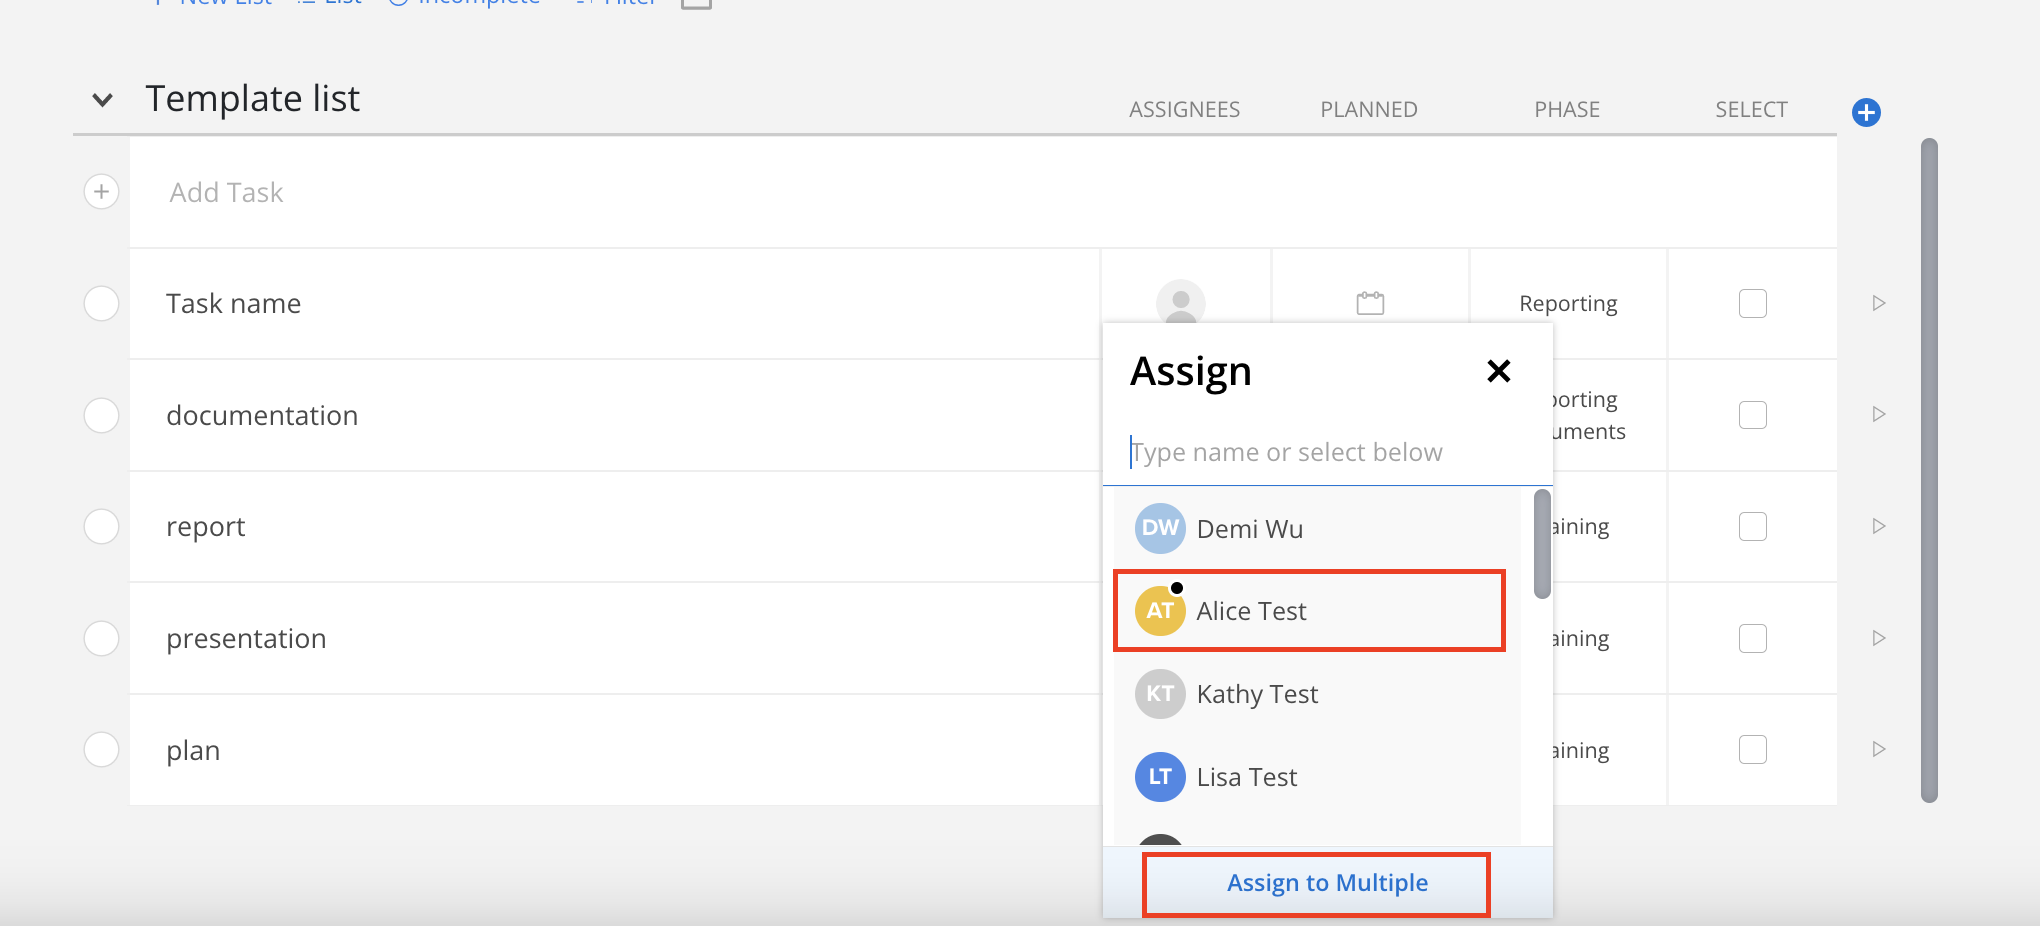
Select a Member to assign to the Task or click the Assign to Multiple button to select multiple Members.
Plan the Task by clicking on the value in the Planned column.

Select a single date on the calendar or set a date range by clicking the More Options button.
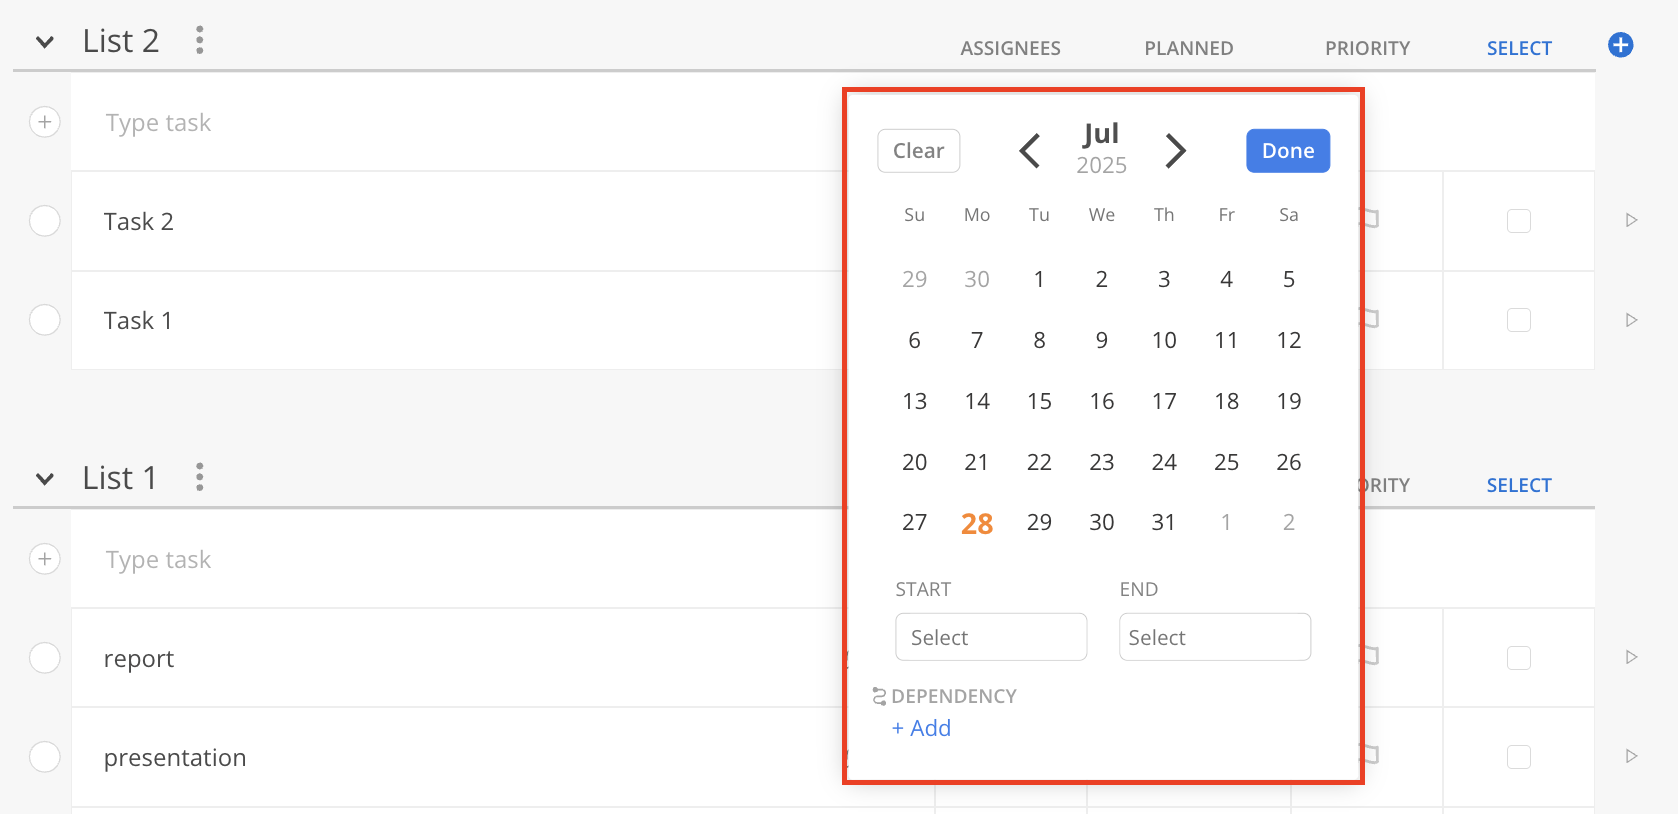
You can also plan your tasks depending on the date of another Task or Phase/Milestone.
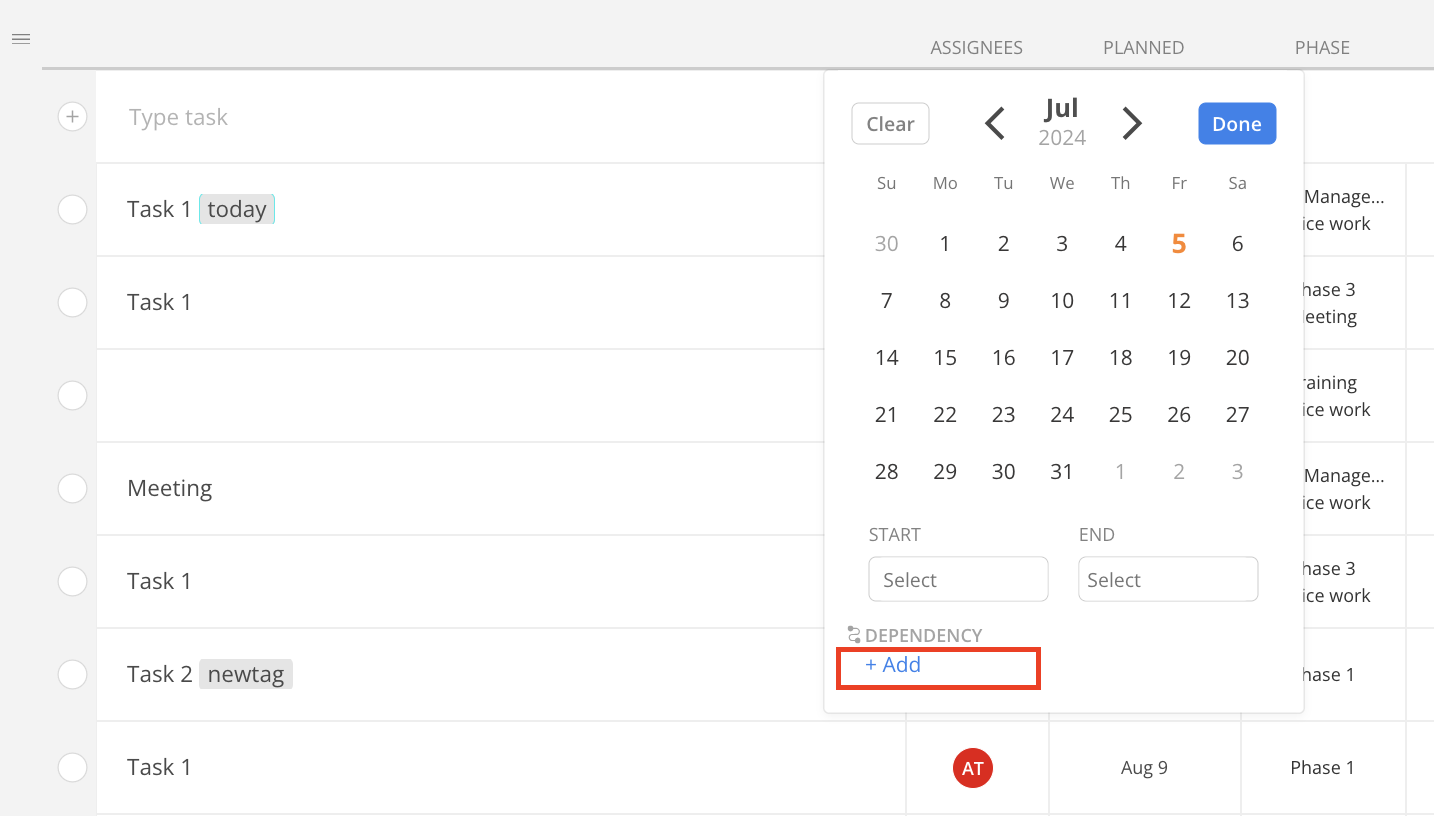
Click Select Start/End to select if you want to set Start date, End date or Start & End date dependency.
Then select what kind of dependency you want to set. Matching date, Waiting for the date, or Blocking the date.
Matching: The date of this Task will align with the date of the dependent item.
Waiting: The date of this task is pending the date of the dependent item and will occur afterward.
Blocking: The date of this task is a prerequisite for the date of the dependent item and will occur beforehand.
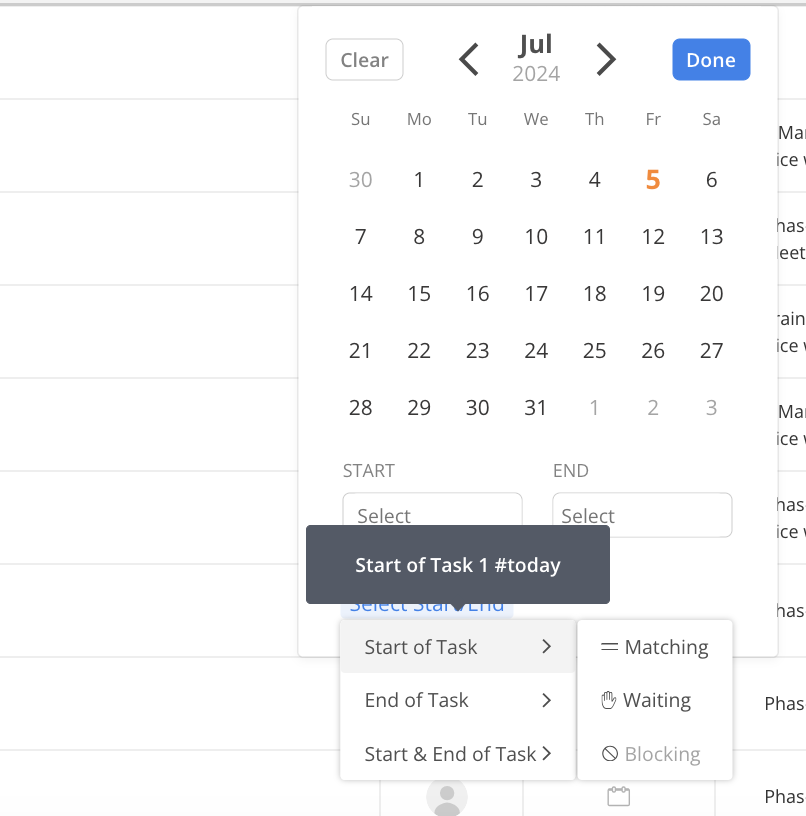
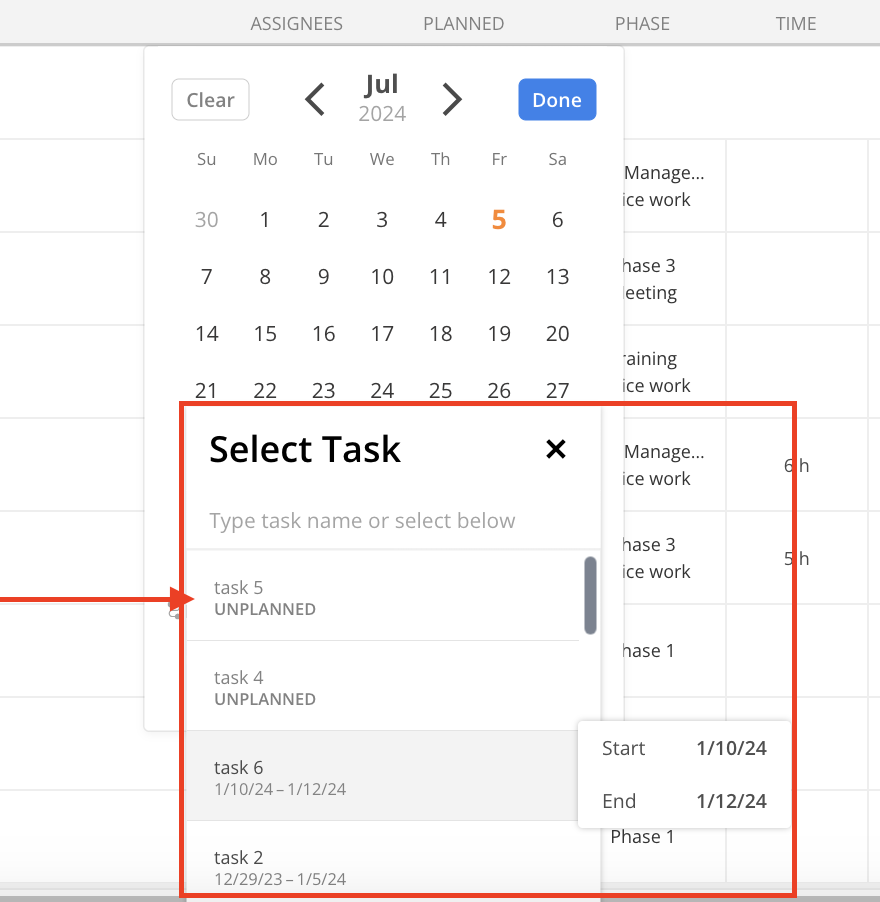
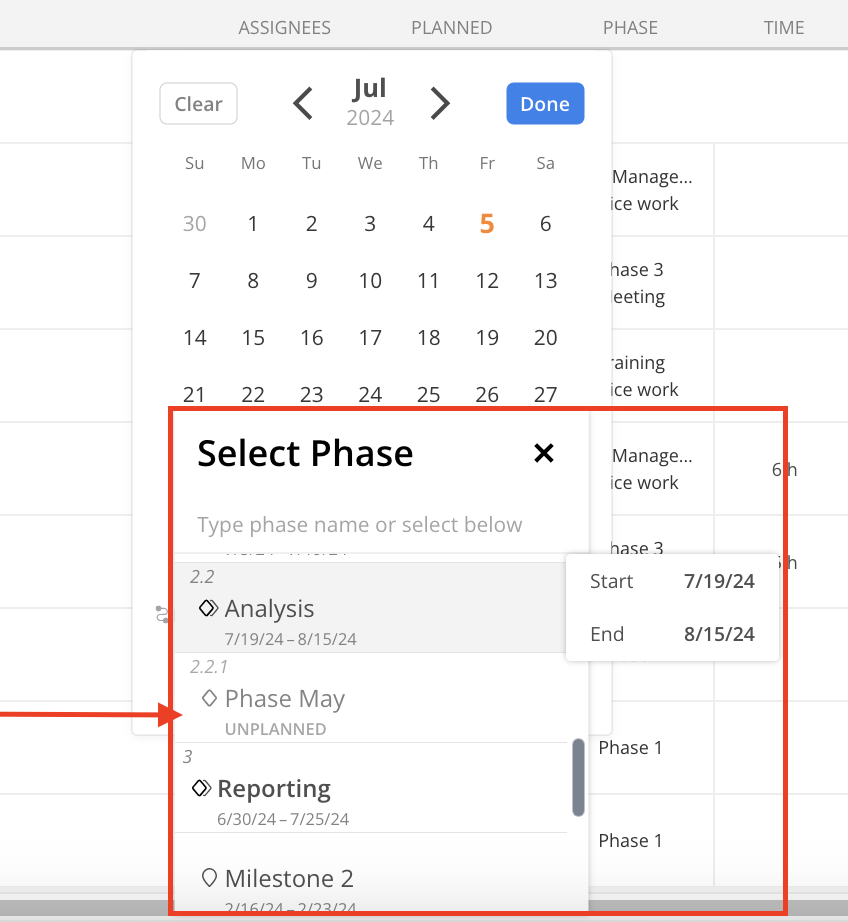
Select the dependency item type, it can be another Task or Phase/Milestone.
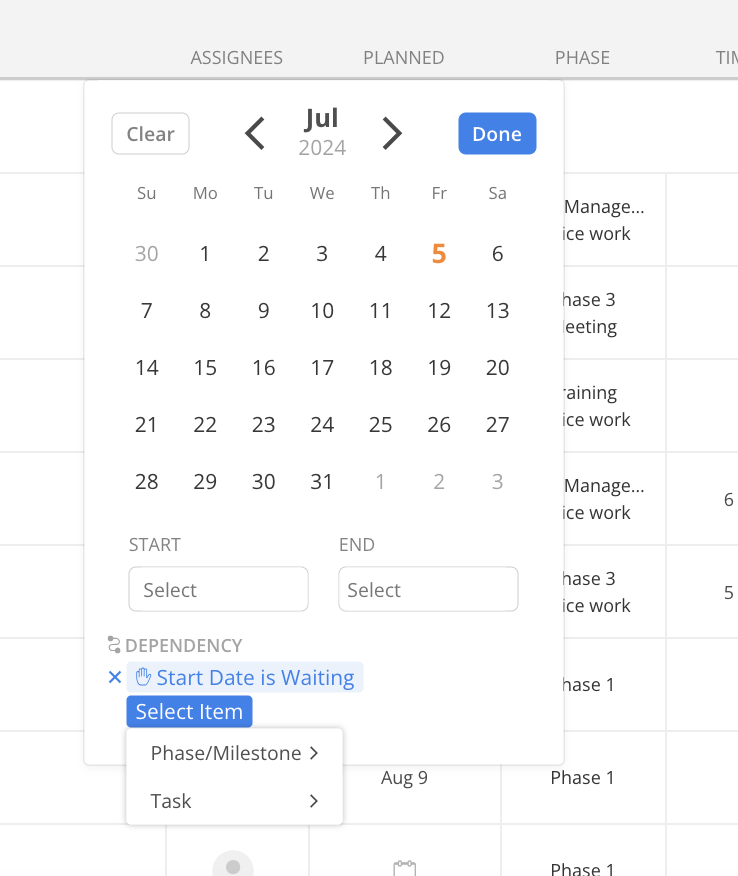
Select the specific Task or Phase/Milestone and the start or end date, or start and end date. The Task or Phase/Milestone that has no date will not be selectable.
Some tasks depend on others due to their sequential nature, where the completion of one task is necessary before another can start. This dependency ensures logical workflow progression, prevents resource conflicts, and maintains project timelines.
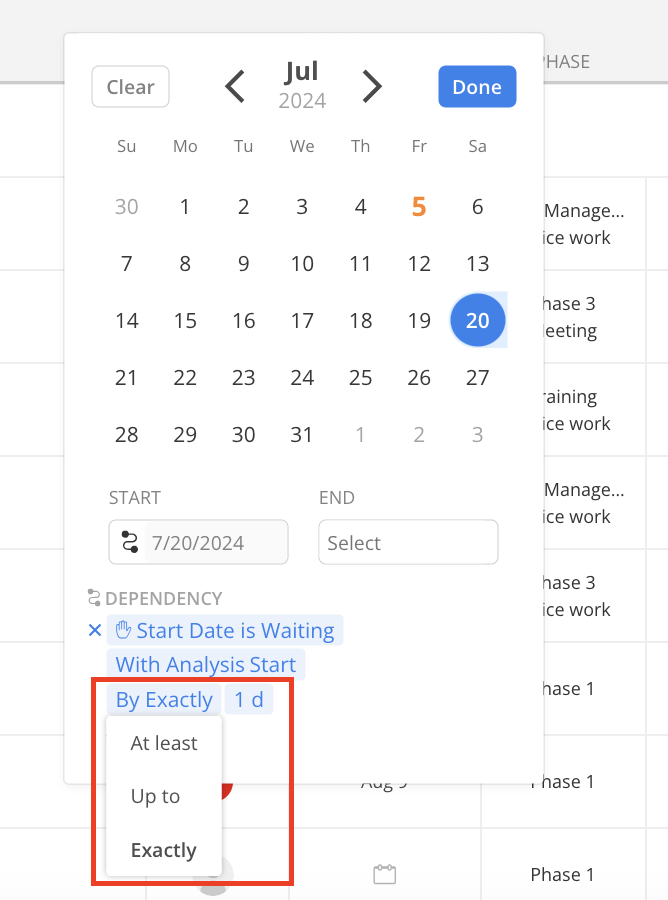
You can also specify how many days if the Task date is in waiting or blocking dependency type.
Exactly: The planned date will always be exactly X days after the selected dependent date.
If the task is set to wait exactly 5 days from July 1st, the planned date will be July 6th.
At least: The planned date is flexible but will be at least X days after the selected dependent date.
If the task is set to wait at least 5 days from July 1st, the planned date can be any date on or after July 6th.
Up to: The planned date is flexible but will be no more than X days after the selected dependent date.
If the task is set to wait up to 5 days from July 1st, the planned date can be any date from July 2nd to July 6th, inclusive.
On the Project Tasks page, the following properties can be configured for each task:
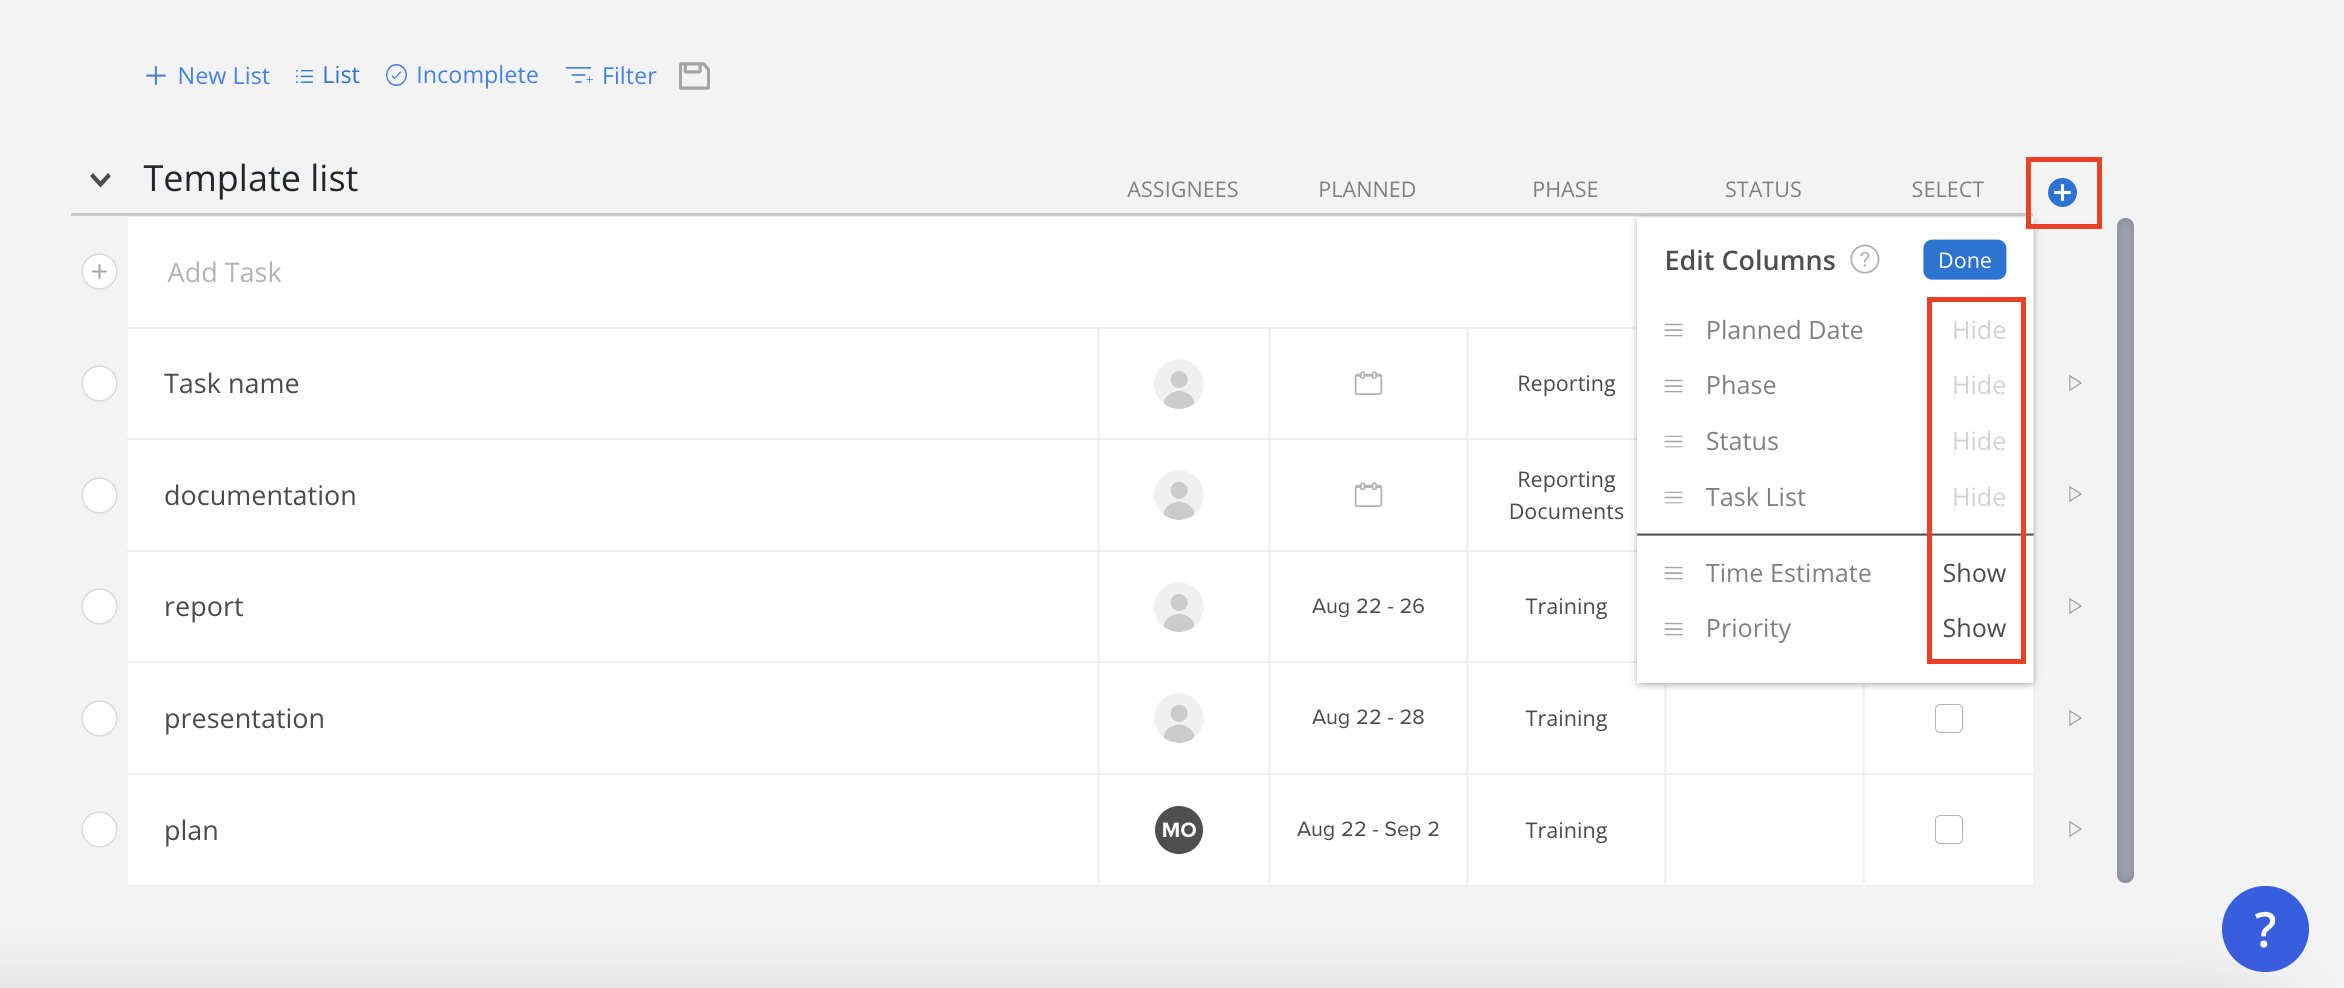
Phase: Assign the Task to a specific Phase/Subphase and/or Work Category of the Project.
Status: Indicate the current progress, such as Not Started, In Progress, or Approved, etc.
Time Estimate: Set the expected time required to complete the Task.
Priority: Determine the Task's urgency and importance within the Project.

If these columns are not visible, click on the plus icon at the top right of the list of Tasks and select the columns to be displayed.
Similar to Project Stages and Status, you can Add or Edit Task Status
The default options are:
Not Started
In Progress
Needs Review
Approved
Issue
No Status

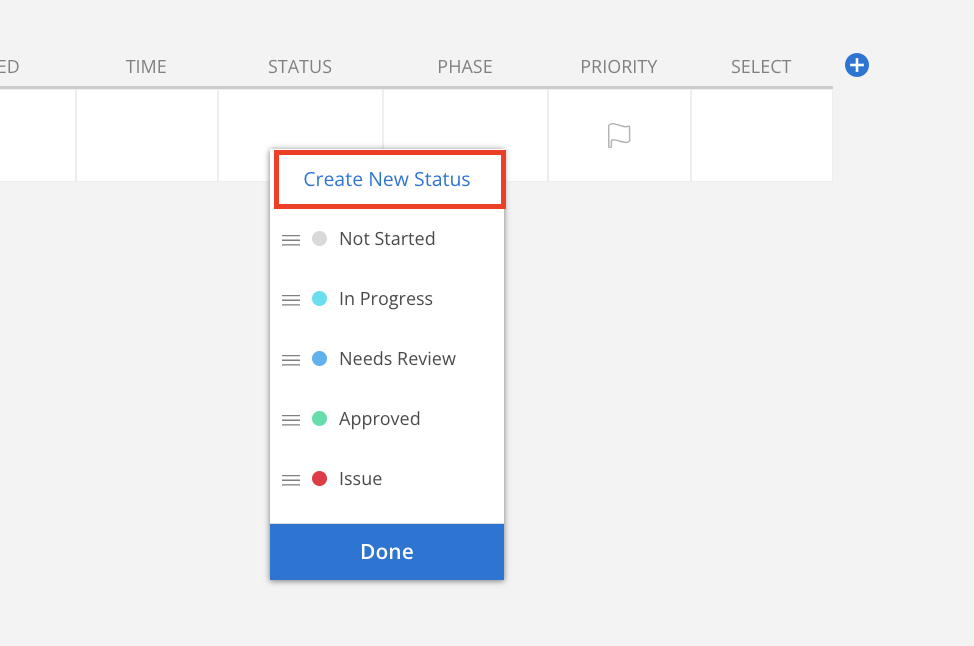
Click the Status cell on a Task. Click Add/Edit Status

Click Create New Status.
You can also click the existing status to edit the name and change the color.
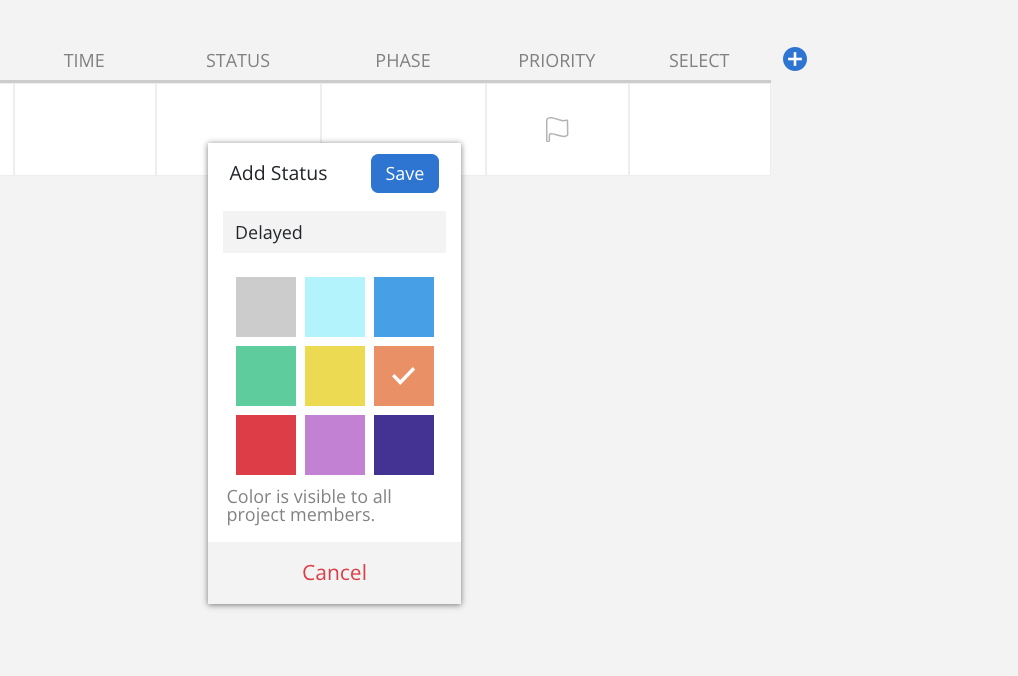
Enter the status name and select a color. Click Save button.
Click cancel to exit if you change your mind.
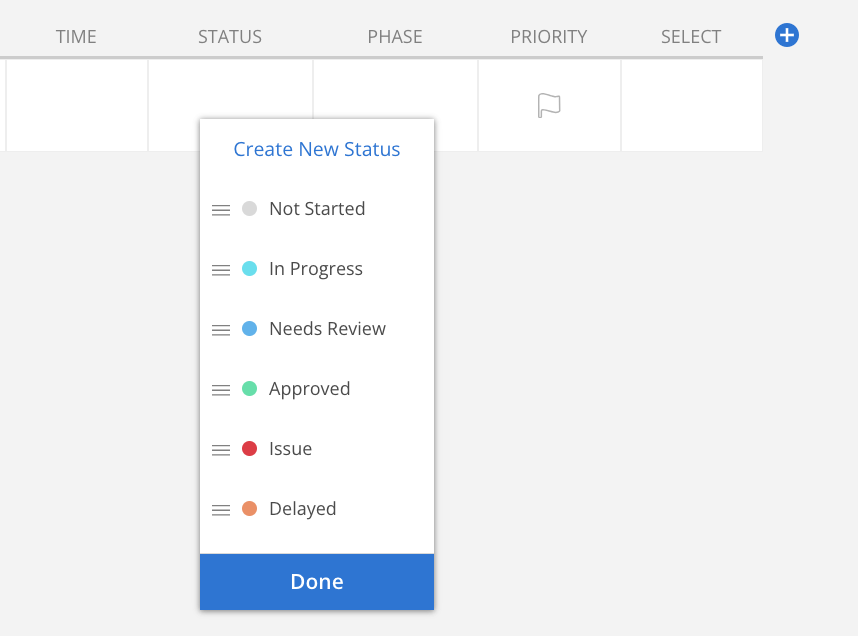
The New Status will show on the list. Statuses can be dragged and reordered, allowing Tasks to be sorted accordingly.
Click Done when you have completed your changes.
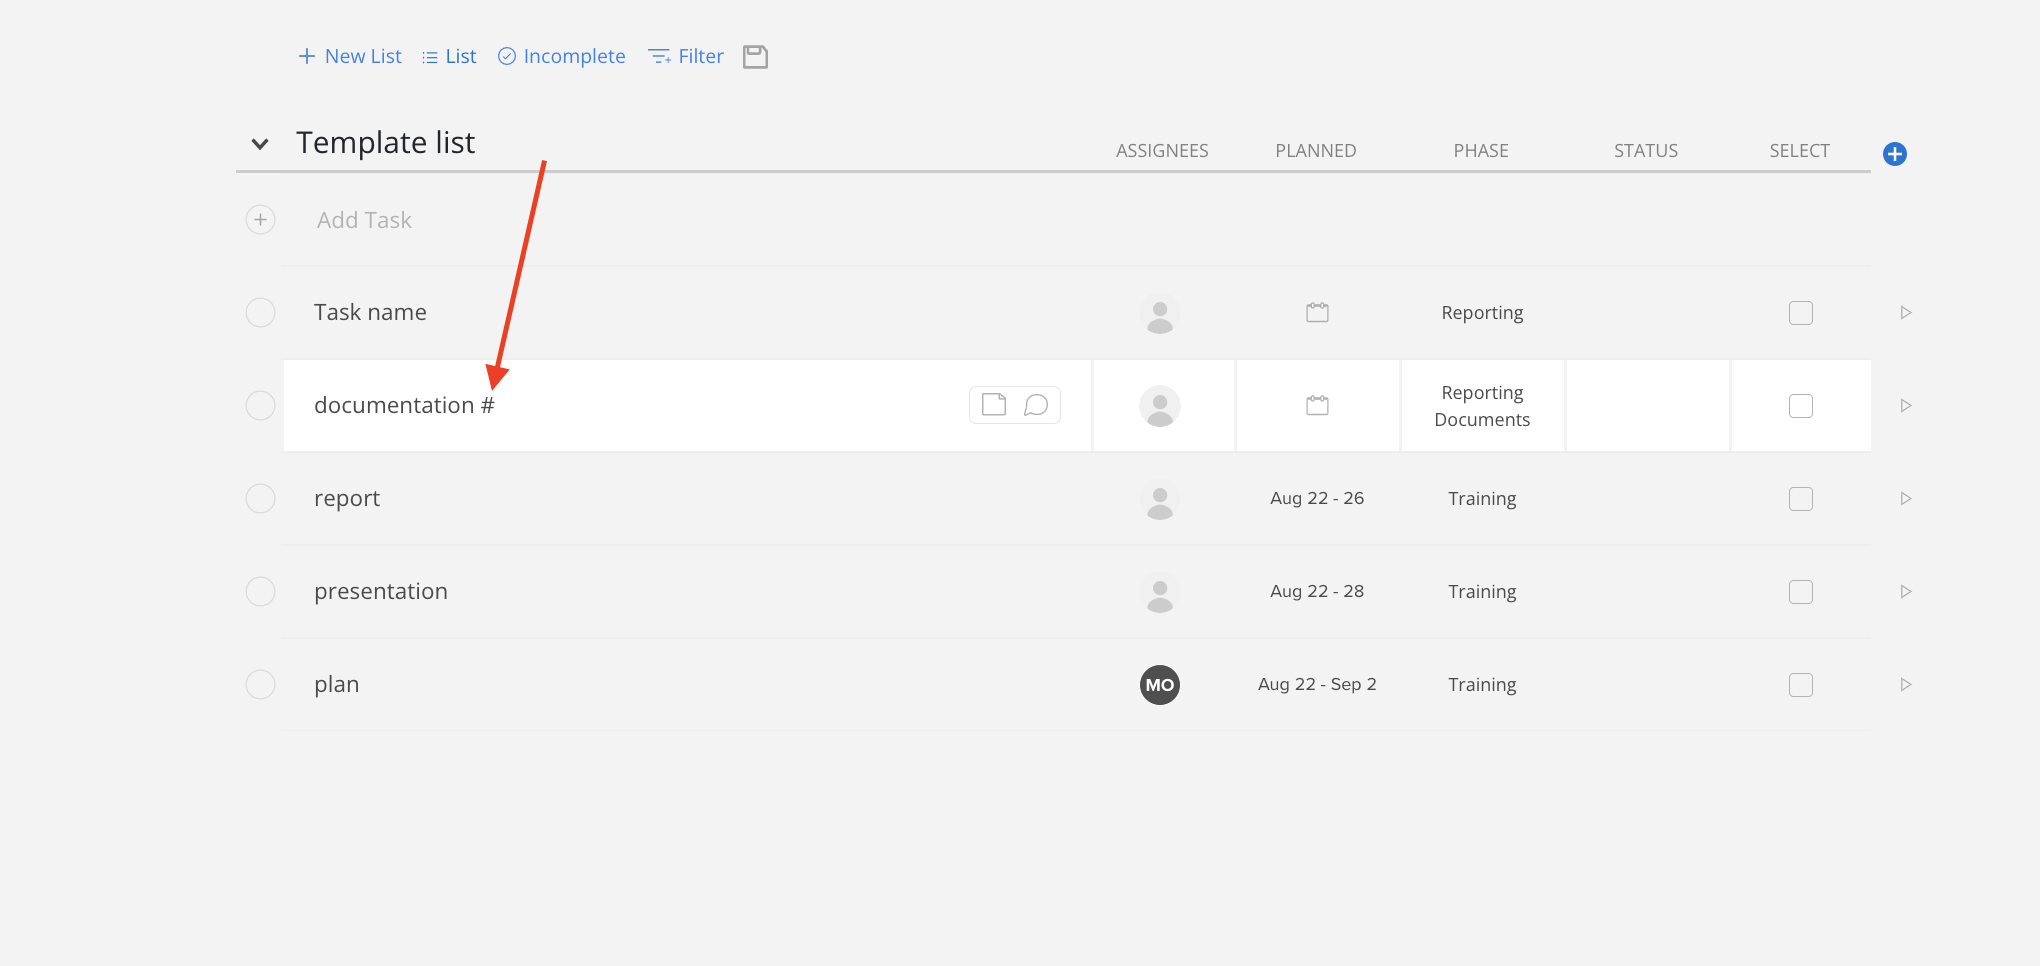
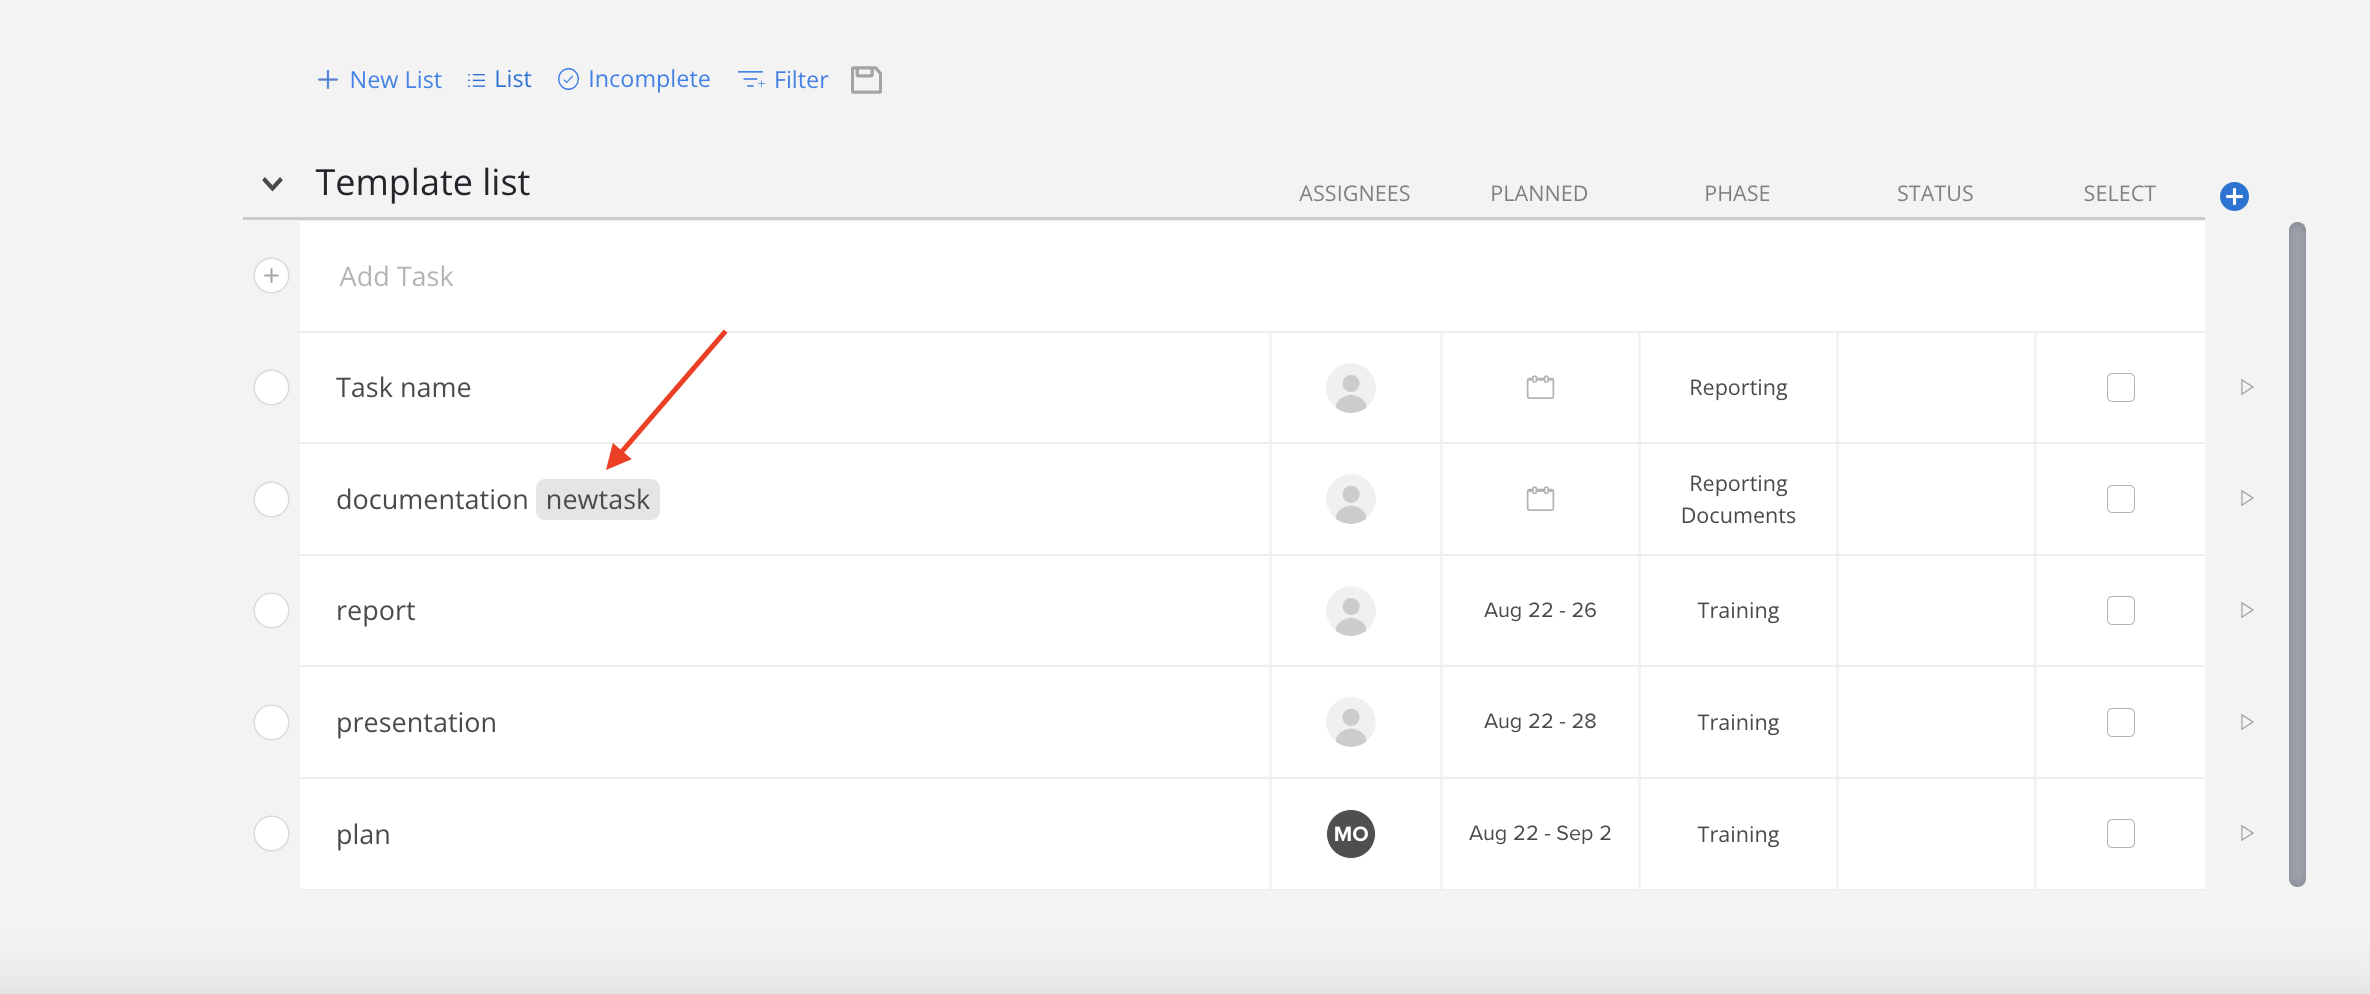
In the Task title, add a pound symbol (#) followed by a keyword to create a Tag.
Click on Filter above the Tasks list and select Tag to filter Tasks by Tags.
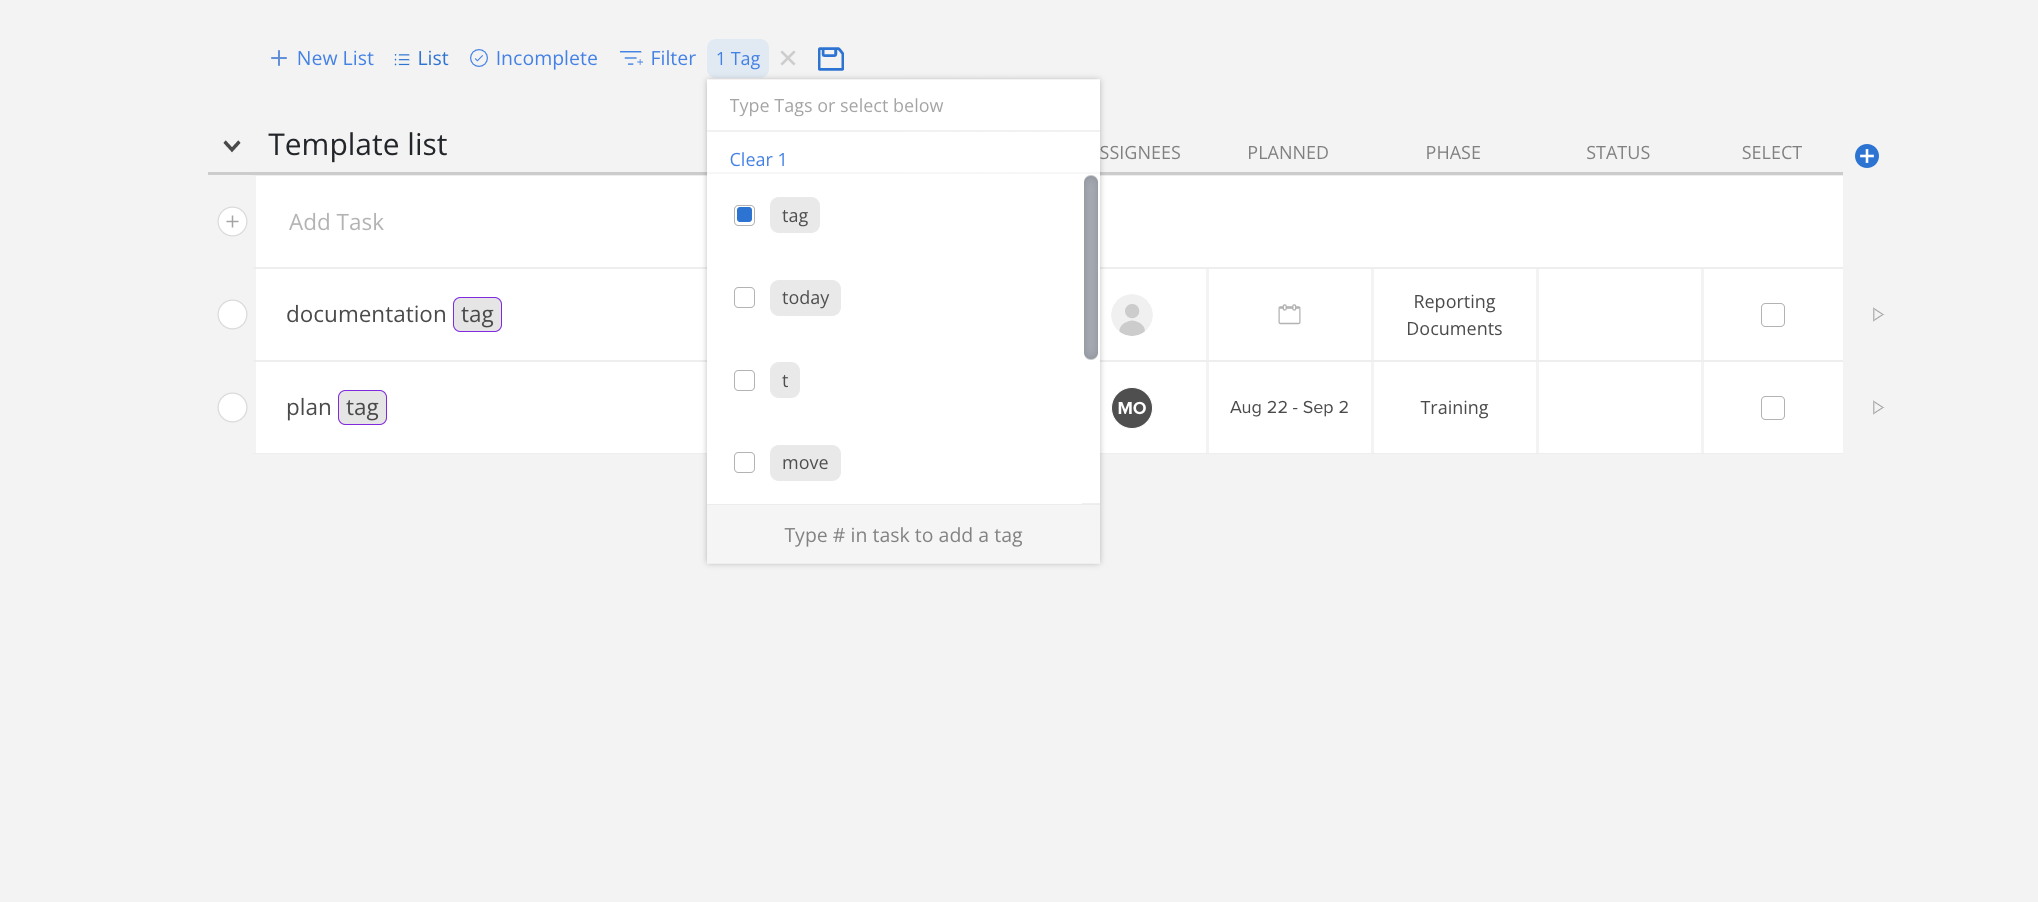
Click the Tag filter to select the Tags for which Tasks must be shown.
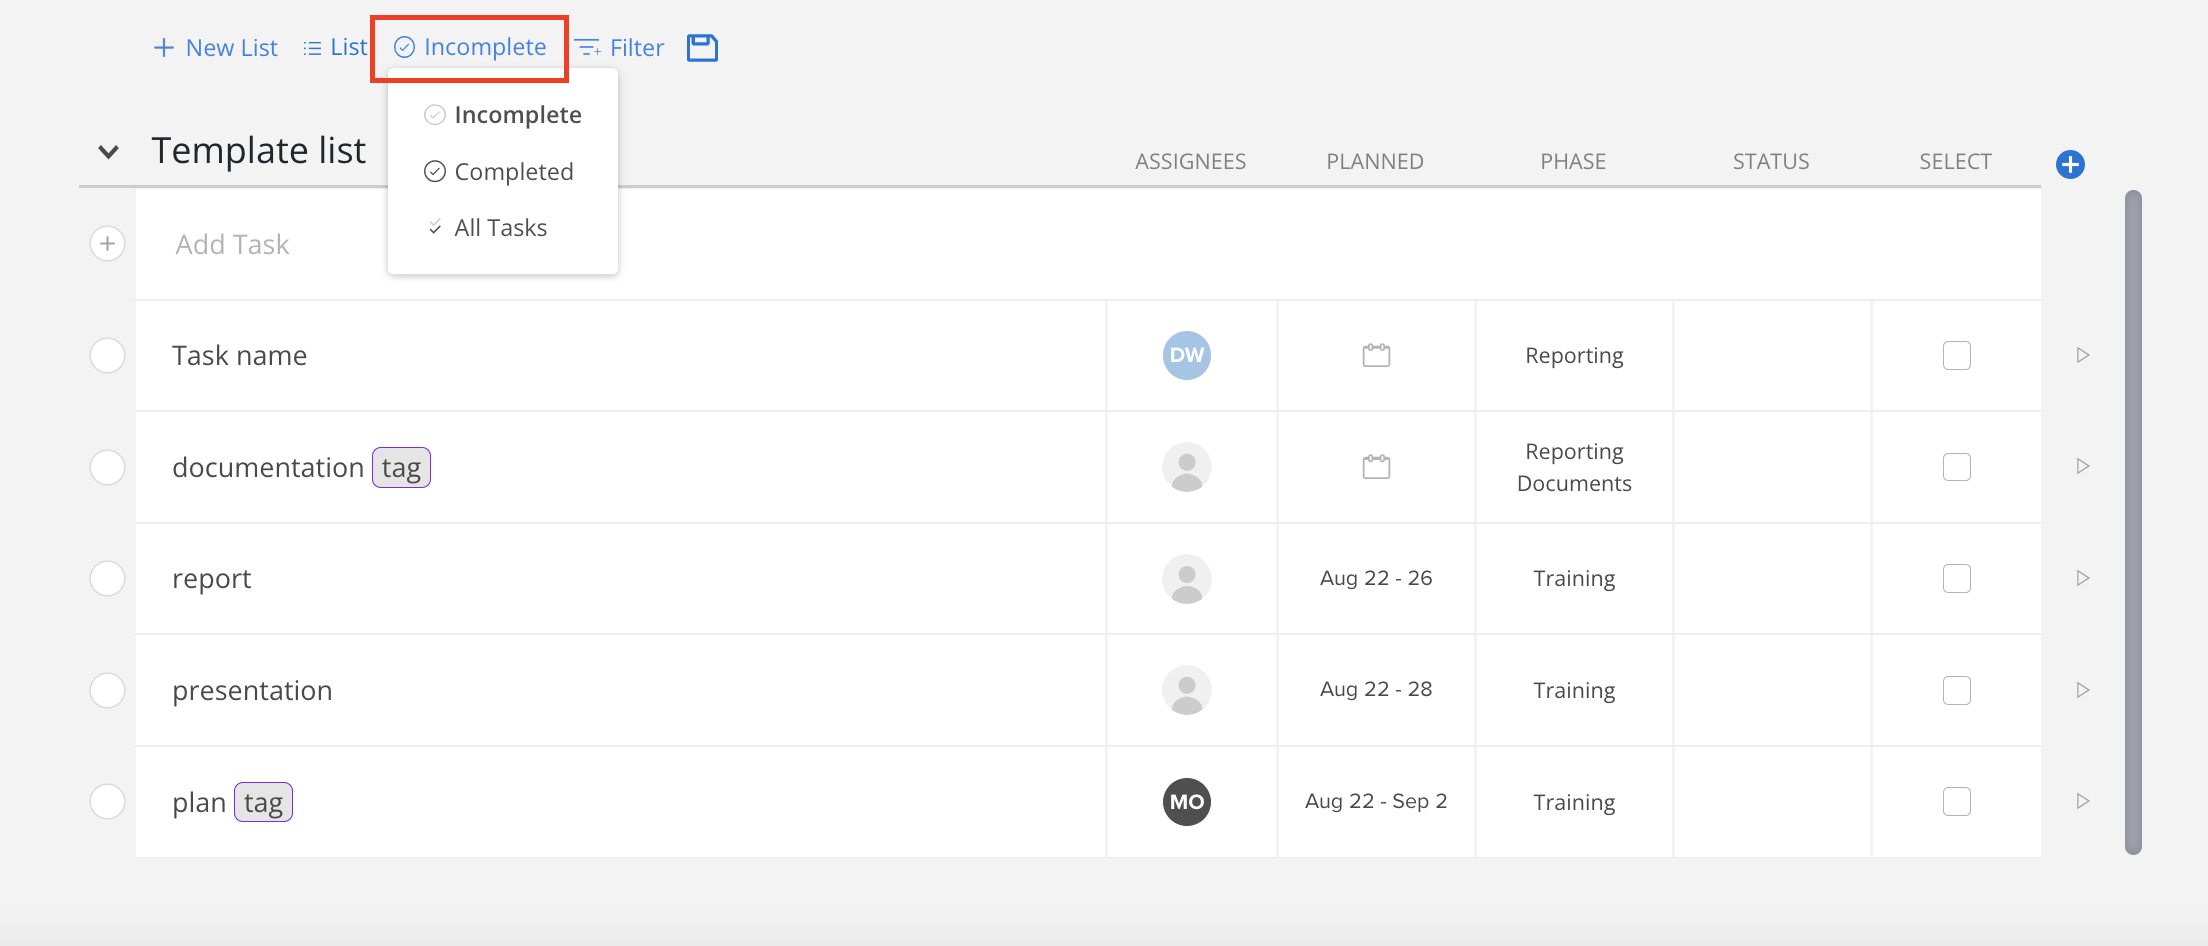
Choose between viewing incomplete Tasks, completed Tasks, or all Tasks.
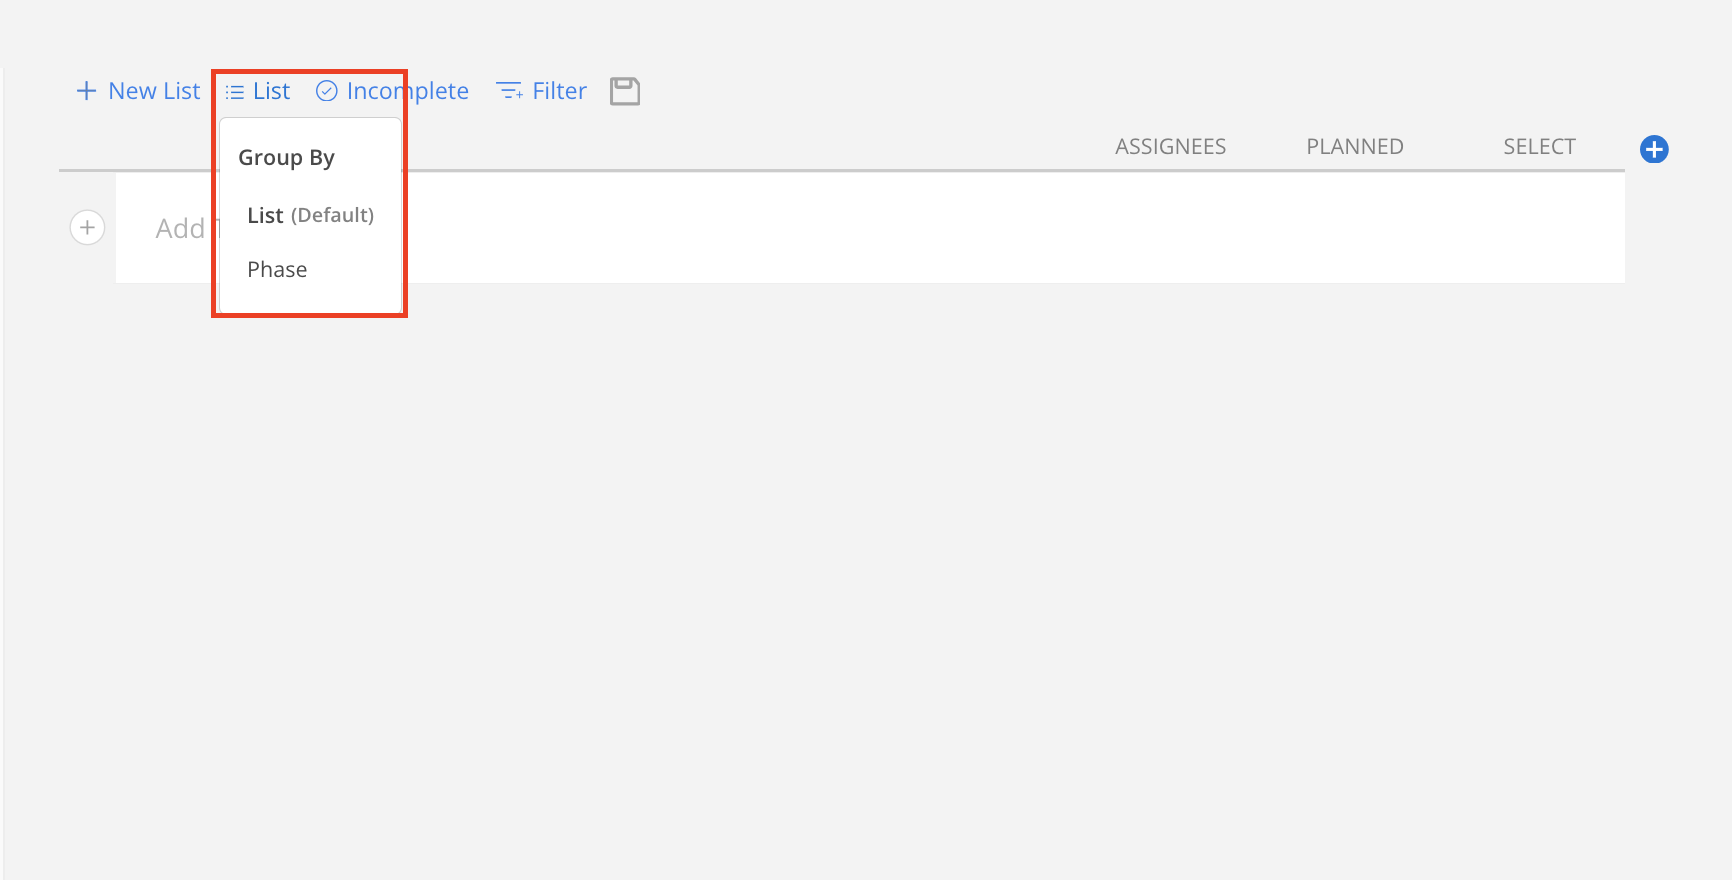
Group Project tasks by Task List or by Phase.
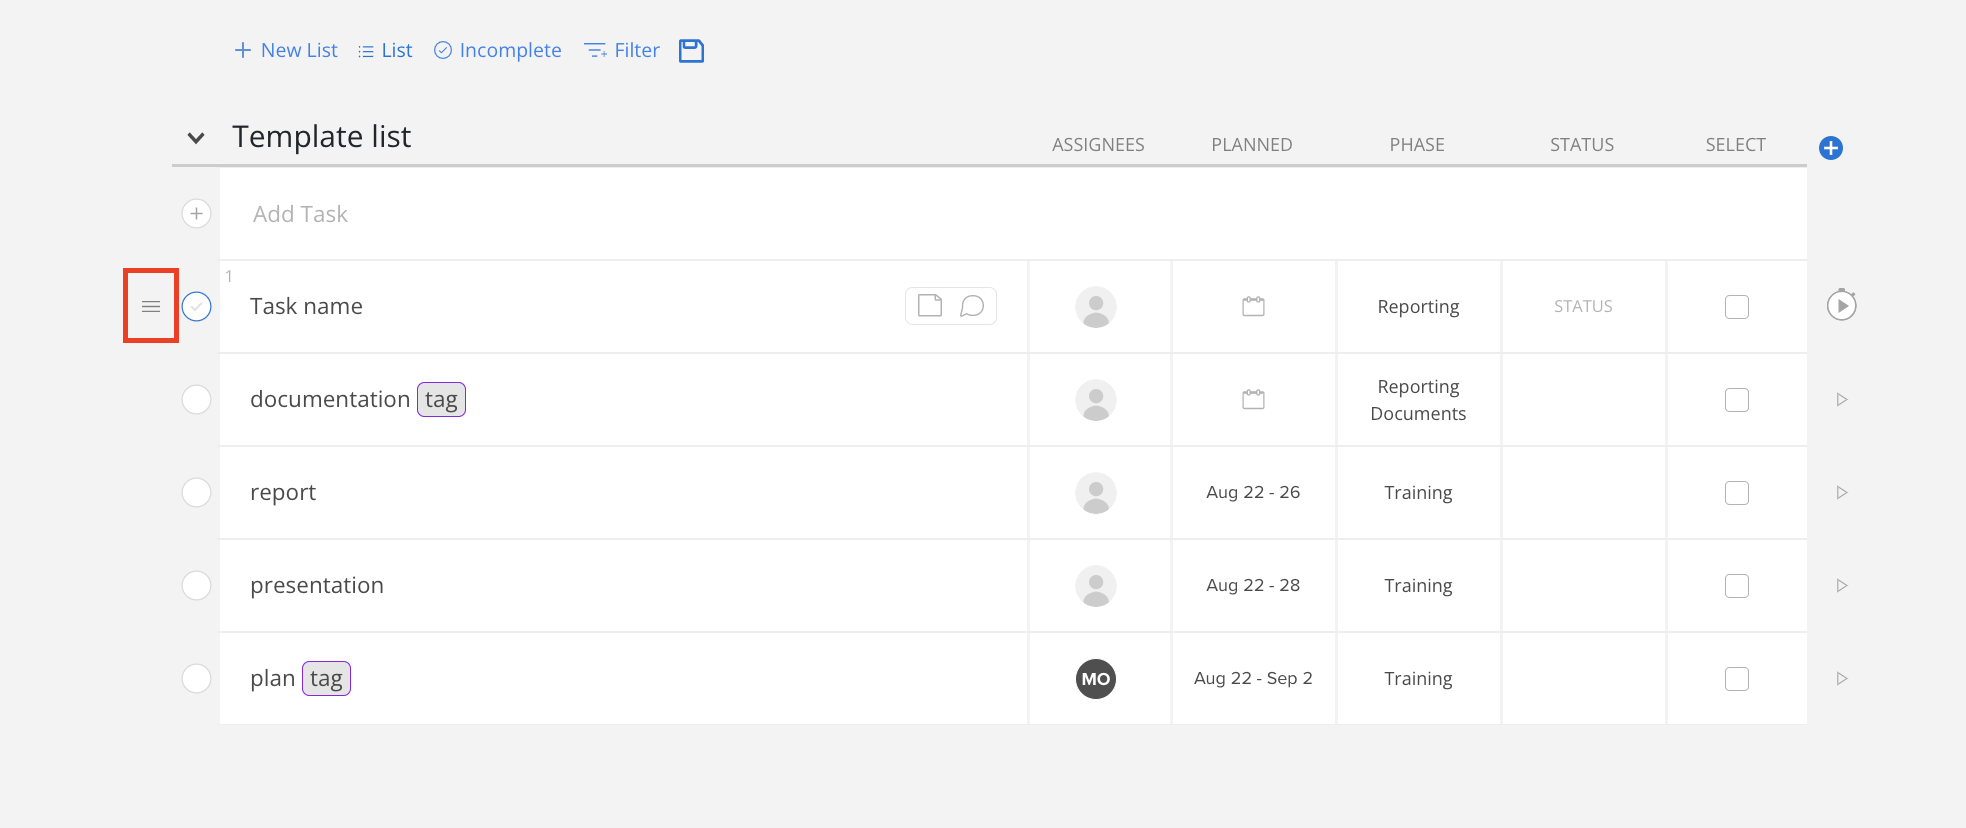
Hover on the Task. Drag and drop the three-line icon to the left of the Task to move it to a different position within the same list or to a different list.
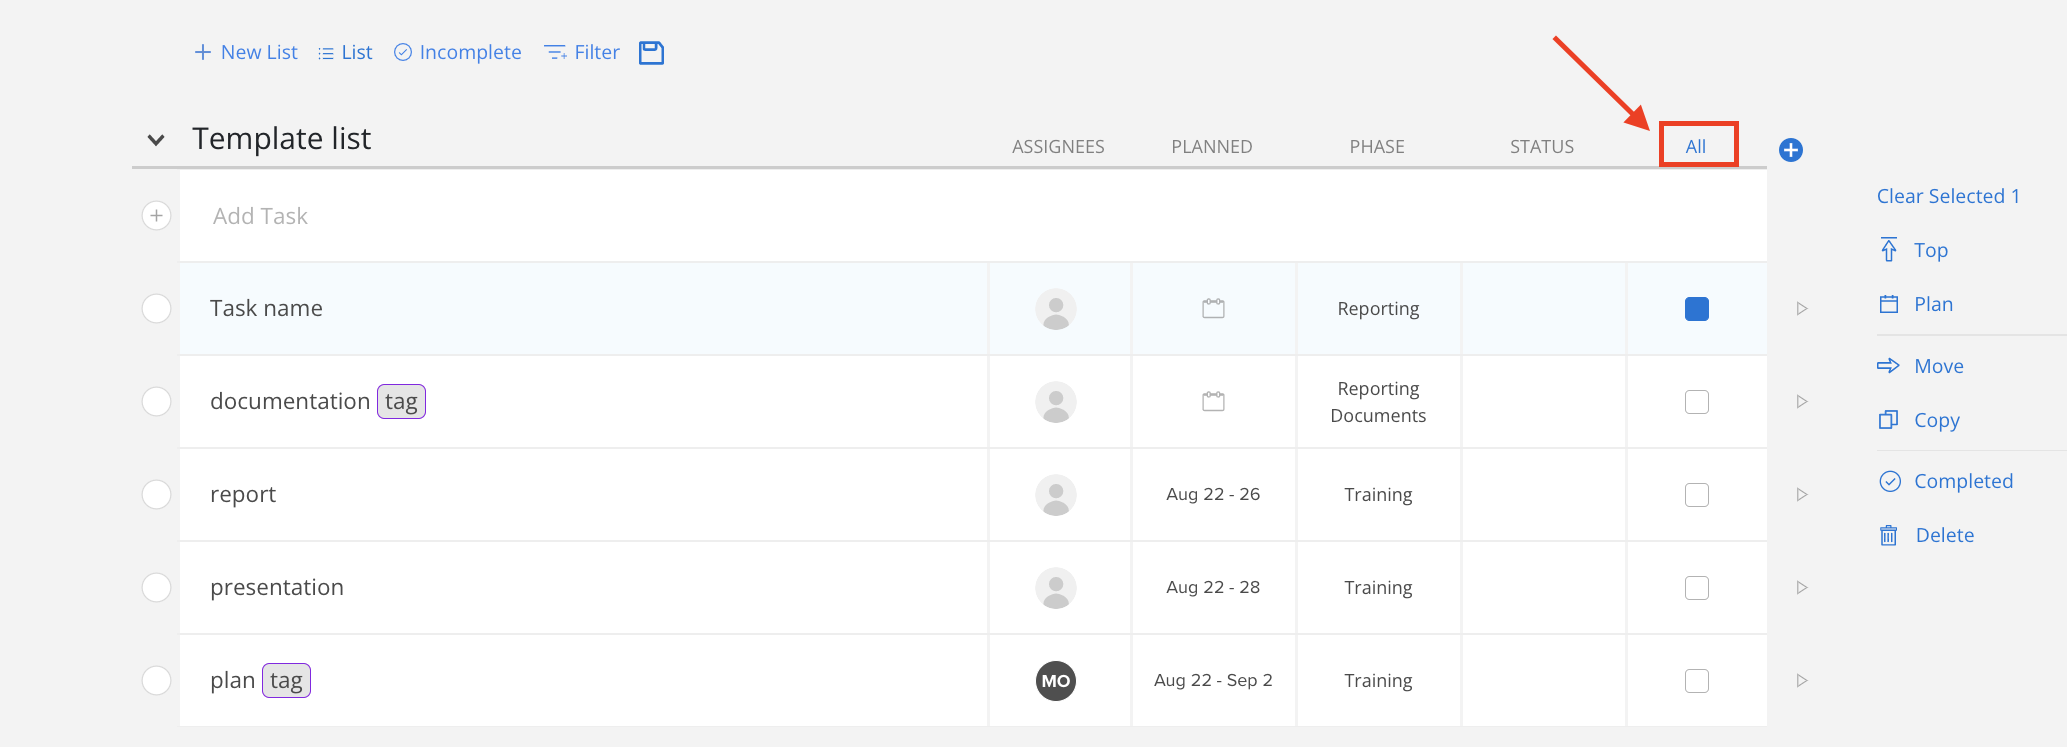
Use the checkboxes on the right side of the list to select Tasks to perform bulk actions, including planning, moving, and copying to another Project. The tasks can also be marked as completed or deleted them from this menu.
When you select one task, an 'All' button will appear, allowing you to click on it to select all tasks simultaneously.
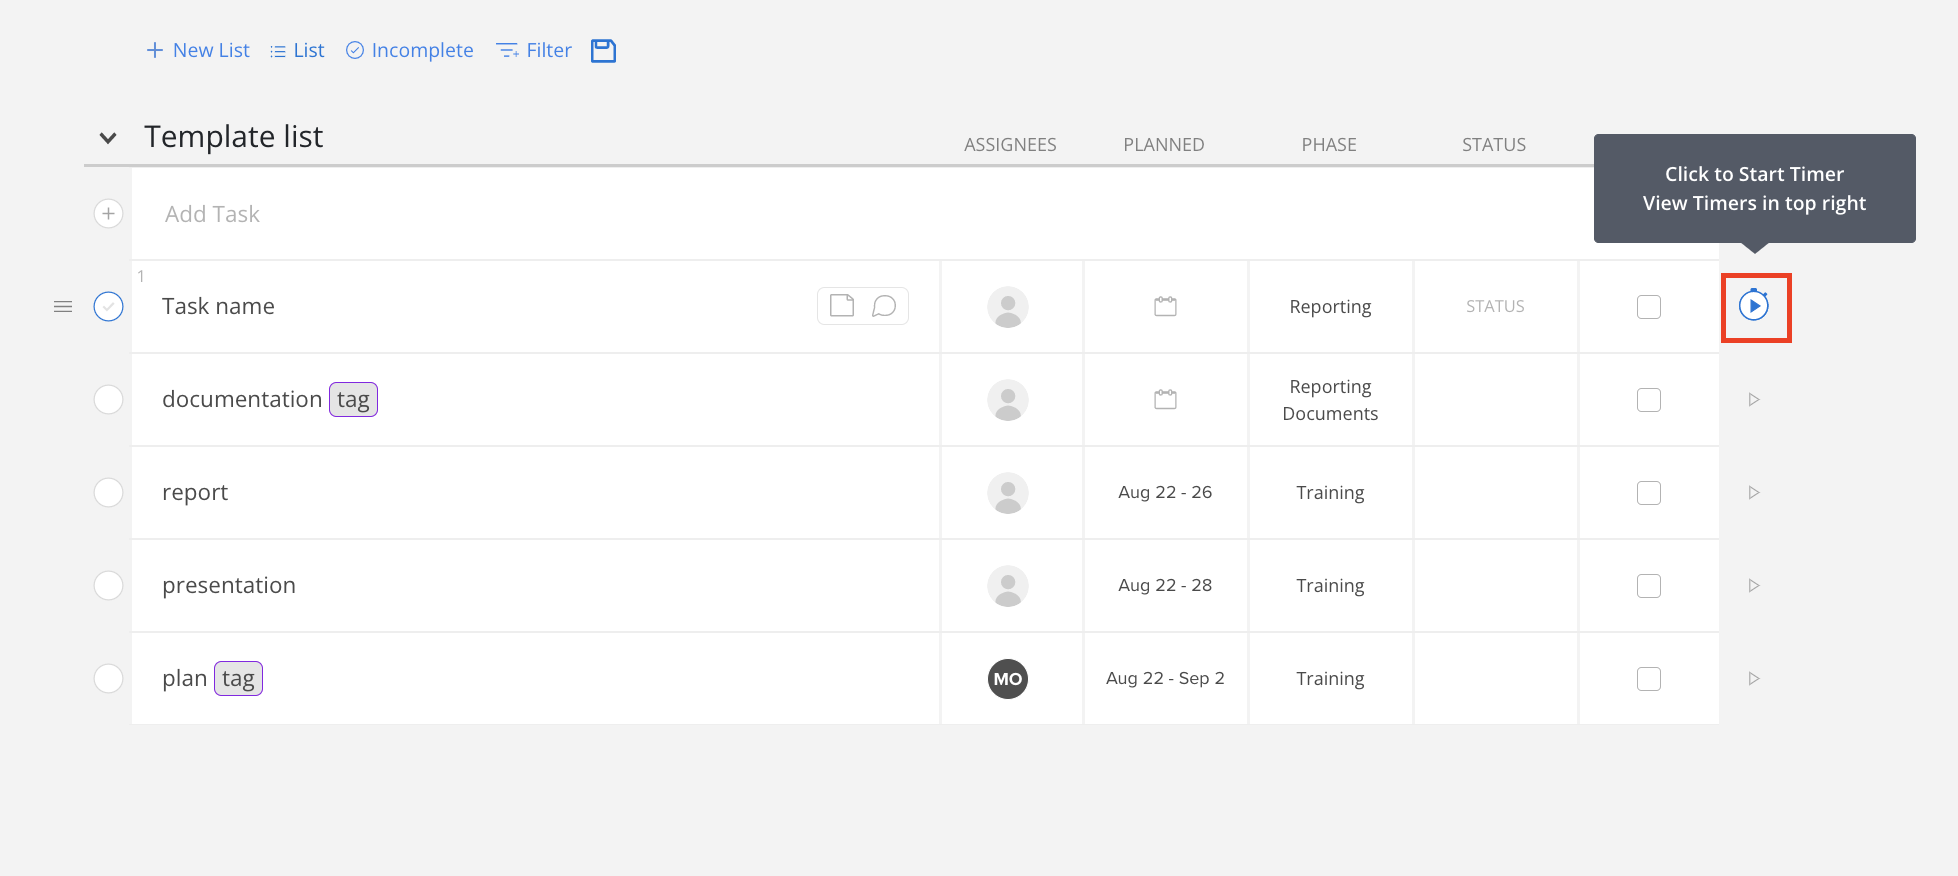
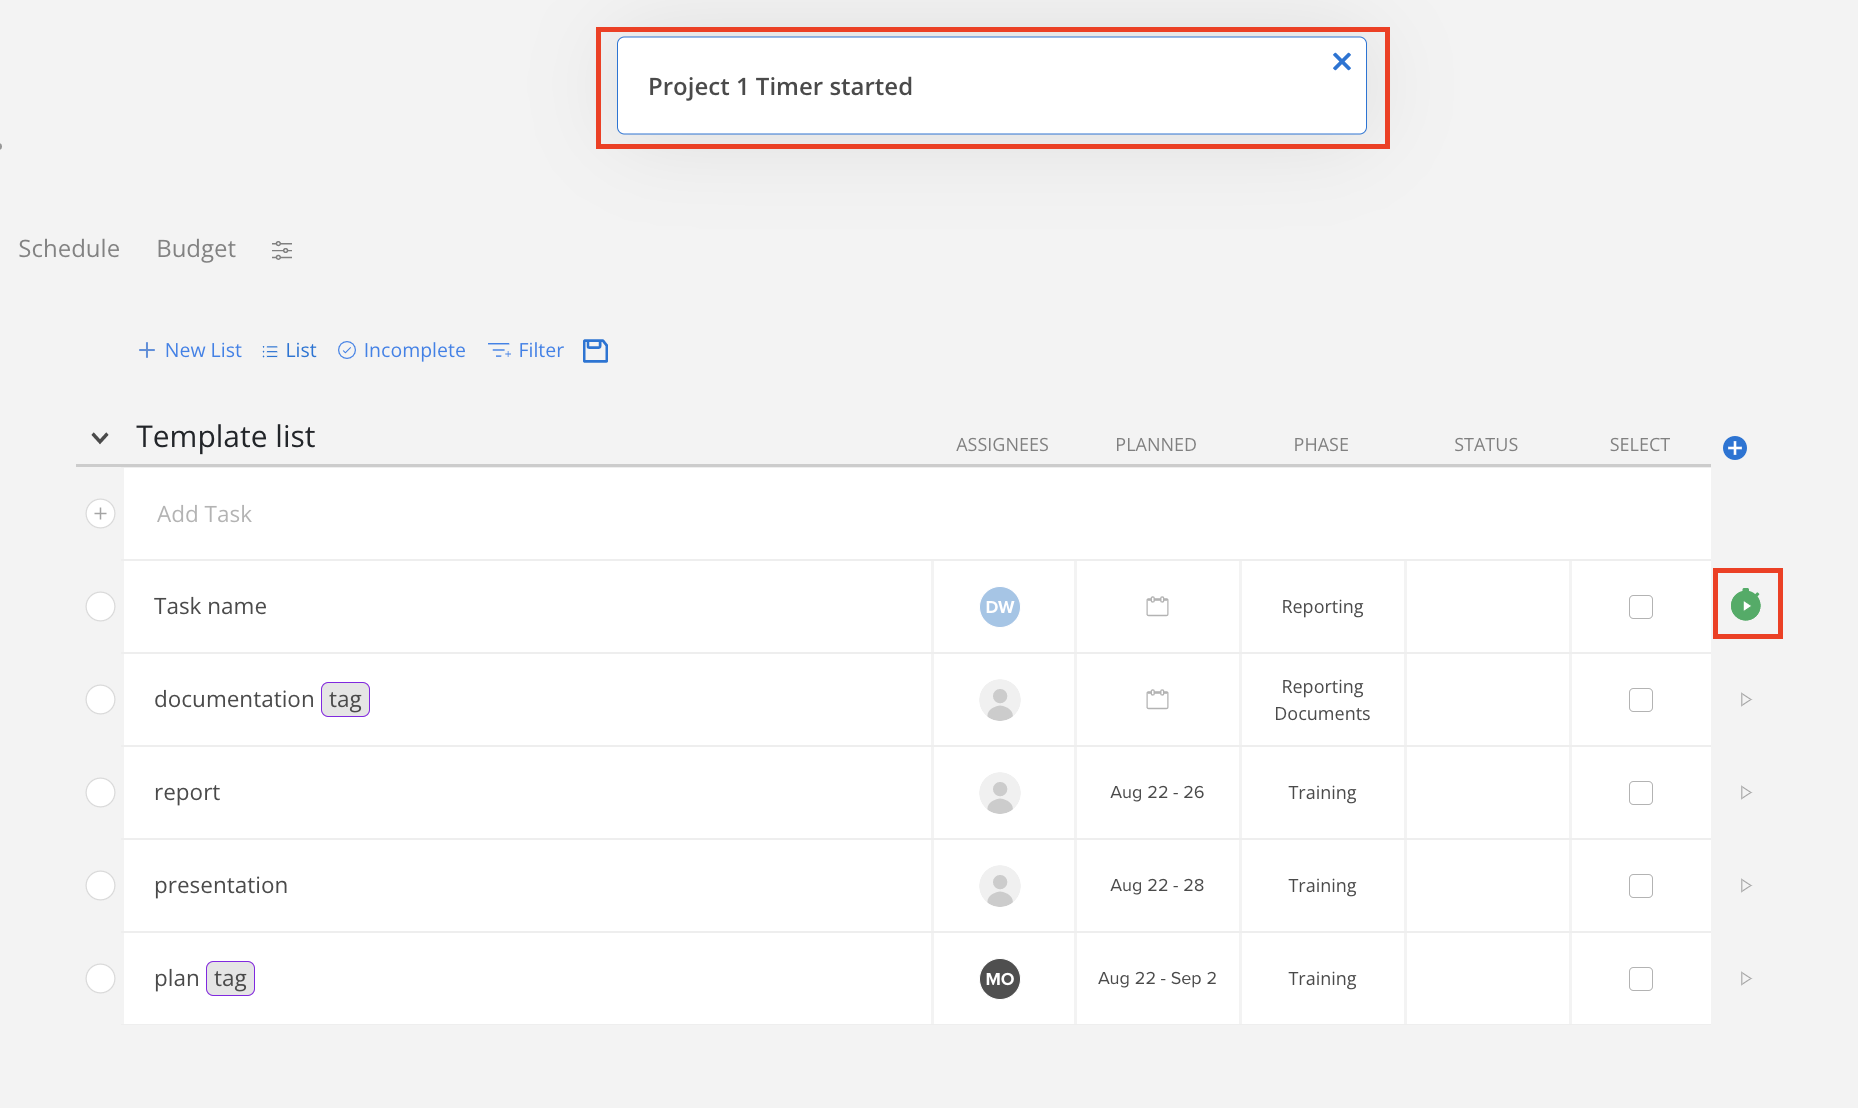
Click the play button to the right of the Task to start a timer.
The timer will turn green, indicating it is running, and a notification will indicate that the timer has started.
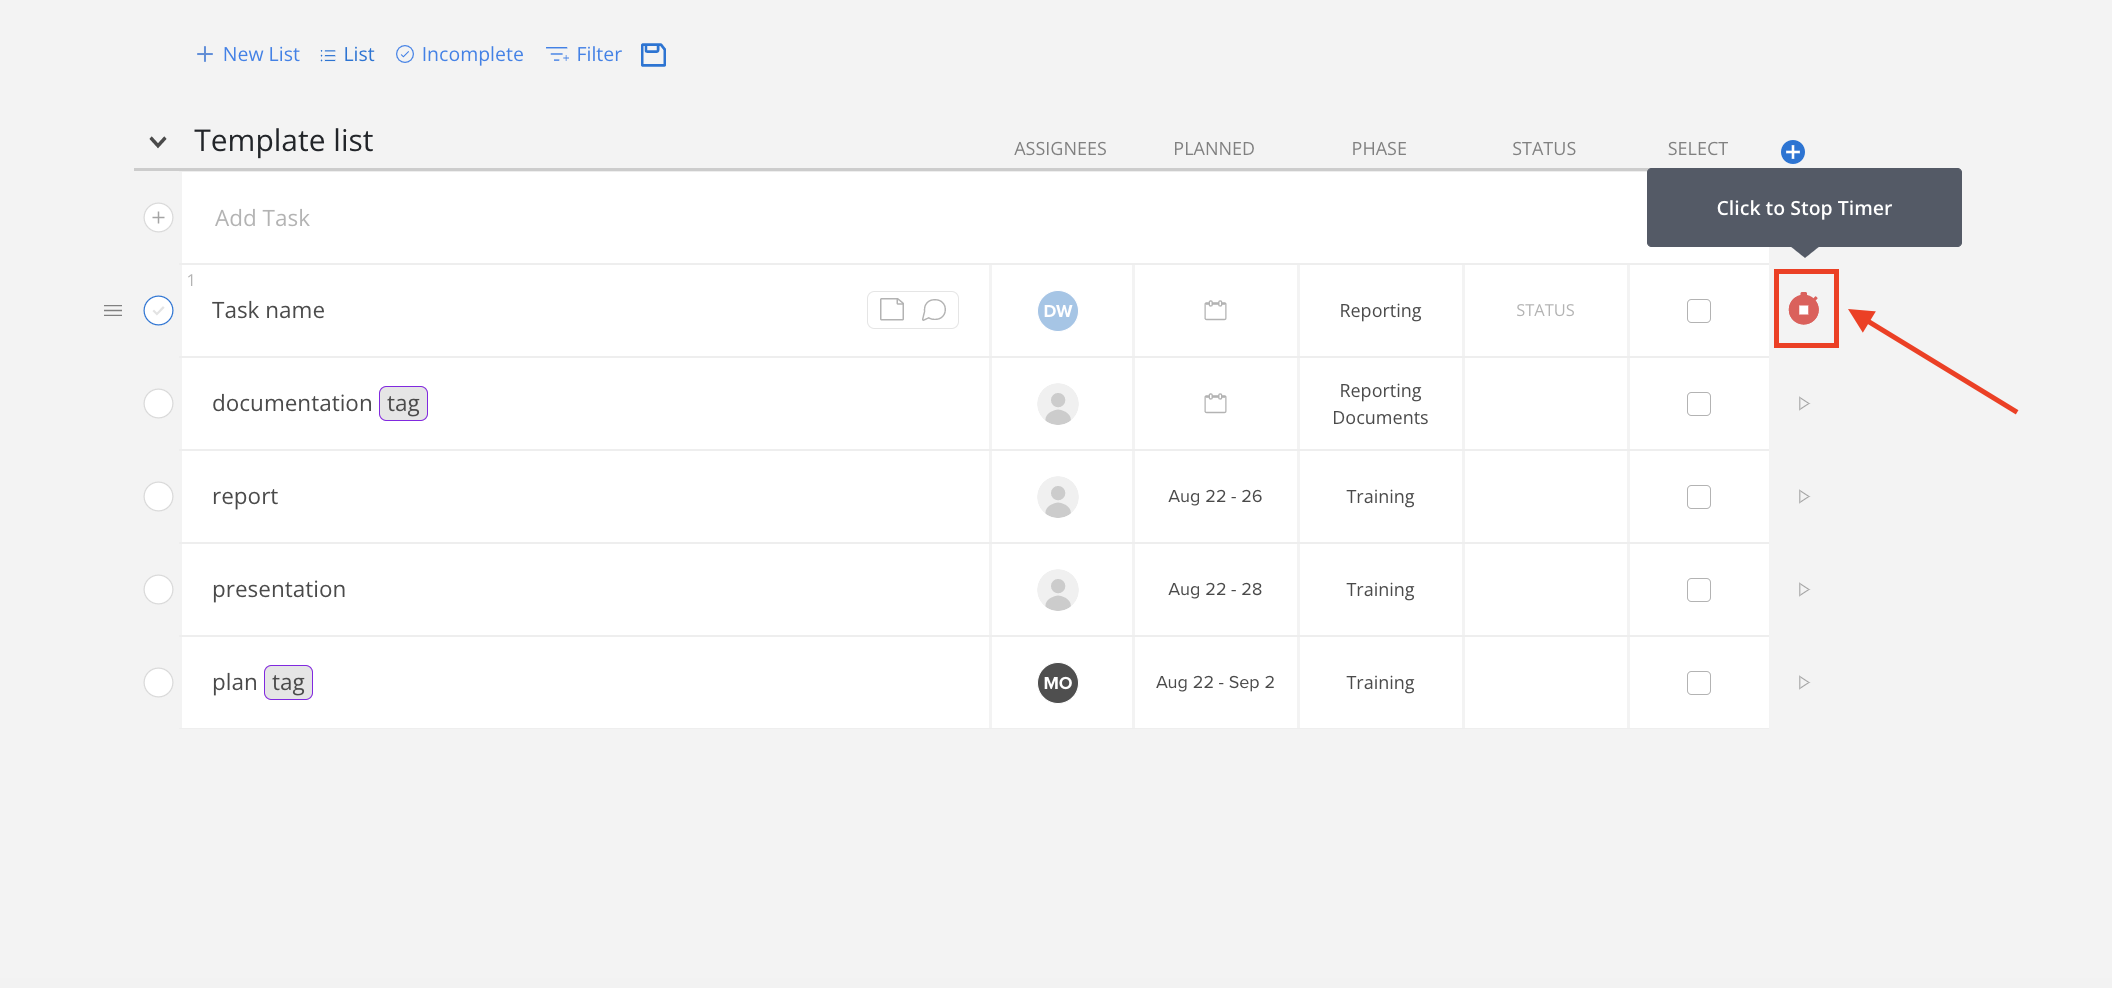
Hover on the green timer icon, it will turn red. Click the icon to stop it.
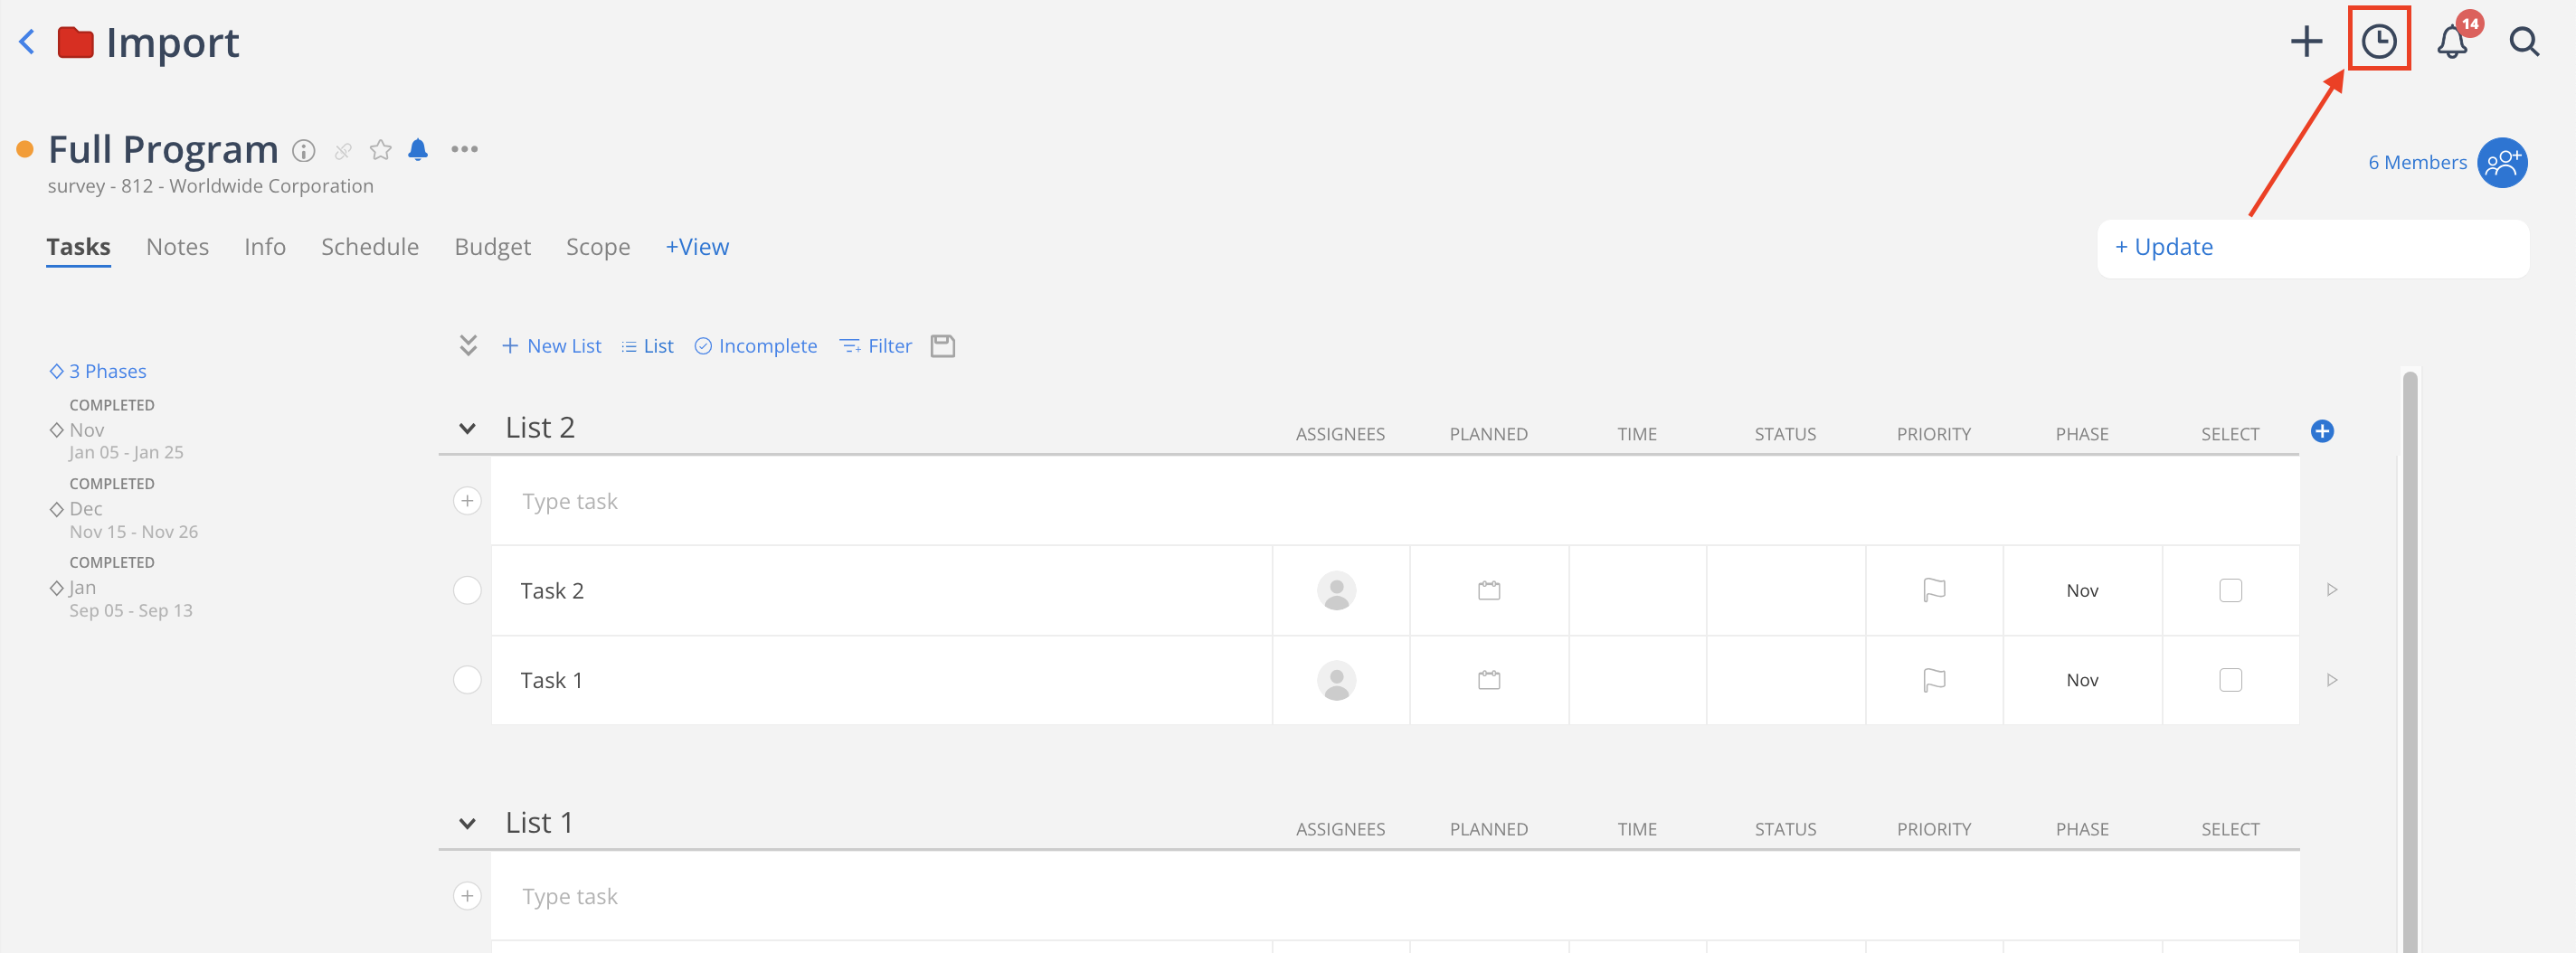
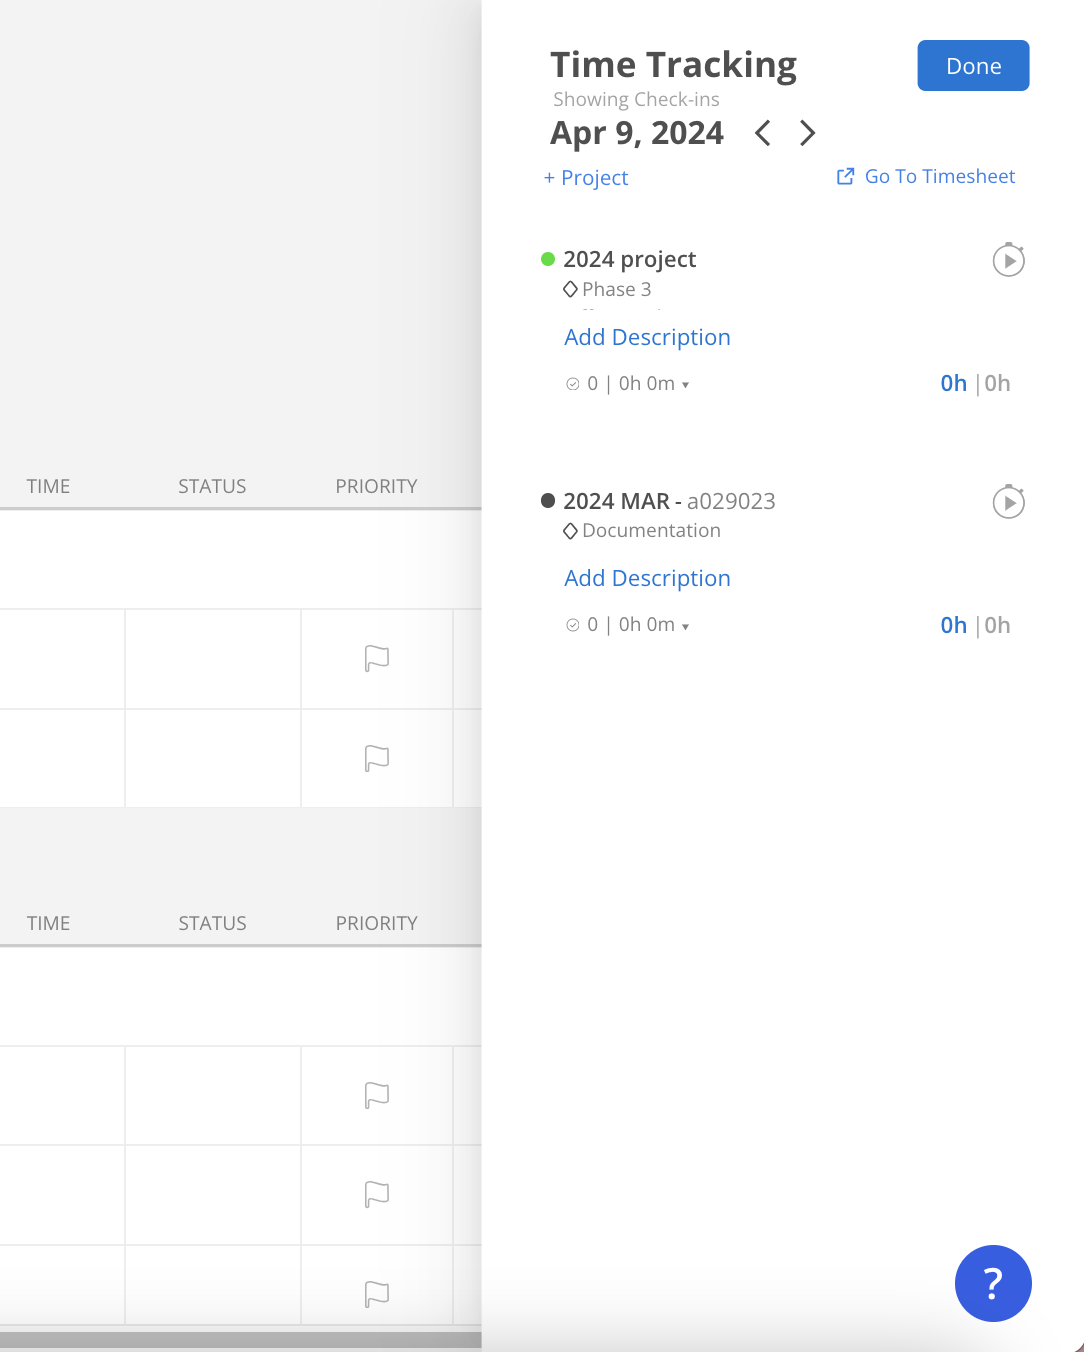
Click the timer icon in the top right corner of the window to view your timers.
