The Budget Modal provides an overview of a project's financial status, breaking down the budget by Phase, Subphase, and Work Category. It details budgets, fees, spent time, and planned time, along with estimated hours or currency amounts per team member. This tool streamlines financial insights, aiding in accurate planning and effective budget management.
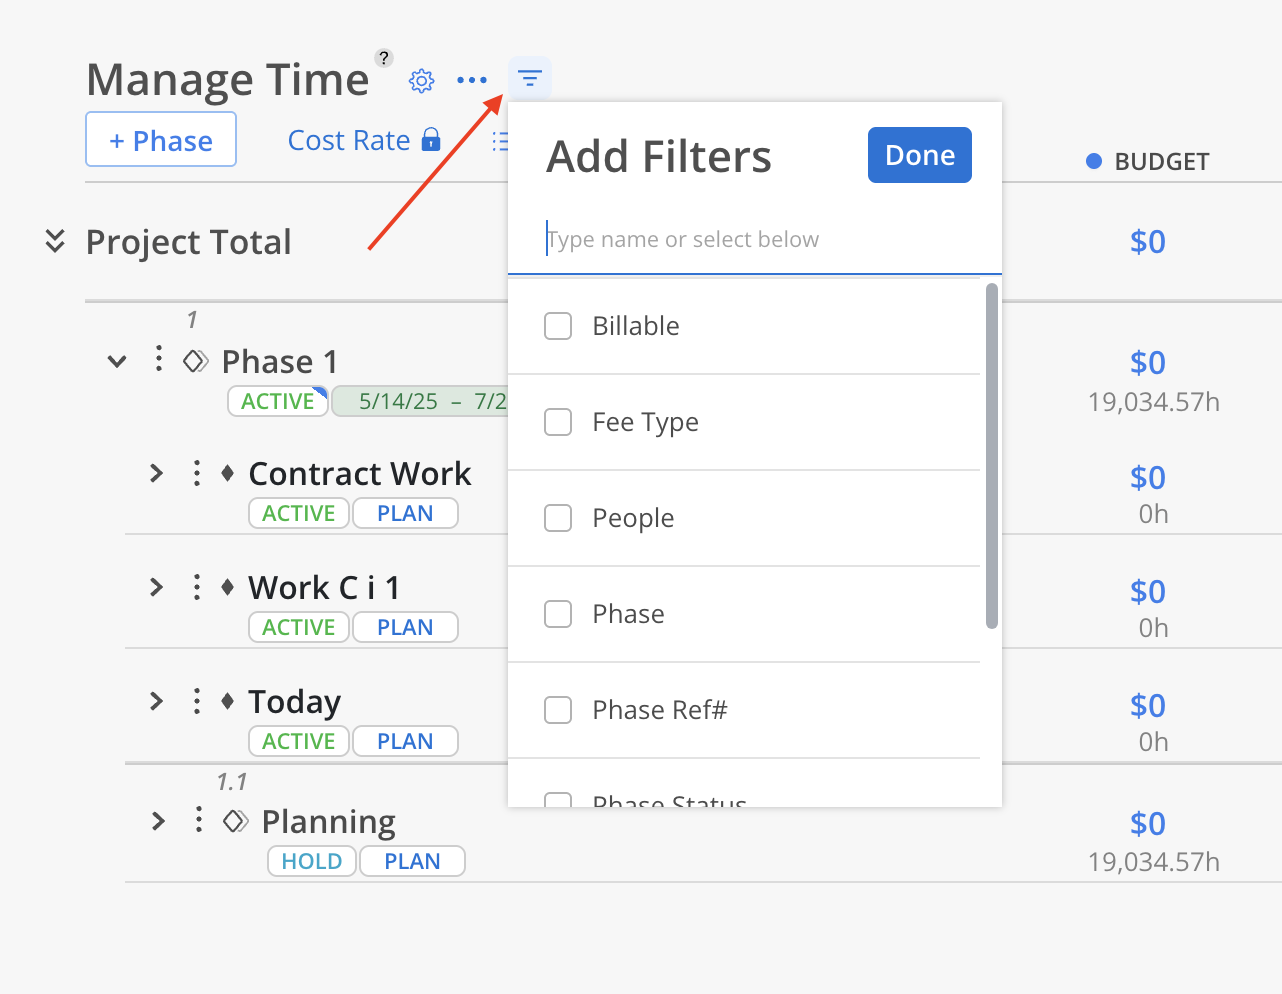
Filters are available at the top of the page. Any filters you select will be automatically saved for future sessions. Filters are specific to the current project and will not carry over to other projects.
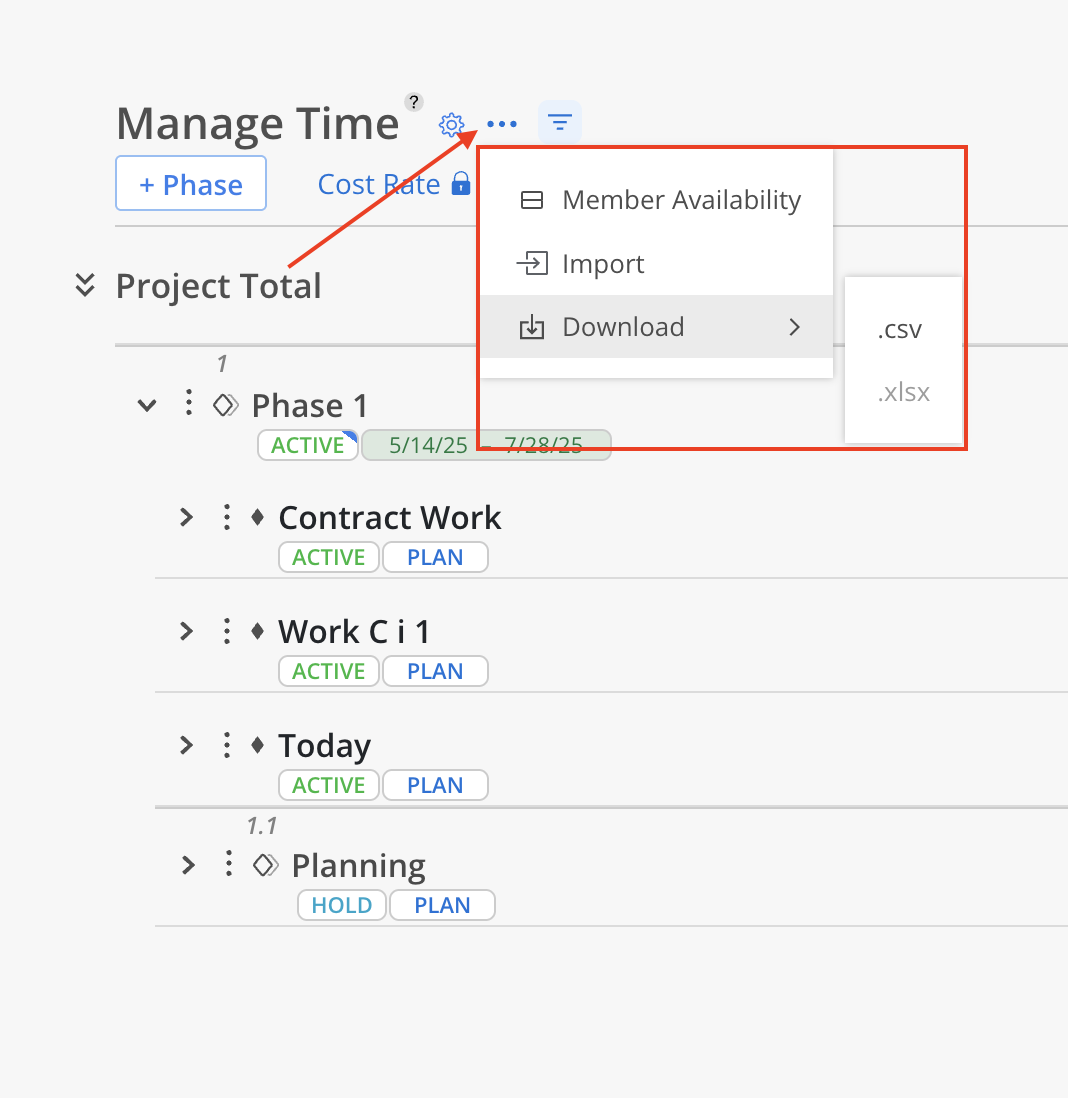
The three-dot on the top next to the settings icon provides various options:
Member Availability: View availability of the Members of this Project in a split screen.
Import: Perform a CSV import of Project/Phases/Work Categories.
Download: Export Project budget information in .csv or .xlsx format.
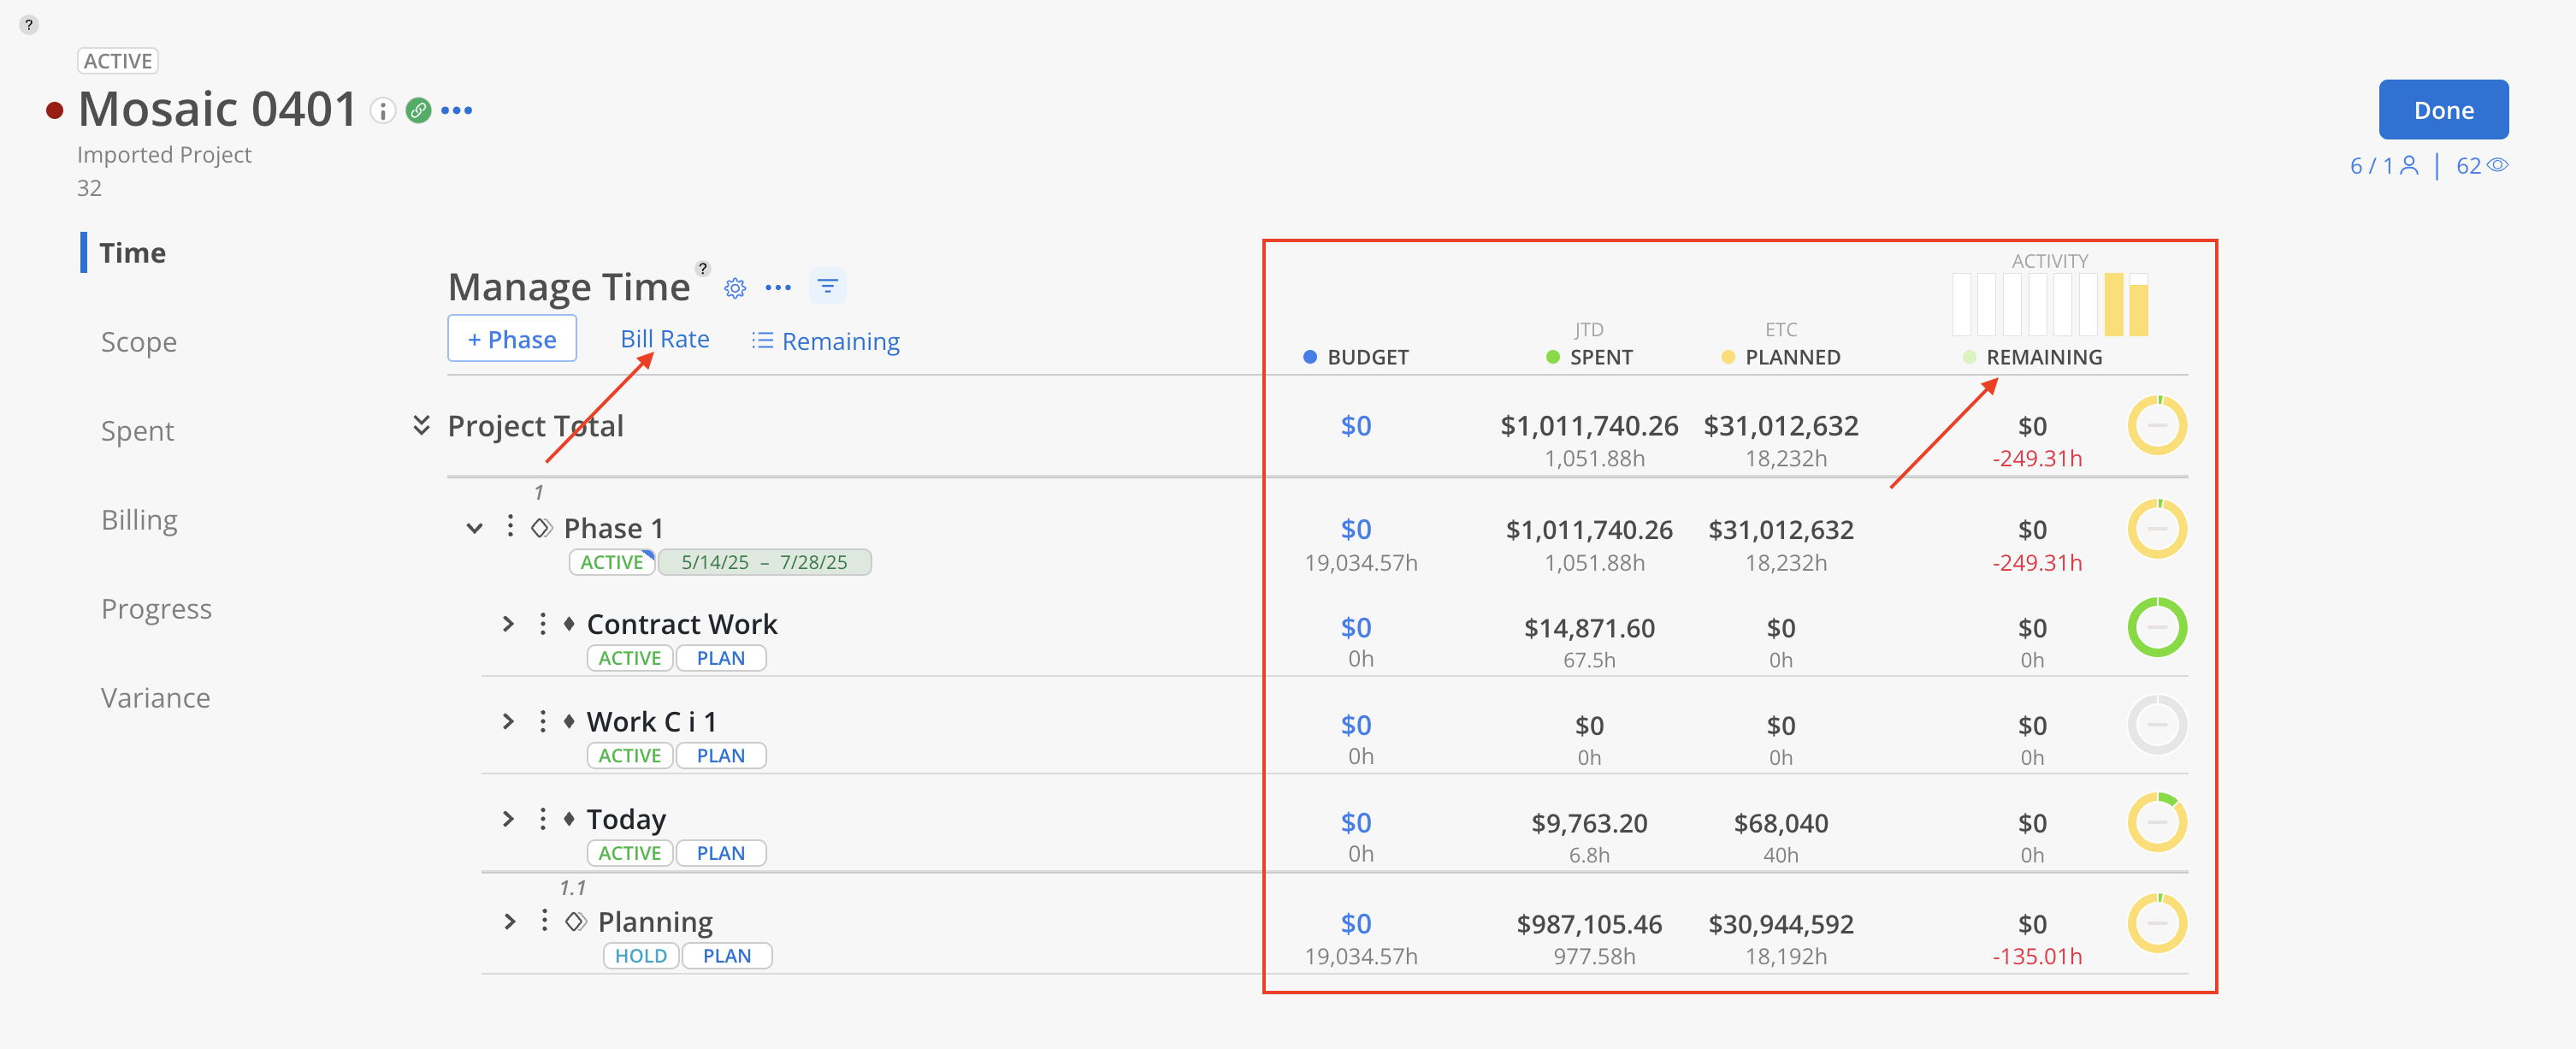
On the time tab, the total row for each phase or work category summarizes several key metrics:
Budget: Shows the total allocated budget for the phase or work category. If the fee is different from the budget, it would be displayed separately on the top of the blue text.
Spent: Represents the actual cost or hours spent on the phase or work category. This includes currency amounts and hours logged.
Planned: Shows the planned expenditure or hours expected to be spent. This is reflected in both currency and time (hours).
Remaining/Profit: Displays the remaining budget or profit amount, or the available hours, depending on whether the view is set to Bill Rate or Cost Rate. This value is calculated as the difference between the Budget and the actual spent amount for the Phase or Work Category.
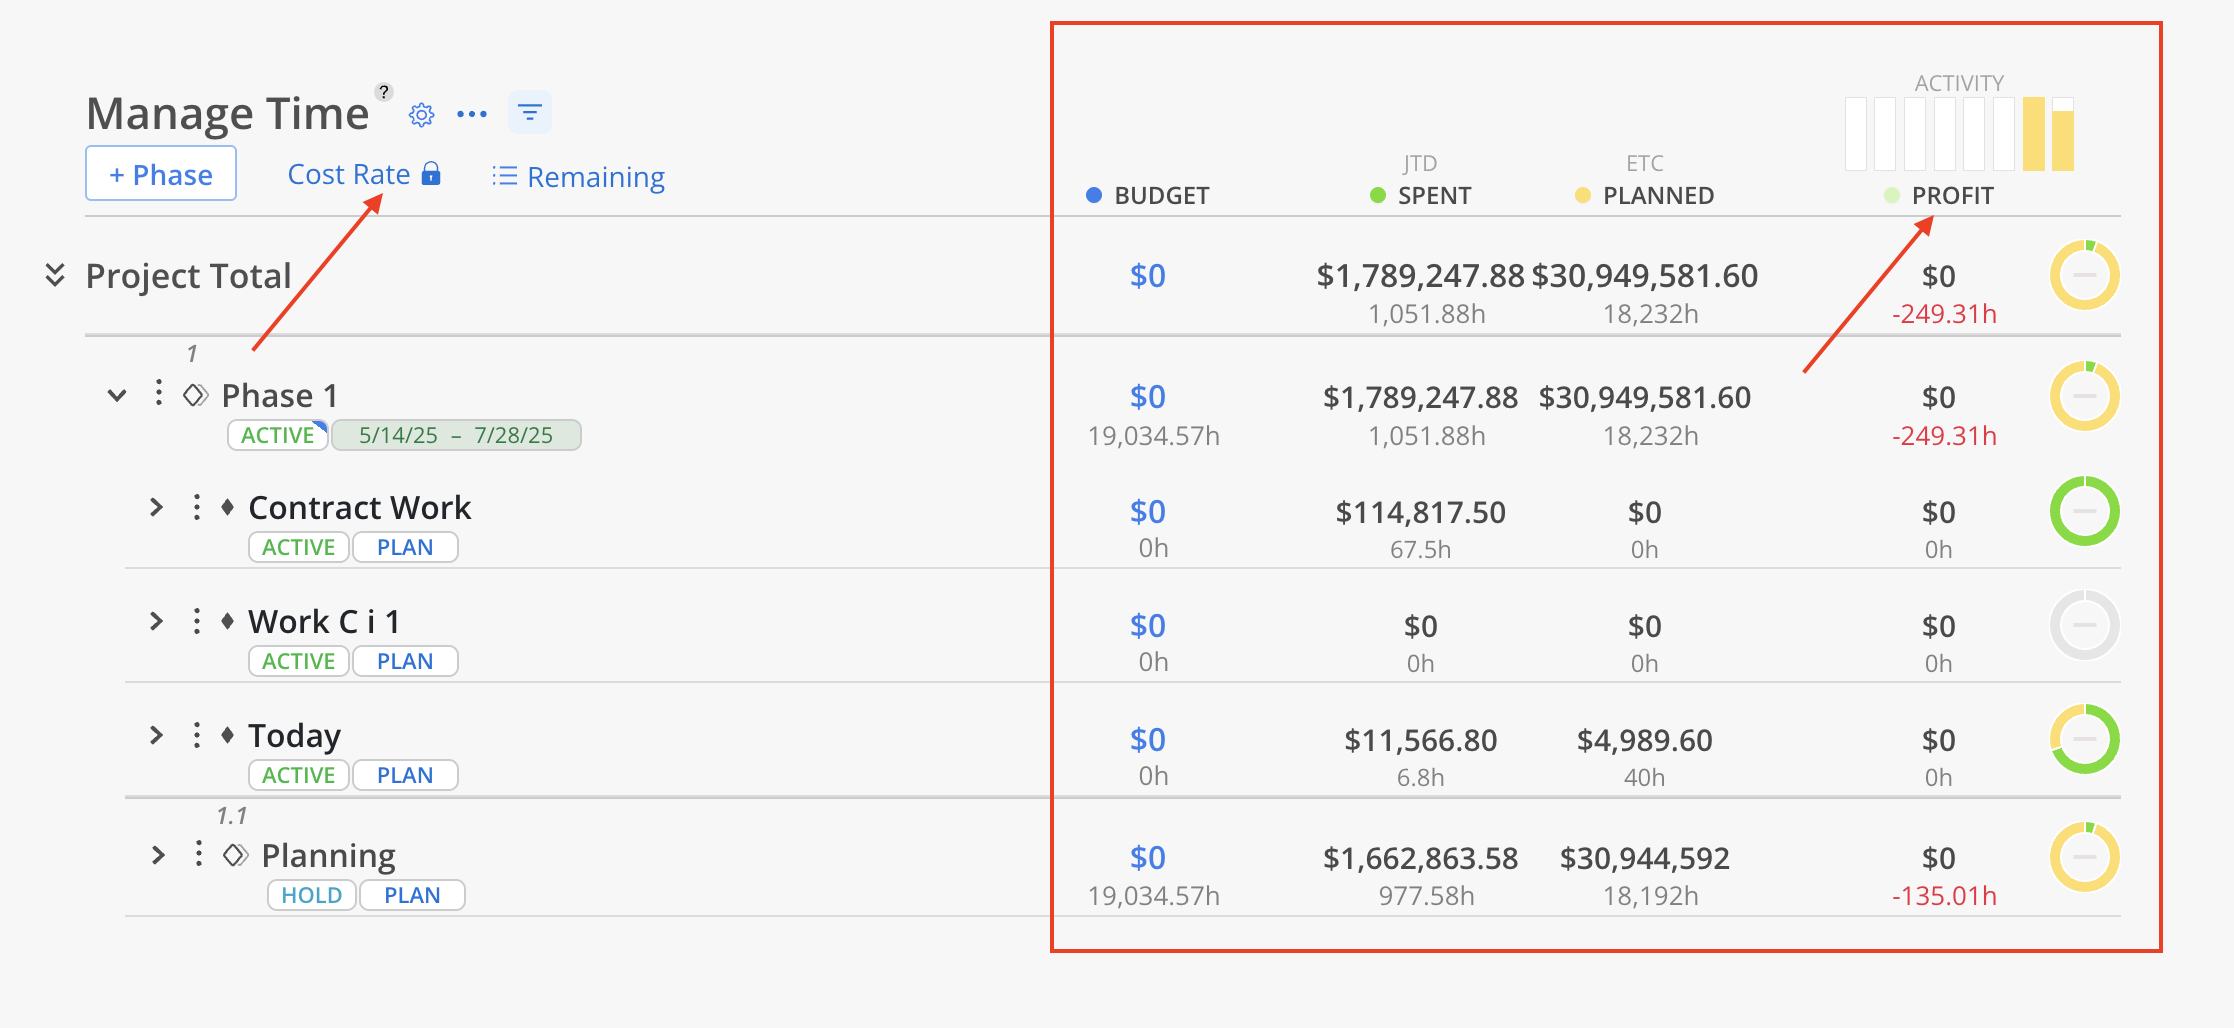
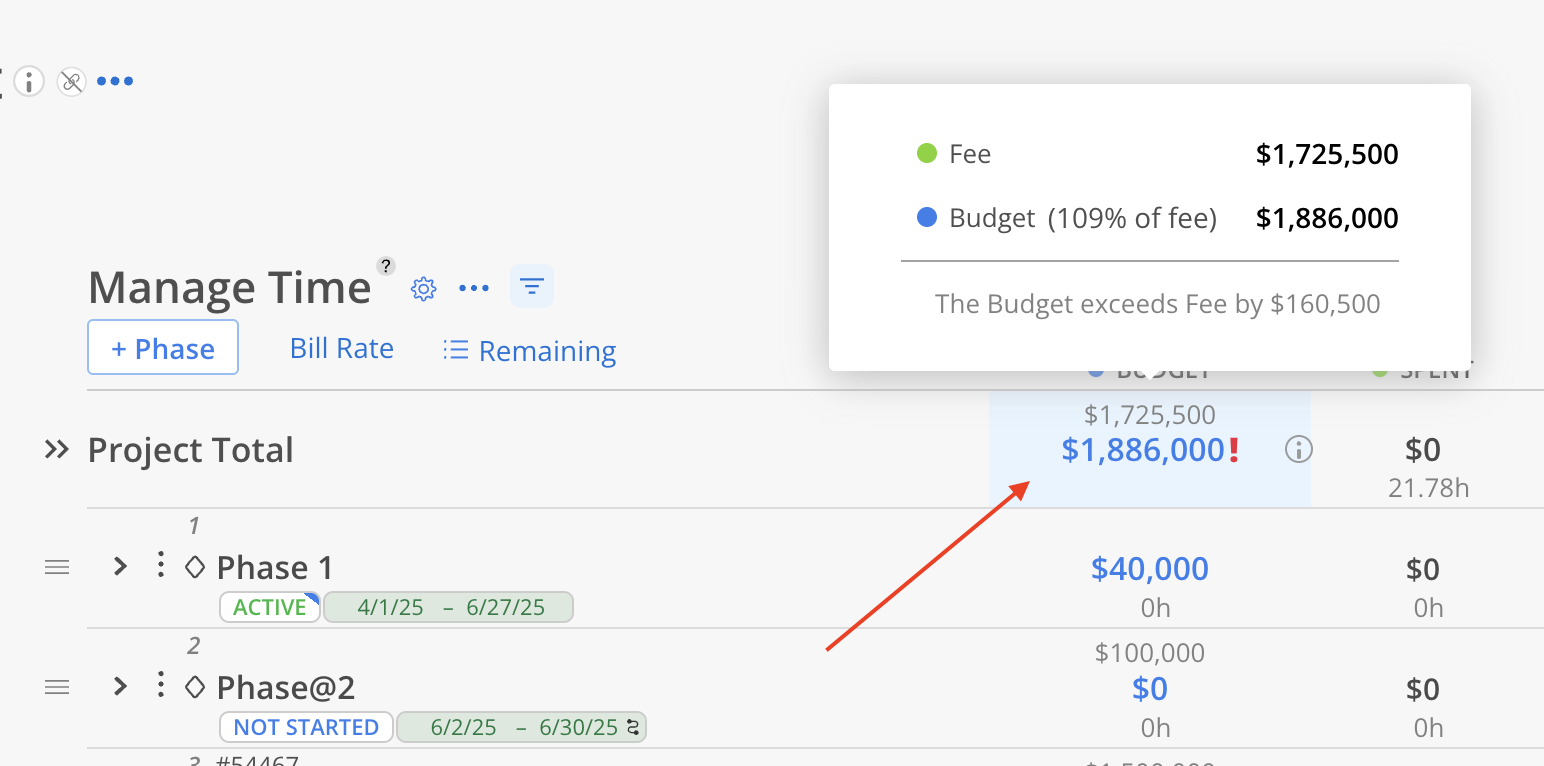
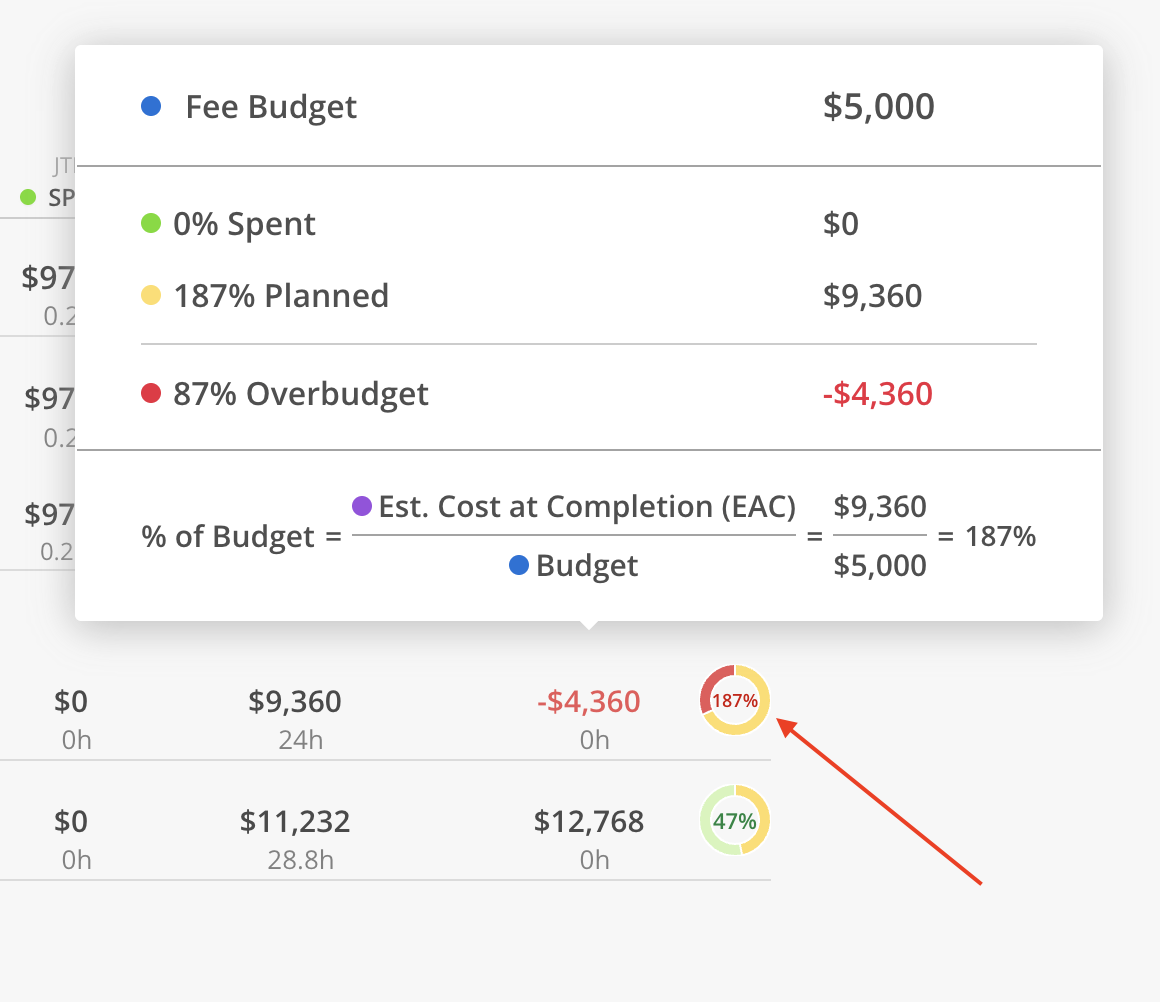
The pie charts in the Budget modal provide a quick visual summary of budget, spent, planned, and remaining values for each phase and work category.
The percentage value is displayed in the center of each row’s pie chart.
Hover over a pie chart to view a tooltip with detailed budget data.
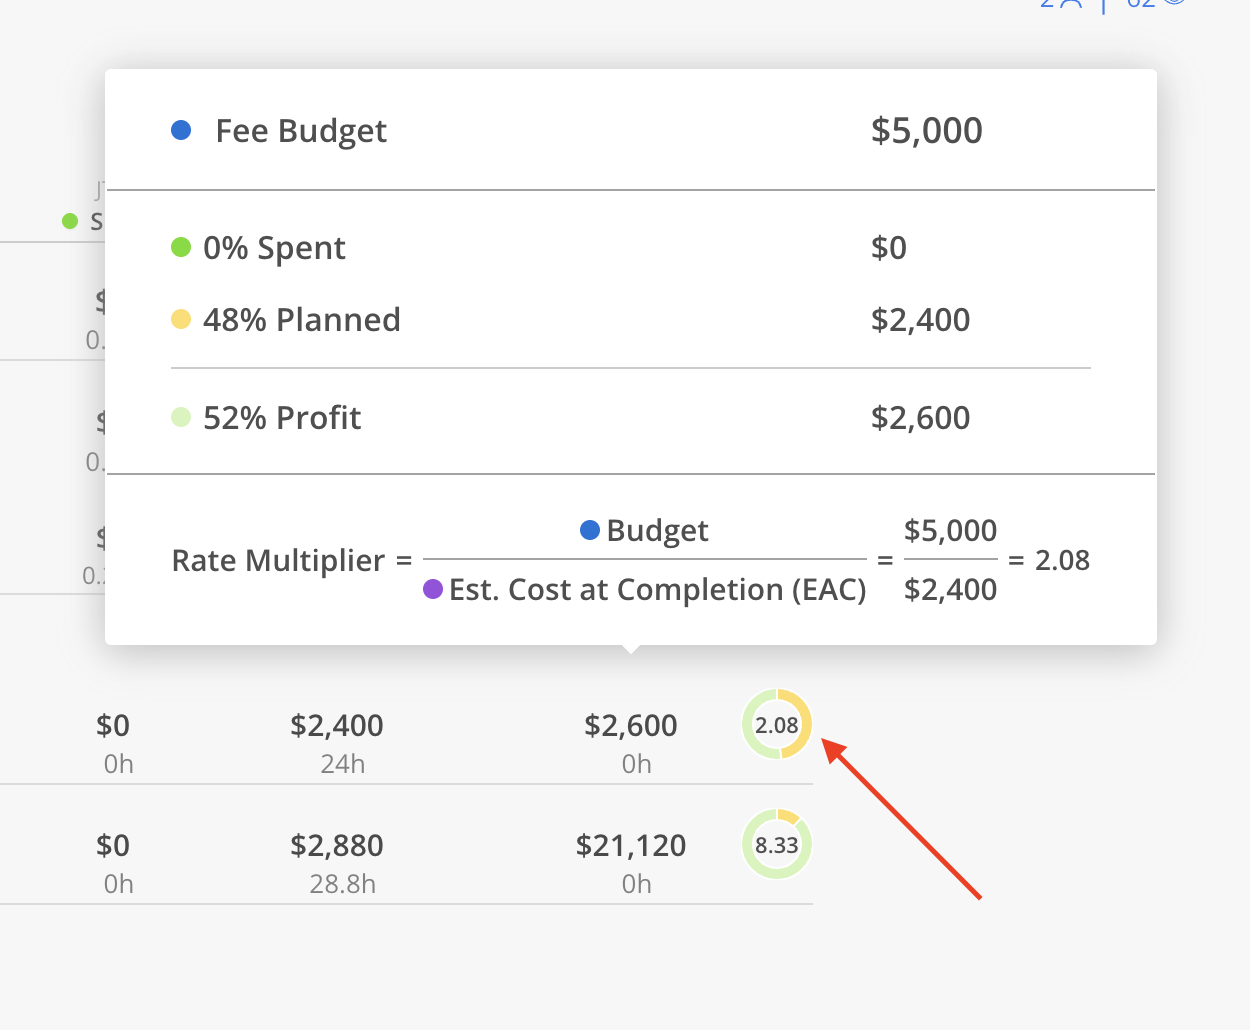
Cost Rate View
The center of the pie chart will display Rate Multiplier value instead of a percentage.
Hover over the pie chart to view a tooltip with detailed cost data.
The Remaining and Estimate at Completion (EAC) view provides insight into Budget by comparing planned and actual usage.
Remaining represents the unused portion of the Budget, calculated as Budget – Planned – Spent.
EAC estimates total expected use, calculated as Planned + Spent.

Here is an example of the EAC view
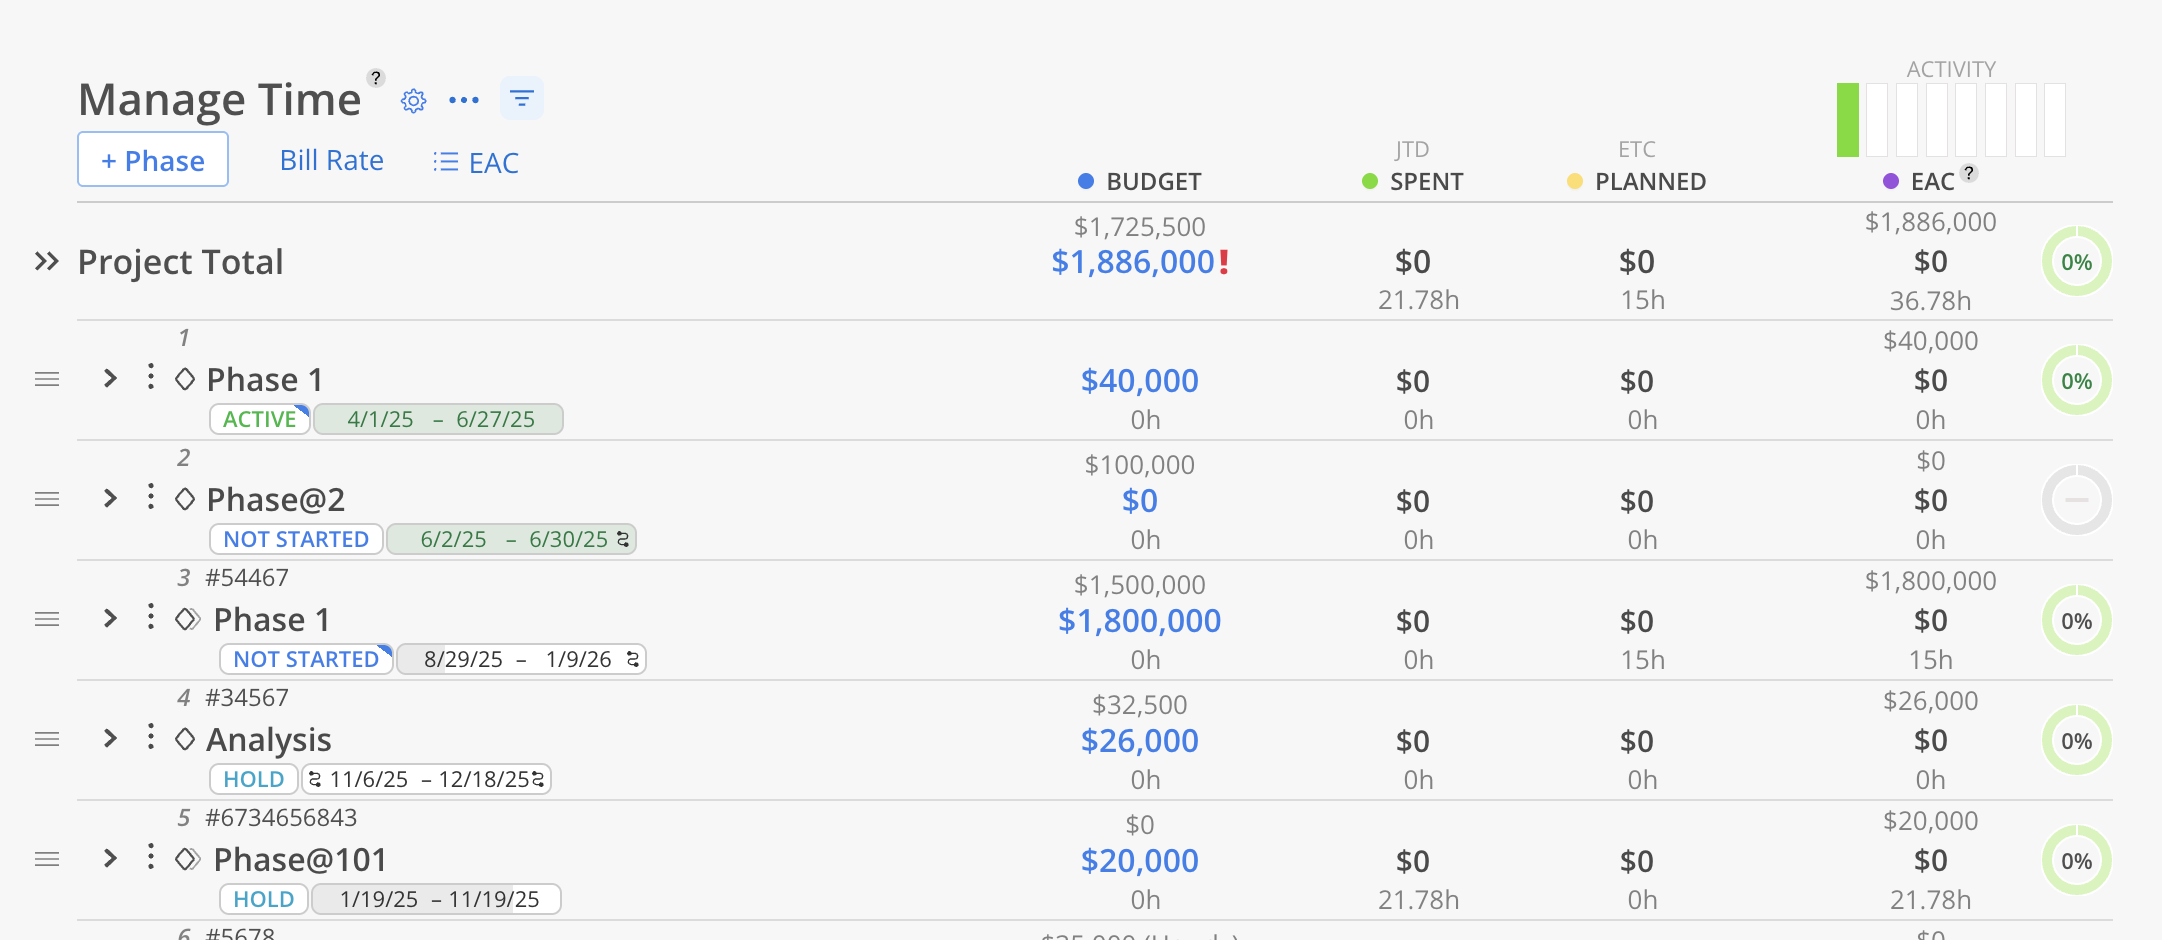
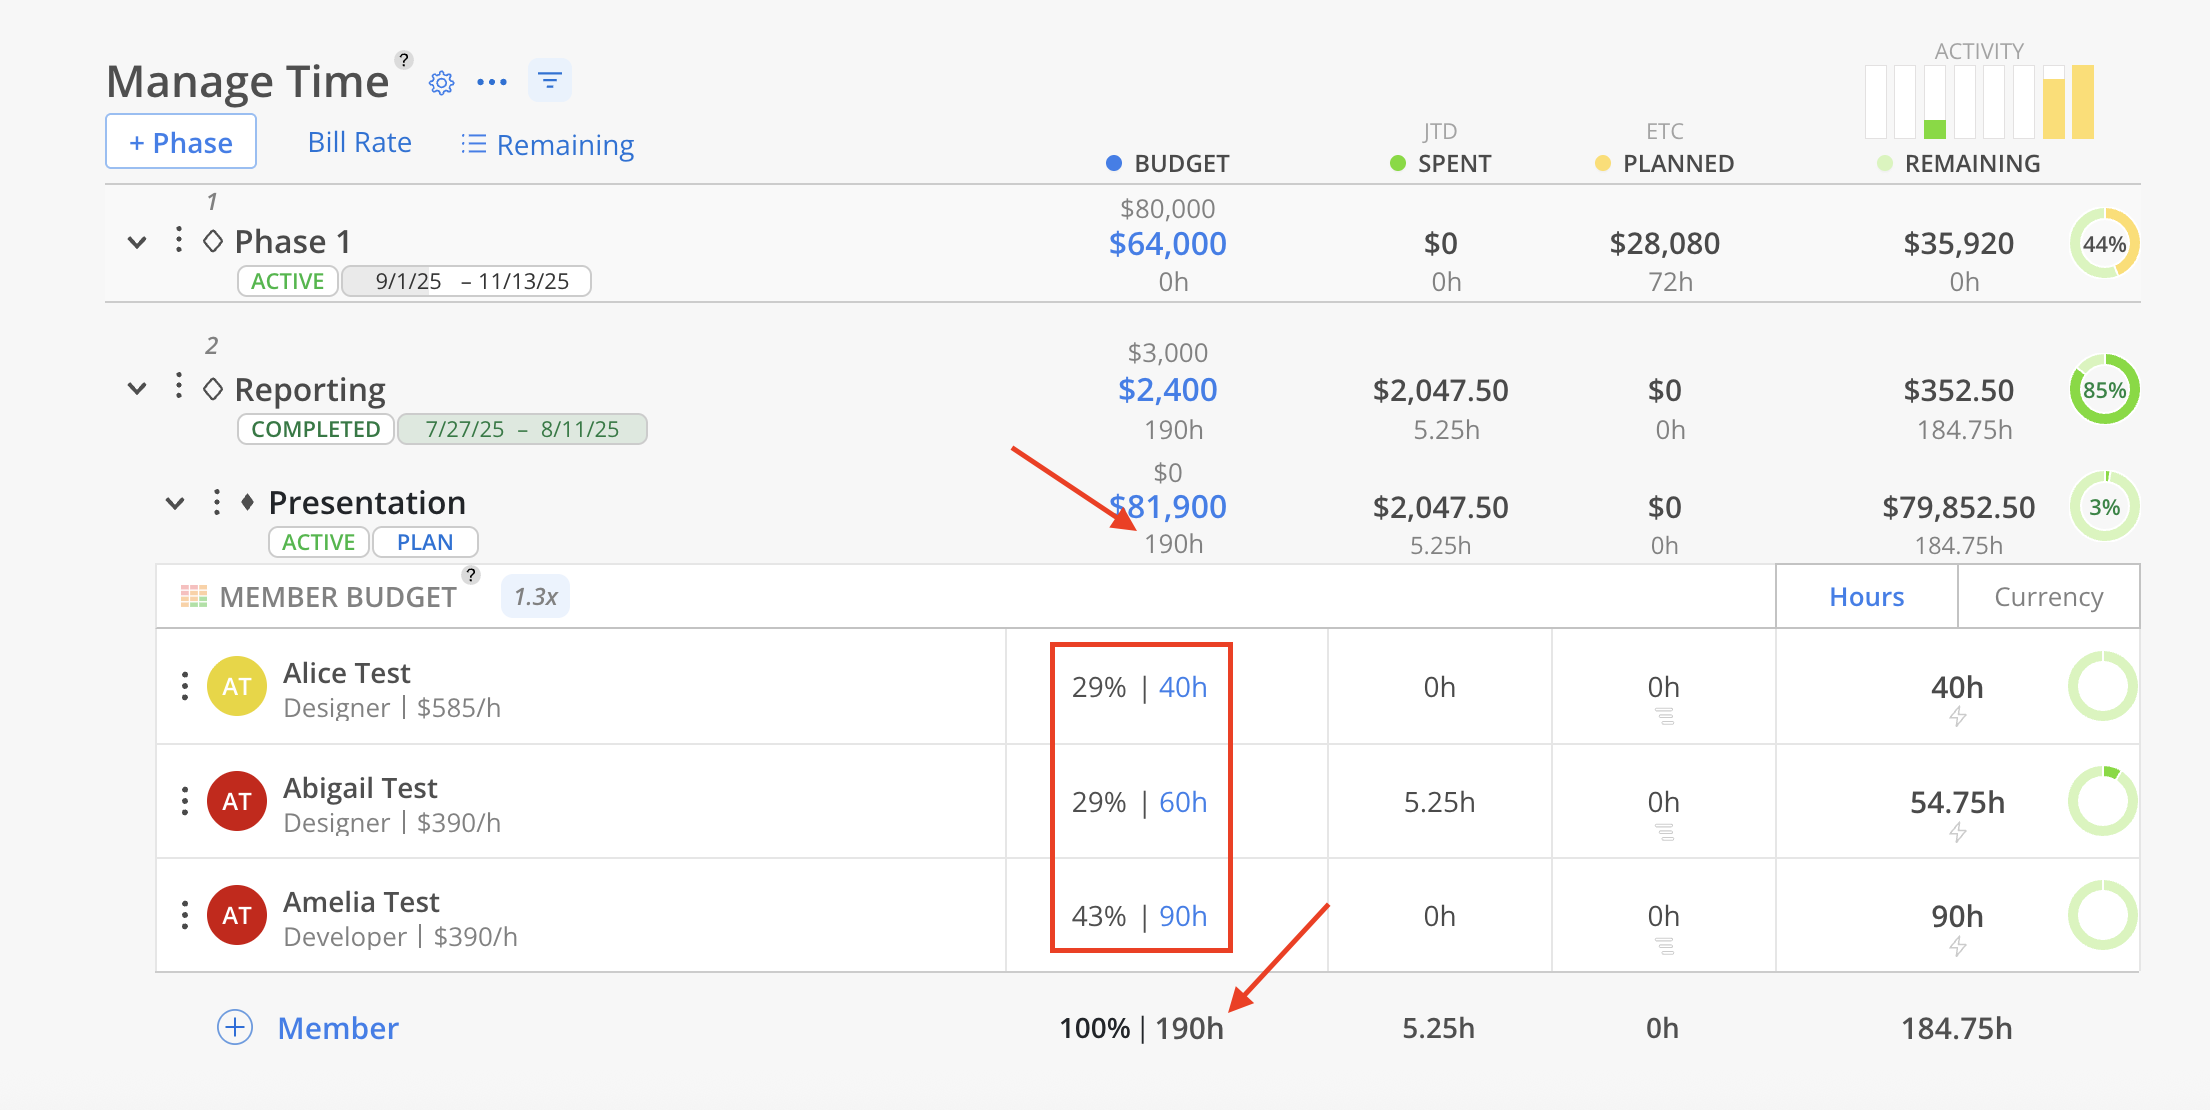
Under the Budget amount, aggregated estimated and remaining hours of members will be displayed in grey text.
Budget With Total Spent + Planned Time
When the Phase or Subphase has budget with set to Member Time Budgets > Total Spent + Planned Time, the total estimated hours will be total the sum of Spent and Planned hours.
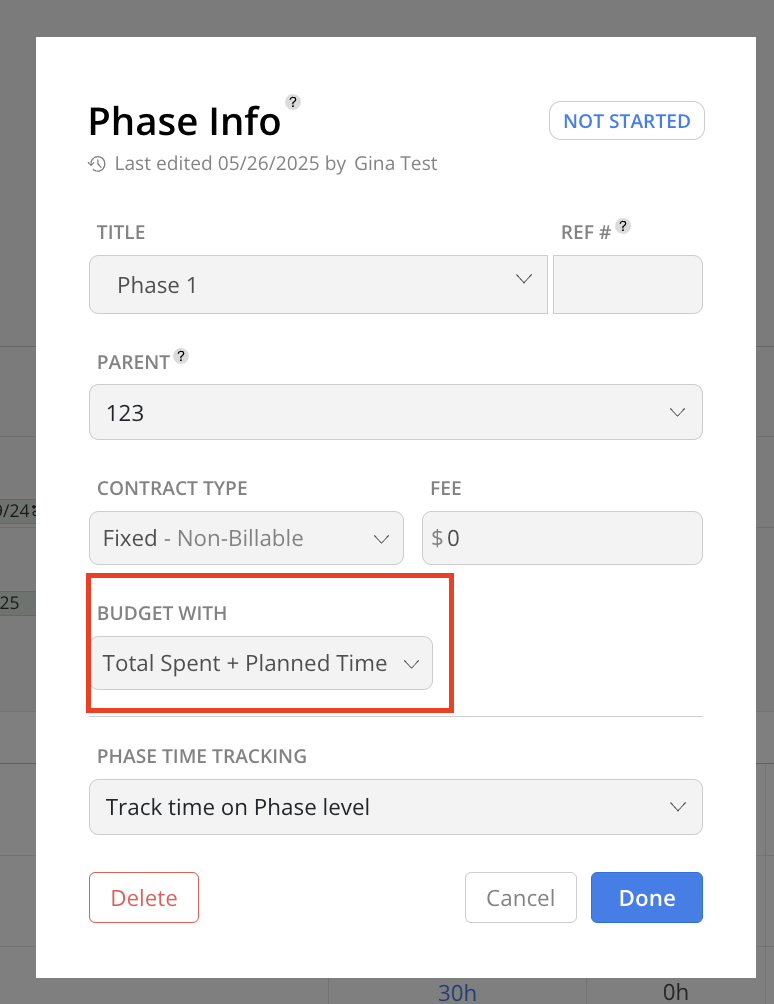

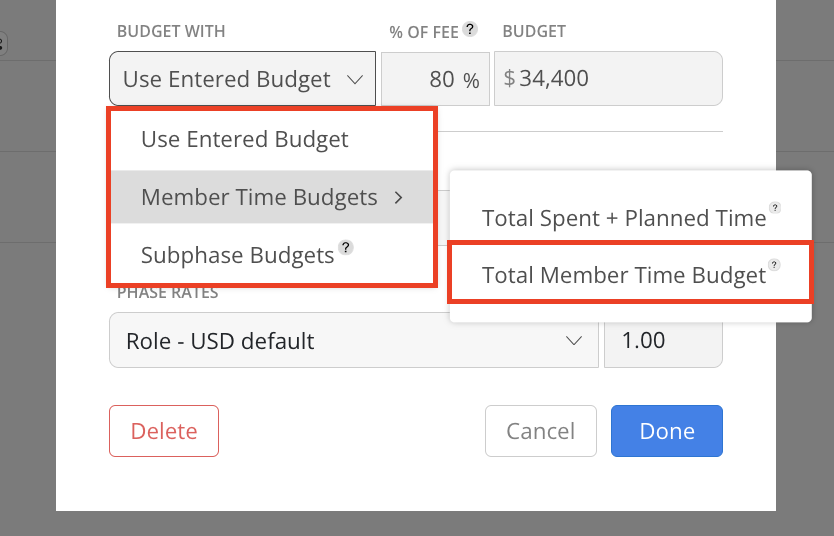
Other Budget With Settings
When the Phase or Subphase has budget with set to other settings except Member Time Budgets > Total Spent + Planned Time, the total estimated hours will be the sum of hours of all Subphases and Work Categories (including the default "No Work Category").
The Subphase Subtotal view provides a consolidated summary of budgeted hours and financials across all Subphases within a given Phase. The Subphase Subtotal only appears when a Phase contains more than two Subphases and is expanded.
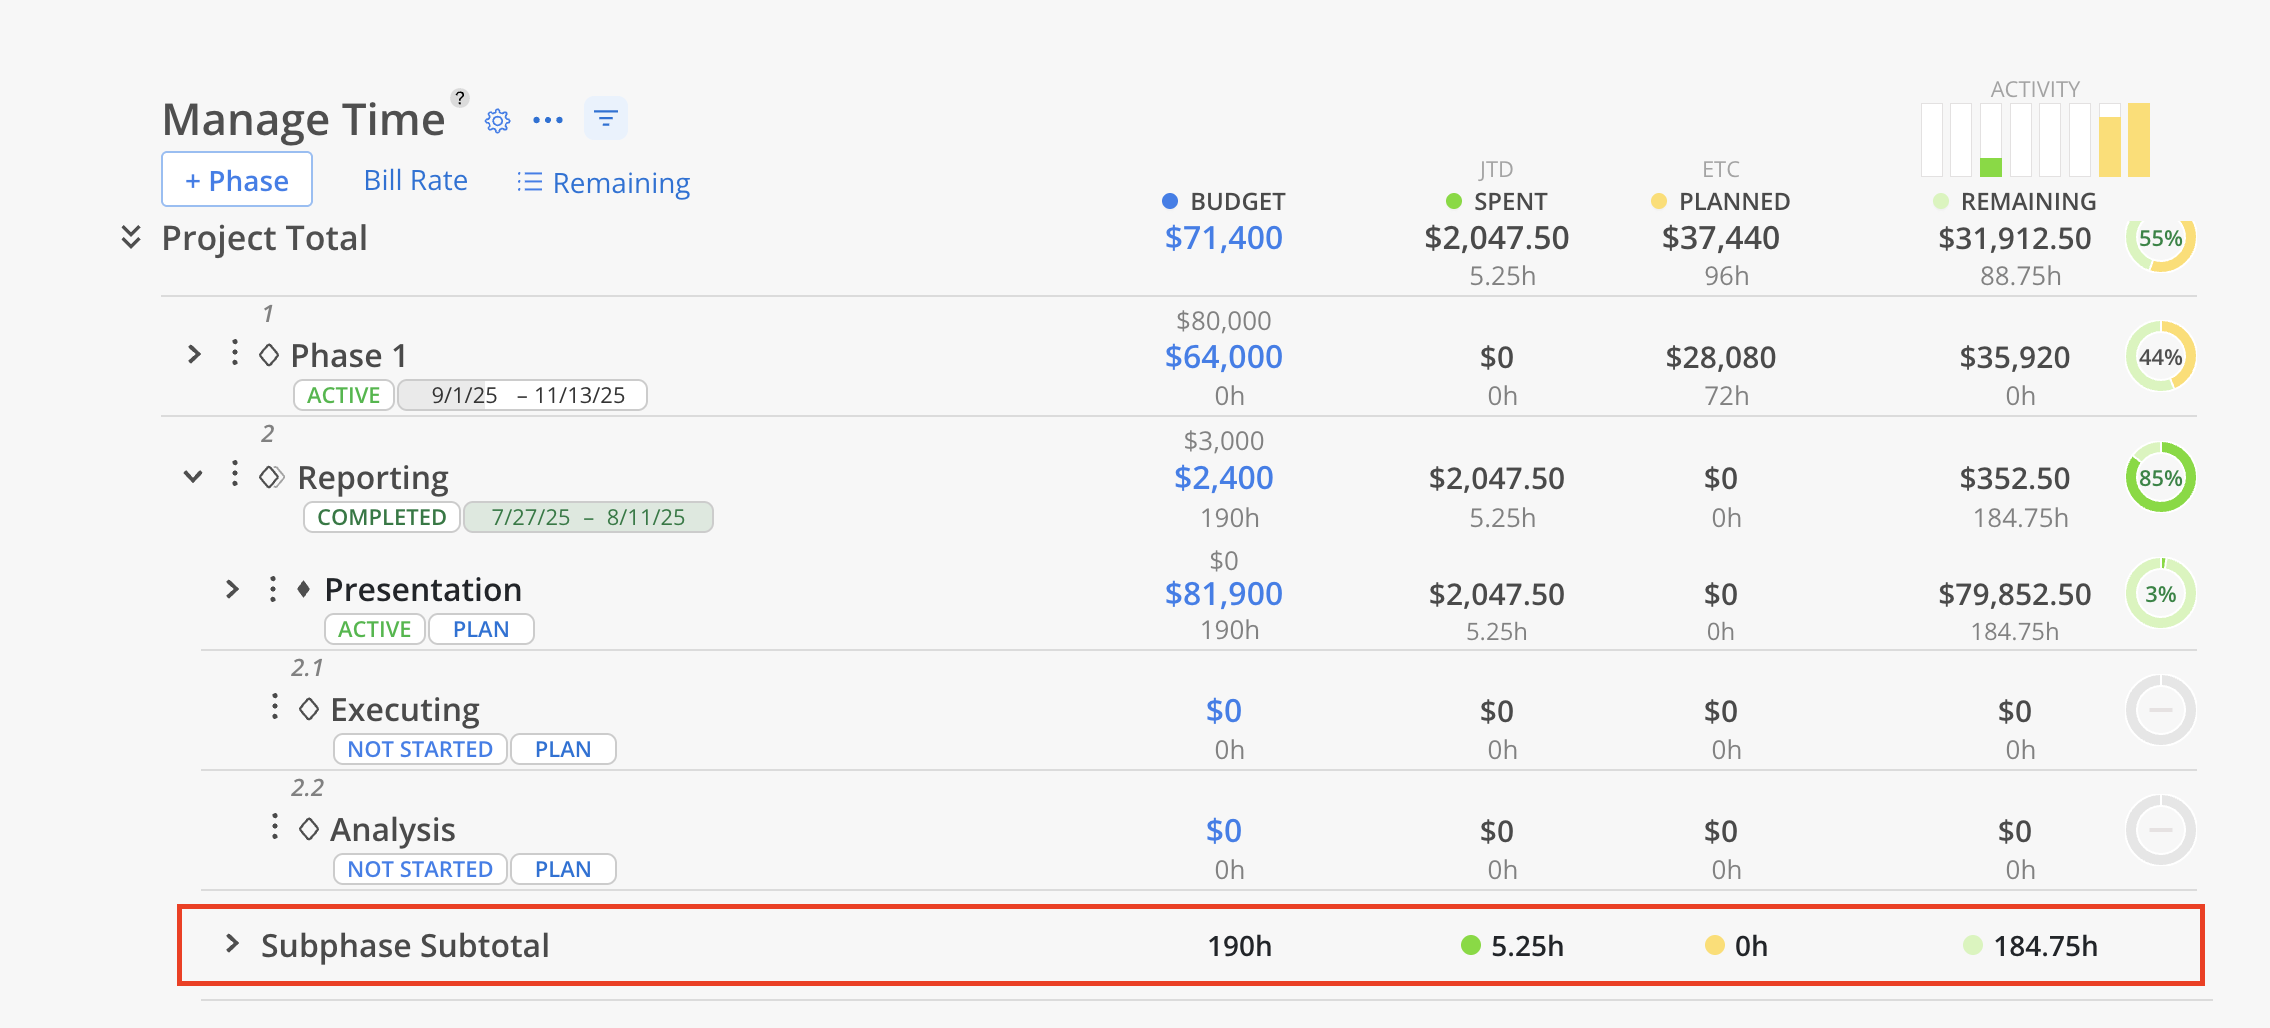
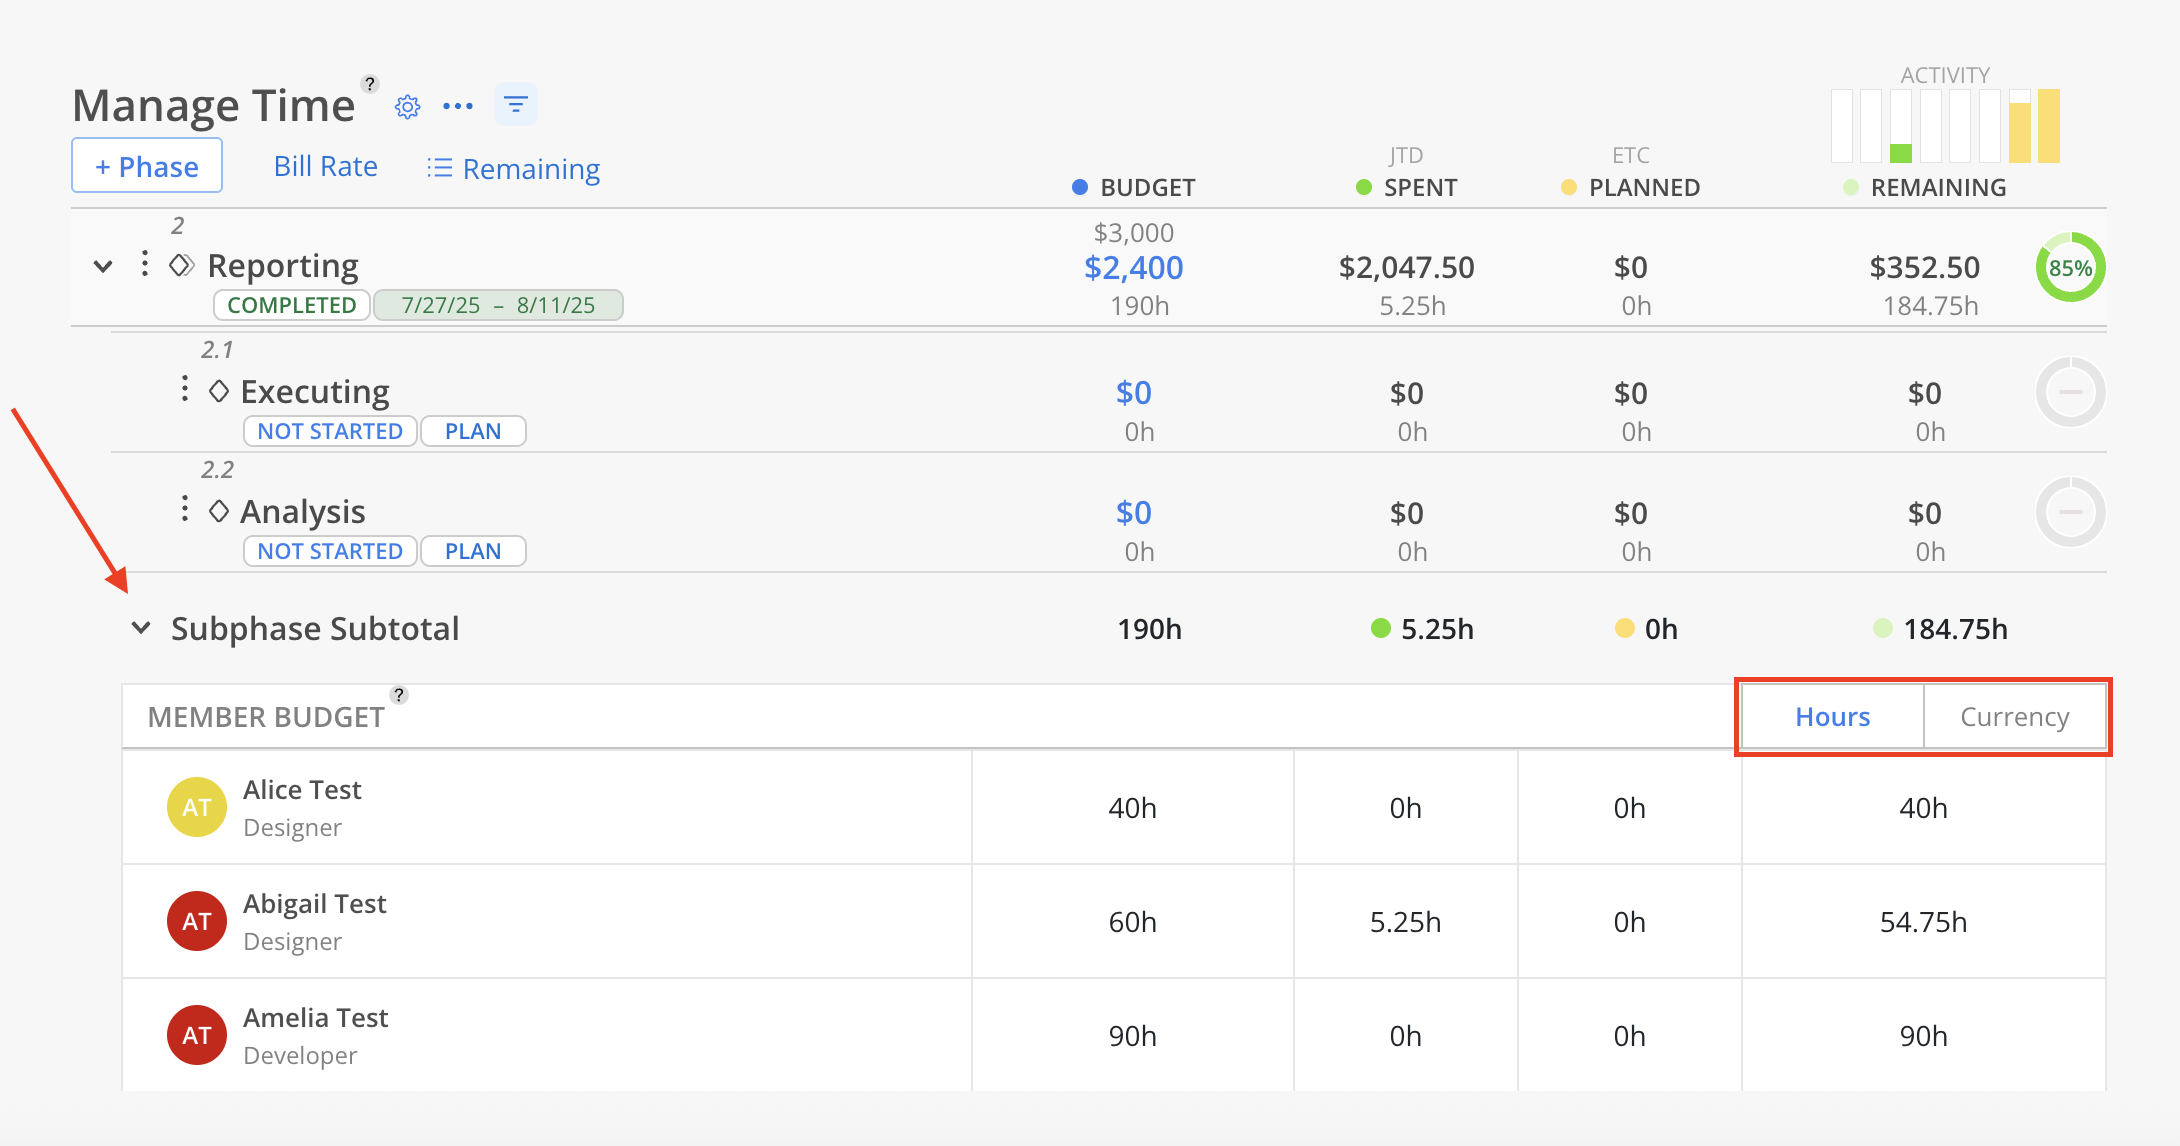
Expand the Subphase Subtotal row to view the aggregated totals for Budgeted Hours, JTD (Job-to-Date) Spent, ETC (Estimate to Complete), and Remaining time across all related Subphases.
These totals are available in both Hours and Currency views.
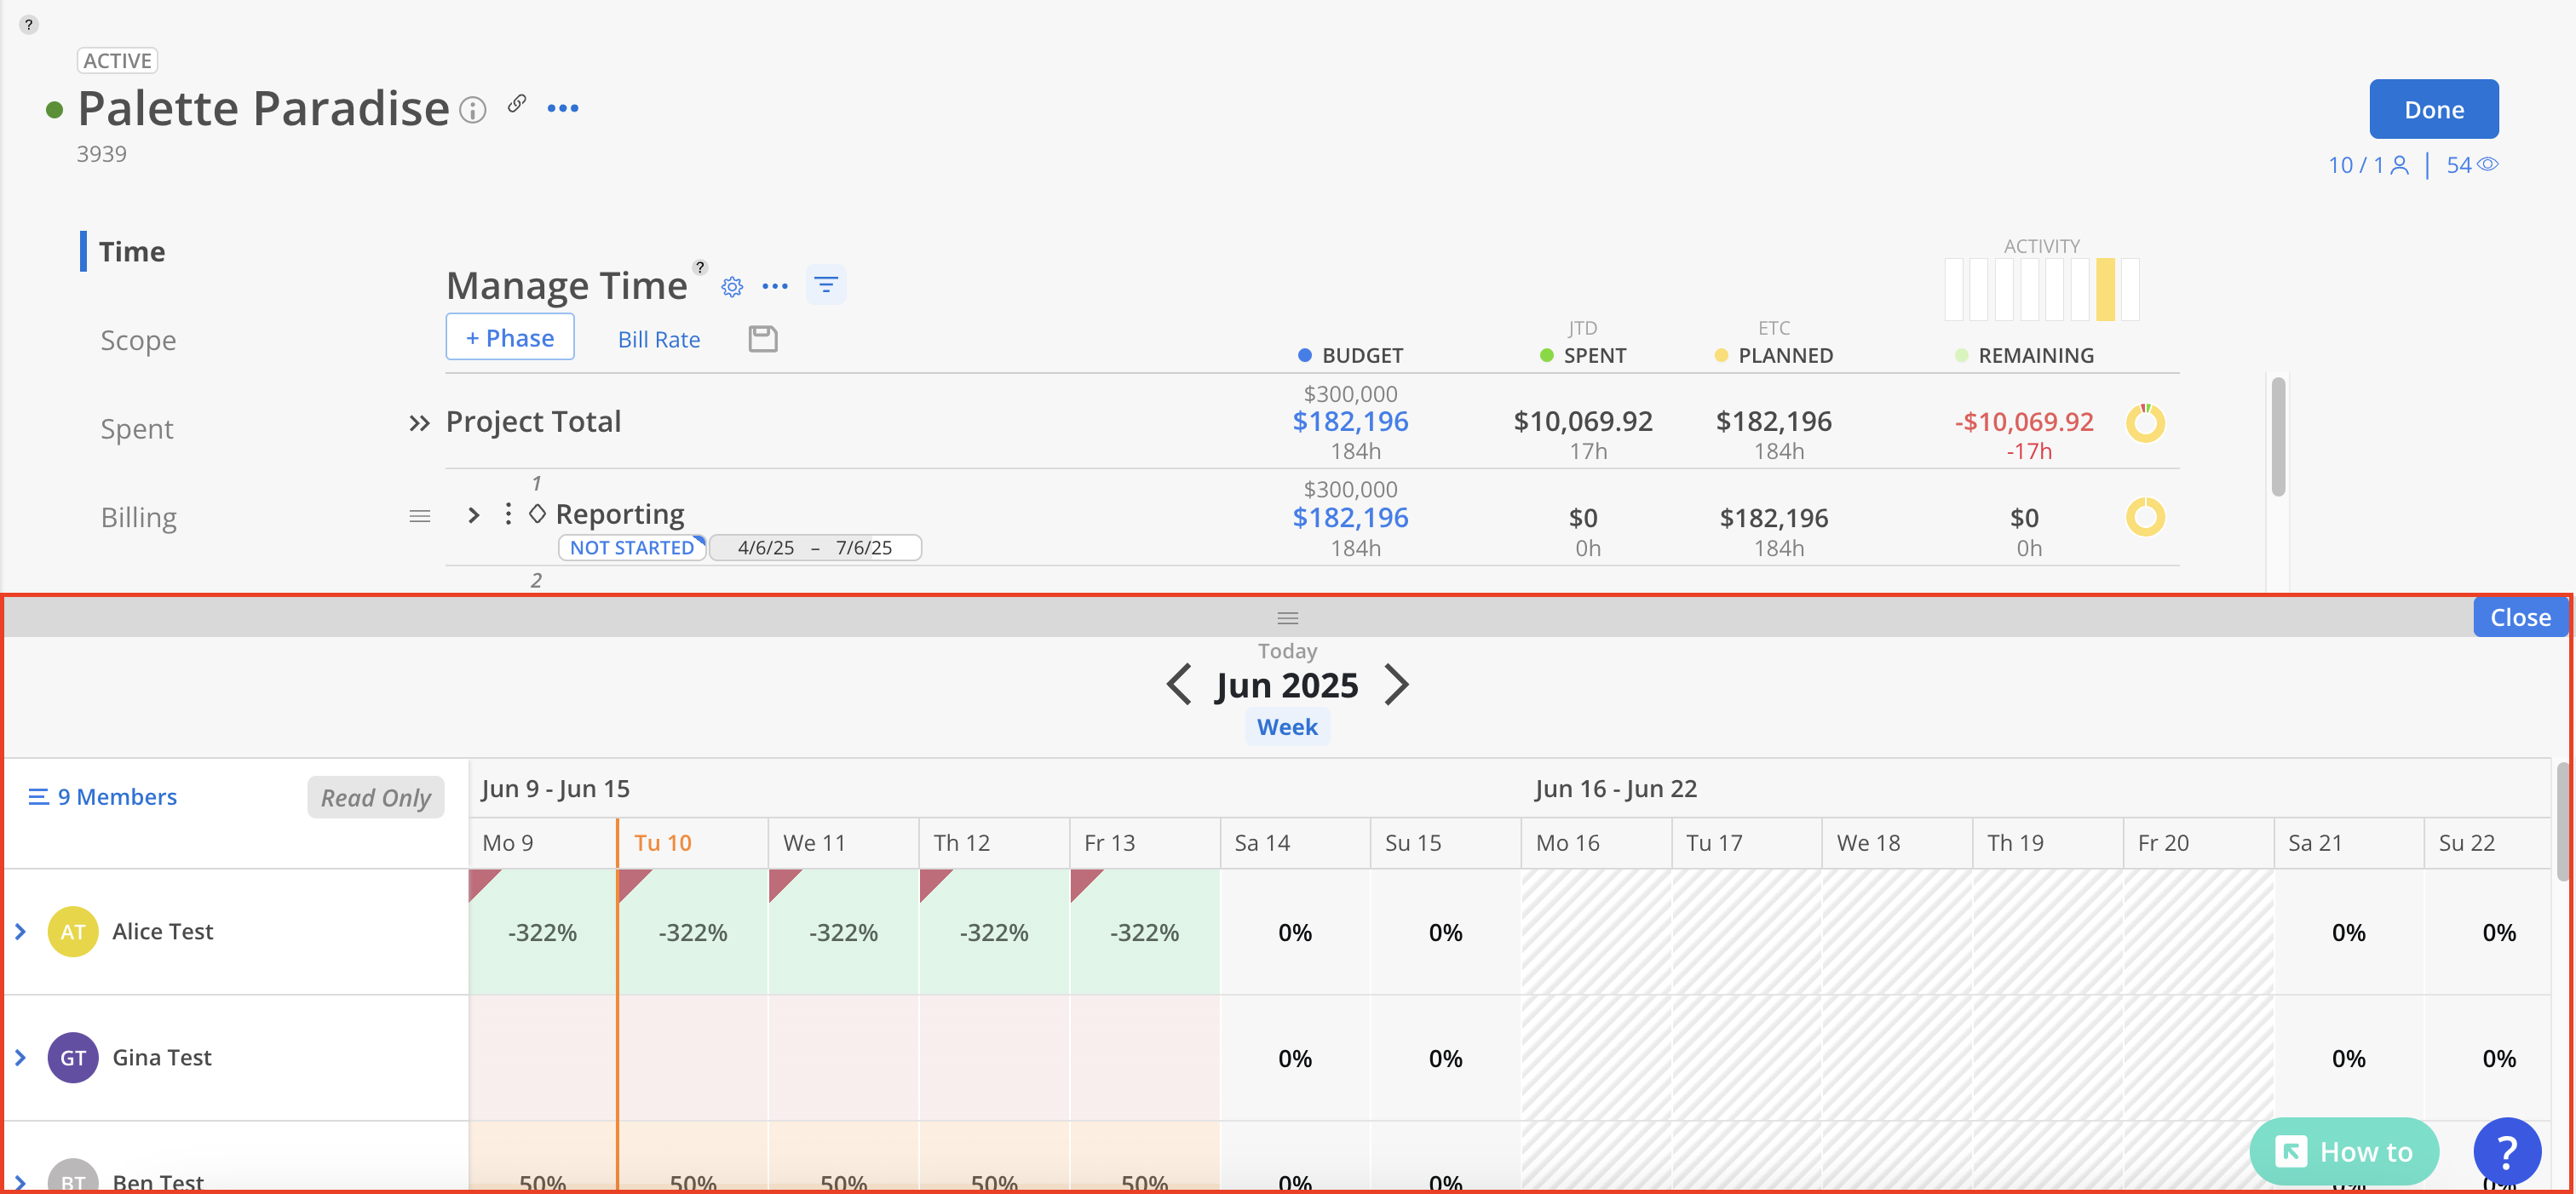
The Member Availability feature offers a comprehensive view of each team member's current assignments, remaining capacity, and overall availability within the project.
Click the three-dot on the top. Click Member Availability button.

A split screen will appear, mirroring the layout and functionality of the Workload page. This view displays the current Workload and Capacity of Members to support more effective planning.
Adjust the size of the split screen by dragging the center divider.
To close the view, click the Close button on the right, or drag the screen all the way to the bottom.
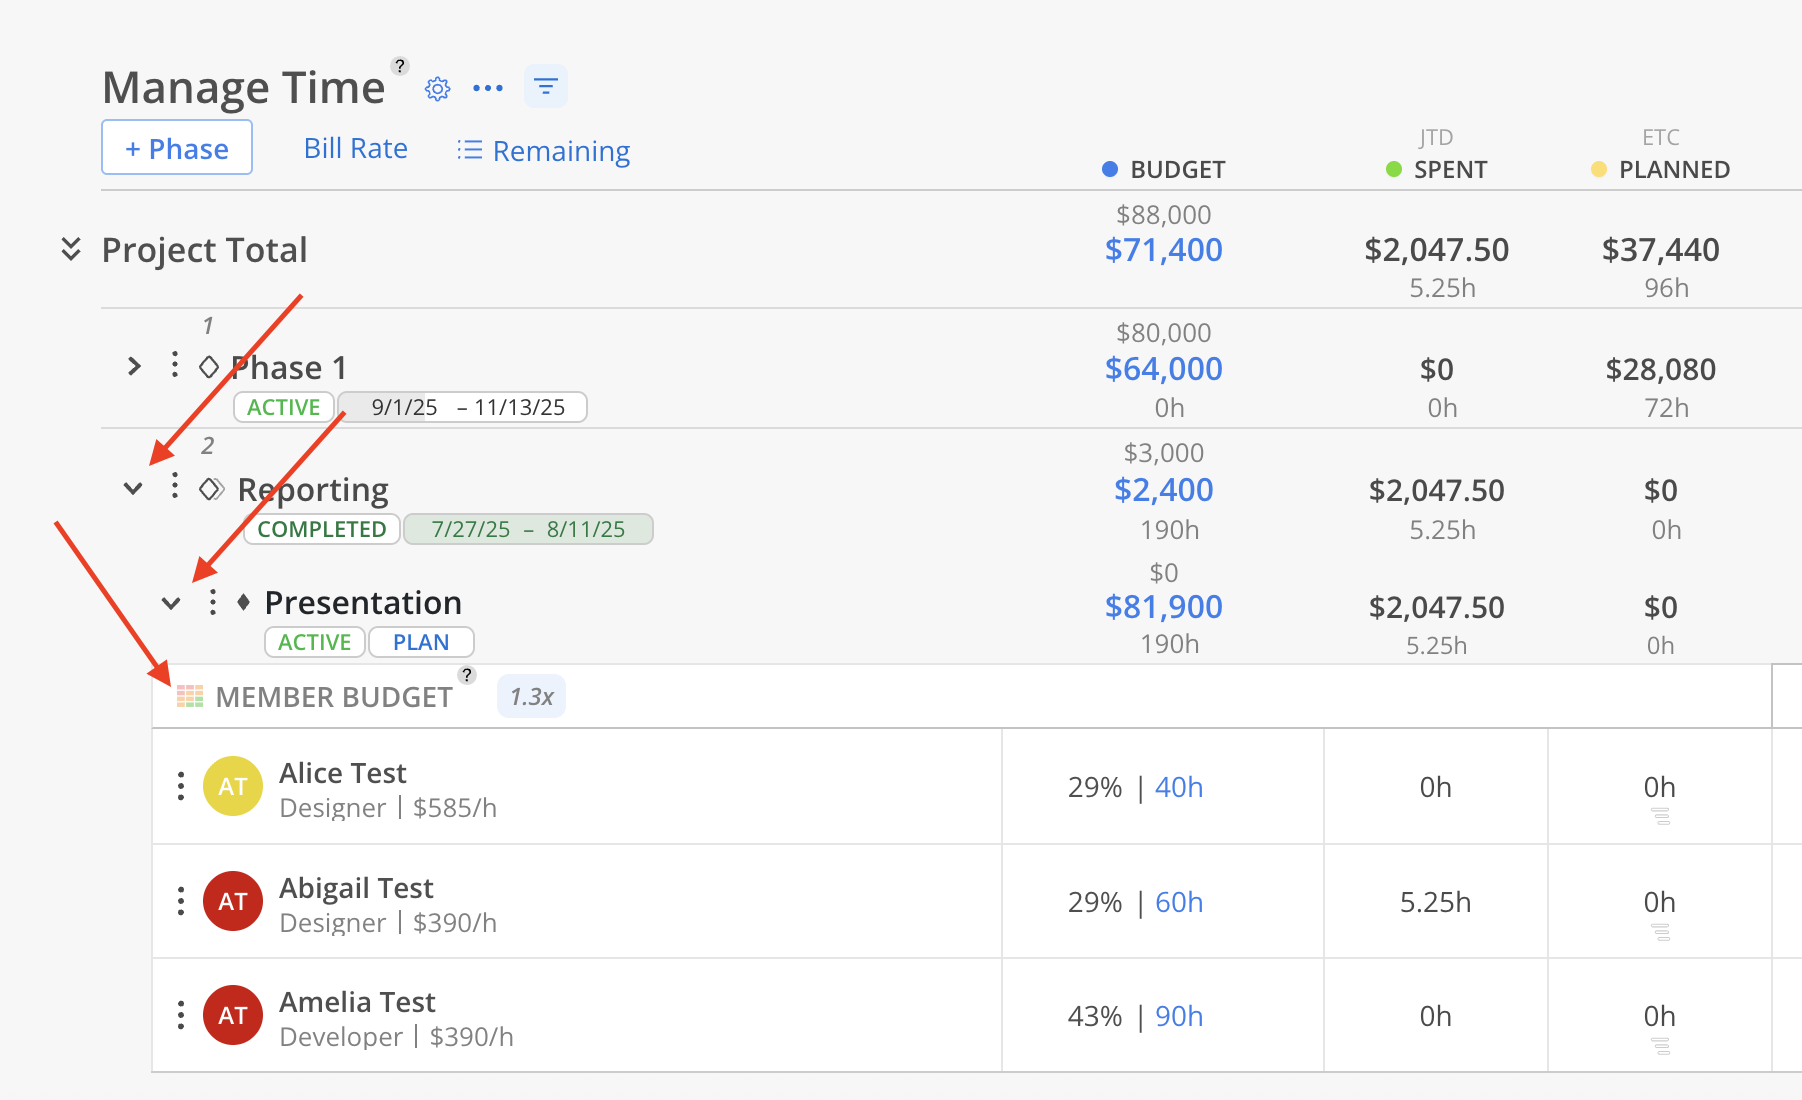
Alternatively, click the icon on the Member Budget table under each Phase or Work Category (if any) to access this view.
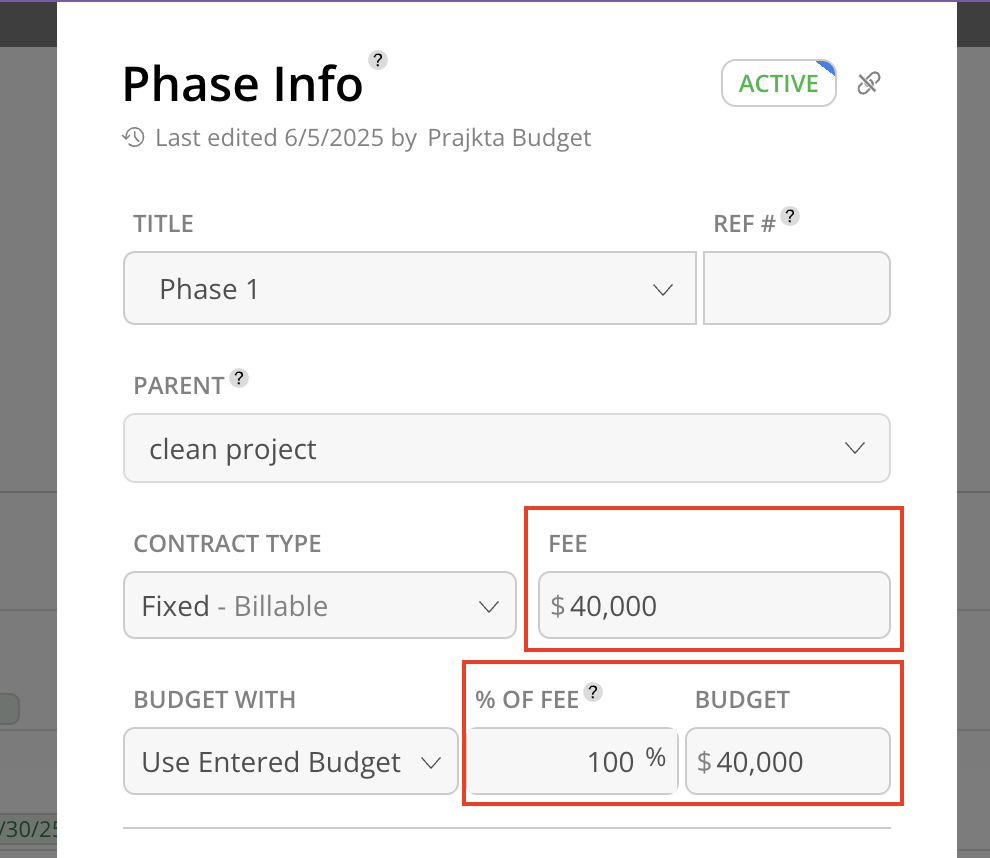
Click the budget amount on a phase. You can set the Phase/Subphase budget information on the Phase Info Modal. The budget and fee on each Phase/Subphase needs to be set separately.
Learn more about Phase Info Modal

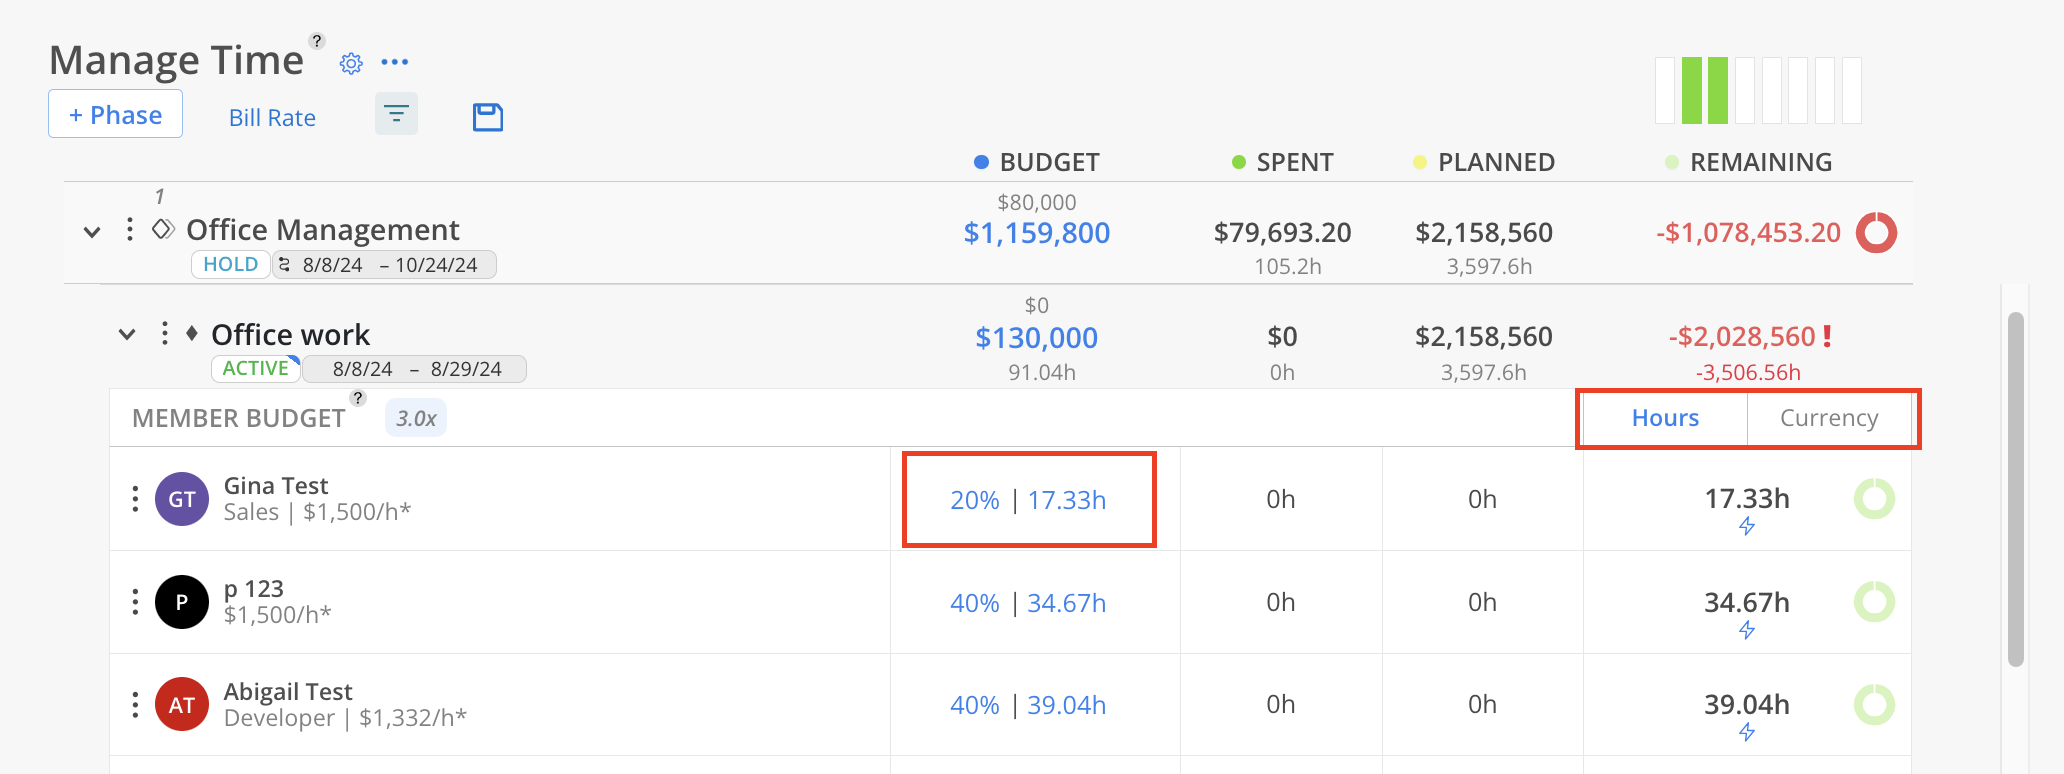
You can toggle the budget between Hours or Currency.
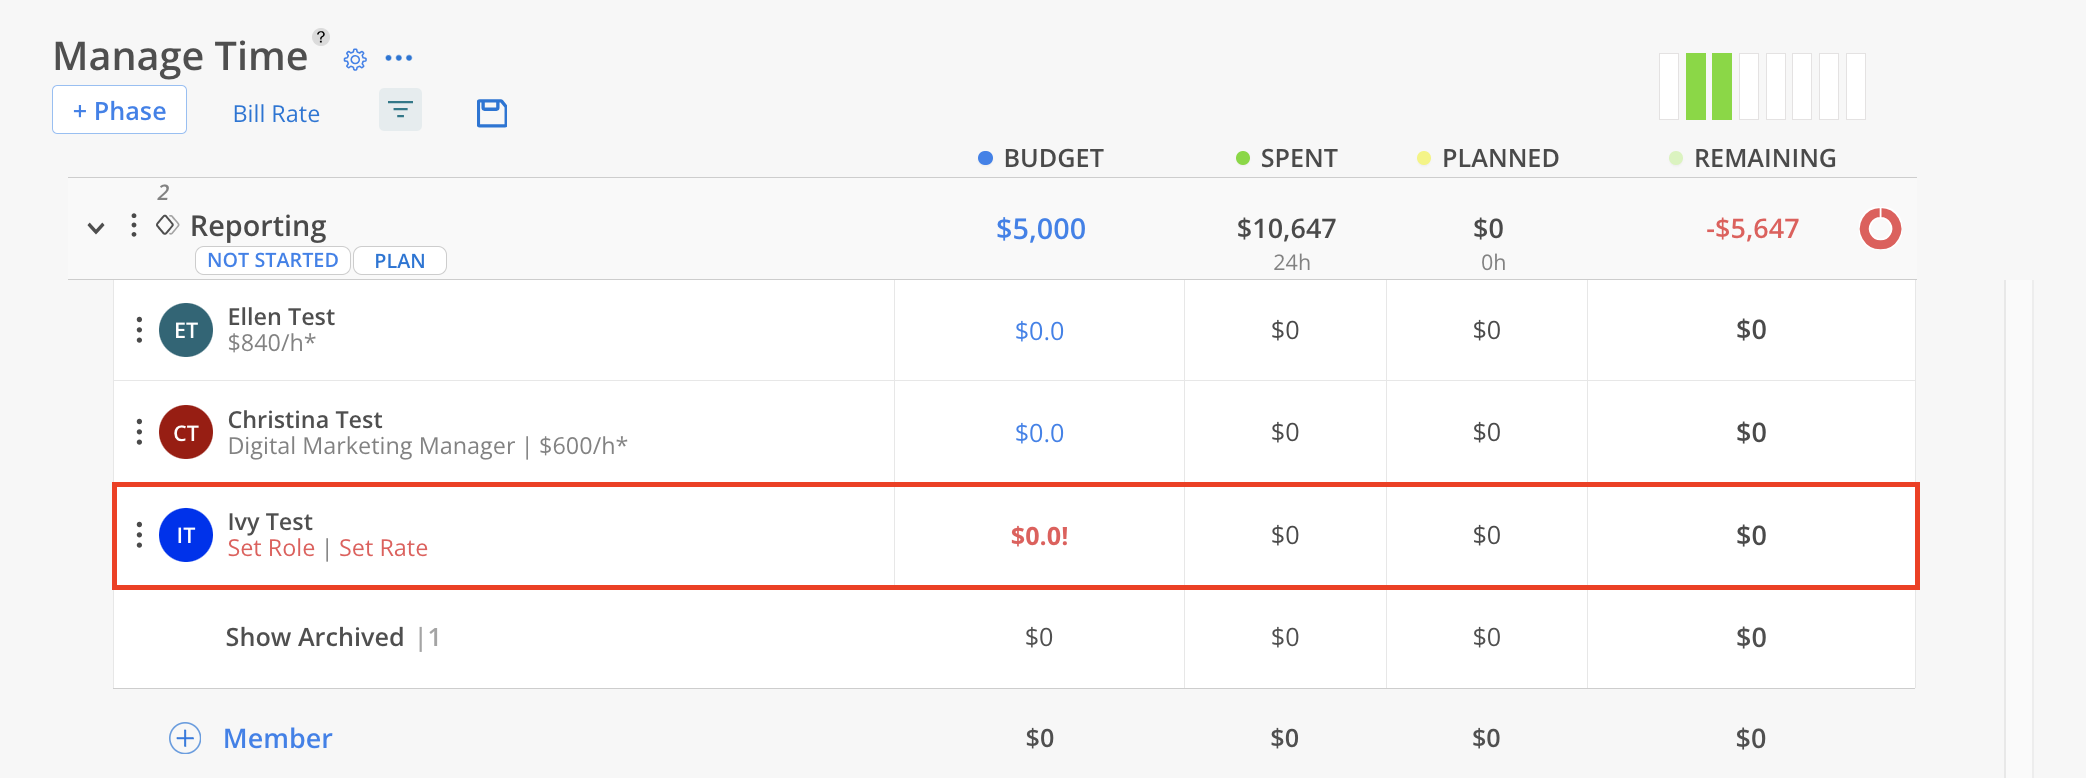
Enter the percentage, hours, or currency amount for each team member assigned to this Phase or Work Category
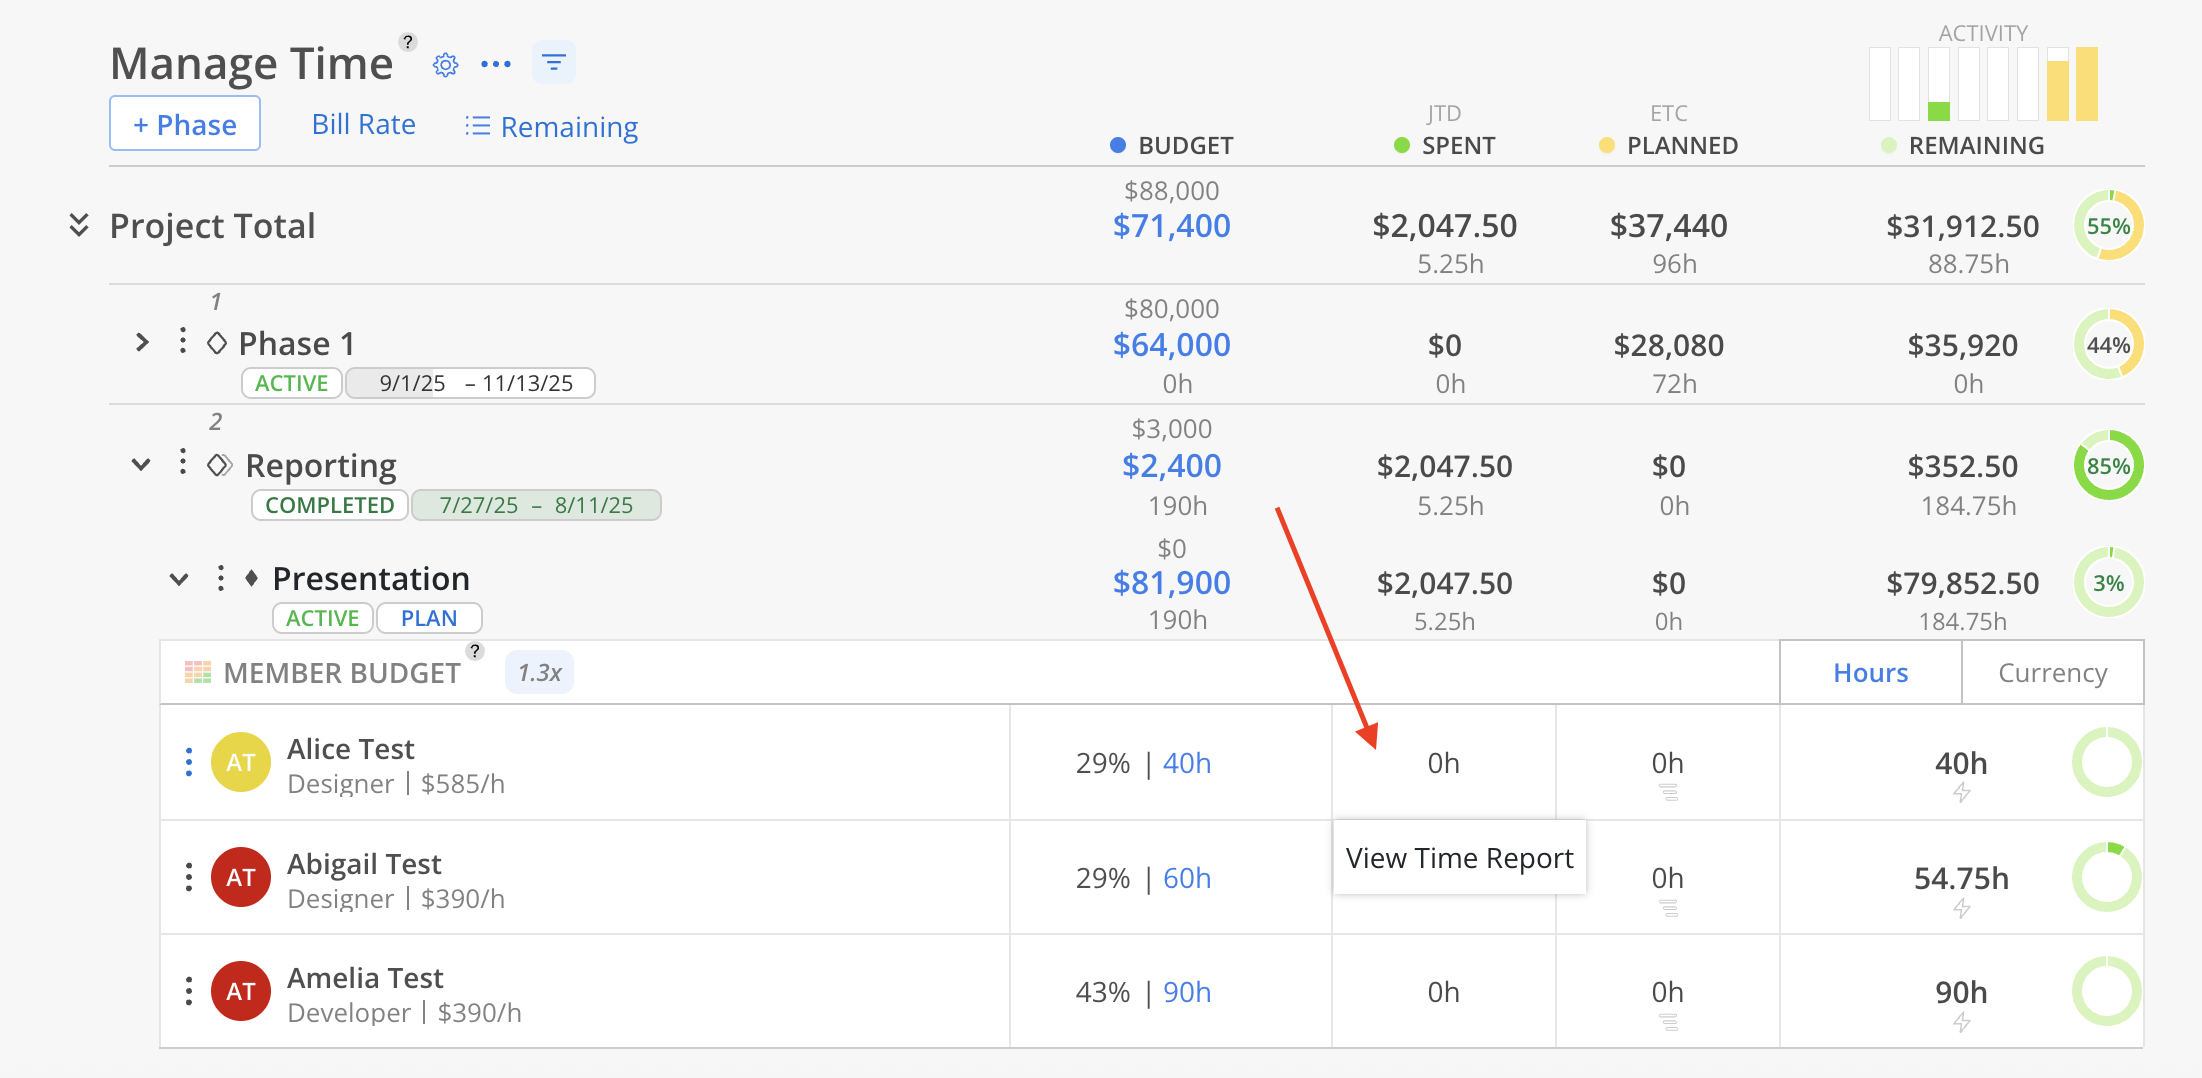
Click on the Spent column to see the "View Time Report" button, which takes you to spent tab of Budget modal to view the Timesheets on this Project.
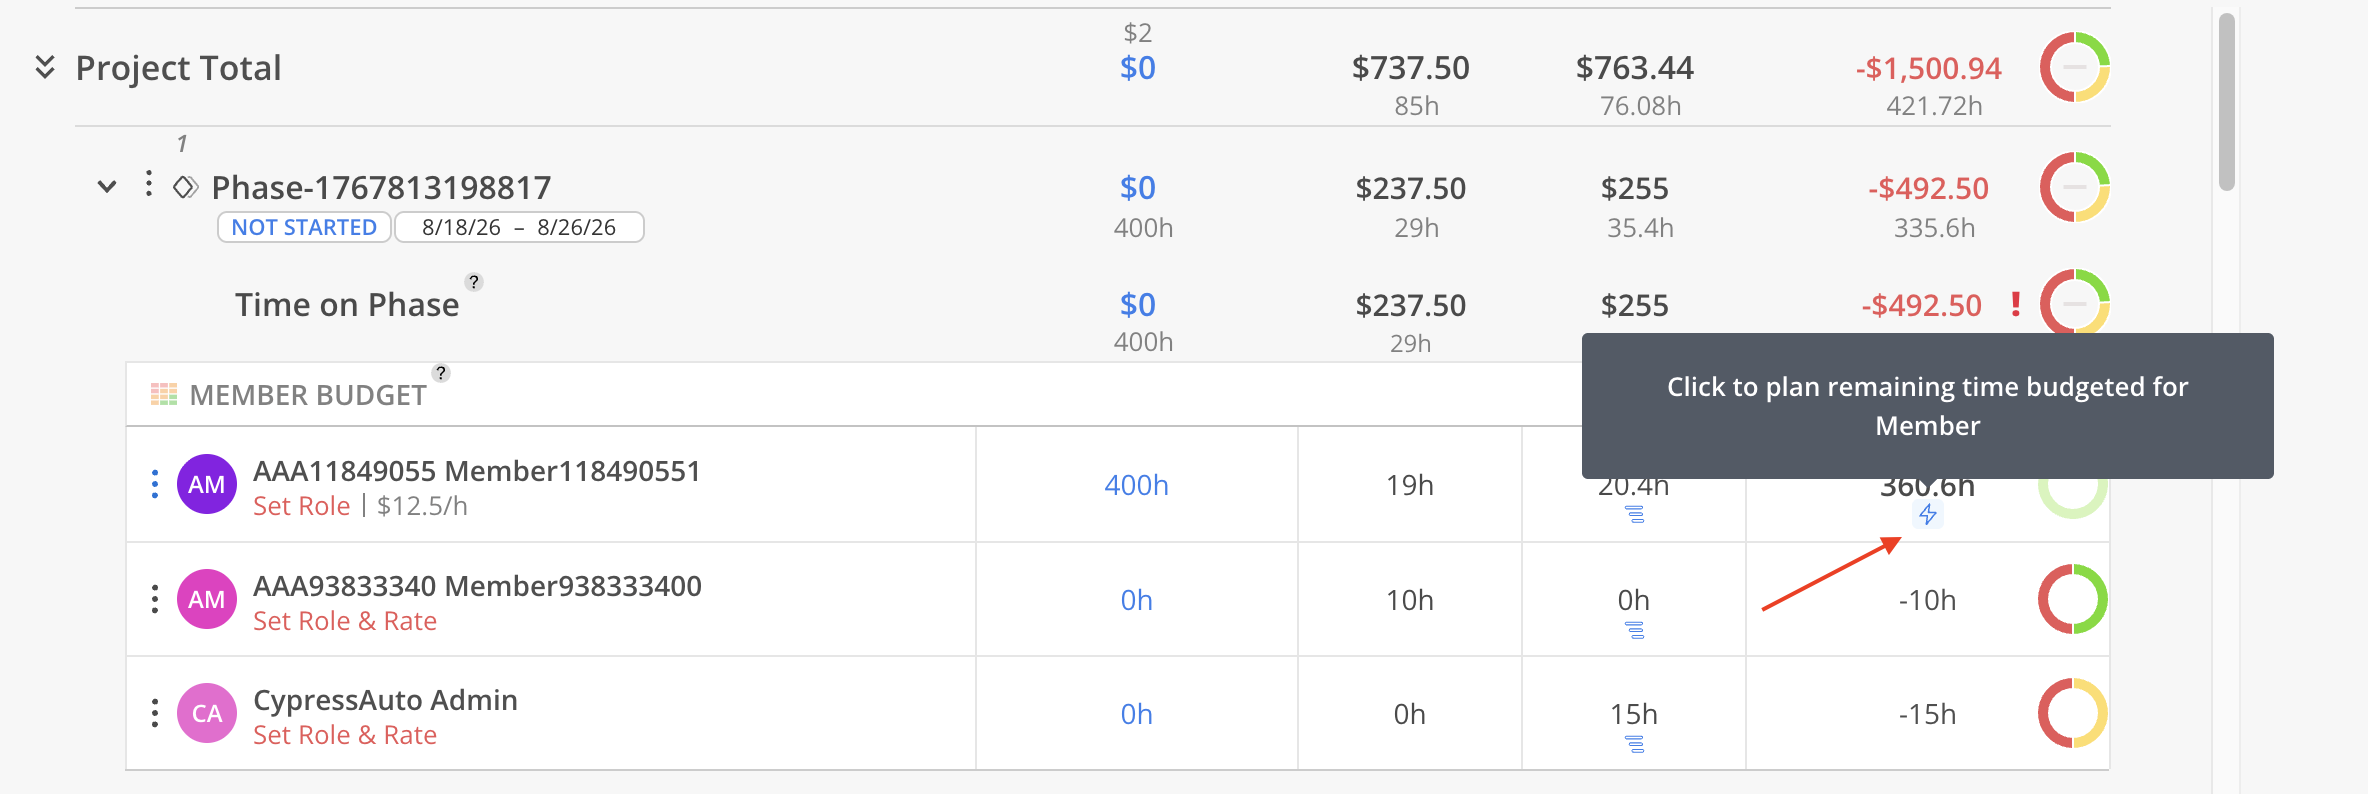
In the Remaining view, a lightning bolt icon appears when a Member has positive remaining hours.

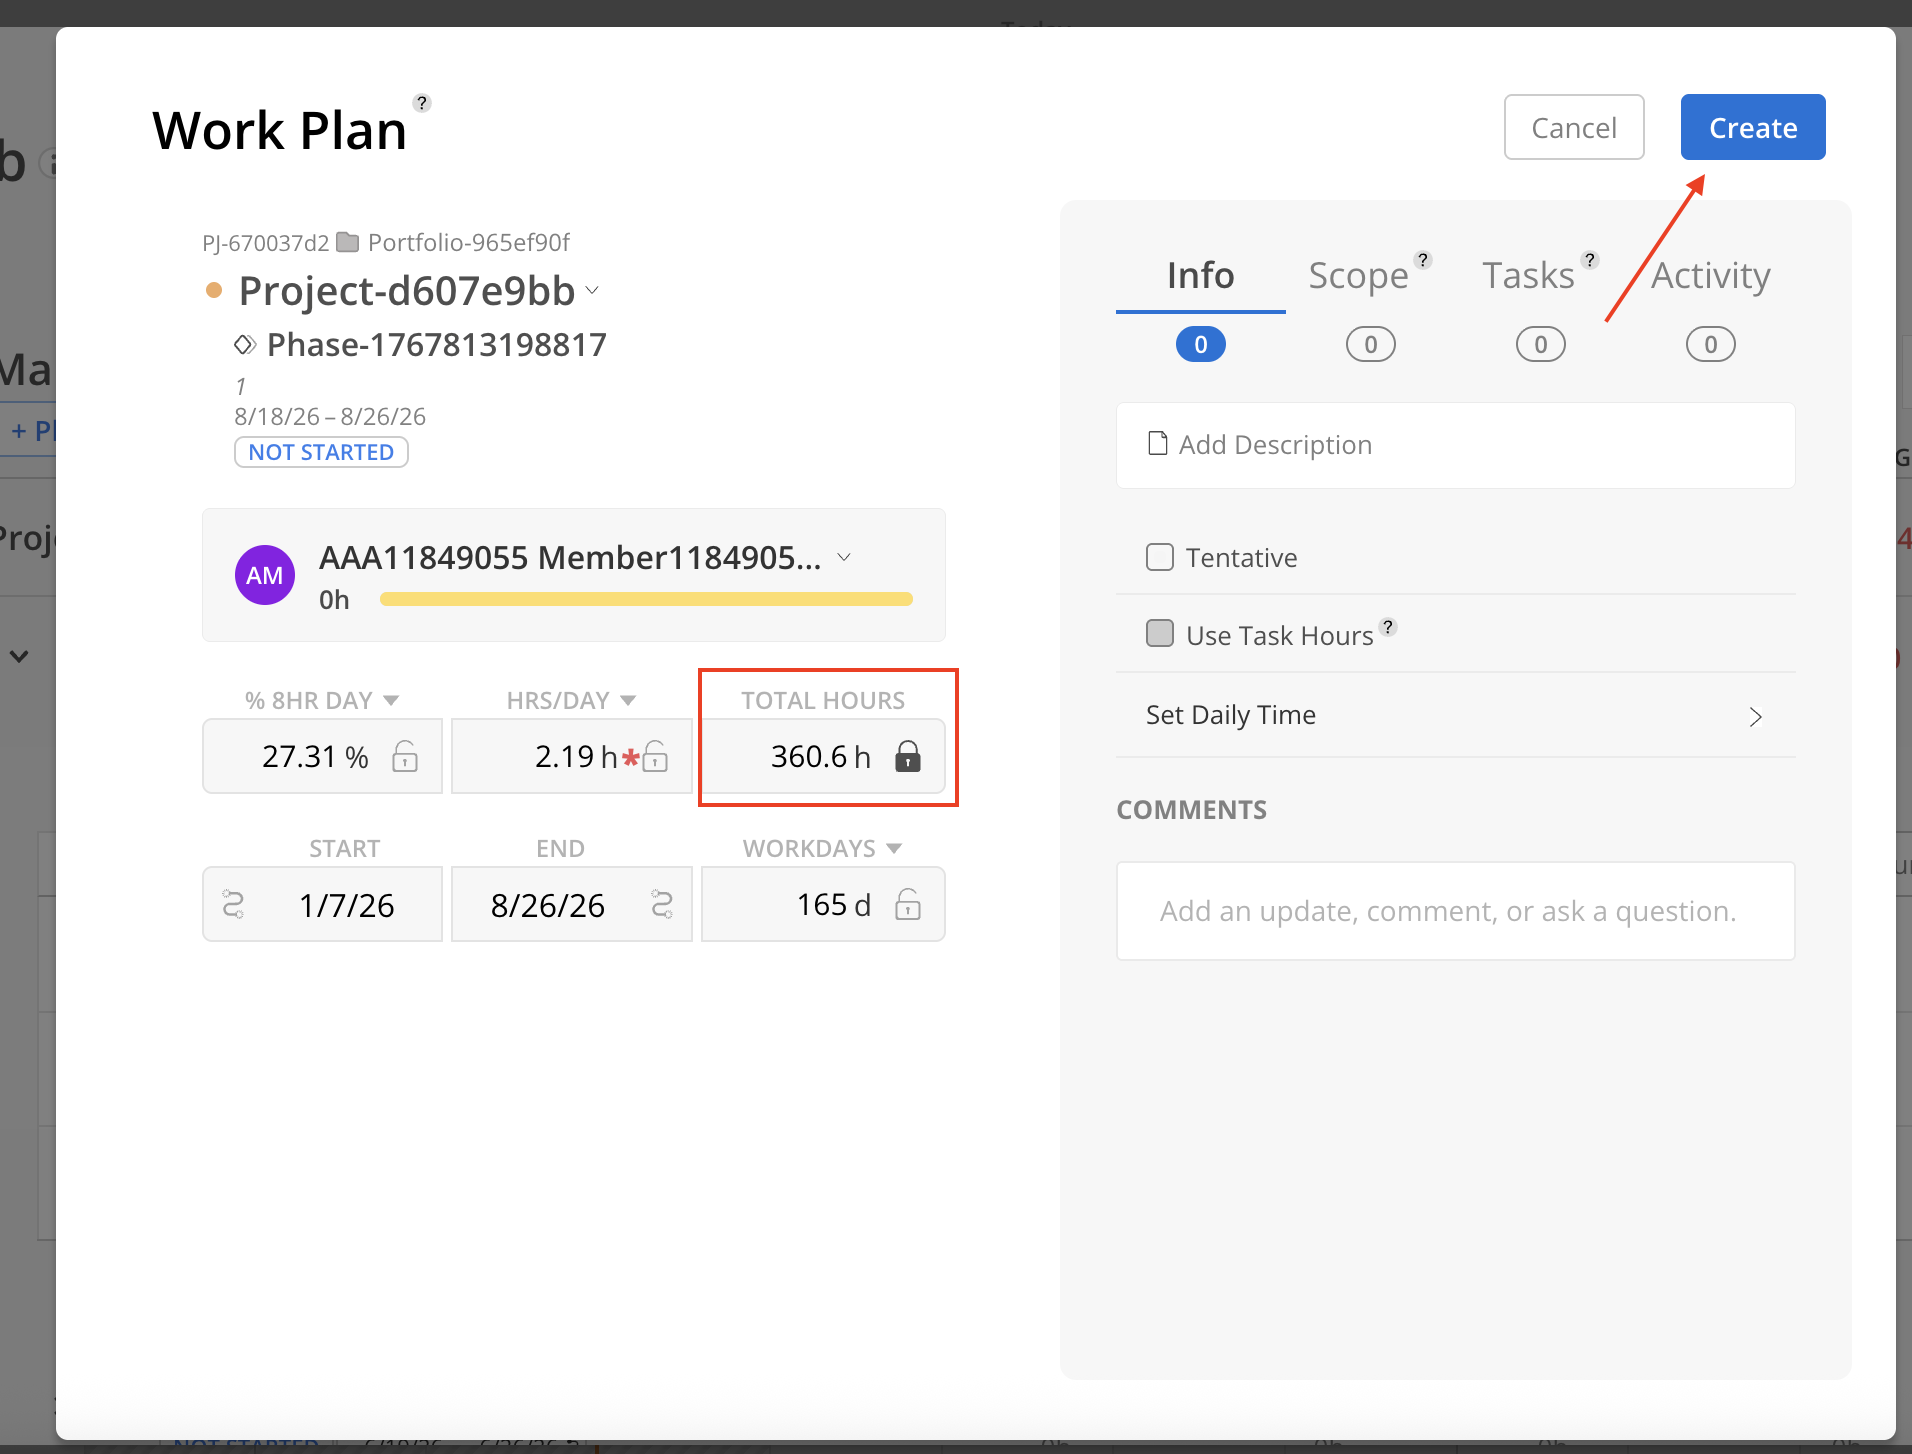
Selecting the lightning bolt opens the Work Plan modal.
In this modal, the Total Hours field is locked and automatically populated to match the remaining hours. Other Work Plan details can be adjusted as needed. Once all necessary information is updated, select Create to finalize the Work Plan.
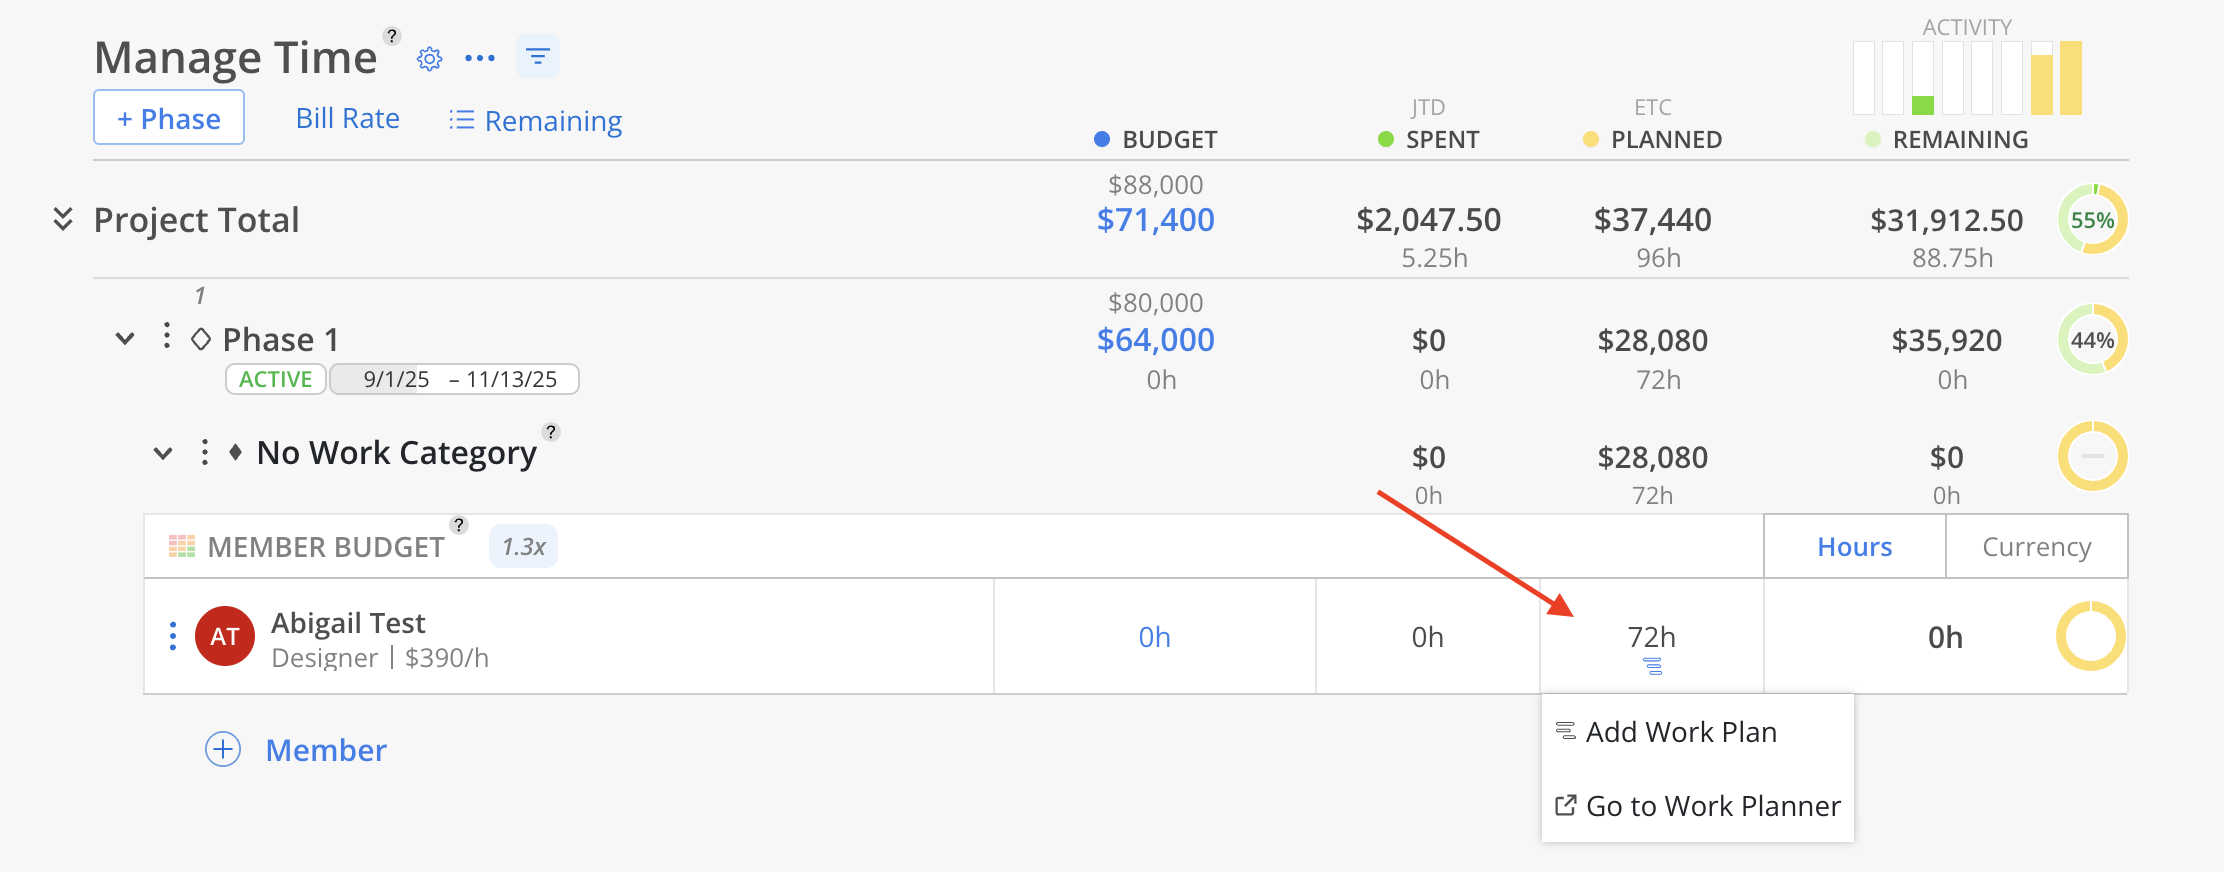
Click on the Planned cell to access the "Add Work Plan" button or the schedule icon.
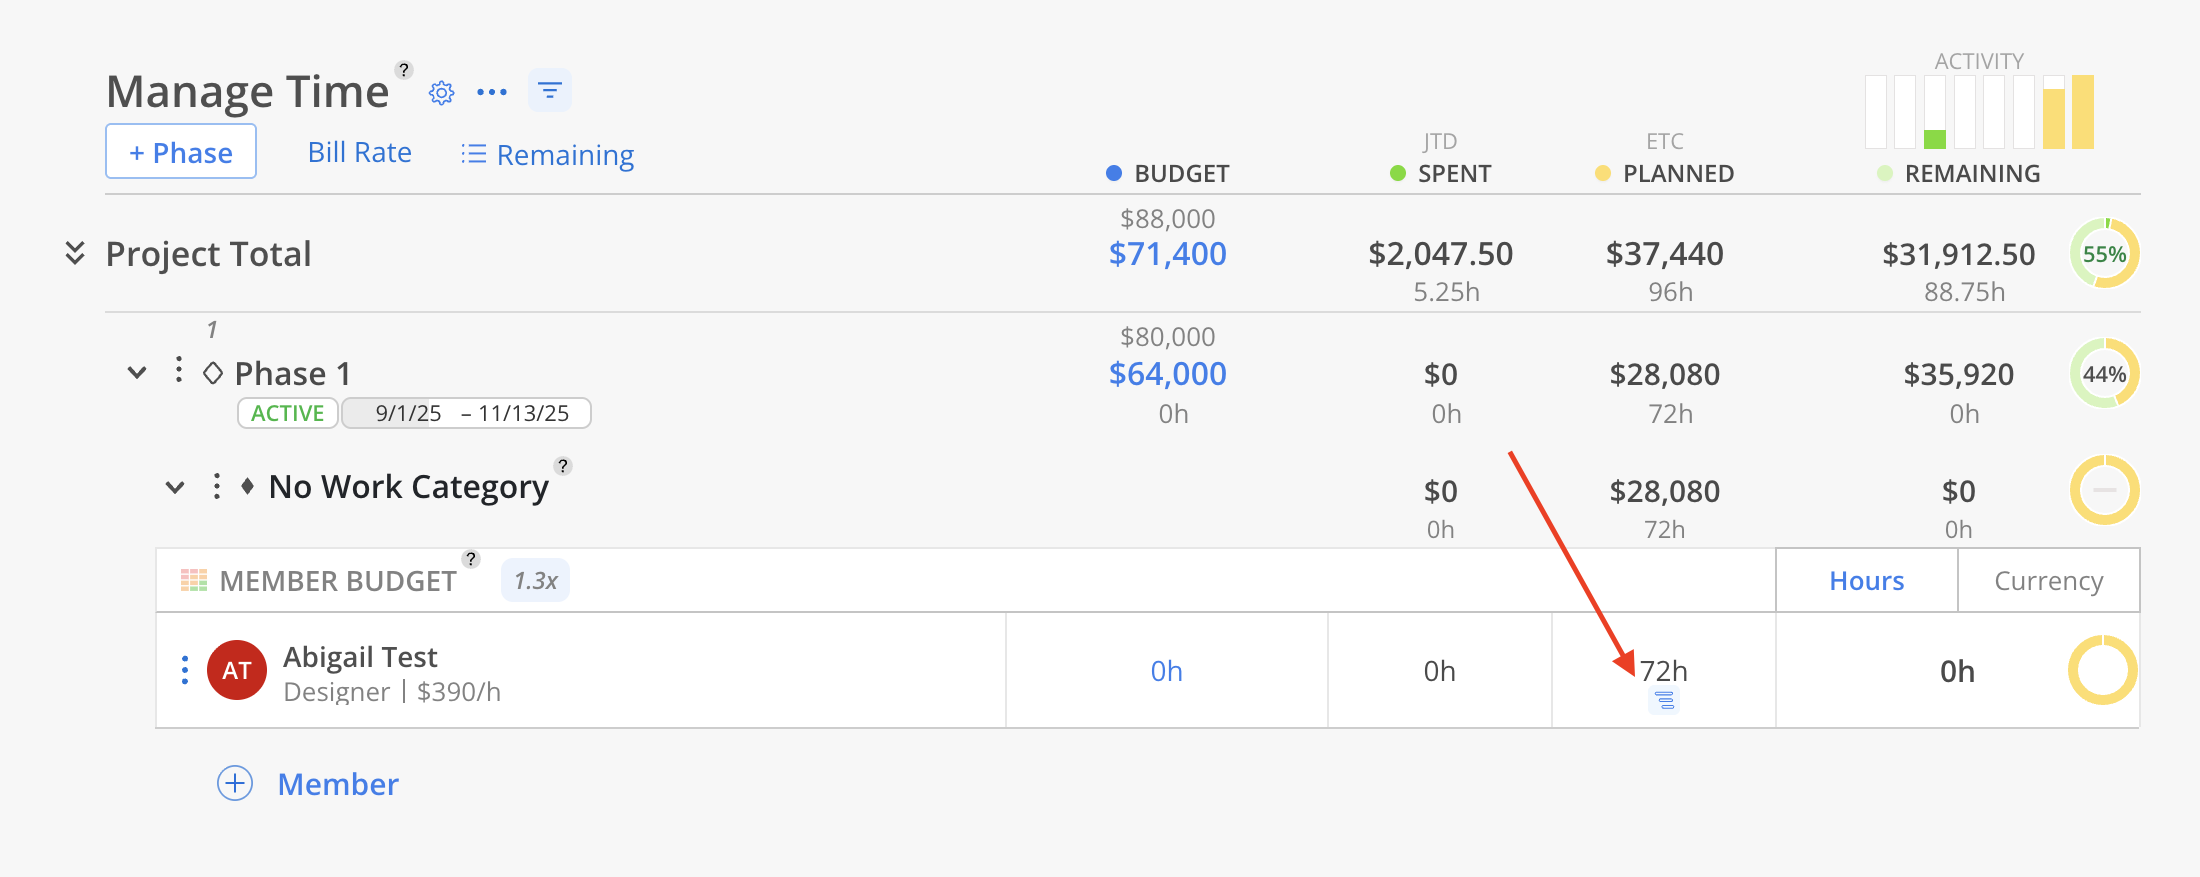
The "Go to Work Planner" button opens a new tab directing to the Workload Space, where existing Work Plans can be reviewed, adjusted, and managed efficiently.

You can add phases to the project to break down the fee and schedule.
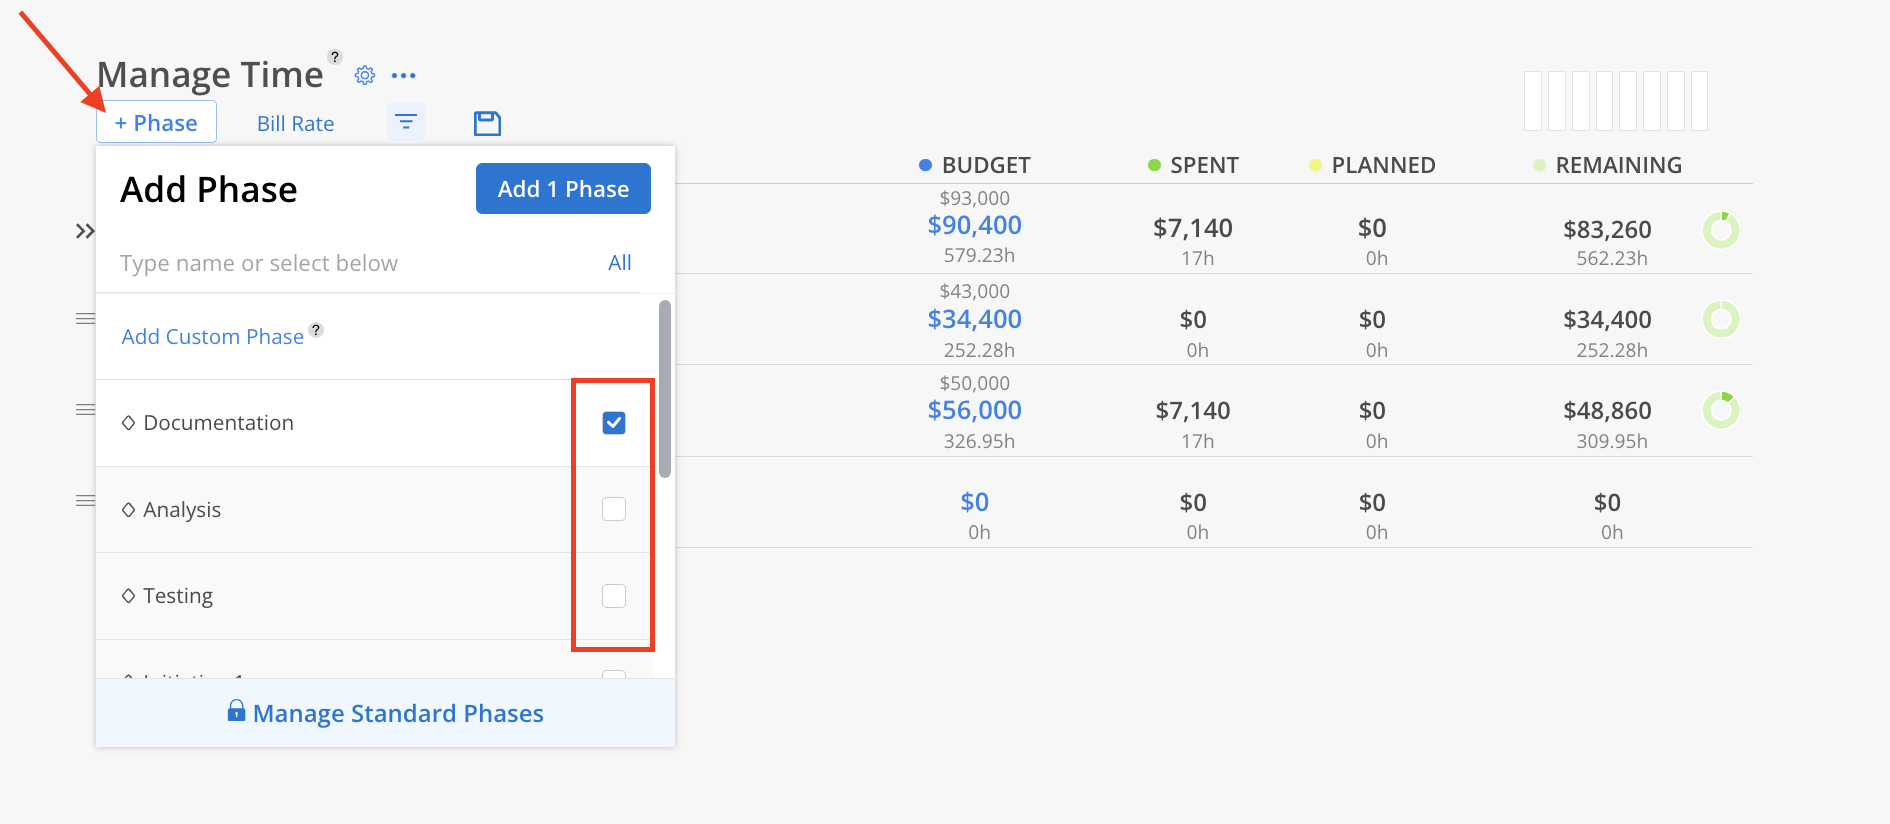
Click +Phase on the top. Select the standard phase(s) you want to add by clicking the checkboxes. Click Add X Phase on the top when finished.
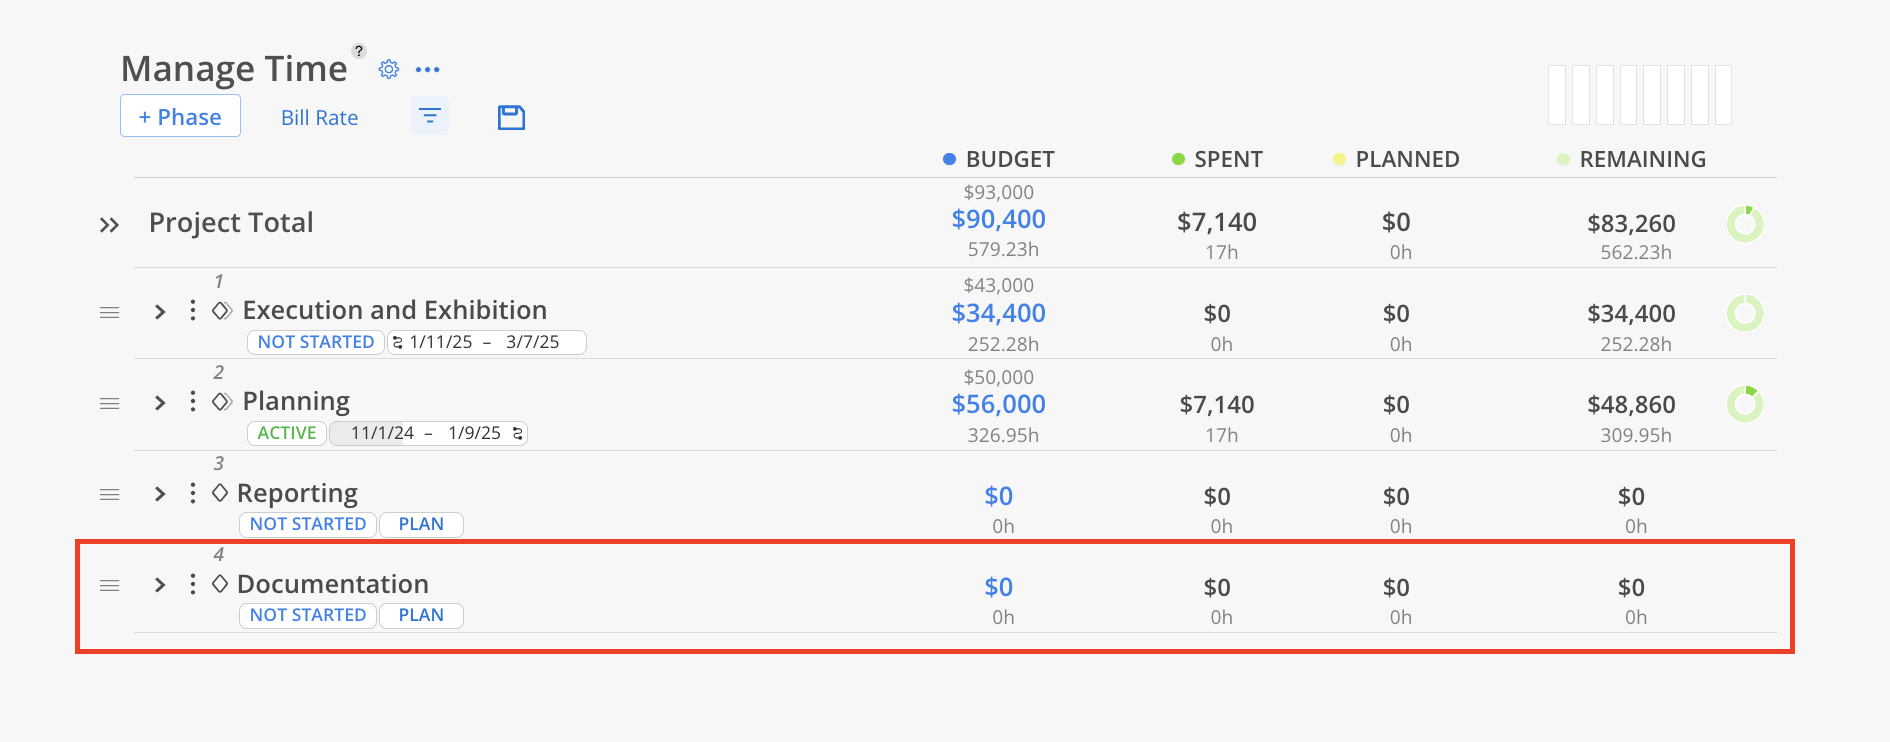
The phase(s) will be added to the end of the list on the table.
You can add phases to the project to break down the fee and schedule.
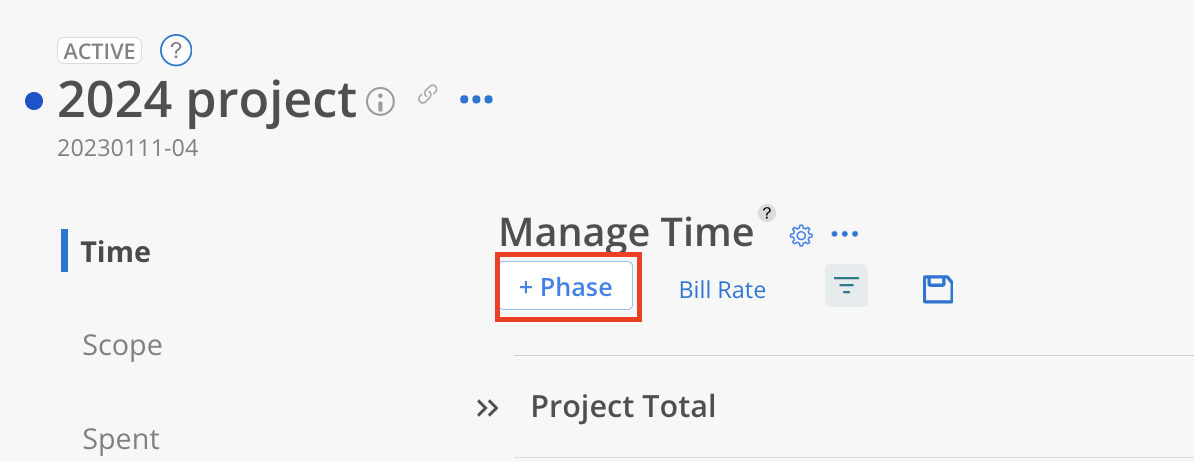
Click +Phase on the top.
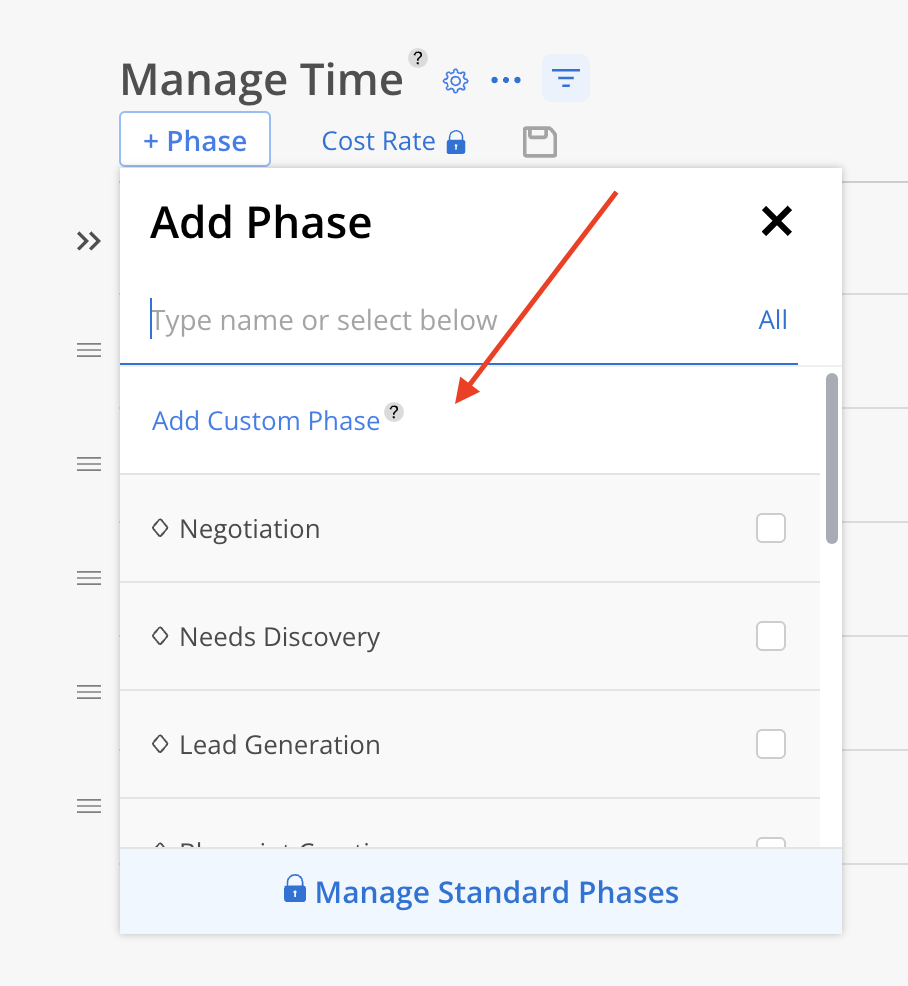
Click Add Custom Phase.
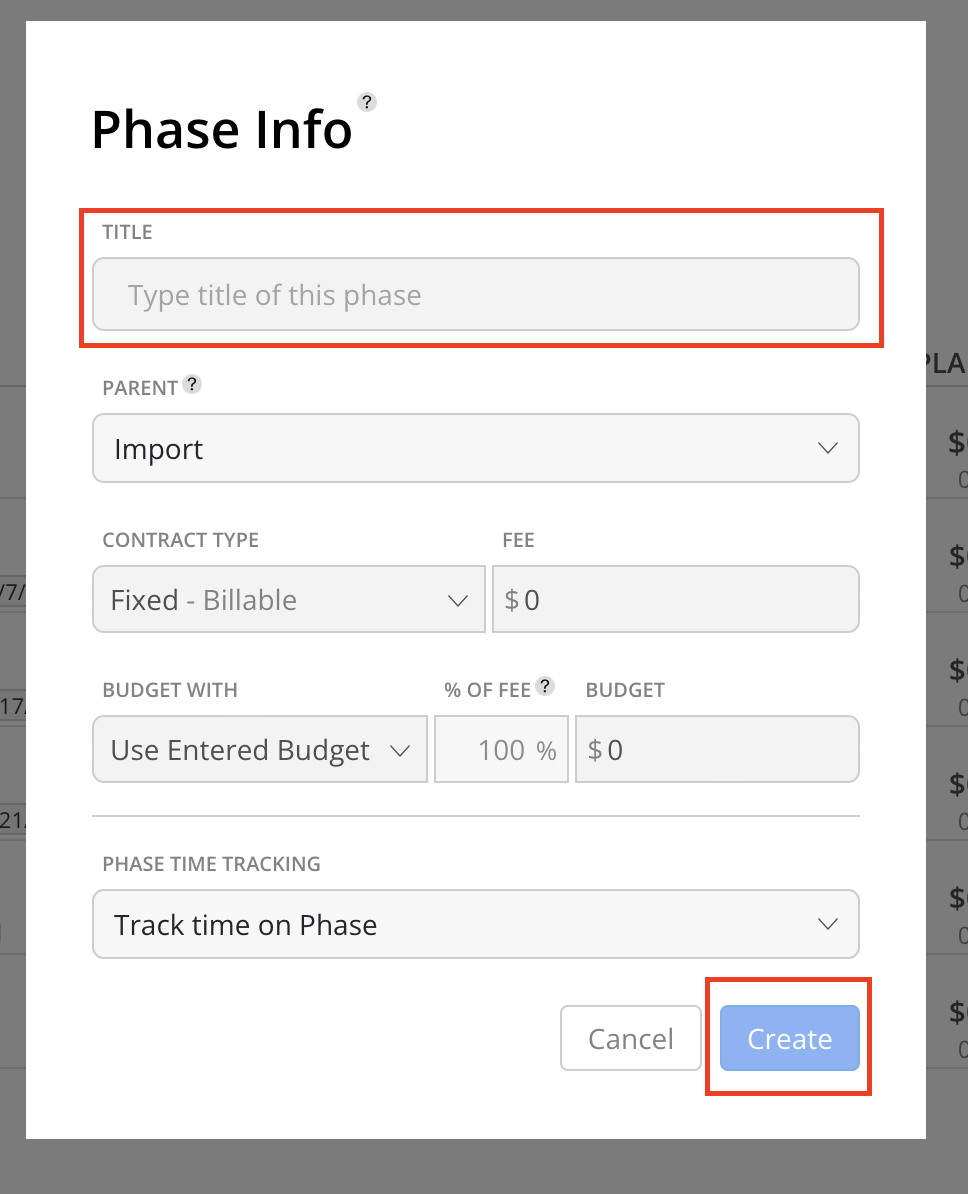
Enter the Phase title and Phase budget information. If you want to change the parent of the phase you can also do it here.
Click Create.
Project and Phase schedules allow you to distribute and monitor fees over a period of time. These dates are essential to present the schedule on the Planner and Schedule View. If you are unsure, you can add an approximate date now and easily modify them at any time.
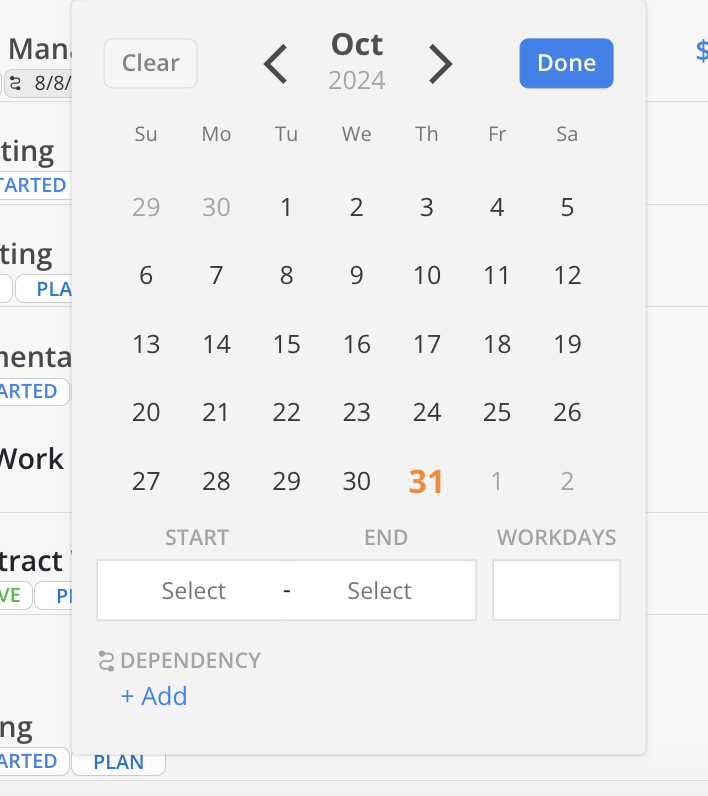
Click the Plan button on a Phase or Work Category.

Select the start and end date. The date can also be depending on other phases of this project.
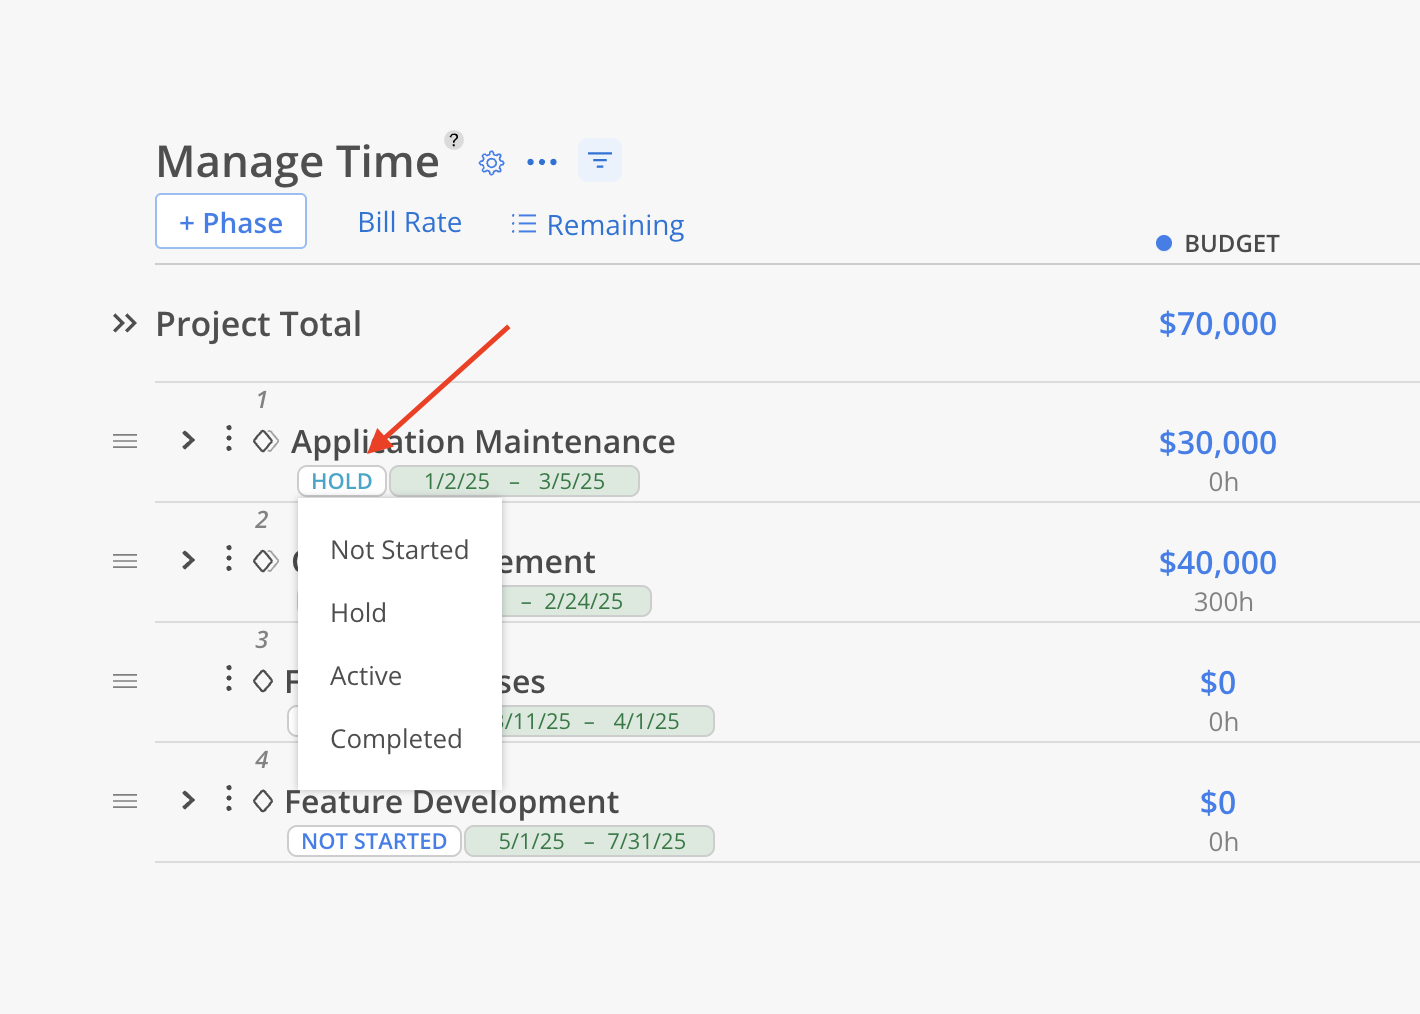
Click on the status button next to the dates on the Phase or Work Category to change the status.
Work Categories or Sub-phases can be used to further break down fee budgets. They can be high-level scope categories, different office locations, other disciplines, or various departments.

Click the three-dot on the phase that you want to add the work category to. Click Add Schedule Item > Add Work Category.

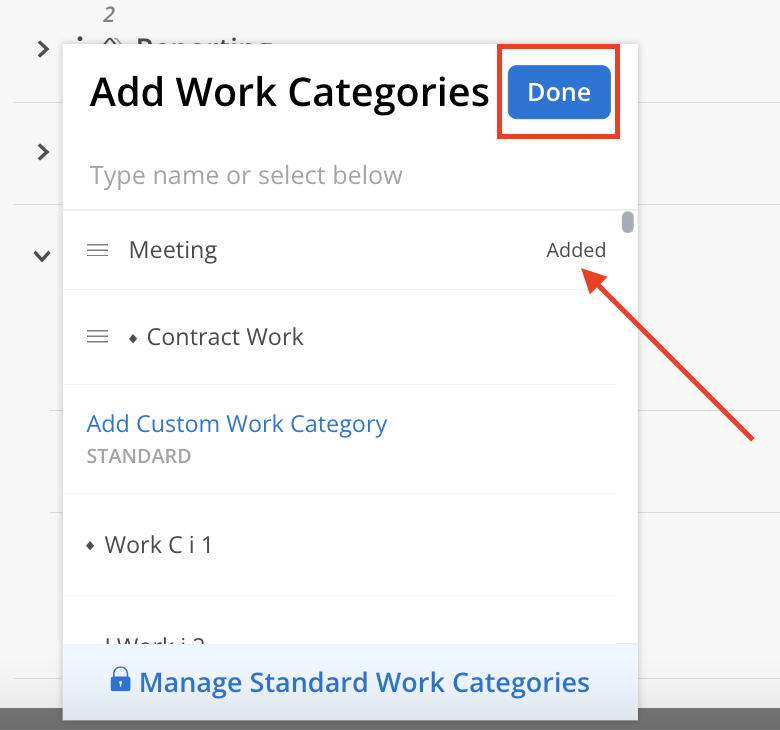
The existing Work Categories will show on the top. Select the Work Categories you want to add, they will show "Added" text. Click Done on the top of the menu when finished.
Newly added Work Categories should show on the table. You can set up the budgets and fees the same way you set those on a phase.

Click the three-dot on the phase that you want to add the work category. Click Add Schedule > Add Work Category.

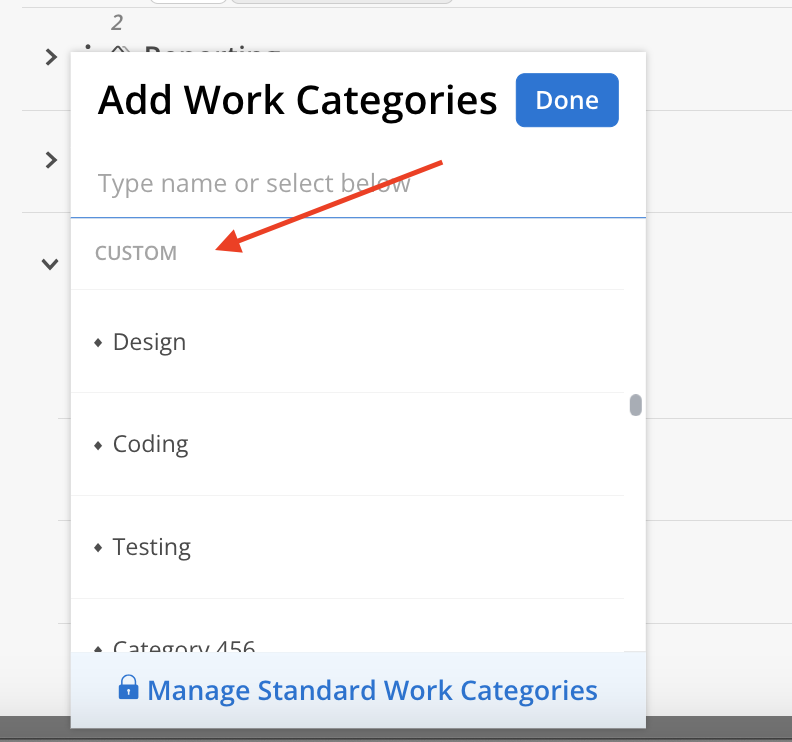
Scroll down to see all the existing custom work categories. Select the ones you want and click done.
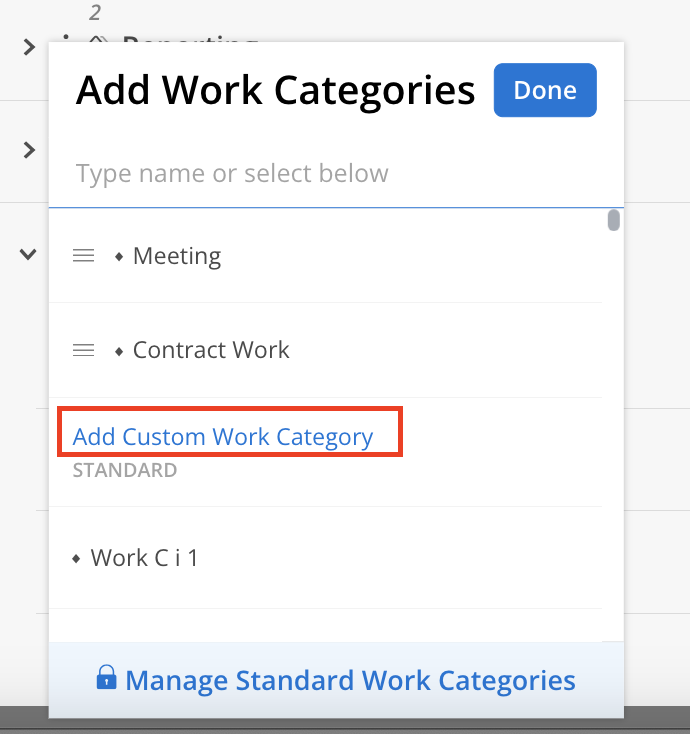
If the existing custom work categories are not the ones you want. You can create new custom work categories by clicking Add Custom Work Category.
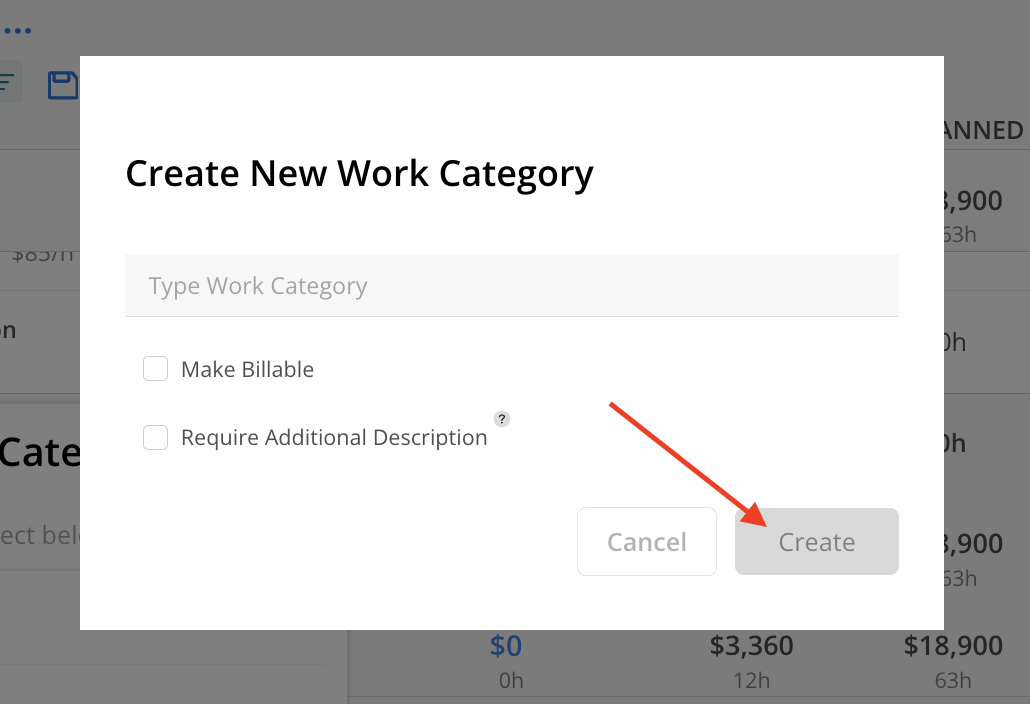
Enter the work category name. Select if the work category requires additional description when entering the timesheets and if the work category is billable or not. Then click Create.
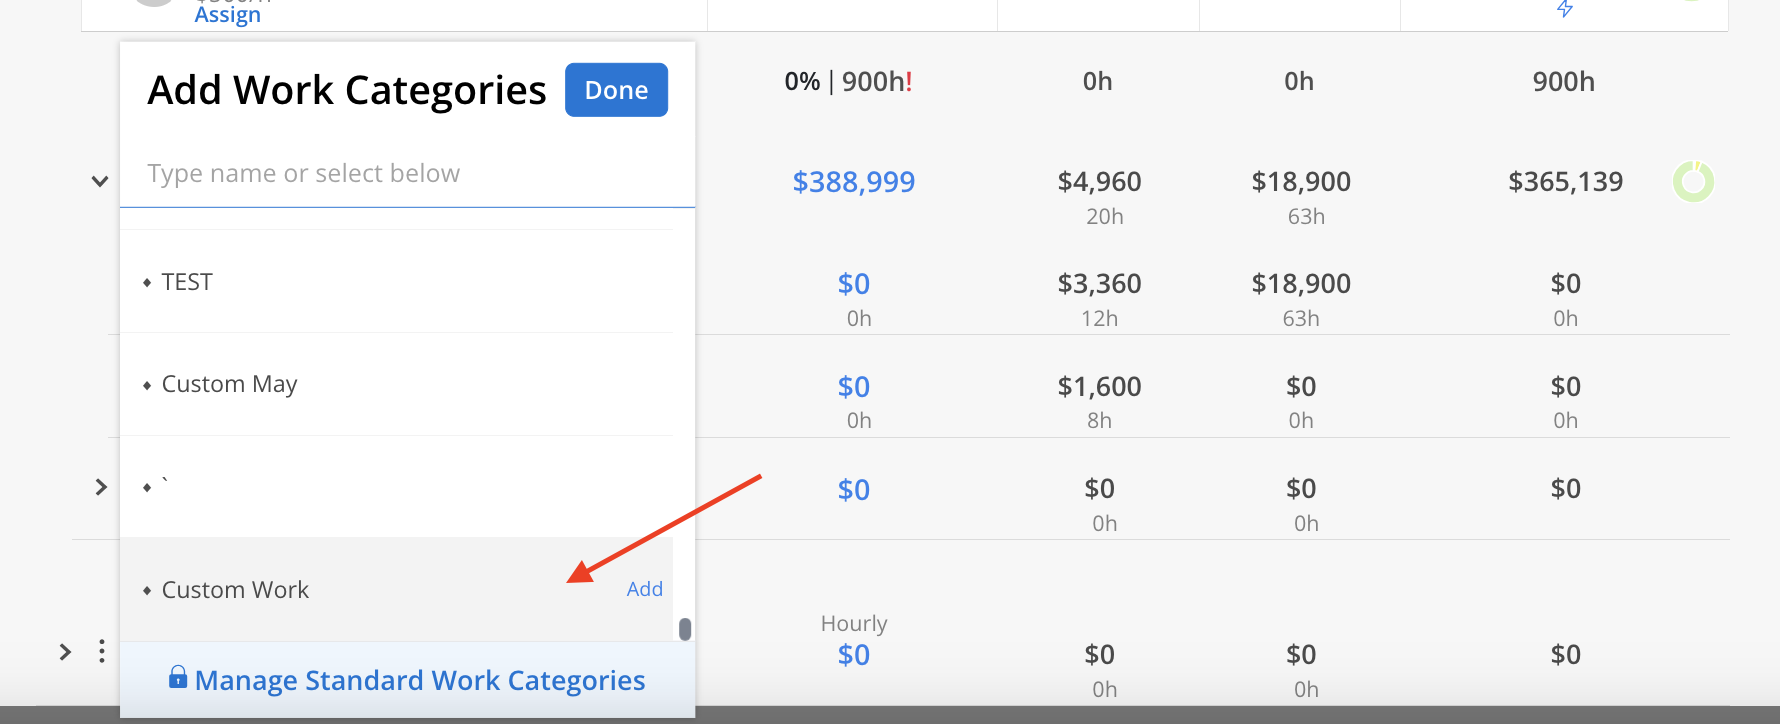
Scroll down to find the custom work category that you just created. Select it and click done.
Click the budget cell of the Work Category.

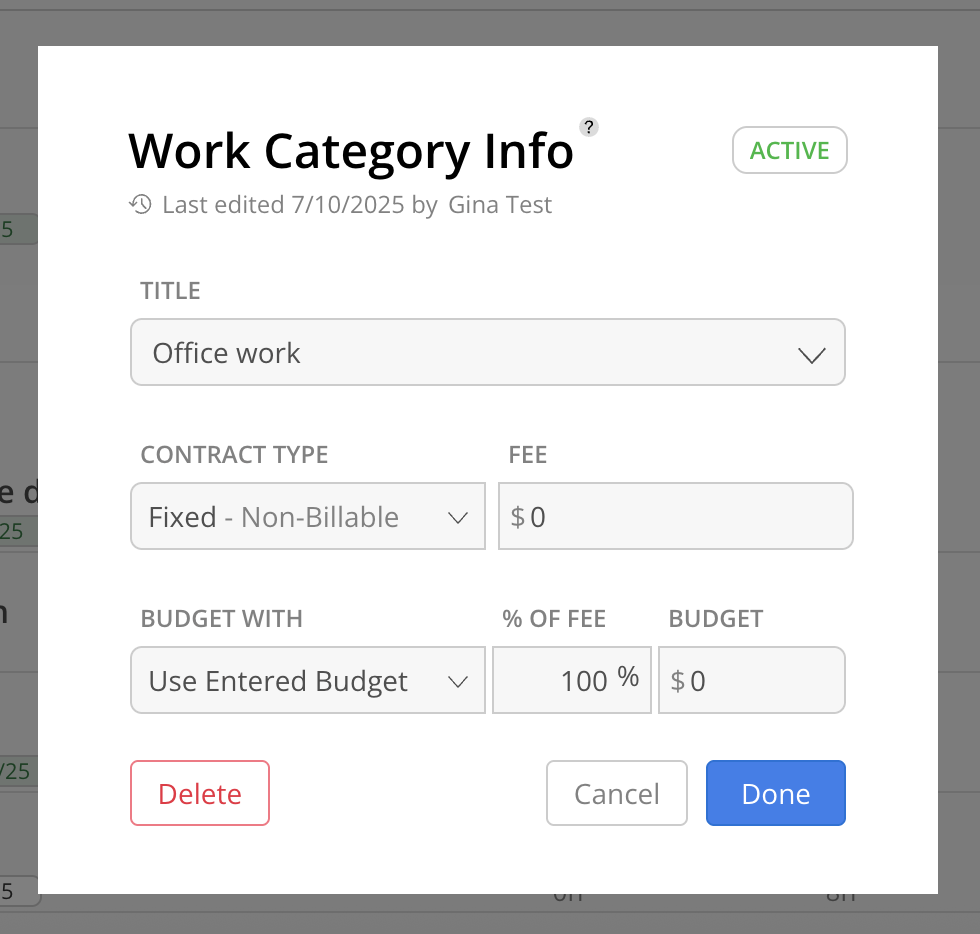
Similar to the phase info modal, you will be able to set the Work Category to contract type, edit the name of the custom Work Category, budget and fee amount and budget with option.
Learn more about Work Category Info Modal
