Open roles appear in the Workload space alongside your team members, with the same search, filter, and grouping tools you already use to manage your people. Bring every unfilled seat across every project into one timeline, group them by role, and sort by planned hours to see where staffing gaps are forming.
This connects the day to day staffing view in Workload to the open roles you already add to projects in Planner. A role you added to a proposal or a future project shows up here automatically, with no extra setup.
Open roles toggle. Select either ‘Member’ or ‘Role’ to toggle to and review in Workload Space
Planned hours per role. Each open role's row shows the hours already planned against it for the period you're viewing, the same way a member's row shows their planned hours.
Cross-project breakdown. Expand an open role's row to see which projects are contributing hours to that role.
Hours, not capacity. An open role's row tracks the hours planned against it, since it stands in for unfilled work rather than a scheduled person.
Search. Search open roles by name to jump straight to the role you're tracking.
Filter. Narrow the open roles shown to a specific set, the same way you filter team members.
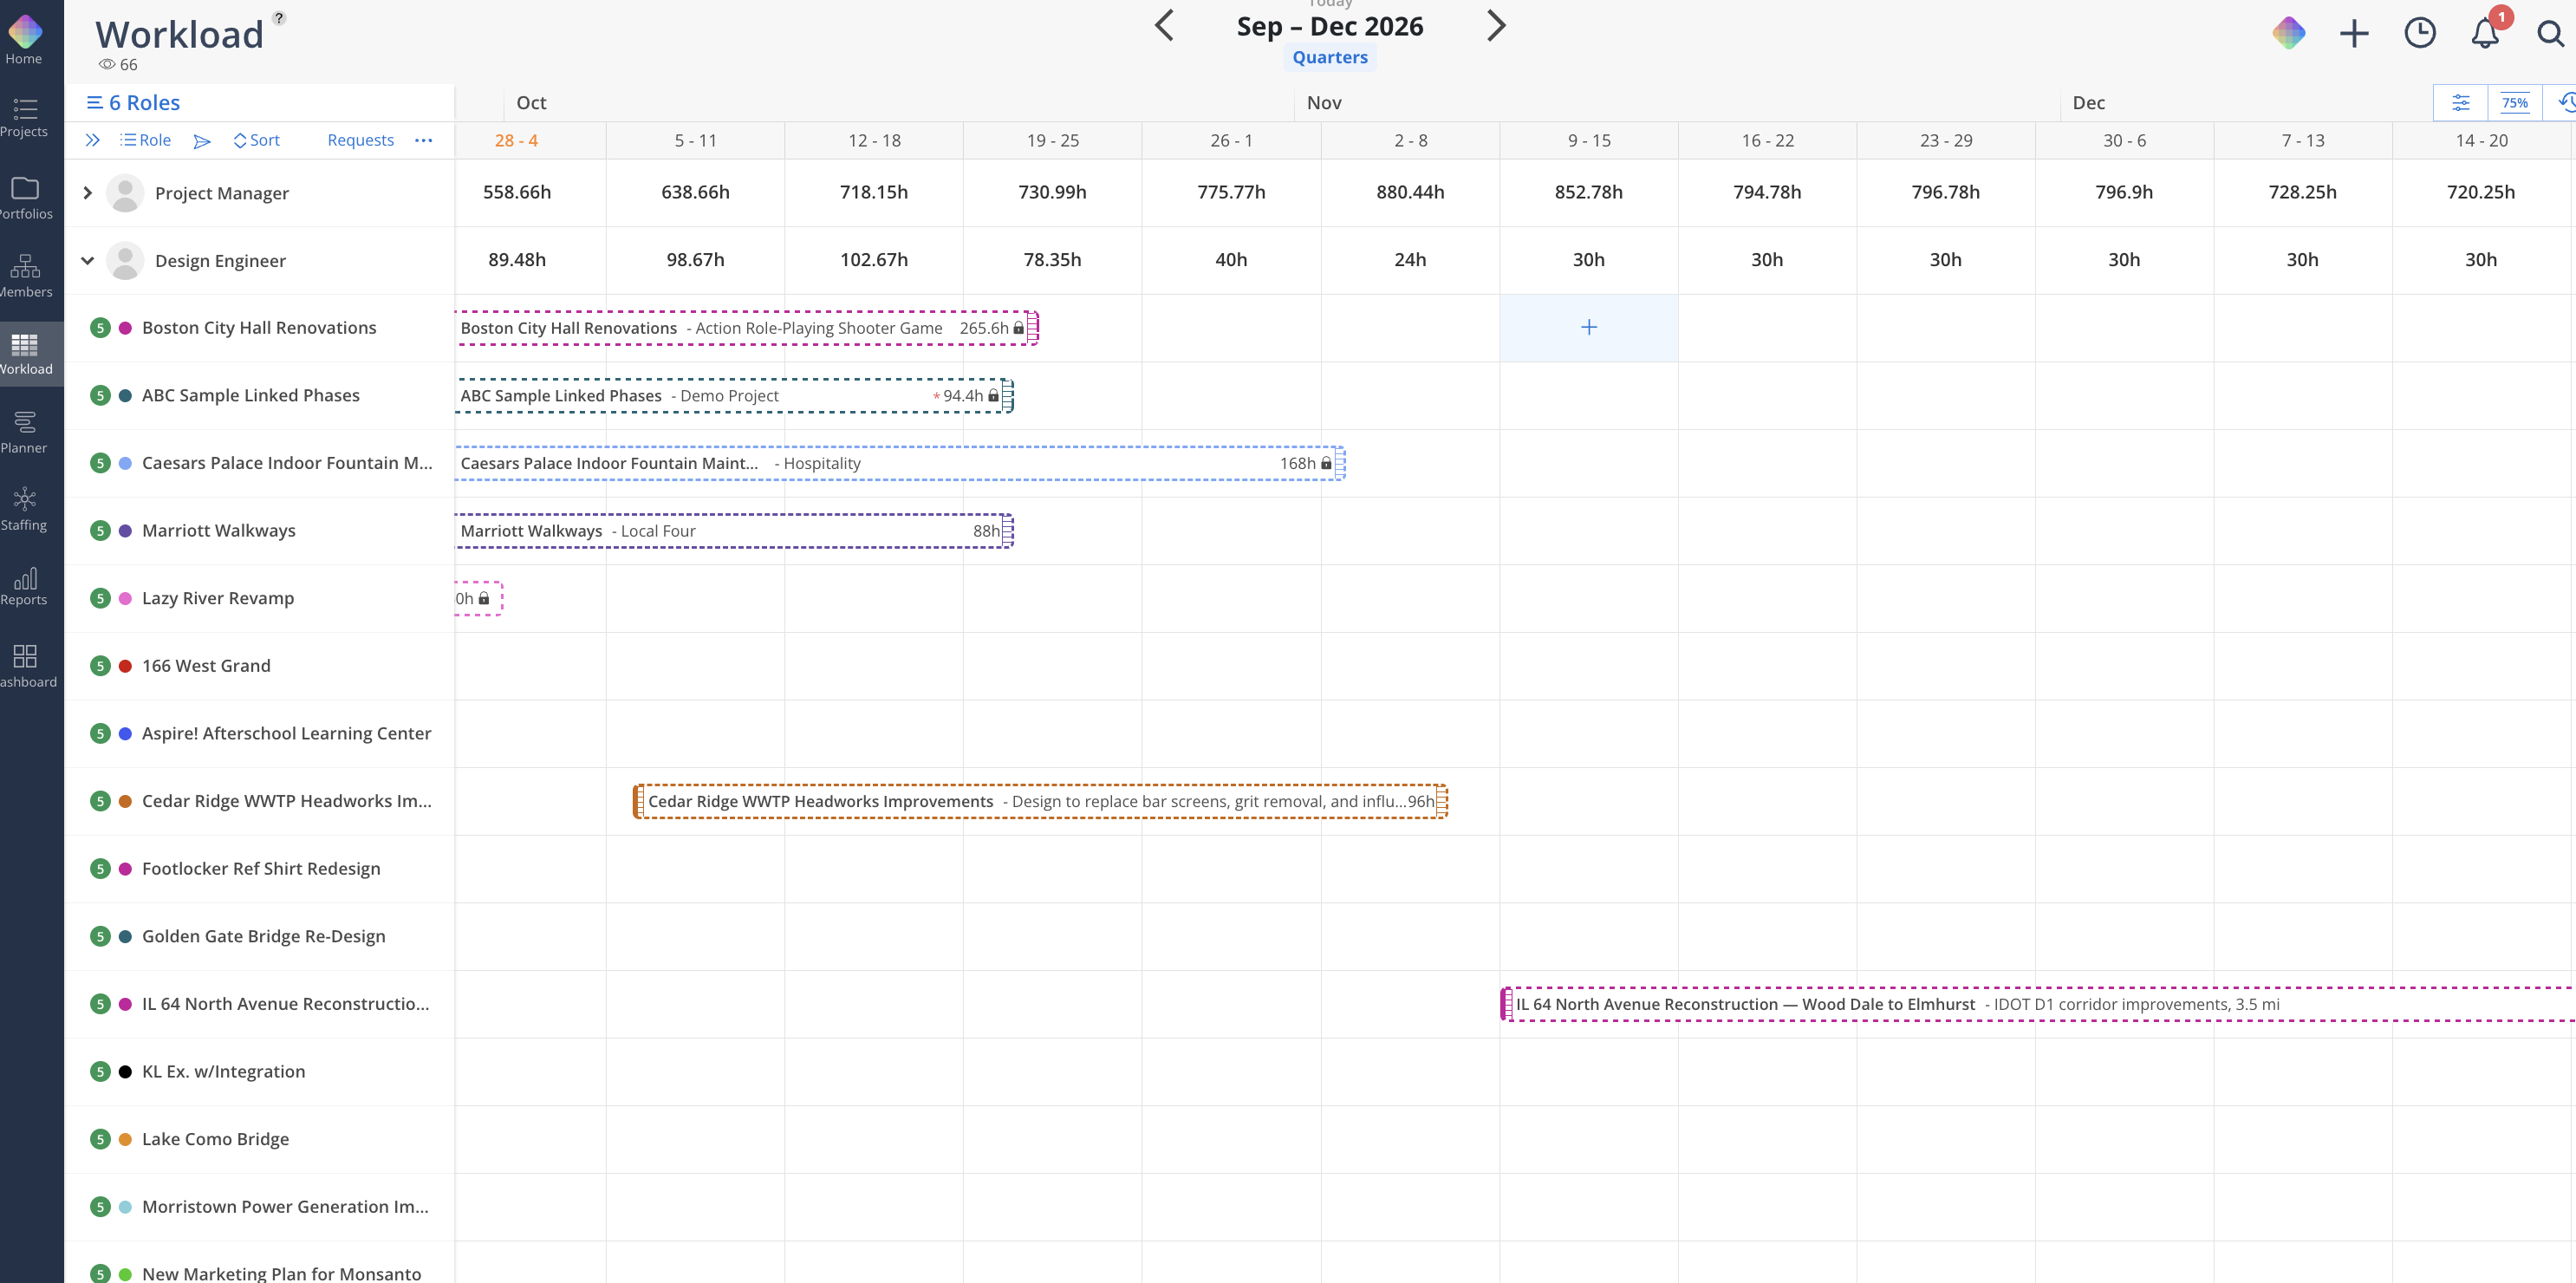
Open the Workload space.
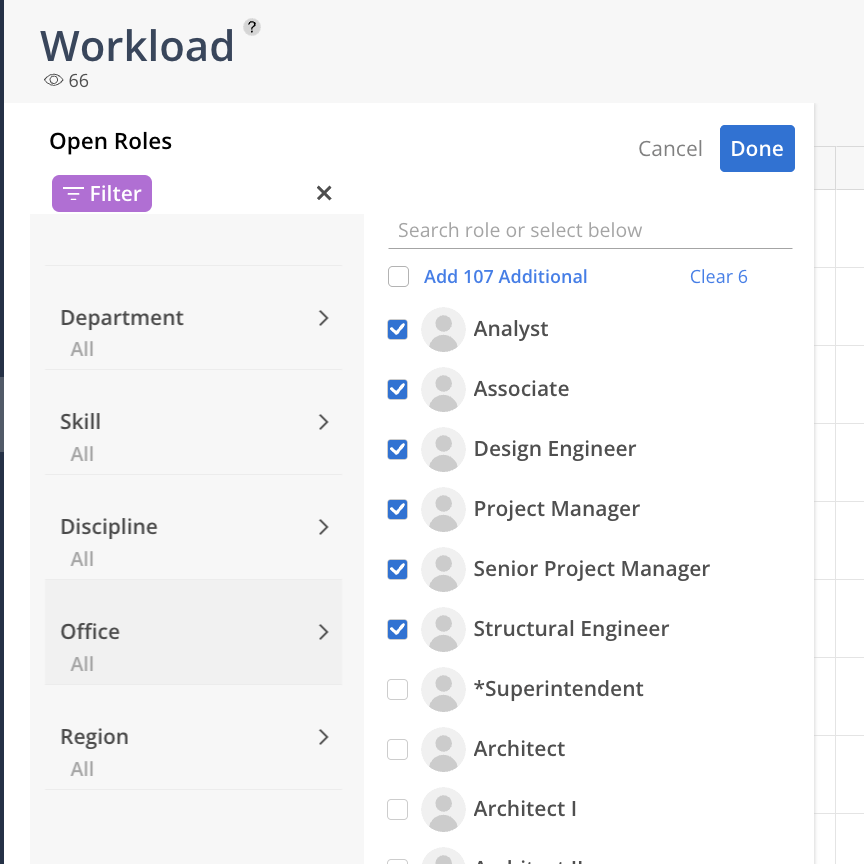
Open the Select Members panel, the same one you use to choose which team members appear.
Choose to include open roles, either every role in your organization or a specific set. [Needs confirmation. Trainers described this control differently across calls while it was rolling out, so the exact label and location may have moved since.]
Click Done to bring the selected open roles into your view.
Use the search bar to find a specific open role by name.
Use the filter control to narrow the open roles shown to the set you need.
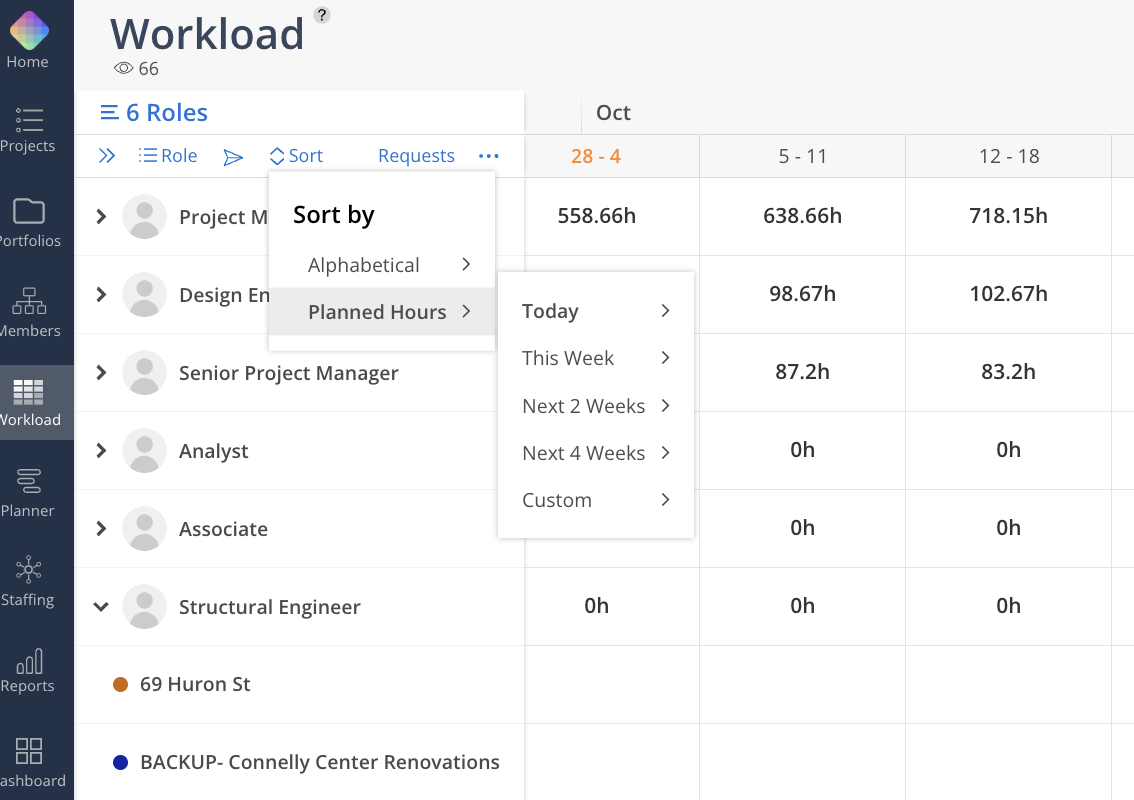
Switch the Workload view to group by role instead of by member. [Needs confirmation. Exact steps and control location.]
Roles are sorted by planned hours, so the roles carrying the most demand rise to the top of the list.
Expand a role's row to see which projects are contributing hours to it, the same way you would for an individual open role.
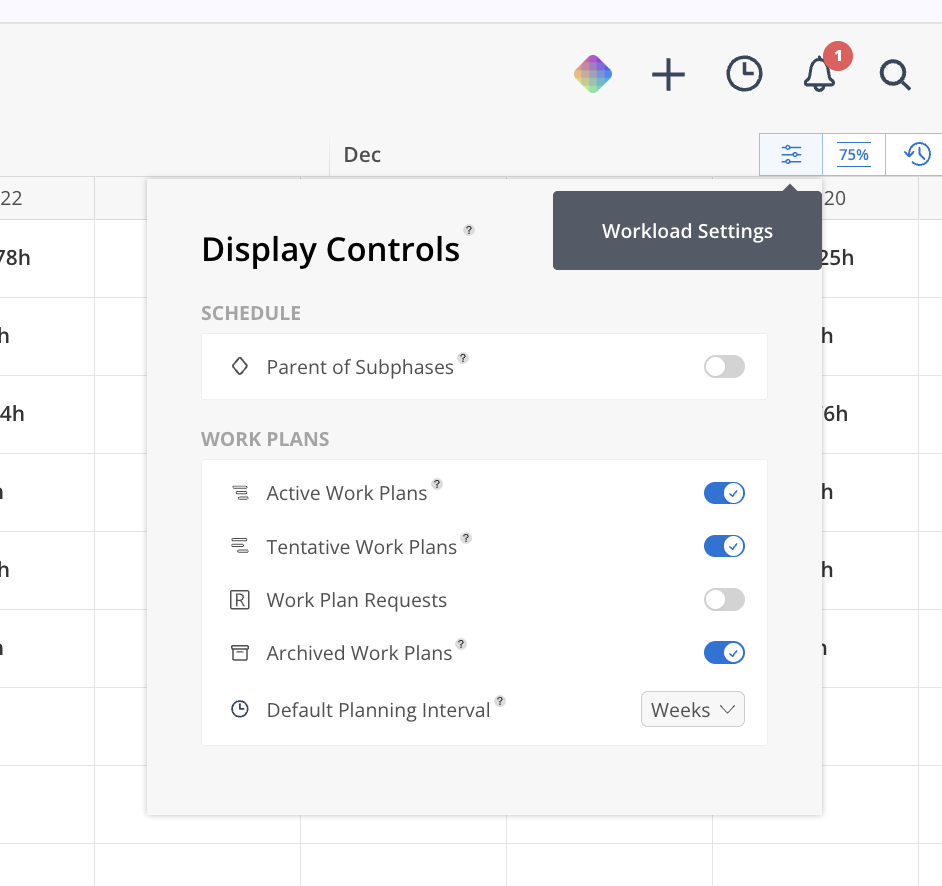
Use the plan type control to choose which kinds of work plans factor into the hours shown for each role.
Adjust this when you want to see committed demand only, or want to include tentative and proposal-stage plans in the total.
Once you've spotted a role that needs attention, use the assign roles view in Planner to see suggested members for that open role, based on their assigned role plus any additional requirements you've added, such as skills, office, or region. 👉 Assign Roles in Planner
For a rolled up summary of planned versus available capacity by role across your whole organization, the role demand report covers the same data at a higher level. 👉 Role Demand Report
Group by role for a company wide view. Switching to role grouping is the fastest way to see every unfilled seat across every project on one timeline, instead of checking role demand project by project.
Use the plan type control to separate committed work from proposals. Toggle tentative and proposal stage plans out of the hours shown when you want a clean read on confirmed demand.
Use it for proposals and future work. Open roles let you plan hours against a role before you know who will do the work, which is common on proposals and early stage projects.
Treat rising hours on a role as a hiring signal. If an open role's planned hours run higher than your current team can take on, that's a cue to hire, contract, or move dates rather than overload existing staff.
Pair it with department tags. If you've tagged your roles with departments, group by department here the same way you would for members. 👉 Roles and Departments
