This guide walks you through the recommended steps to start using Staffing effectively. Each step links to a detailed article if you want to go deeper.
The Staffing space is only available for teams with 50 or more members in Mosaic. If you do not see the Staffing space in your navigation, check with your admin to confirm your team meets the minimum threshold.
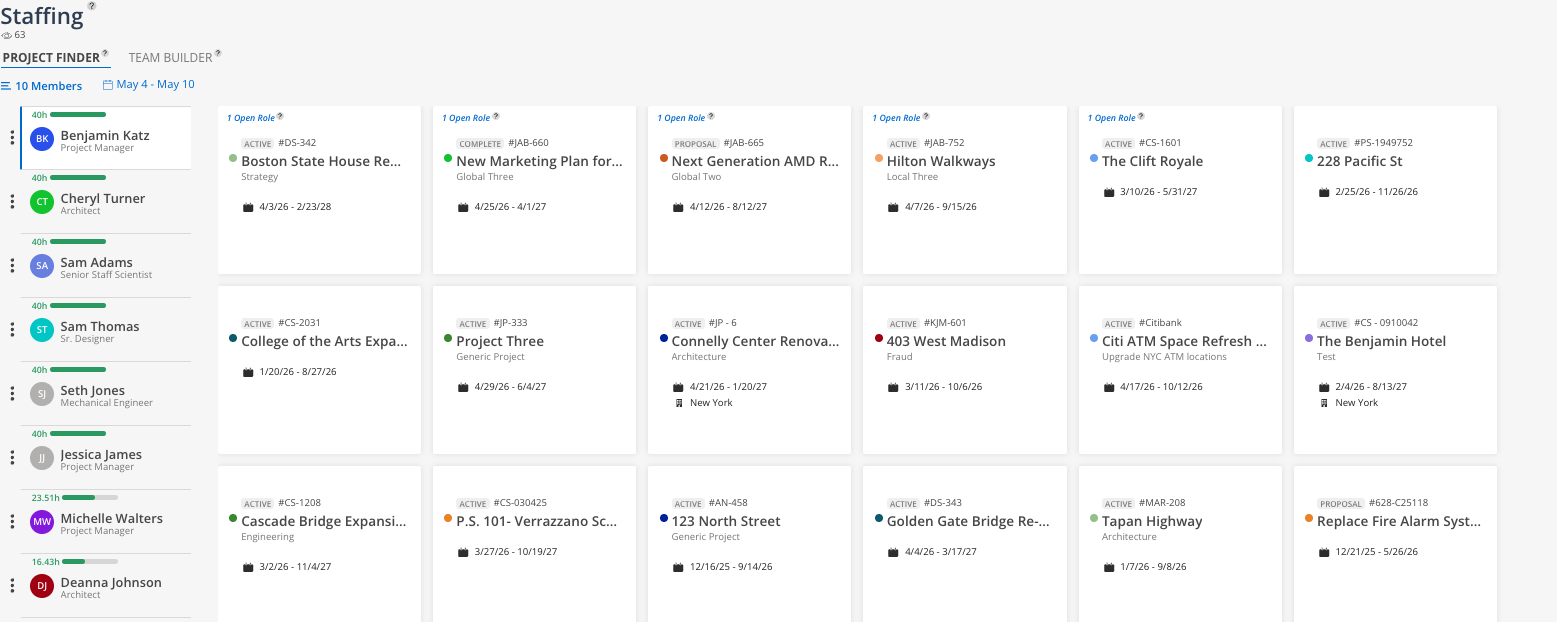
Open the Staffing space and start with the Project Finder tab. Click the Members button to select people on your team. Set the date range to the next 30 days and click on a member to see which projects are recommended for them based on their availability and experience.
👉 For full details, see Project Finder
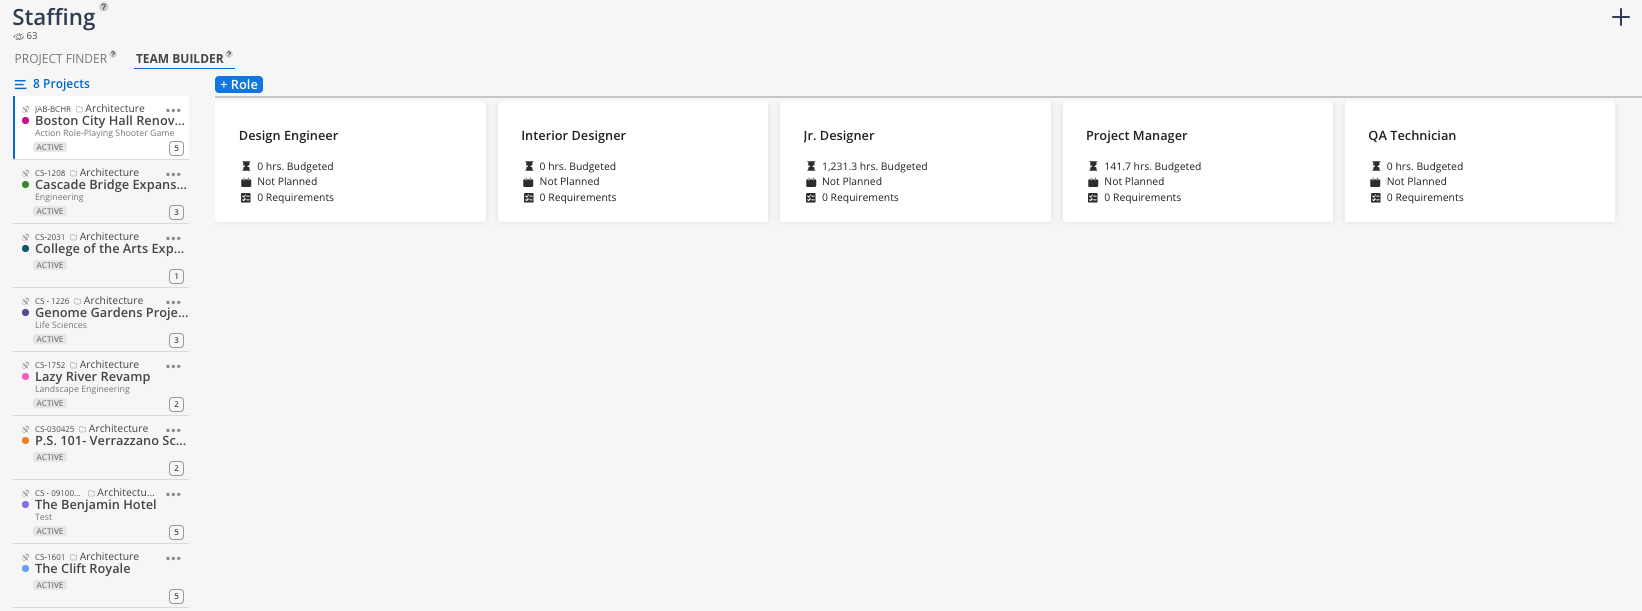
Switch to the Team Builder tab. Select projects using the filter in the top left — use the same filters available in the Planner space. Review the project cards to see which projects have open roles. Click into a role to see suggested candidates.
👉 For full details, see Team Builder
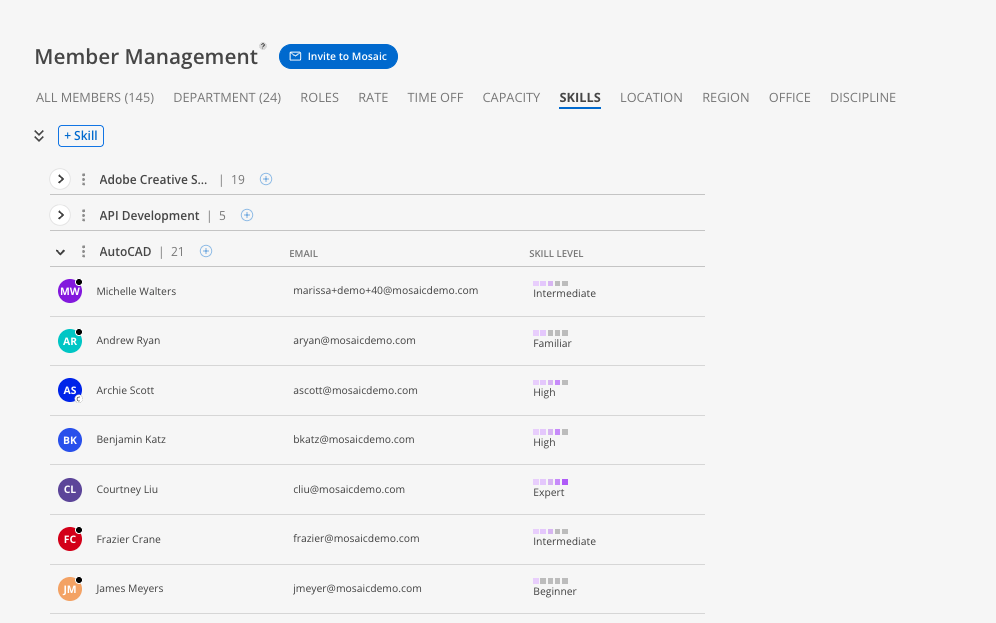
To get the most out of the Team Builder's candidate recommendations, make sure skills and proficiency levels are entered for your team members. The more complete the skills data, the better the system can match candidates to open roles with specific requirements.
👉 Contact your admin to configure skills in the Members space
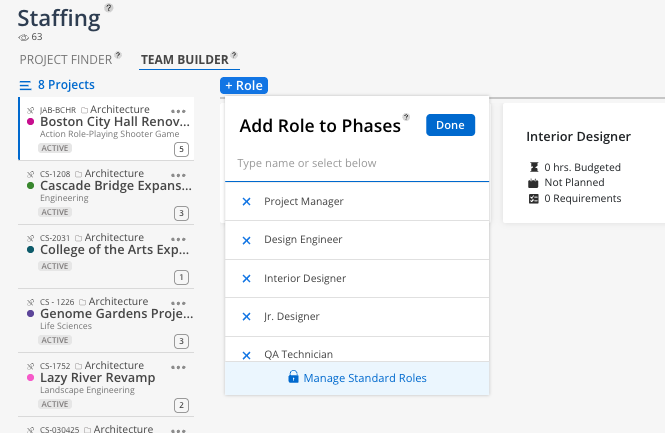
In the Team Builder, use the + Role button to add open roles to projects that need additional staffing. Set dates and requirements so the system can recommend the best candidates.
👉 For full details, see Team Builder
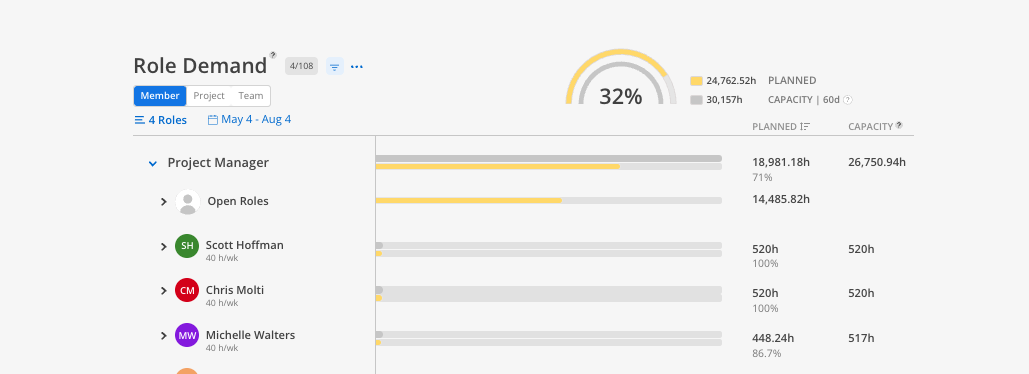
Check the Role Demand report to see open role demand by role type across all projects. Use the Plan Time report to see open roles alongside confirmed members in a single view. These reports complement the Staffing space by providing aggregate and time-based views.
👉 For full details, see Open Roles & Workload
After identifying matches in the Staffing space, switch to Workload or Planner to create work plans for the assigned members. If you need open roles visible in Workload, consider the placeholder account workaround.
👉 For full details, see Open Roles & Workload
Incorporate the Staffing space into your regular capacity planning meetings. Use Project Finder when team members have upcoming availability. Use Team Builder when projects need to be staffed.
Review open roles weekly and update requirements as project needs evolve
Ensure skills data stays current for your team members
Explore the Workload and Planner spaces for day-to-day capacity management
Start with Project Finder if you have available people — It is the fastest way to identify where someone's time could be used
Start with Team Builder if you have projects that need help — It surfaces the best candidates for each open role
Skills data is the key to better recommendations — Invest the time upfront to enter skills and proficiency levels for your team
The Staffing space complements, it does not replace, Workload — Use Staffing to identify matches, then use Workload to create and manage the actual work plans
Ask questions — Use the in-app chat or contact your CSM for help configuring skills or open roles
