Which version applies to you? If your organization does not use an ERP integration for time tracking — or if your admin has enabled Mosaic timesheets as the primary time entry method — this article applies to you. If you enter time in an ERP and Mosaic shows a read-only sync of those entries, see the Timesheet (ERP sync) article here.
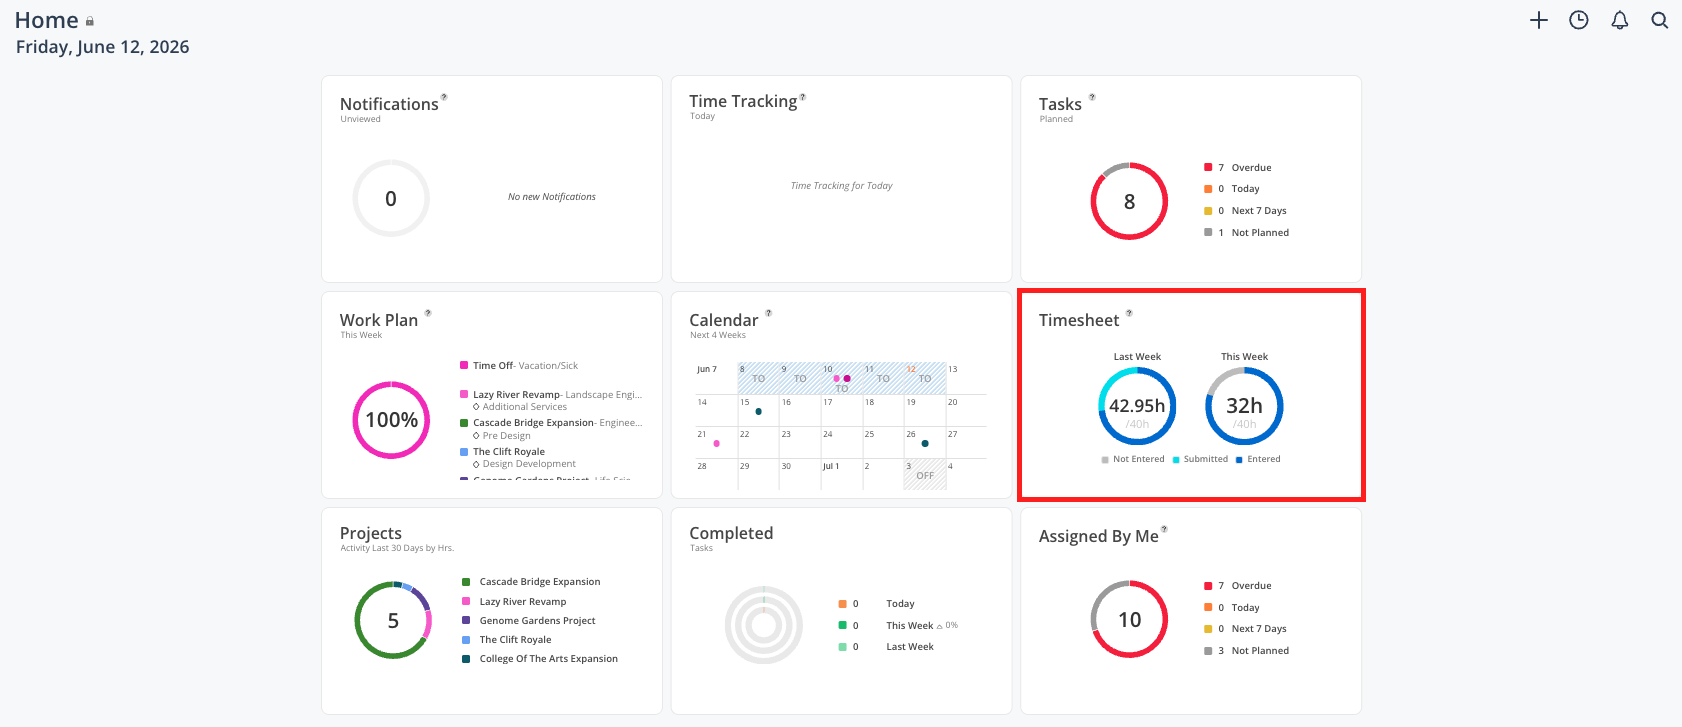
The Timesheet widget is where you record the time you have worked, review what you have entered, and submit it for approval at the end of the week. Your work plans automatically pre-populate the timesheet for each day, so you are not starting from a blank page — you only need to confirm or adjust the hours and submit.
Enter the time you worked today or this week
Review what you have already logged before submitting
Submit your timesheet to your manager for approval
Check whether a prior week's timesheet has been approved
Add time on a project you worked on but were not scheduled for
The Timesheet widget on your Home Space shows a summary of your time entries for the current week, including:
Entered hours — time you have logged but not yet submitted (shown in the timesheet view)
Submitted hours — time you have submitted and are awaiting approval
Approved hours — time a manager has reviewed and approved
Each row in the full timesheet view is organized by project, phase, and work category. Your work plans for the week automatically generate corresponding rows, pre-filled with the hours from your plan. You review, adjust if needed, and submit.
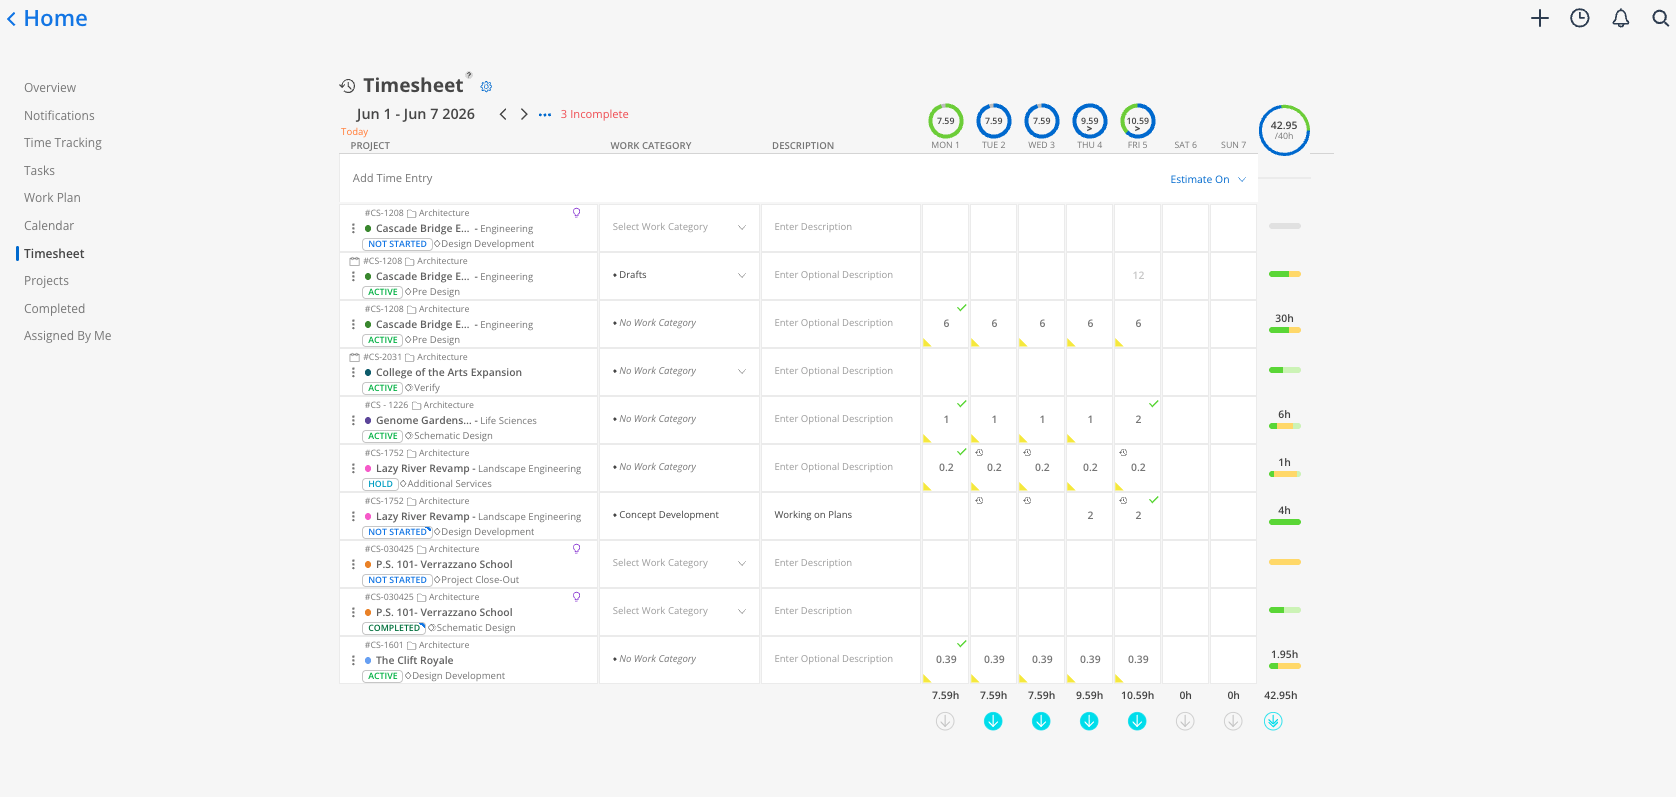
Reading status indicators:
A date shown in red means you have not filled in enough hours for that day relative to your capacity
A red > symbol on a day means you have logged more time than your capacity for that day
A date shown in orange is today
A day marked OFF is a company holiday
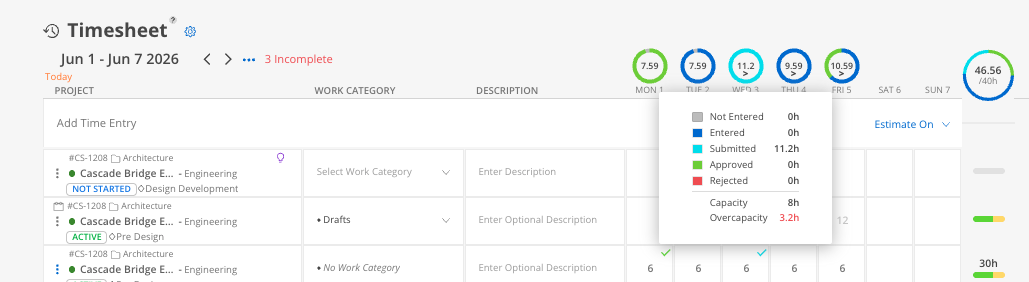
Open the Timesheet widget on your Home Space or click the clock icon in the top-right corner of any space in Mosaic.
Your scheduled work plans for the day appear automatically as rows — each showing the project, phase, and planned hours.
Click the hour field next to a project row to enter or adjust your actual hours.
Add a description or note if needed.
Click Save.
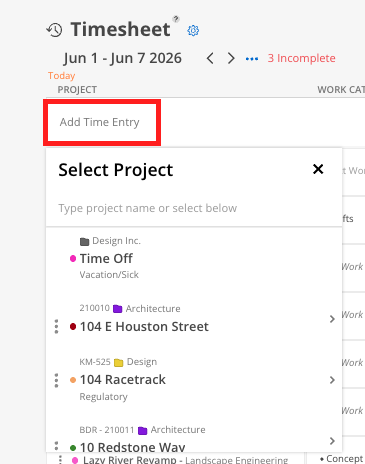
To add time for a project you were not scheduled for:
Click + Project at the top of the timesheet page.
Select the Project, Phase, and Work Category (if applicable).
The row appears and you can enter your hours.
Once you have entered all your hours for the week:
Review your entries and confirm that all days are accounted for. Red dates indicate days that are incomplete.
Click Submit to send your timesheet for approval.
Your entries move from Entered status to Submitted status. Your manager will be notified to review.

Note: Once submitted, you cannot edit your timesheet unless your manager returns it to you or changes the status back. If you need to make a correction after submitting, contact your manager or admin.
Each week's timesheet shows one of three statuses:
Entered — you have logged hours but have not yet submitted
Submitted — you have submitted and are waiting for manager approval
Approved — your manager has reviewed and approved the timesheet
You may receive a Timesheet Reminder notification if your admin has set up reminders for incomplete timesheets. Clicking the notification takes you directly to the timesheet page for that week.
Use the left and right arrows to move between weeks on the timesheet page
Click the date to open a calendar and jump to a specific week
Work plans can pre-populate your timesheet, but they are a starting point — If your actual hours differed from what was planned, update the hours before submitting. The timesheet records what you actually worked, not what was planned.
Approved timesheets cannot be edited — If an error is discovered after approval, an admin or budget manager needs to change the status back to Submitted before it can be corrected.
Time off appears in timesheets — If you have time off entered in Mosaic for a day, it will be reflected in your timesheet view for that week.
Your admin may have disabled manual time entry — If you cannot see a field to enter hours, check with your admin. Some organizations disable direct Mosaic time entry when using an ERP integration.
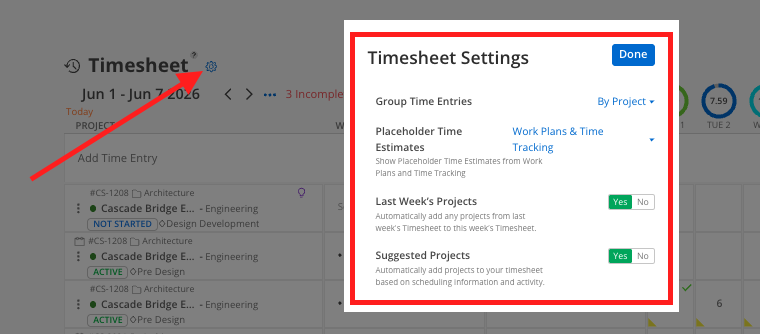
Use the Settings to personalize your preferences — if you’d like a head start on time entry, use the Timesheet Settings to adjust what will populate (and sort) onto your timesheet. Note, this is an individual preference each member can control.
Enter time daily rather than all at once on Friday — Entering time the same day you work it is more accurate and less likely to result in forgotten projects or incorrect hours
Review red dates before submitting — Red dates flag days where your entered hours are less than your planned capacity. Check whether those gaps are genuinely unworked time or an entry you forgot.
Do not wait for a reminder — Submitting your timesheet promptly each week keeps your project budget data current and avoids delays for managers who need to approve and close out periods
Use the timer if you lose track of hours — The stopwatch in the Time Tracking widget or the green clock icon at the top of any Mosaic space can track live time, which you can then transfer into your timesheet entry
