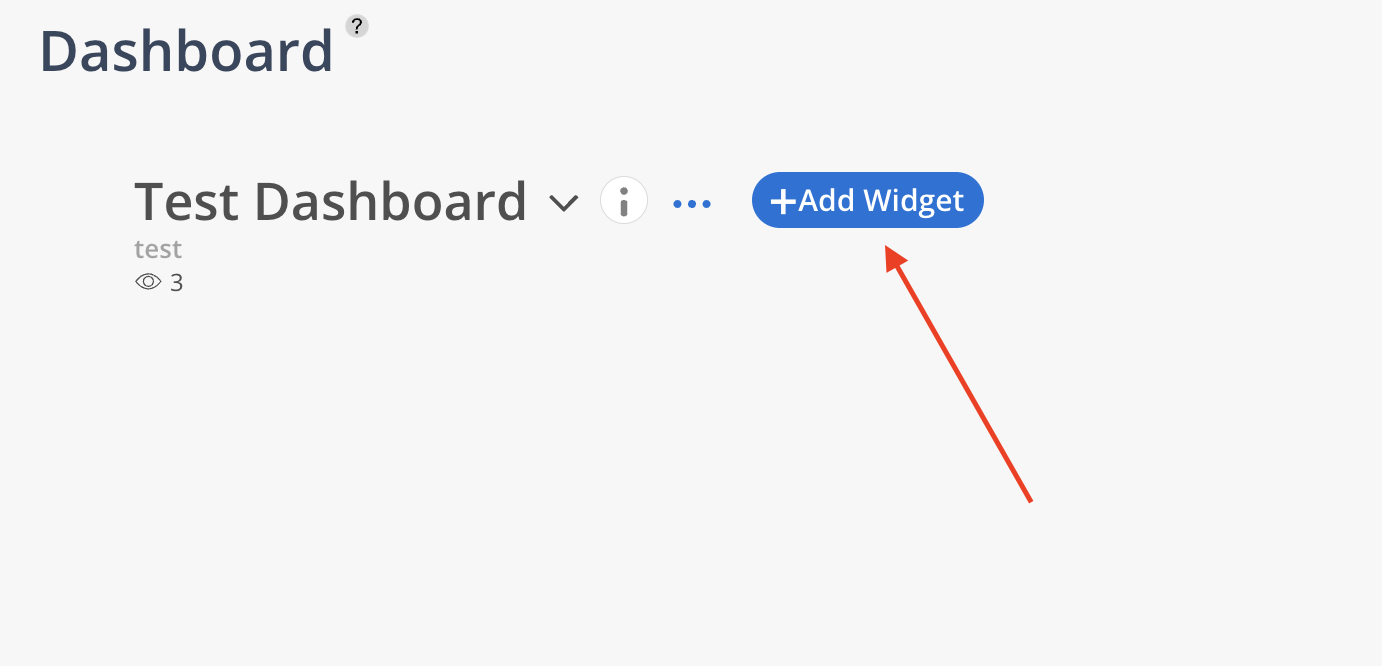
Click + Add Widget at the top of the Dashboard.
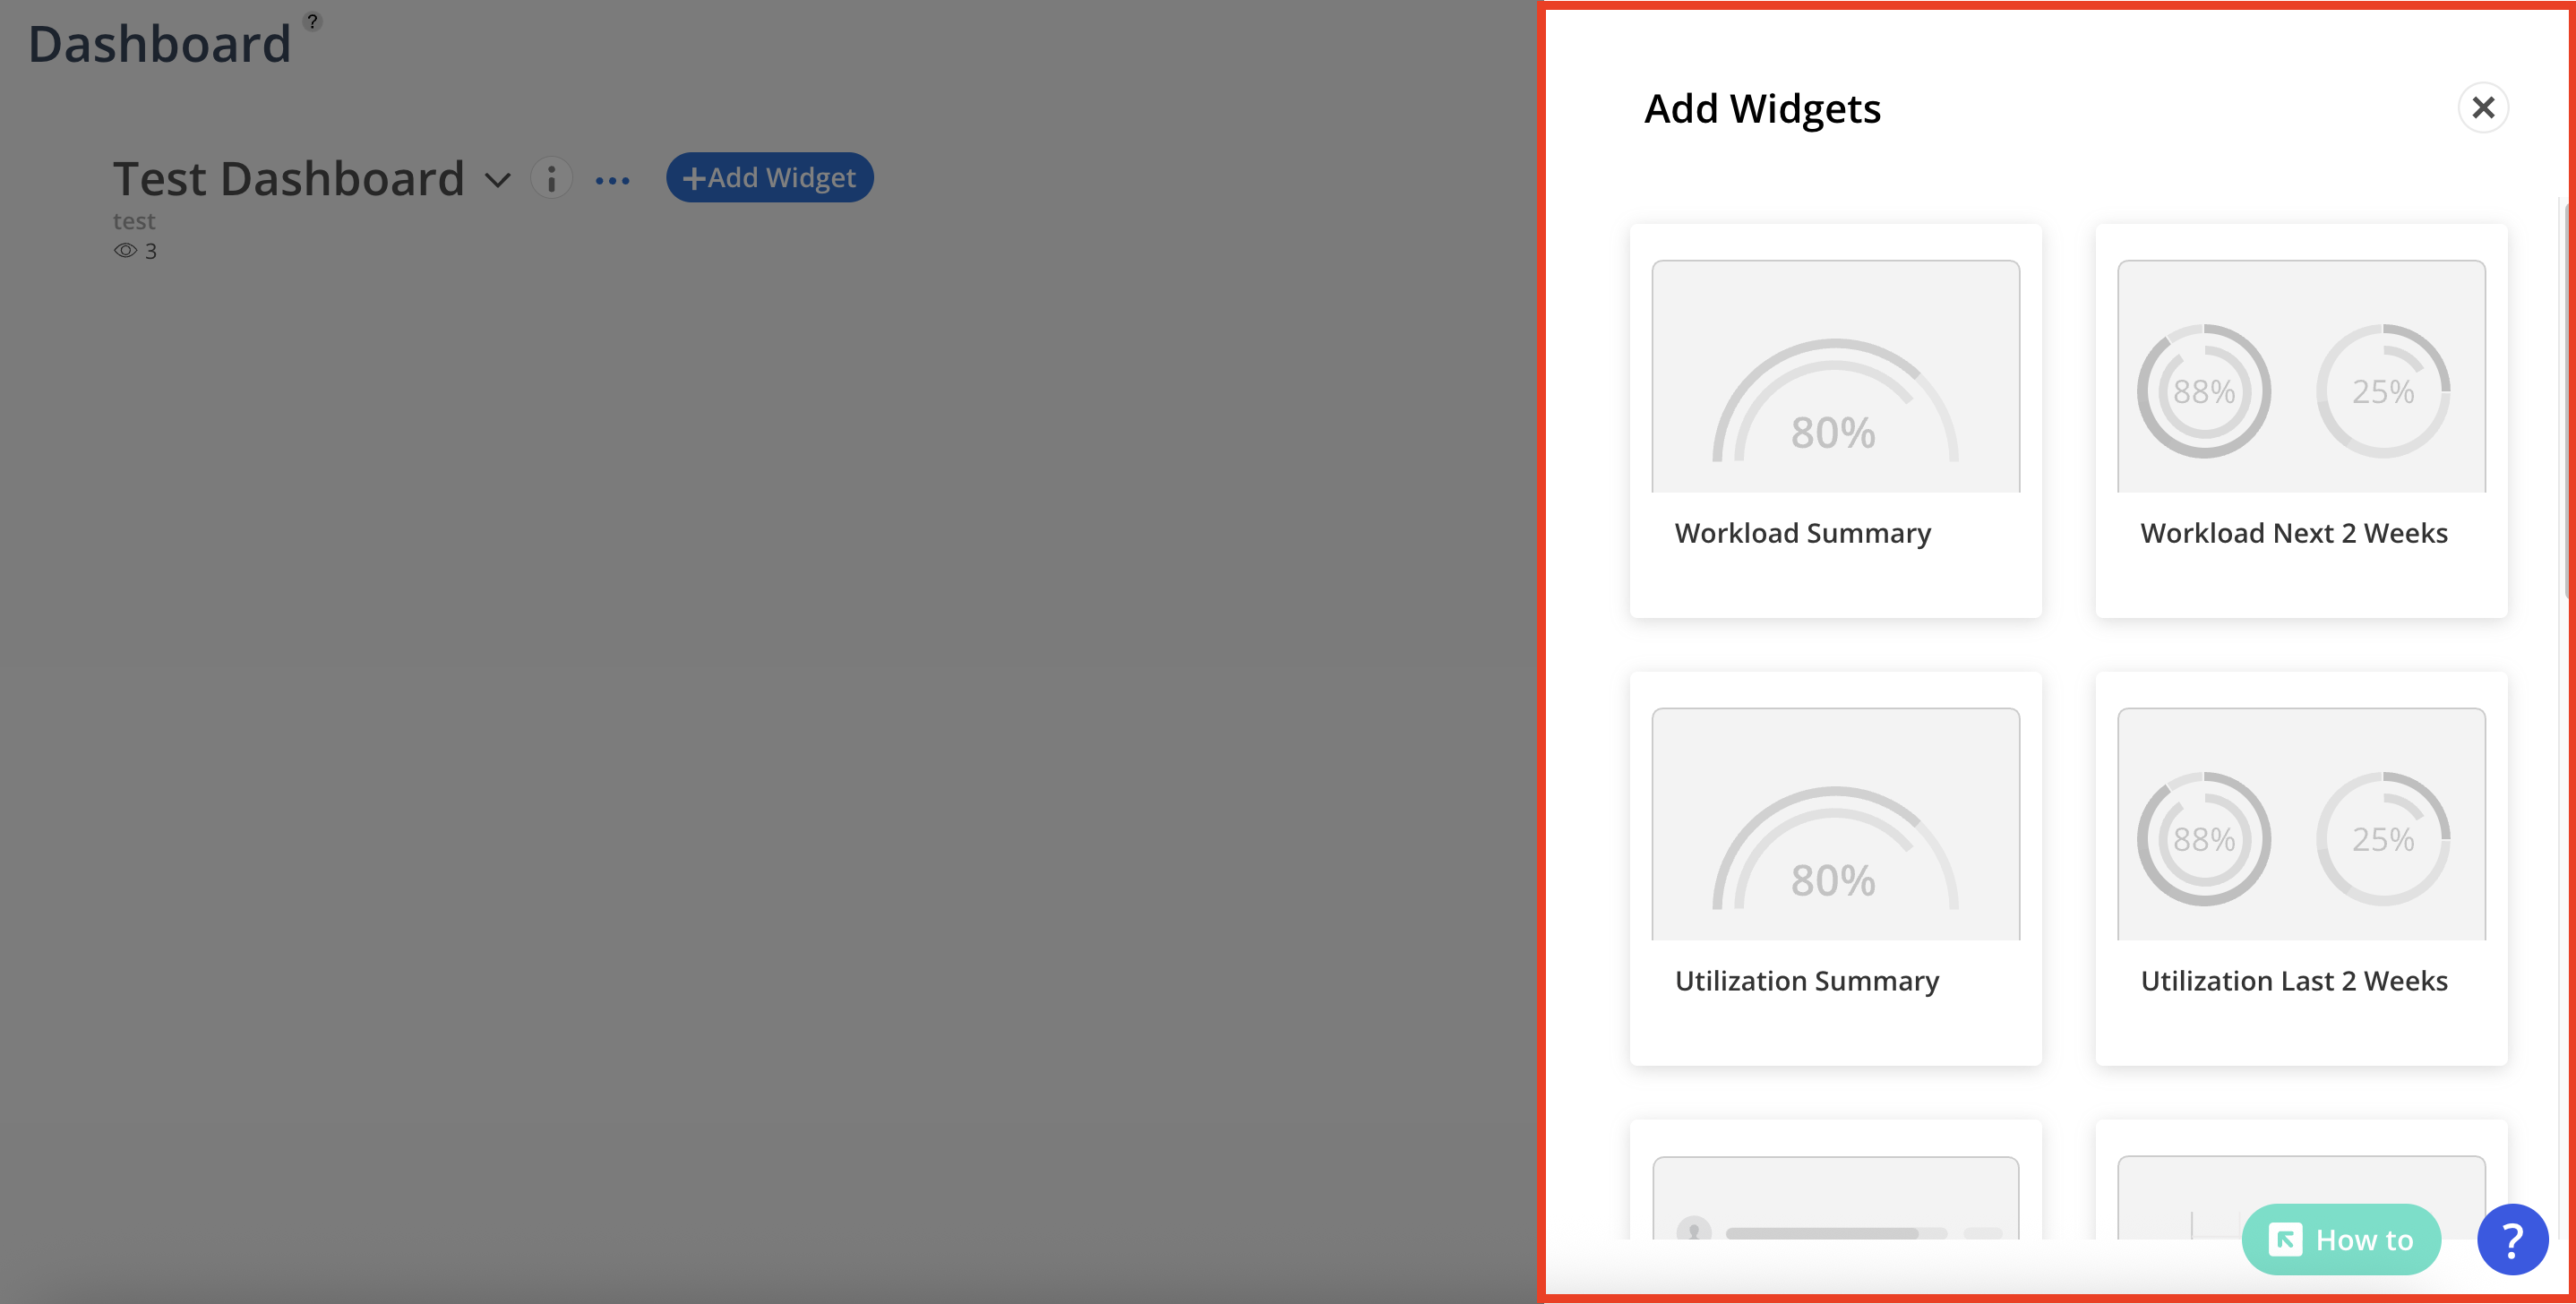
From the expanded menu, select a widget to display. Multiple widgets are available, each presenting different reports in various views.
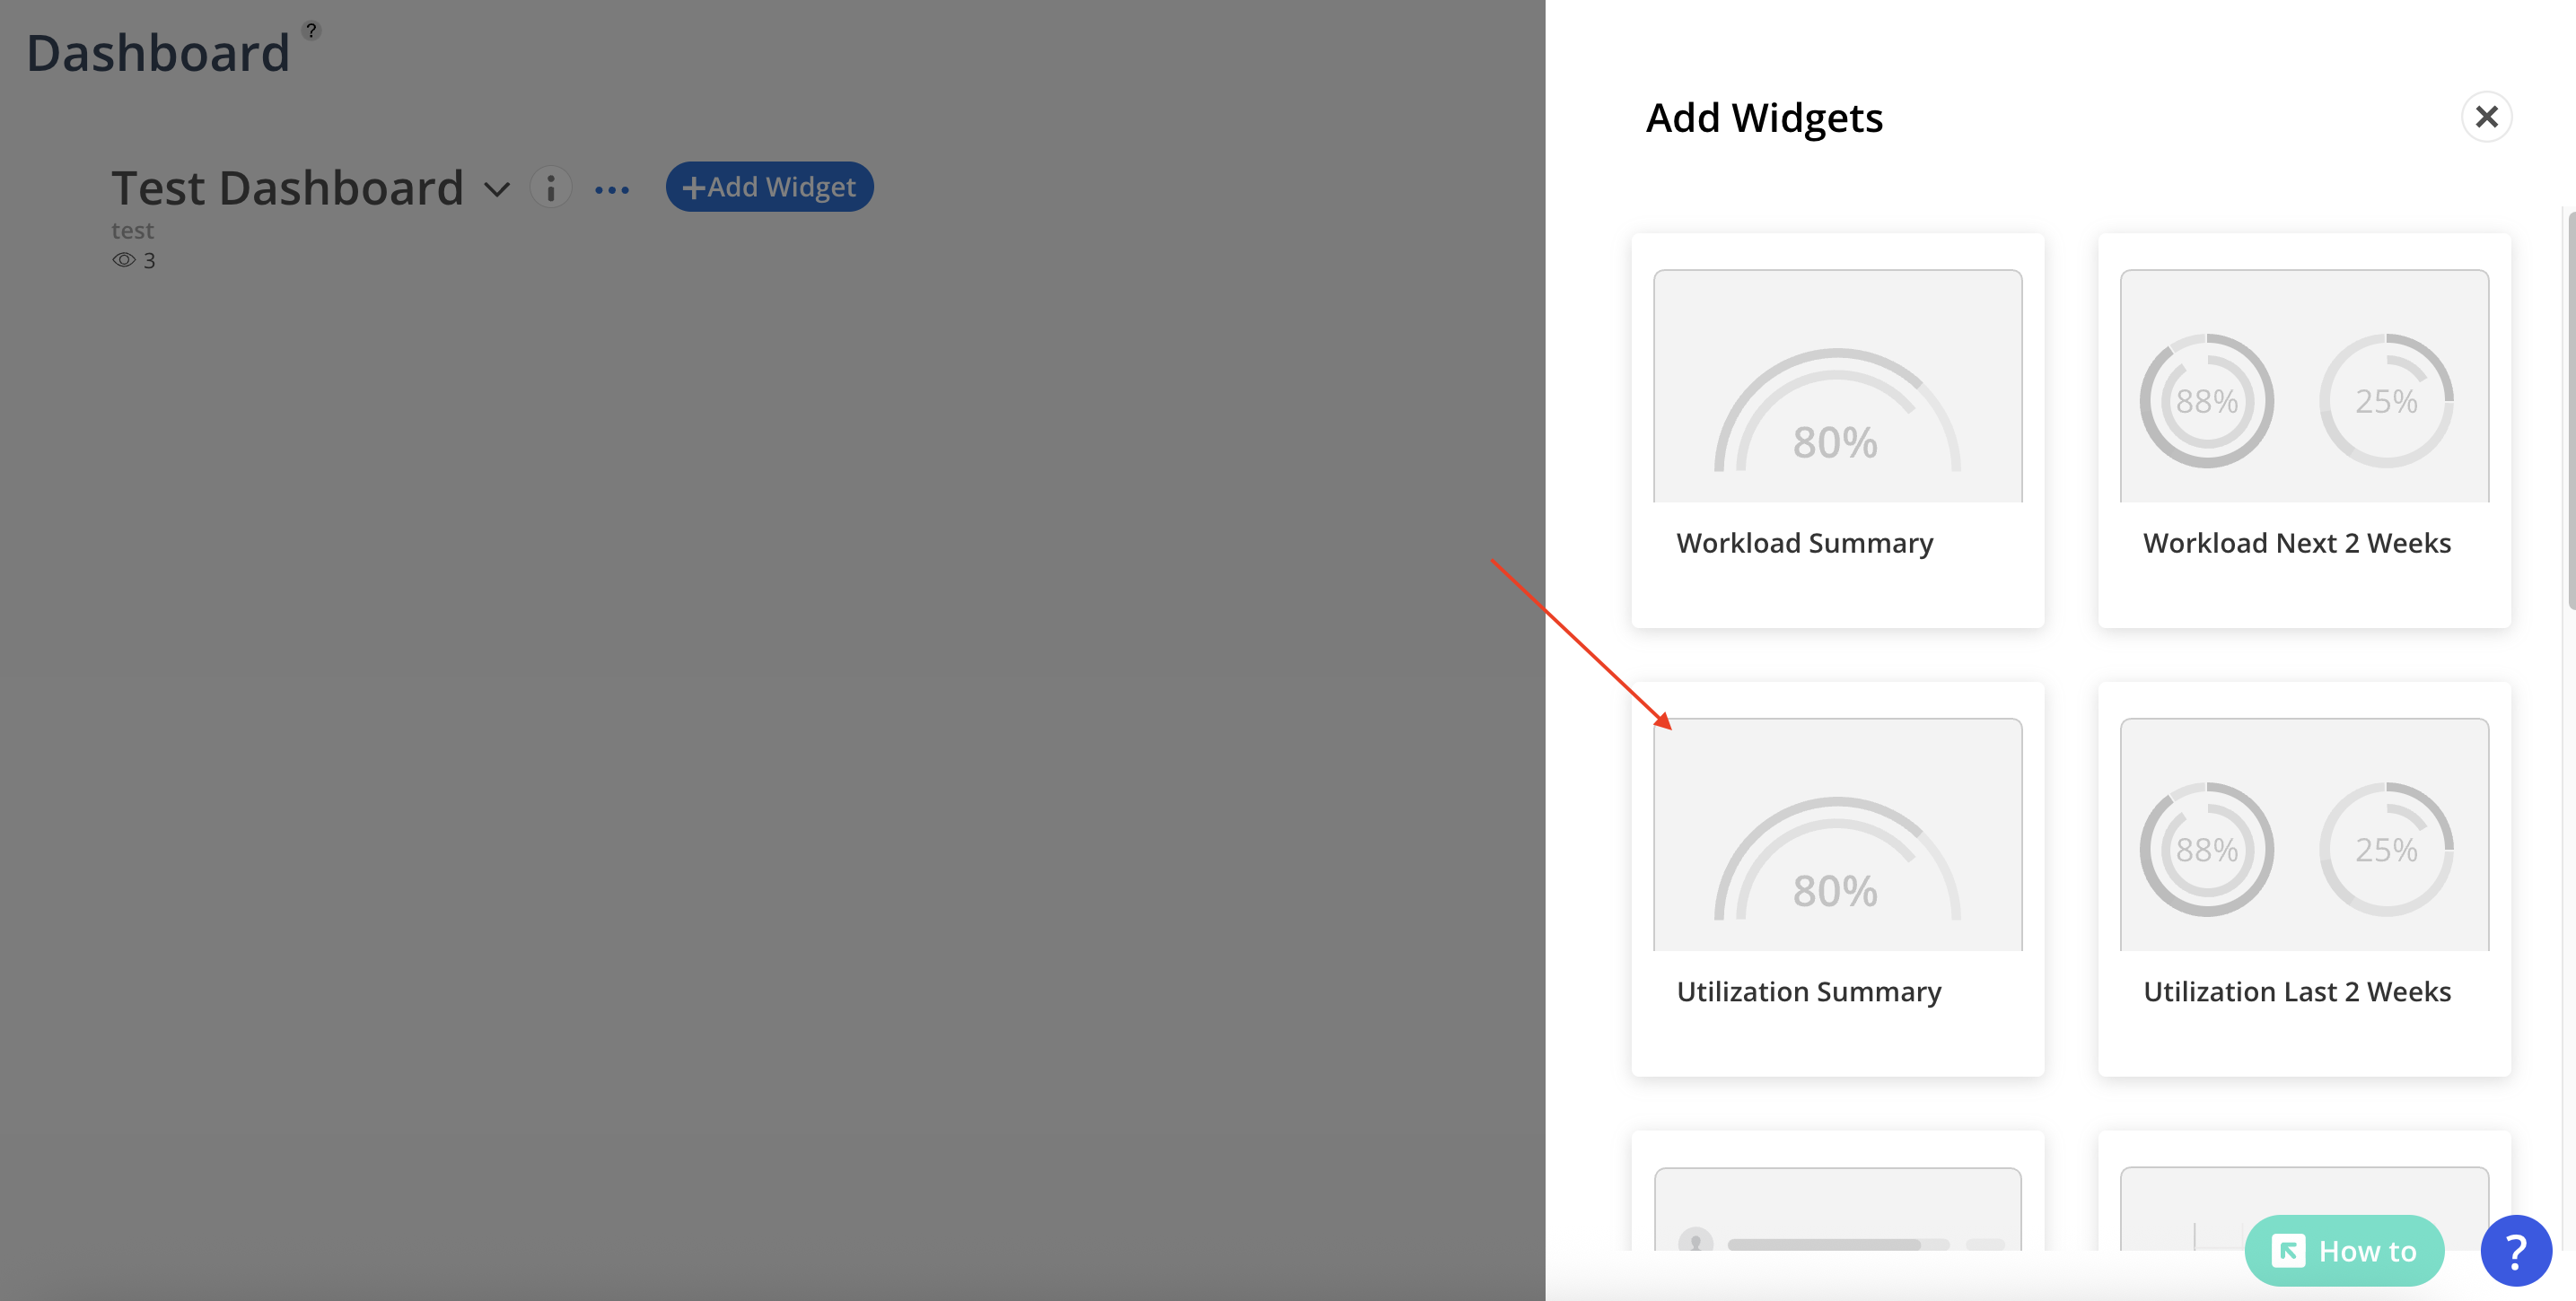
Click the desired widget to proceed.

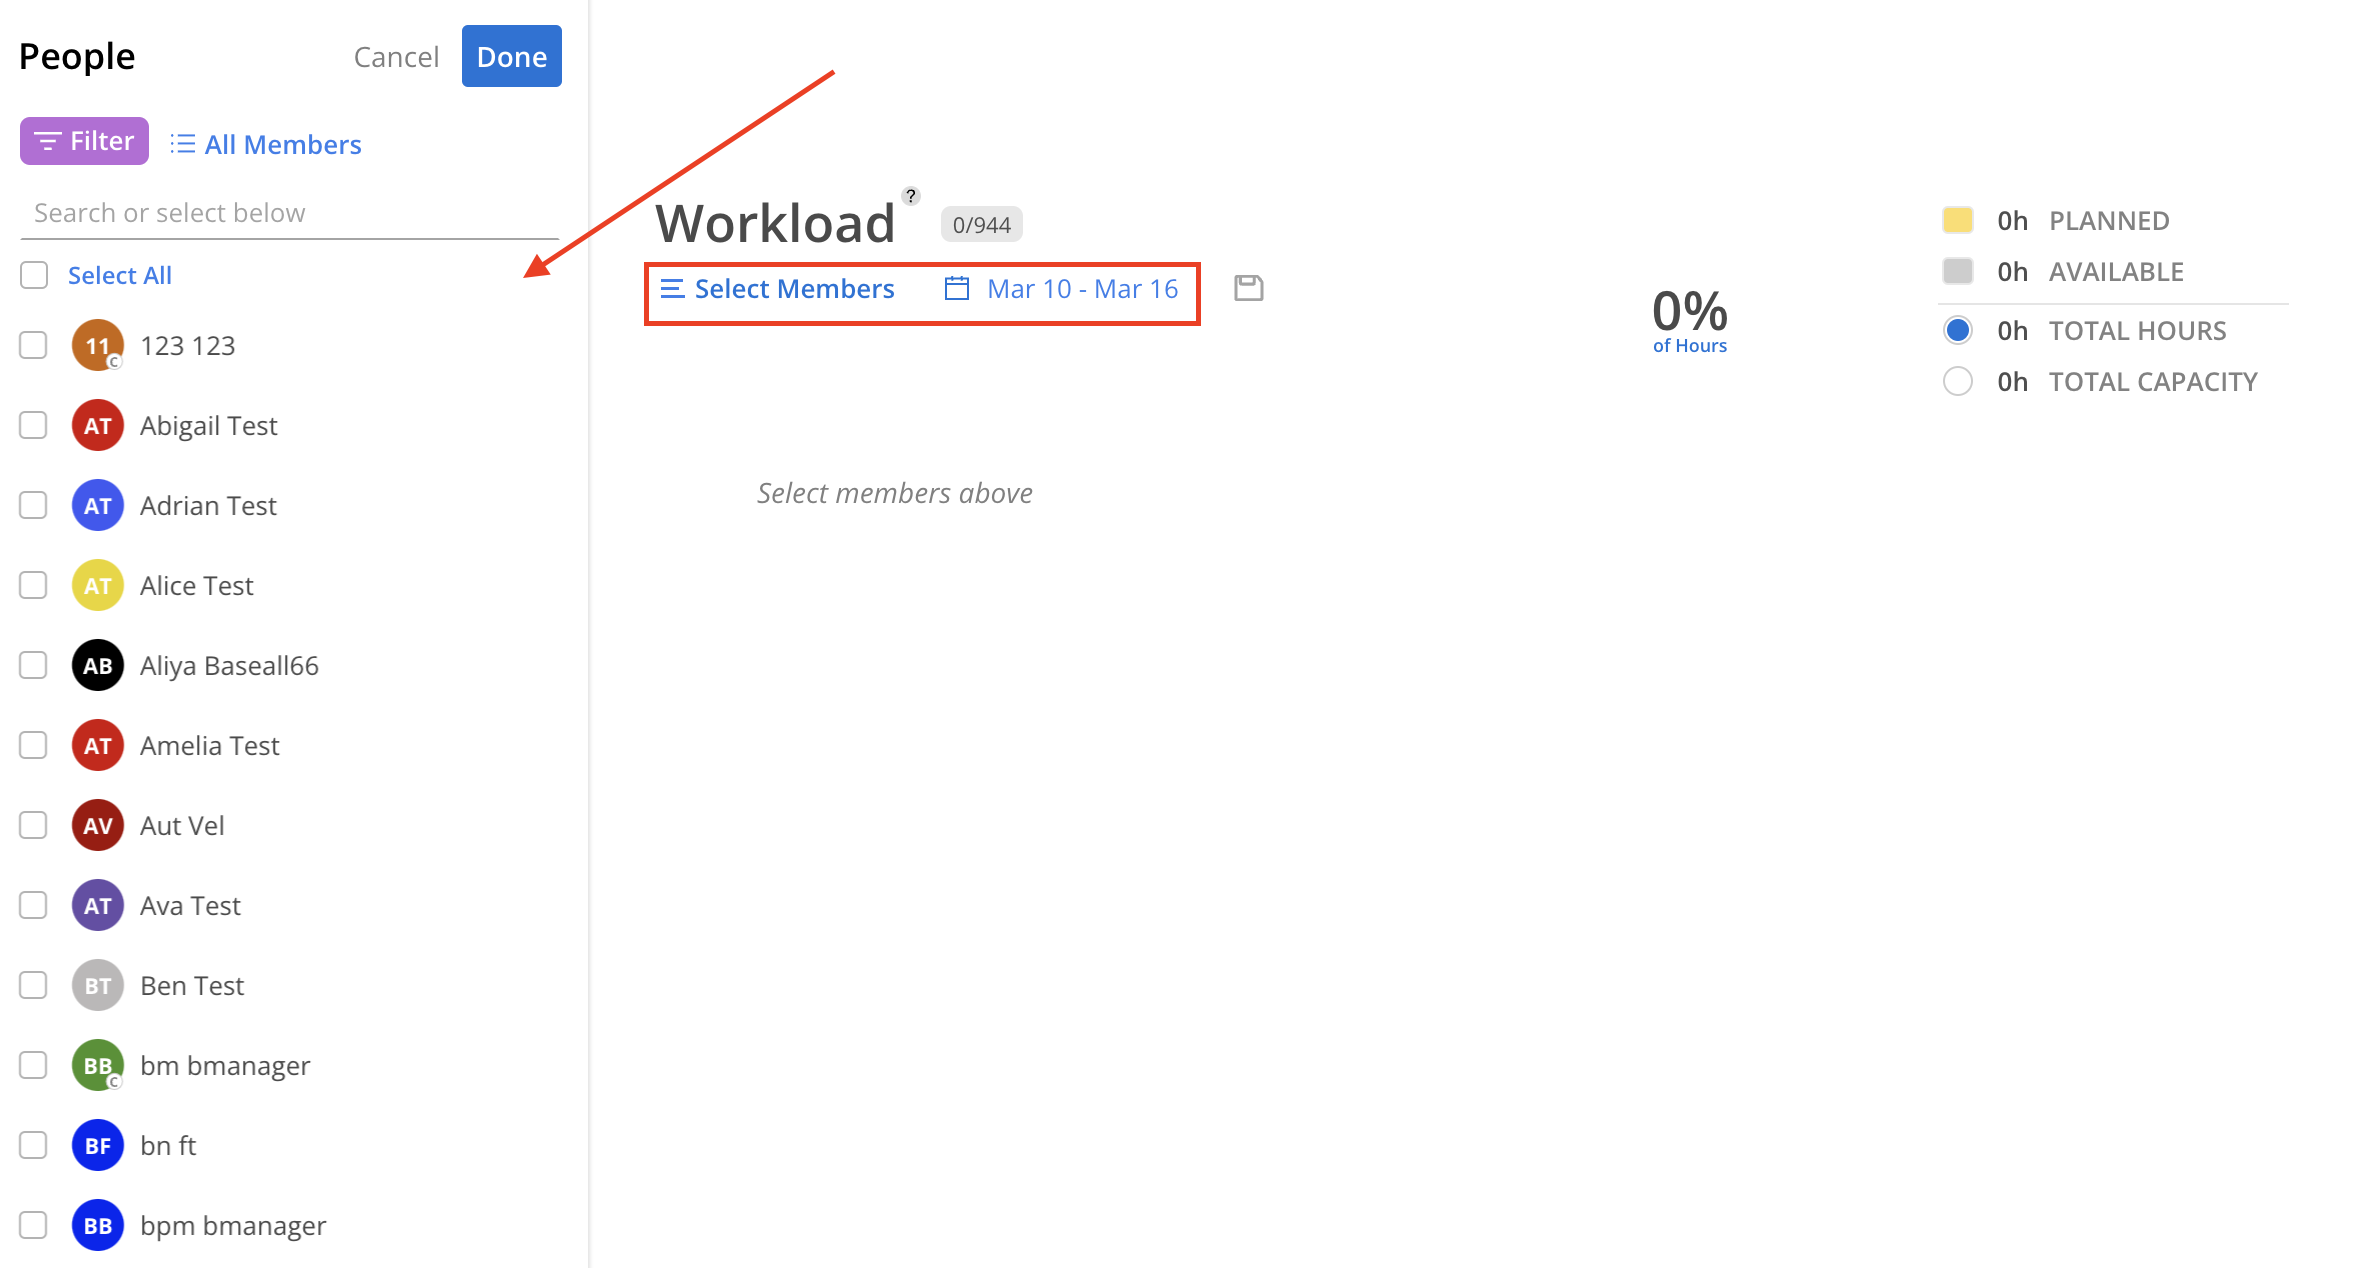
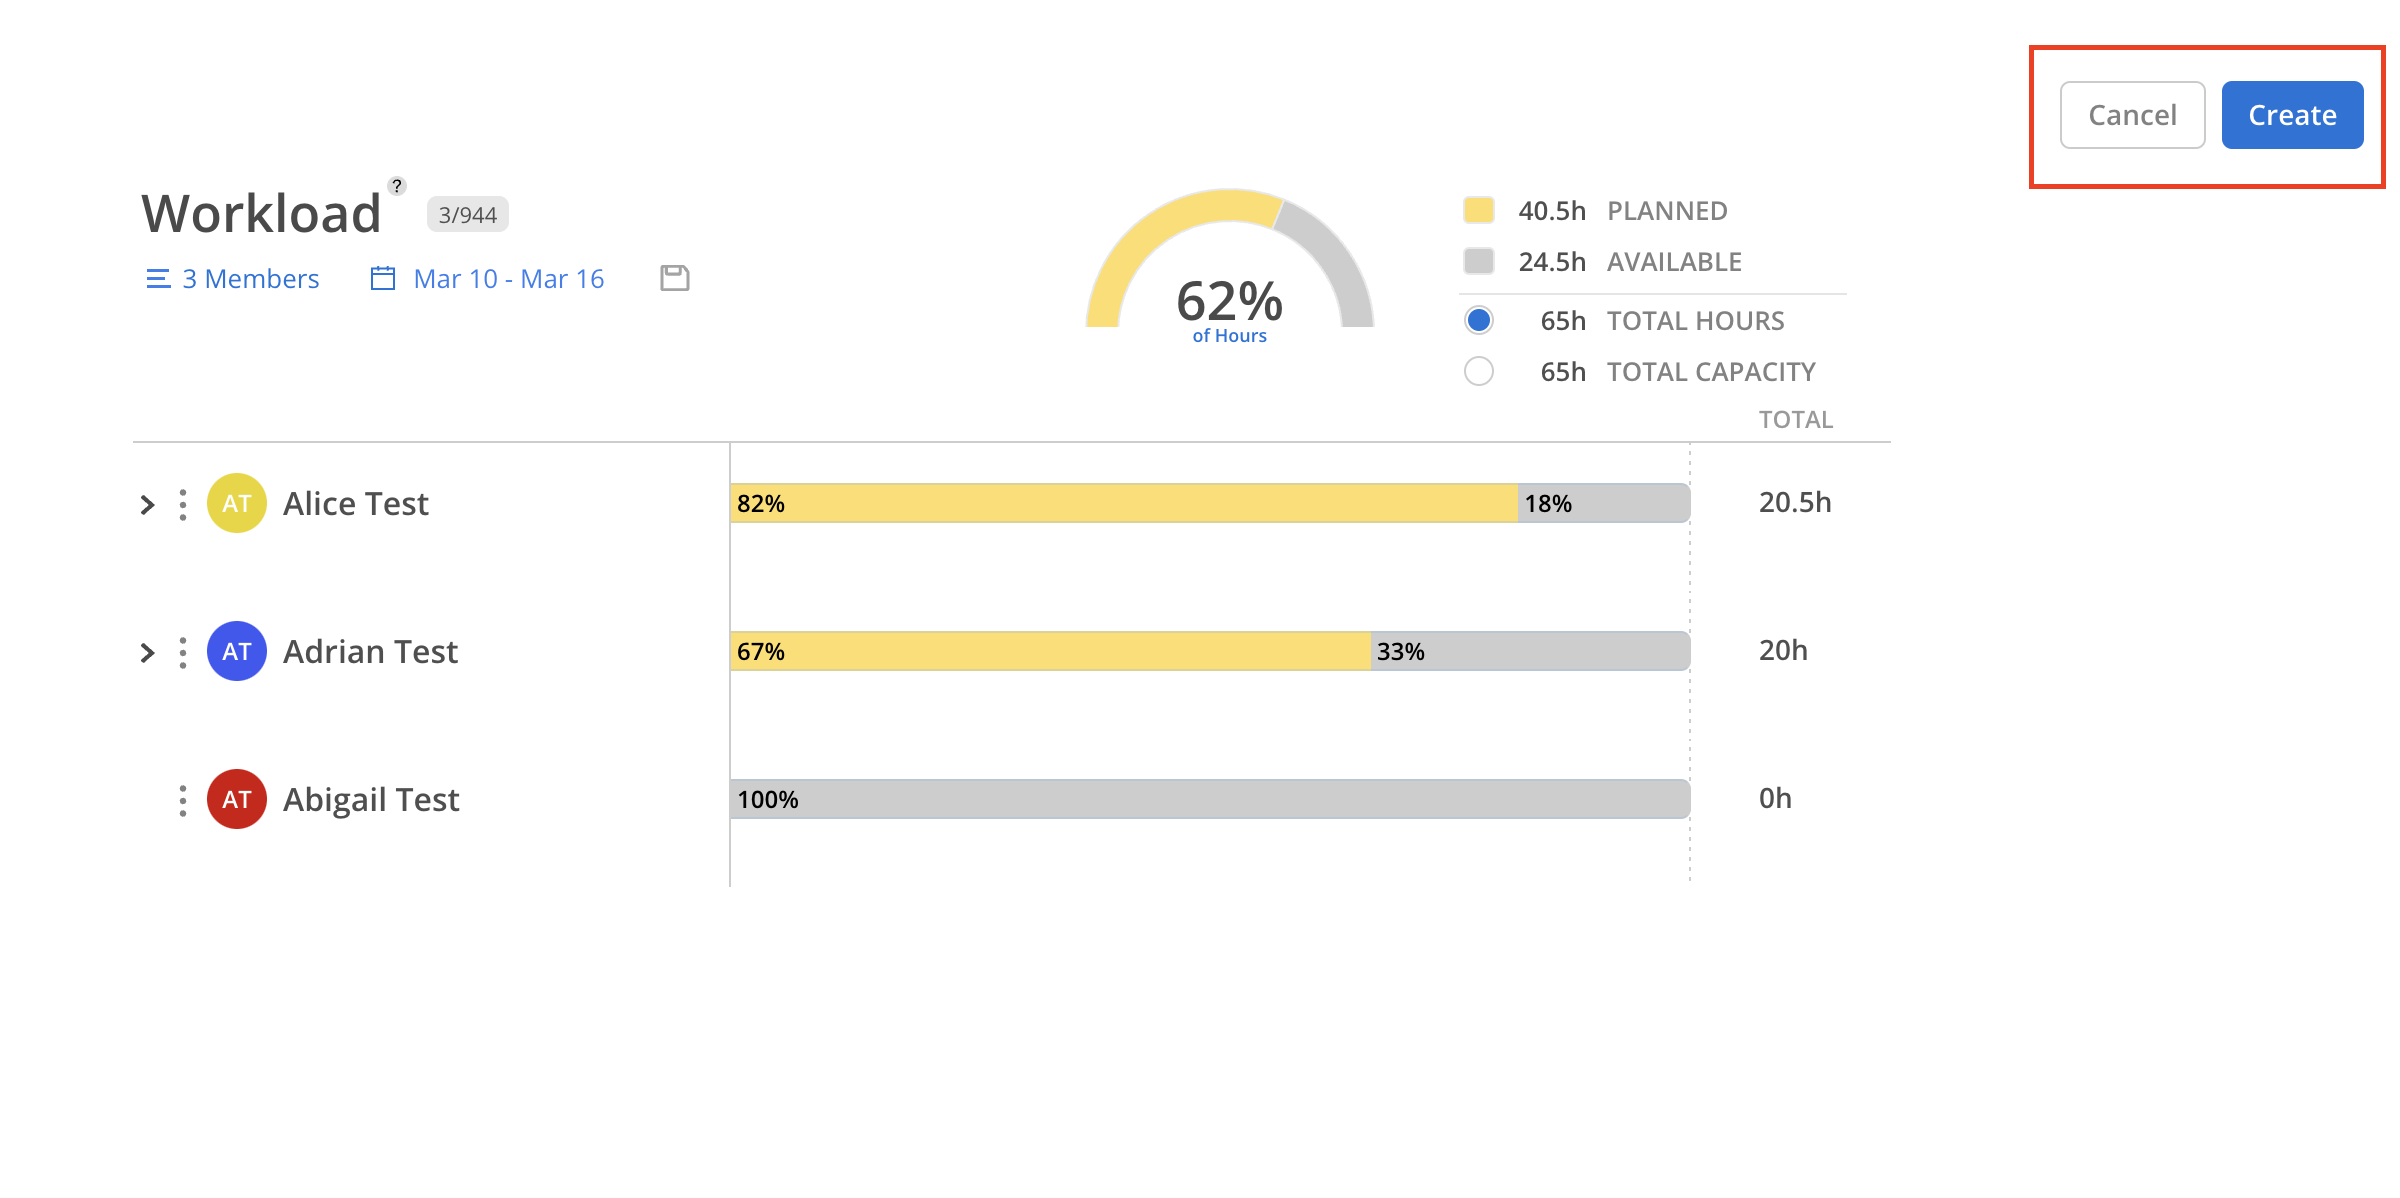
Customize the widget by selecting the relevant Members and date range.
Click Create to finalize the widget or Cancel to discard.
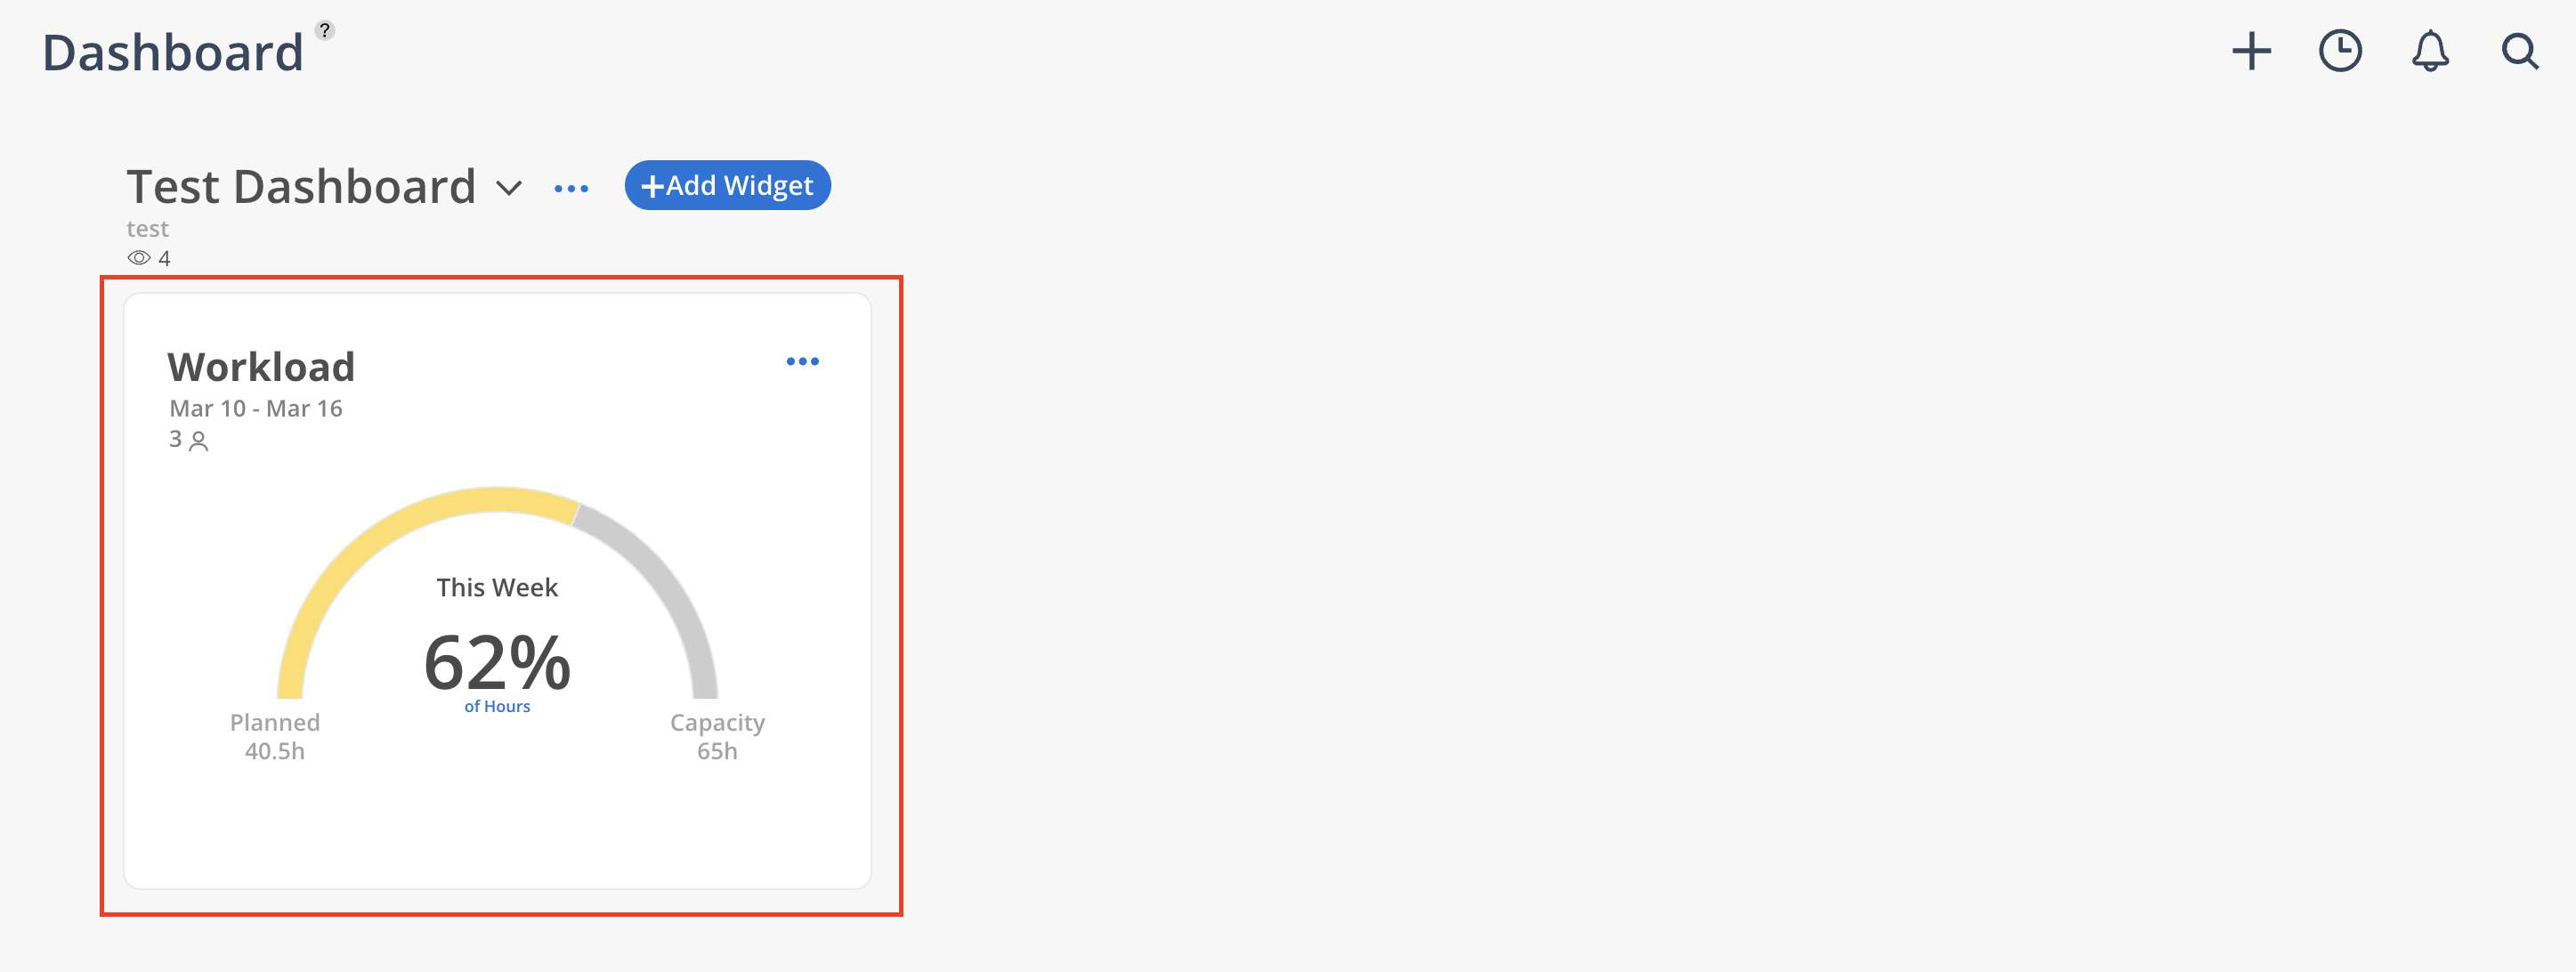
The newly added widget will appear on the Dashboard.
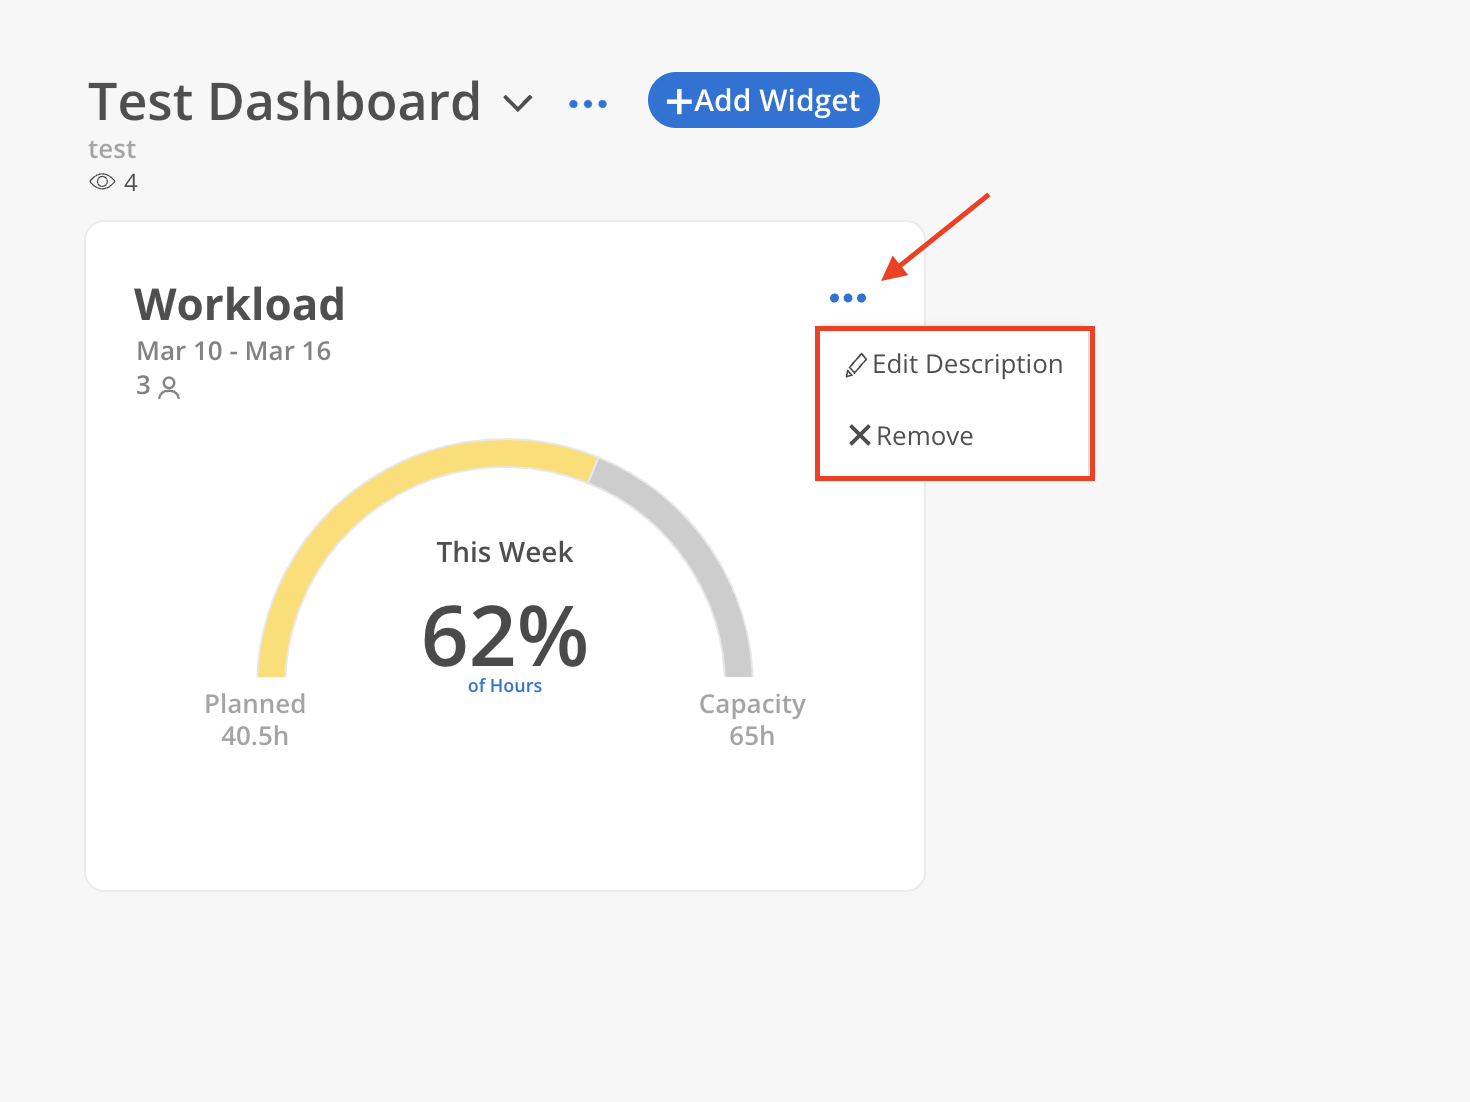
Click the three dots in the top right corner of the widget to edit its description or remove it.
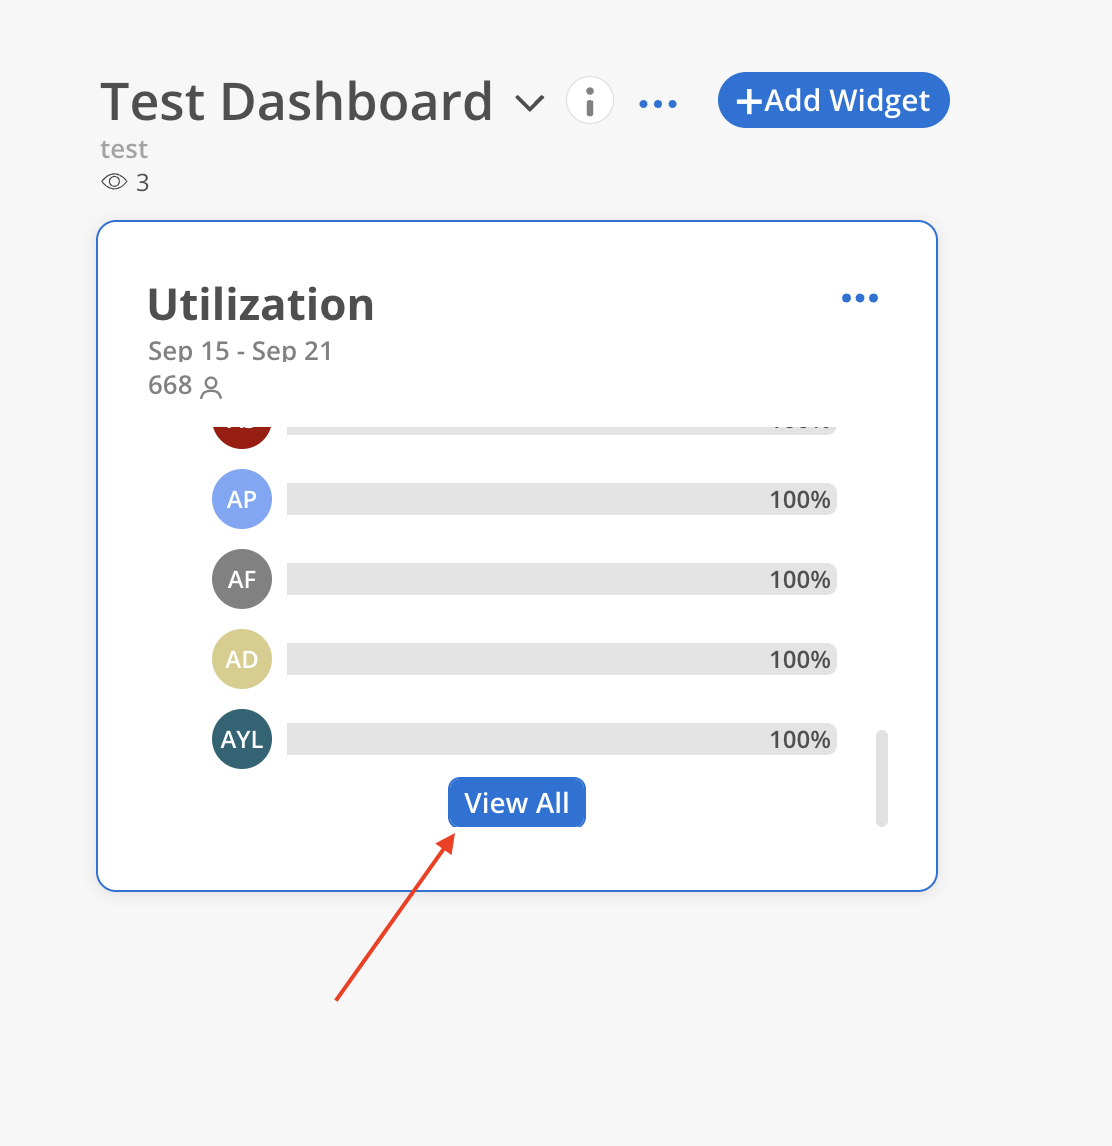
Some widgets may not display all selected Members due to space limitations. To view the complete list, scroll down within the widget and click the View All button to open the full widget view.
Widgets can be rearranged by dragging them to a new position. Changes to the layout are visible to everyone the Dashboard is shared with.
To move a widget, click and drag it to the desired location on the Dashboard. While dragging, pressing the Escape key cancels the action and returns the widget to its original position.
