This section displays all Timesheet entered for the Project, organized by Phase by default. Each row represents an individual Time Entry, regardless of its status—submitted, approved, rejected, or not submitted—and all entries are included in the budget calculation.

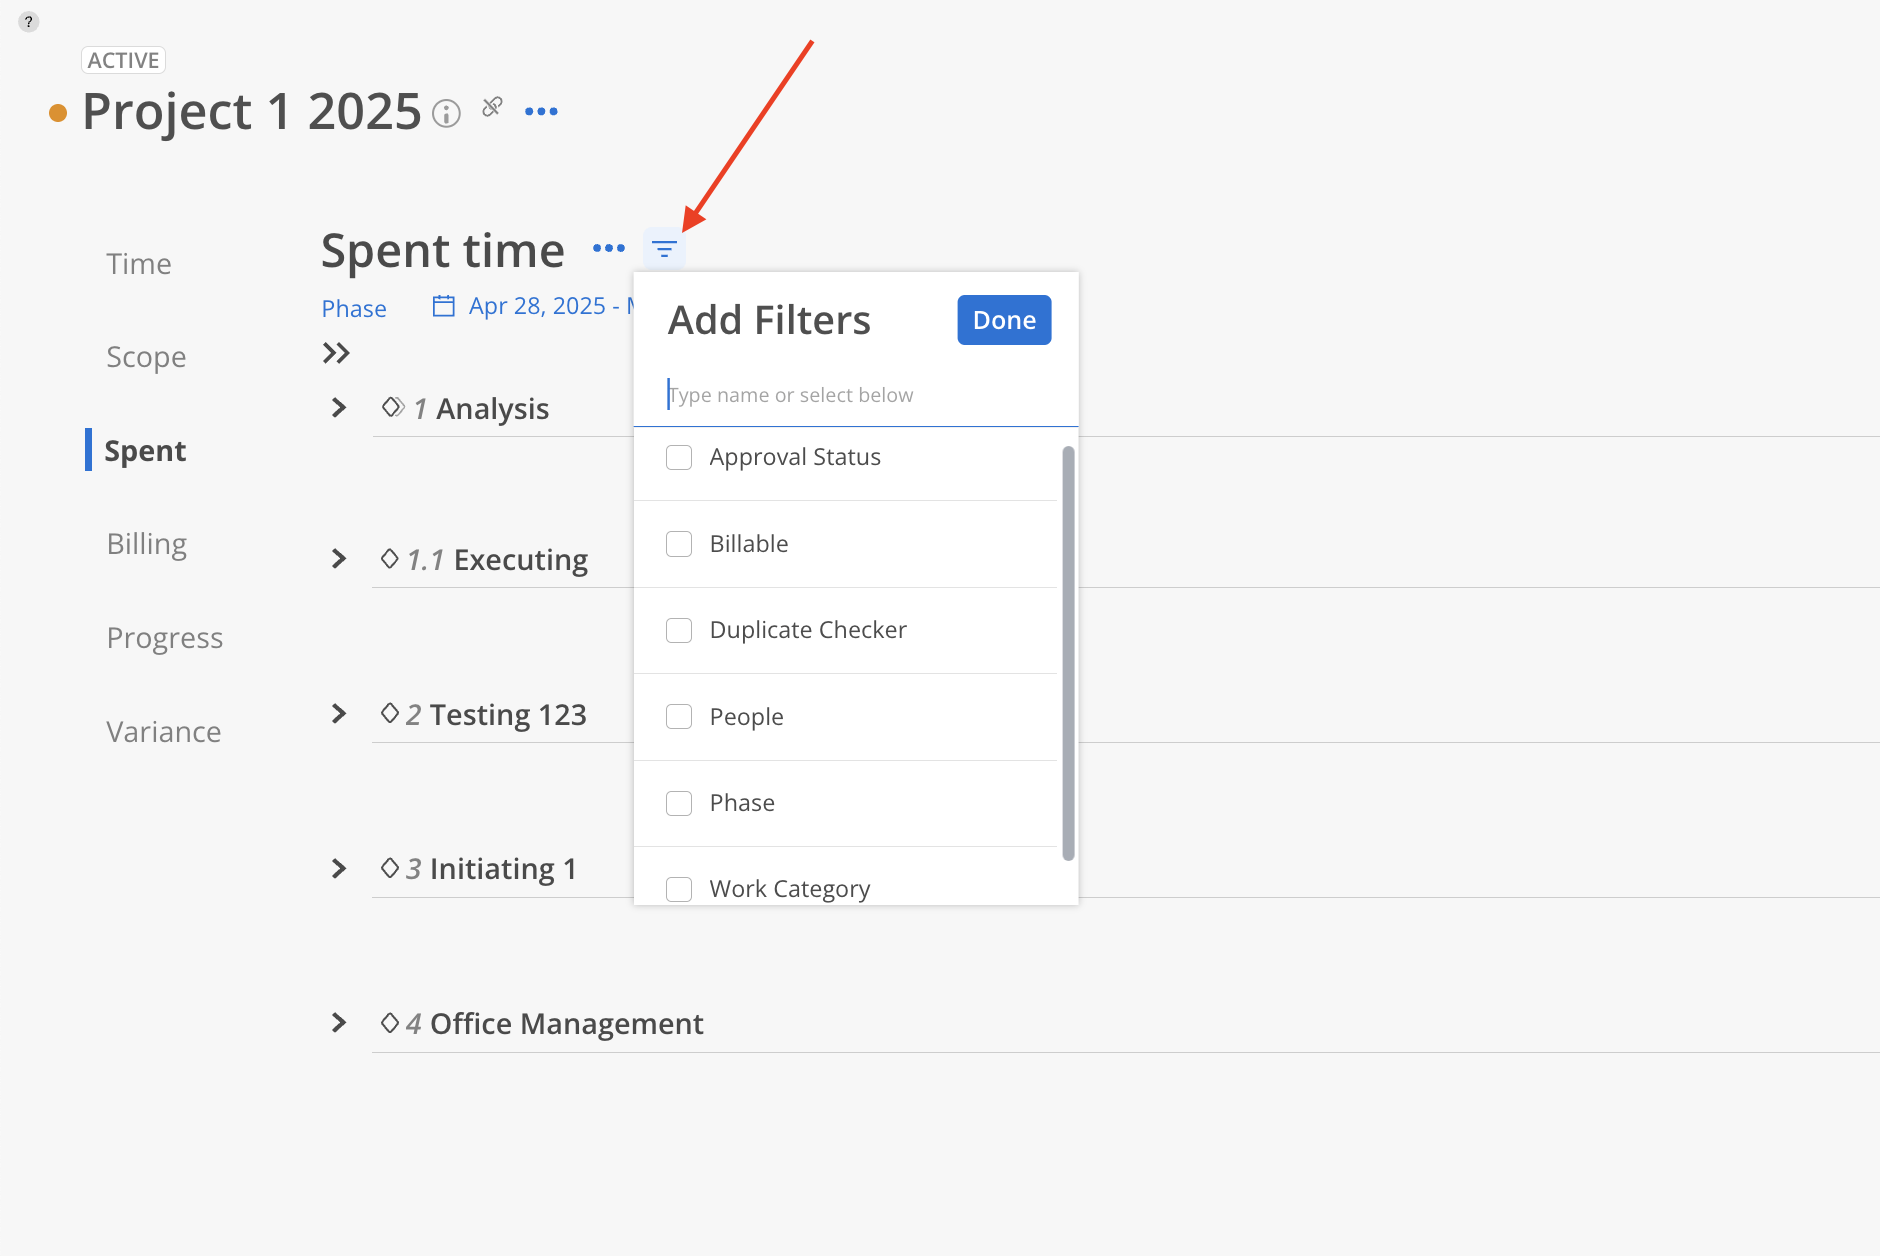
Click the filter icon to open the Add Filters panel, where filters such as Approval Status, Billable, Duplicate Checker, People, Phase, and Work Category can be applied to refine the time entry view.
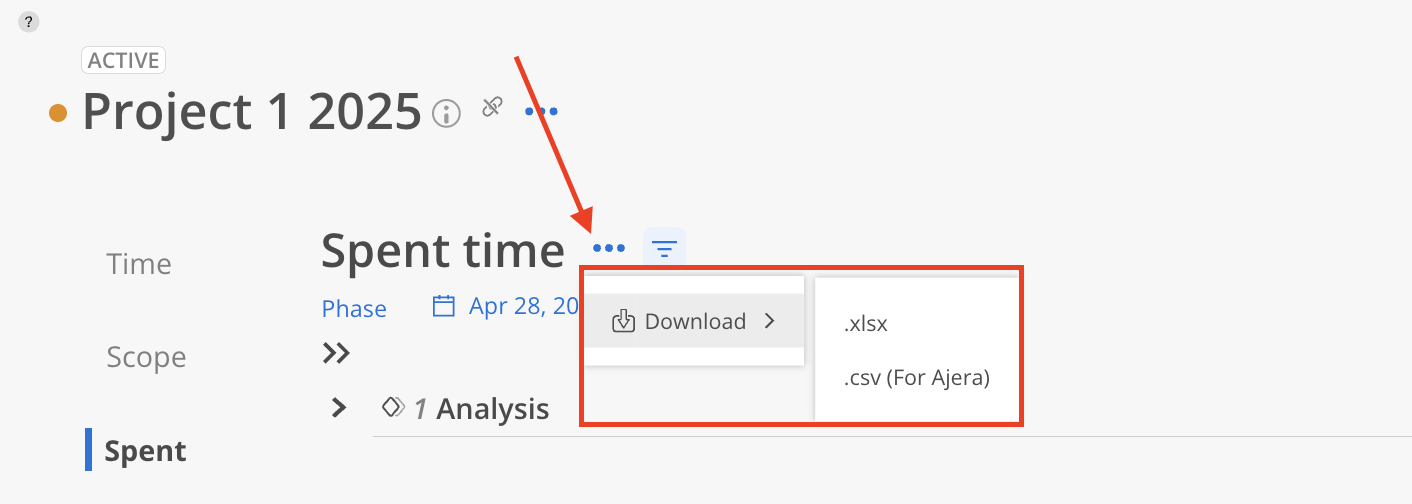
Click the three-dot menu next to Spent time to download time entry data in either .xlsx or .csv (For Ajera) format for reporting or external processing.
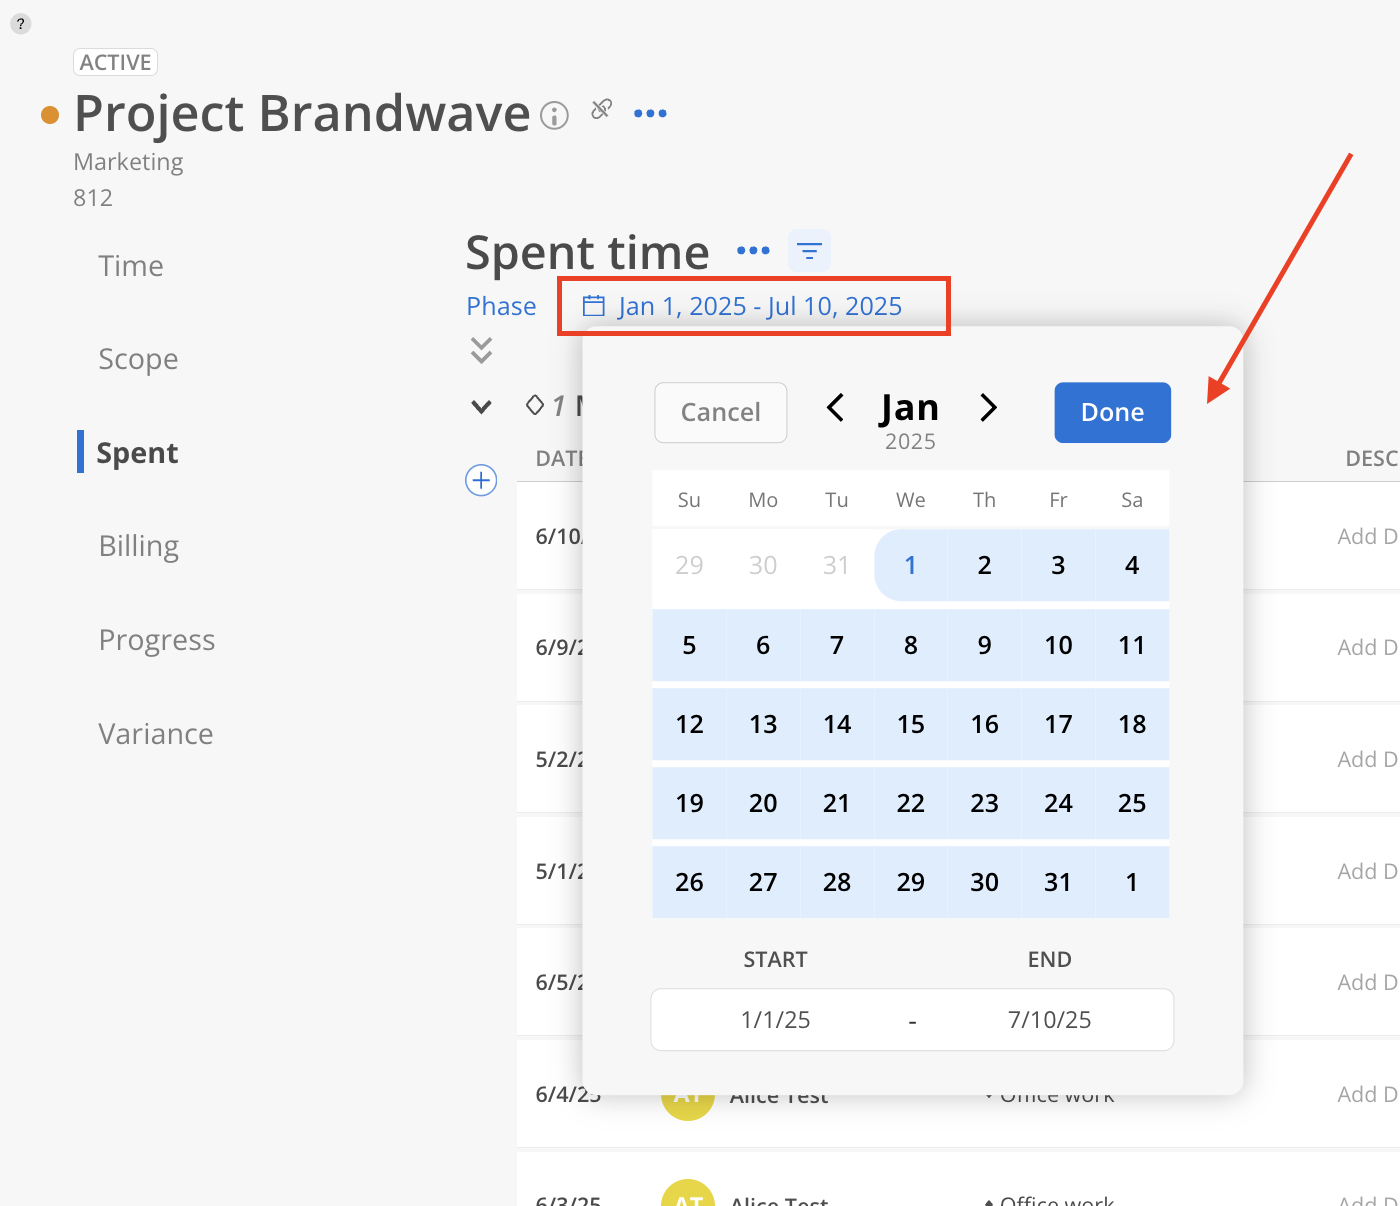
In the top-left corner, the date range selector allows filtering of Timesheets by a specific time period.
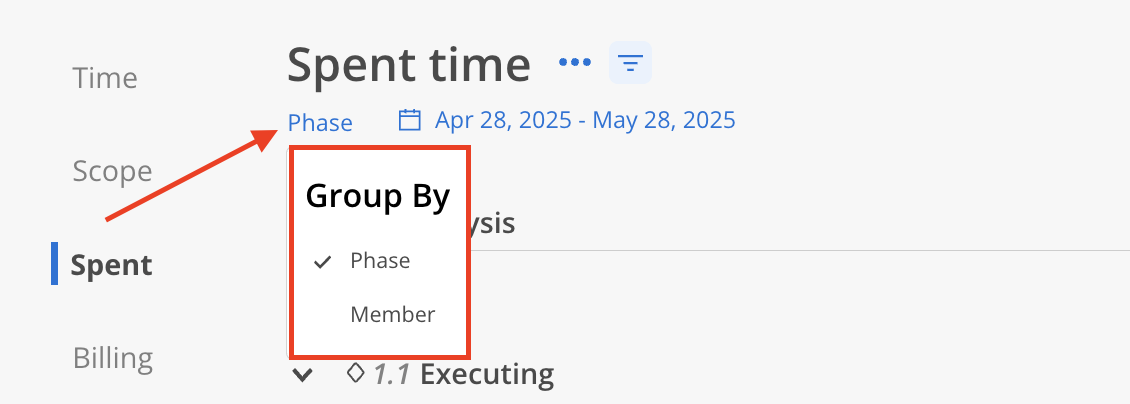
Timesheets can also be grouped by either Members or Phases, providing flexible views for analysis and tracking.
To add a Time Entry for any user in the project, expand the Phase. Then click the plus (+) icon.
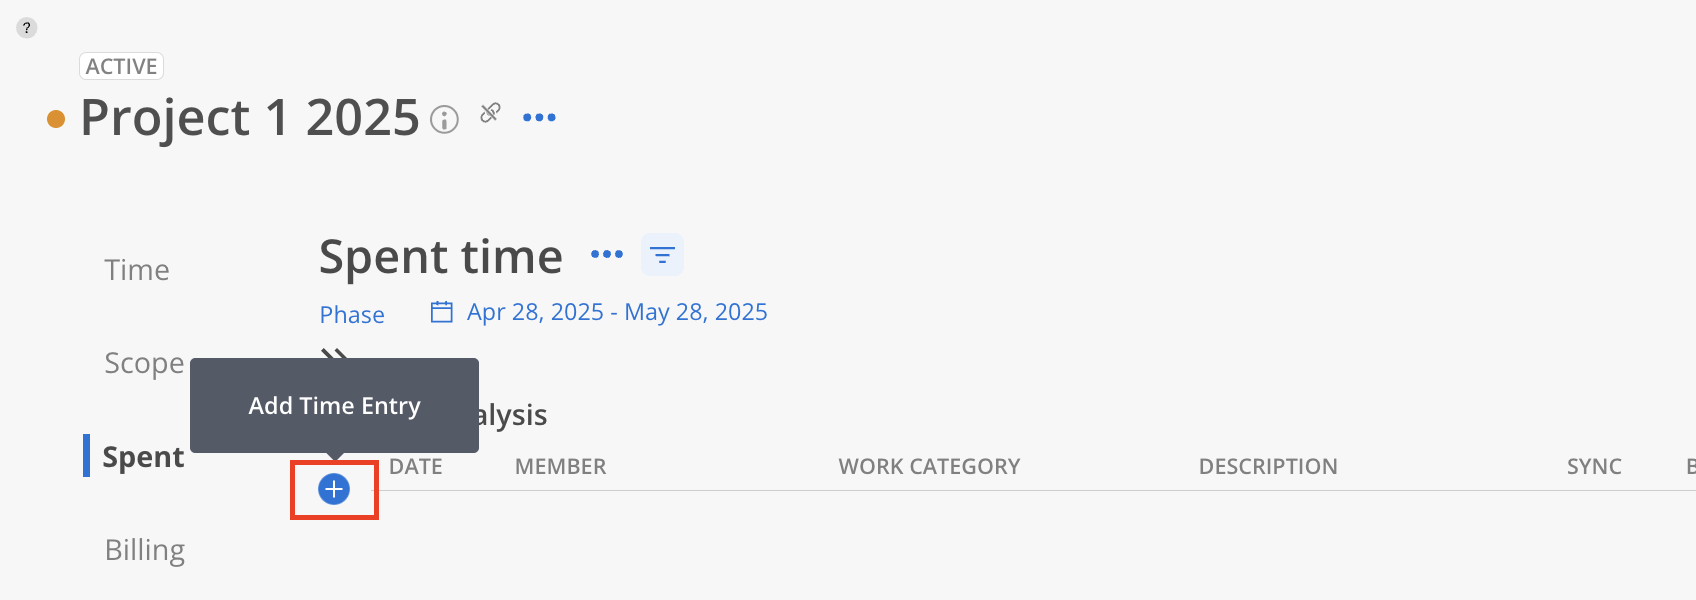
Select the Date, Member, and Work Category. If the selected Work Category requires a description, it must be entered; otherwise, it is optional.
Enter the number of Hours (Invoice Hours are optional), then click Add to save the entry.

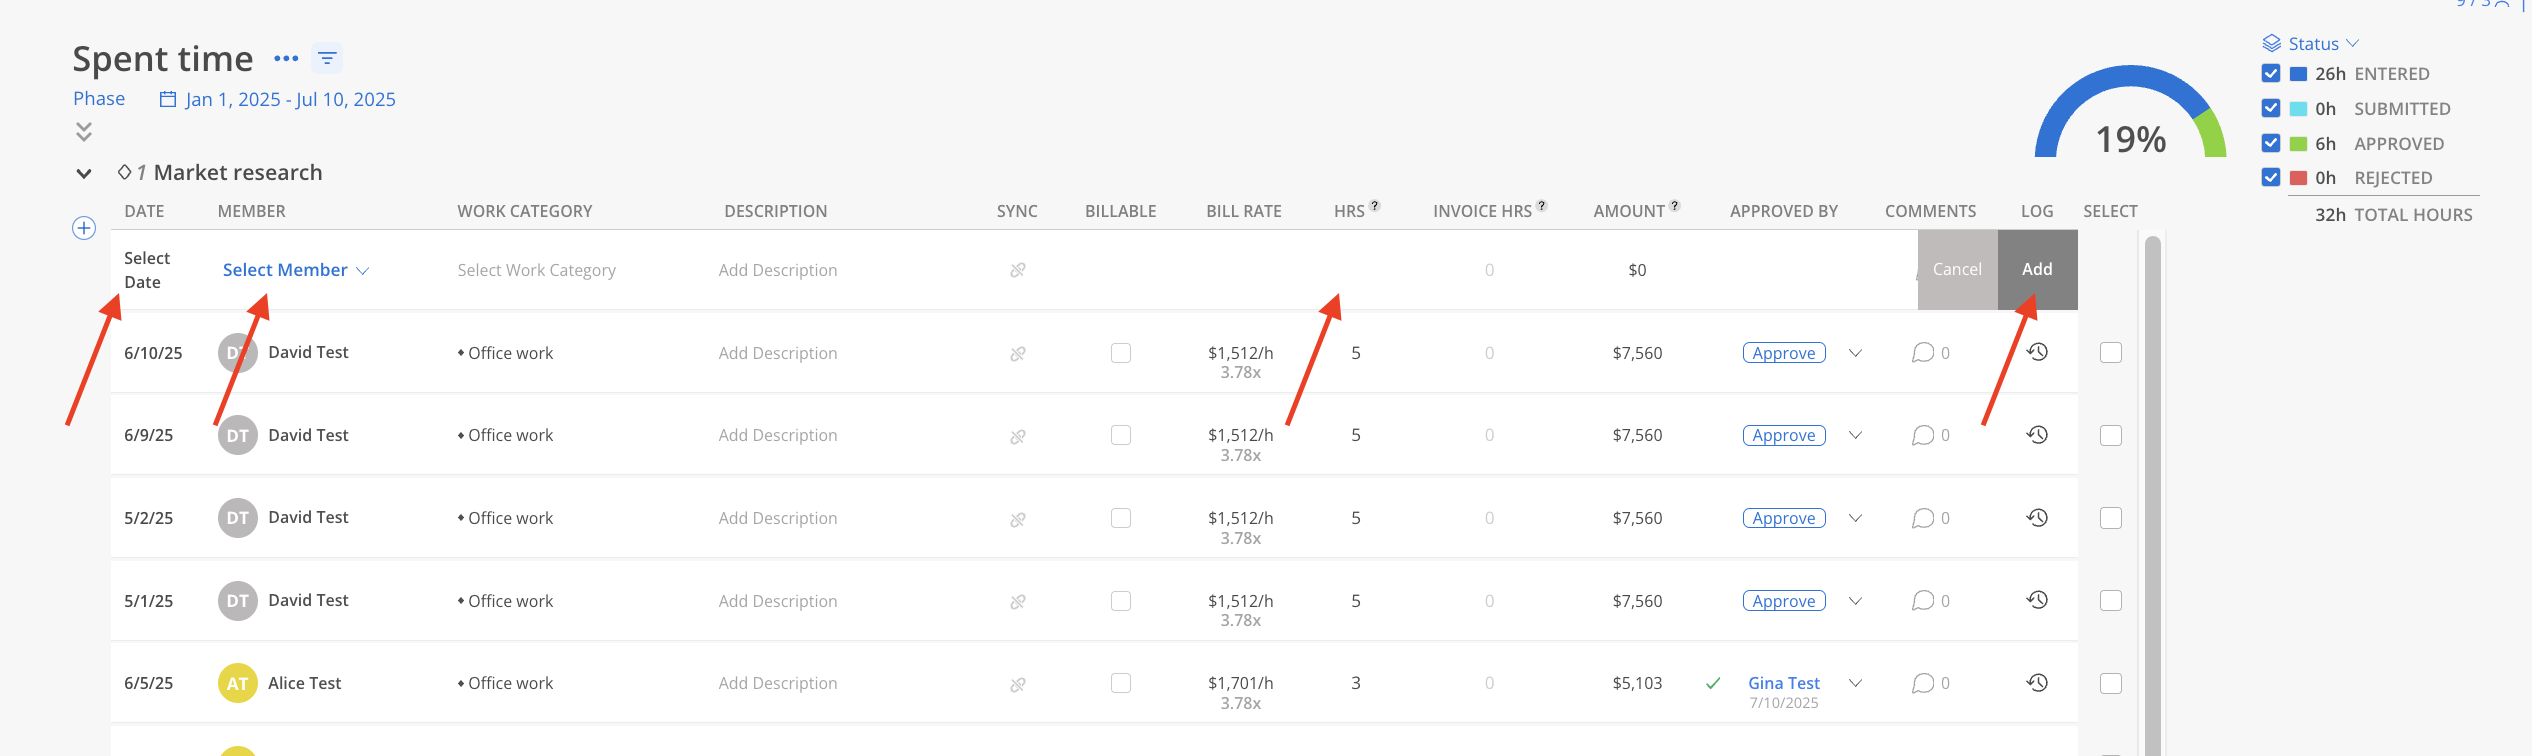
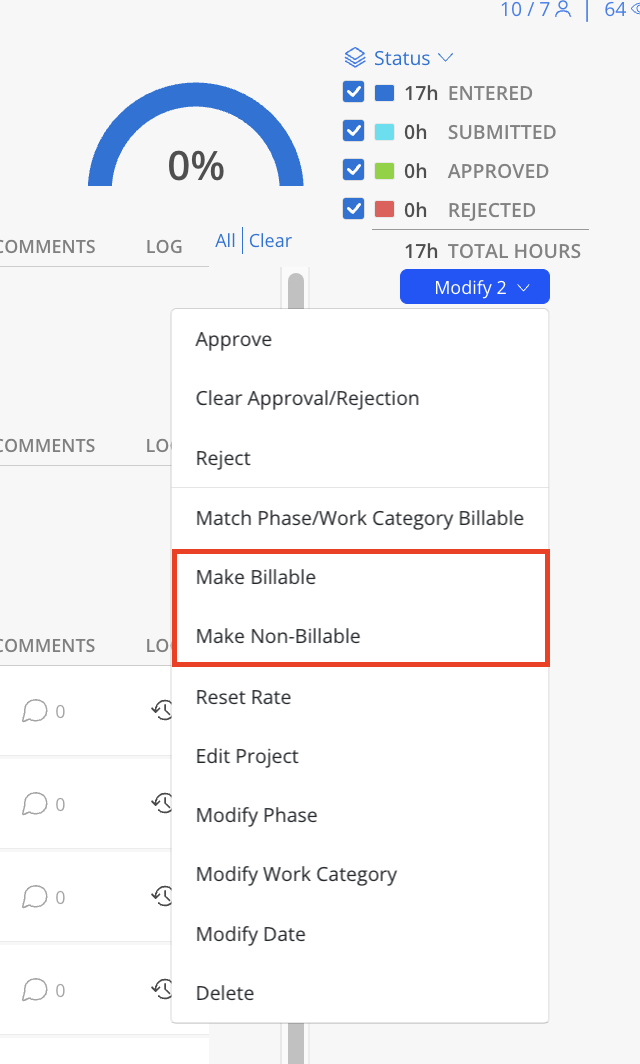
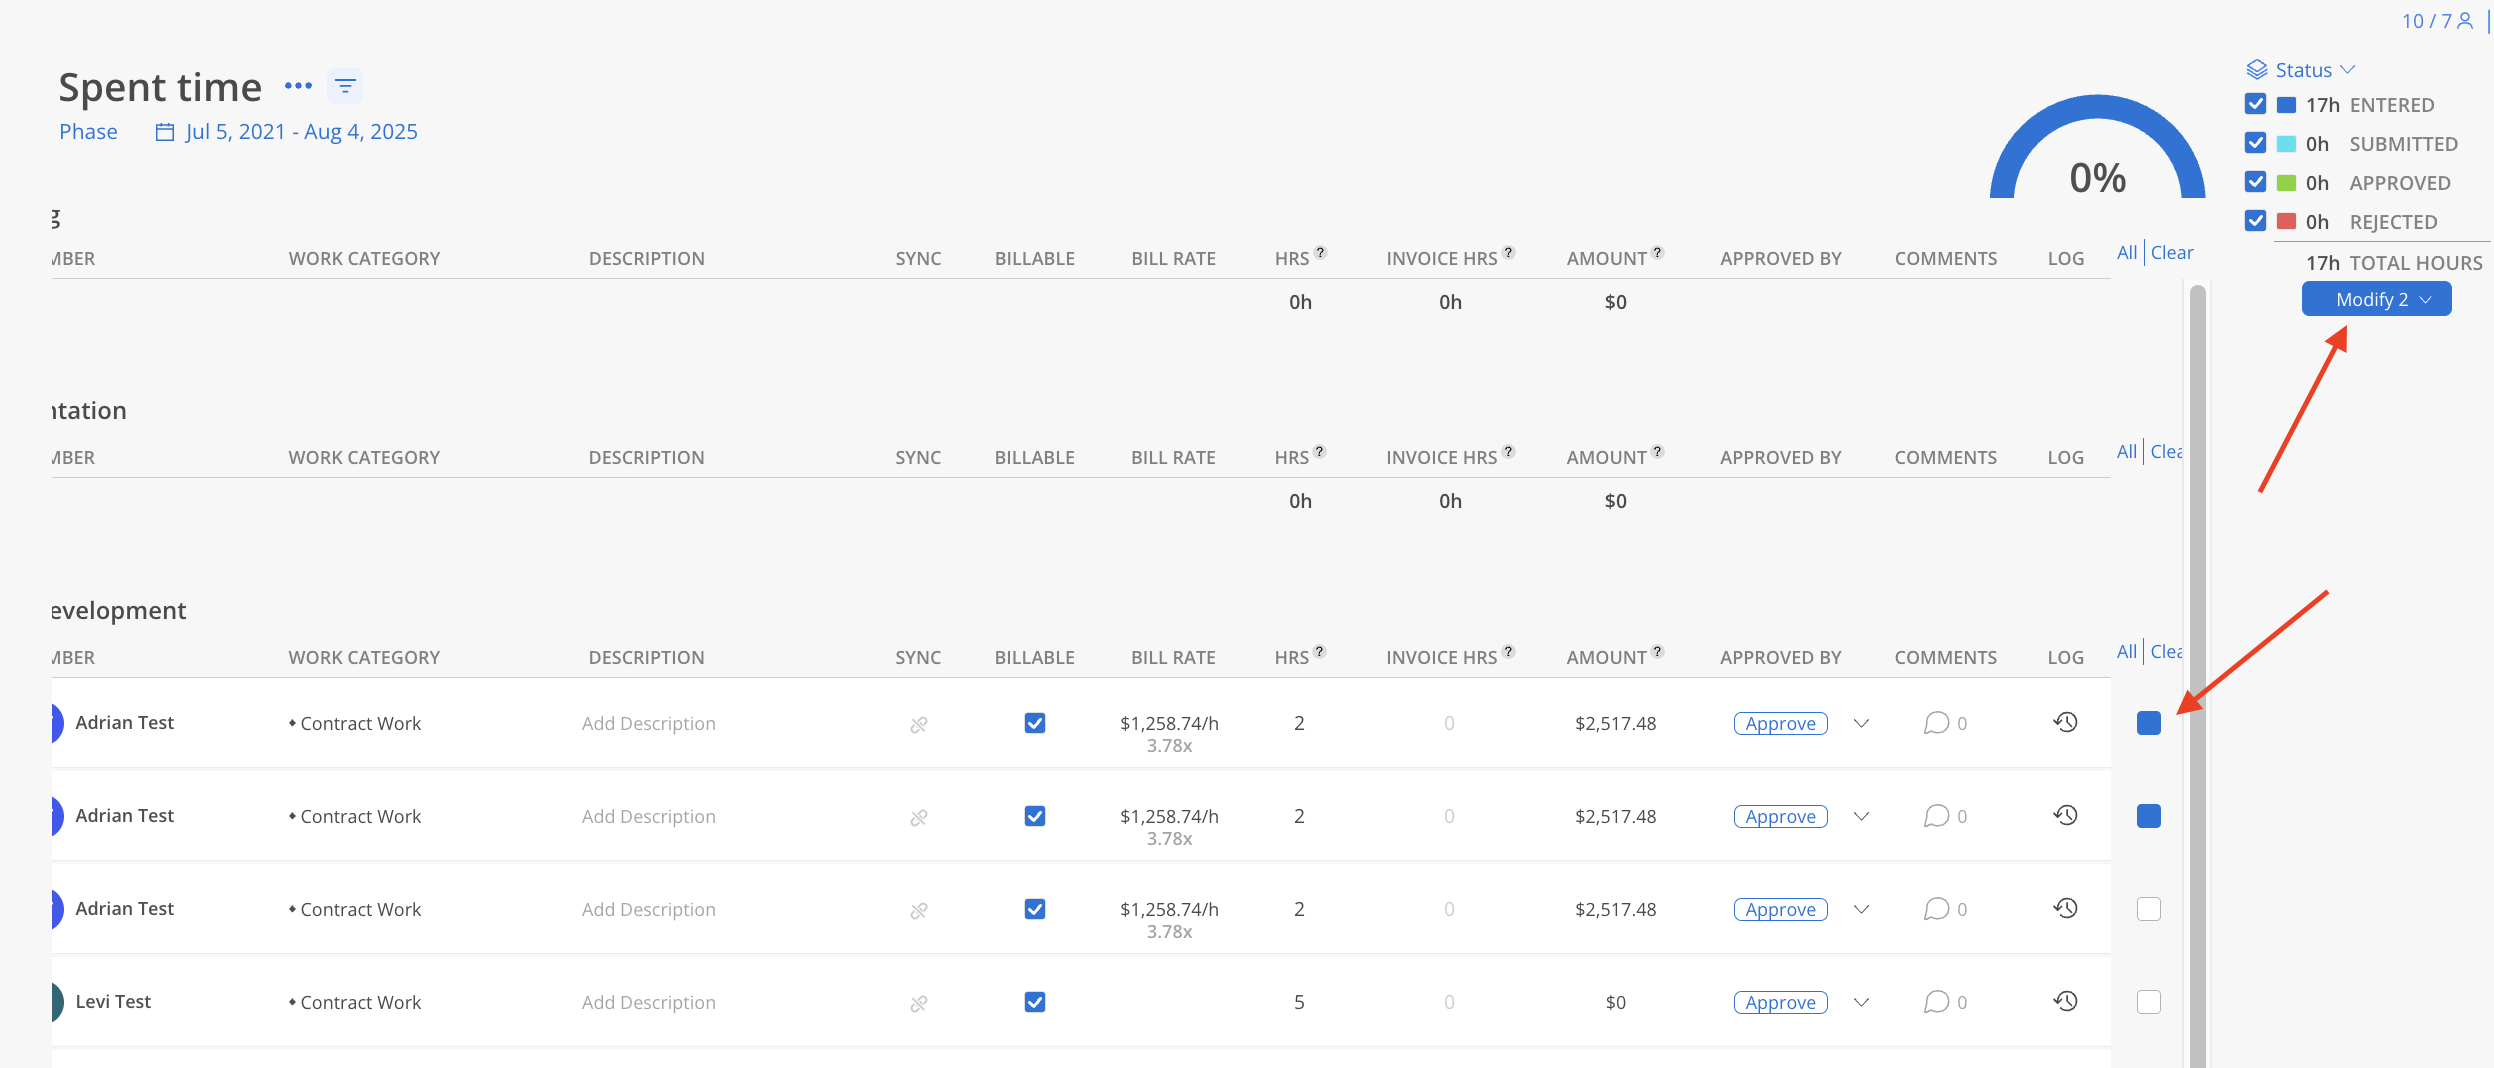
Click the checkbox to select timesheets, click modify on the top.
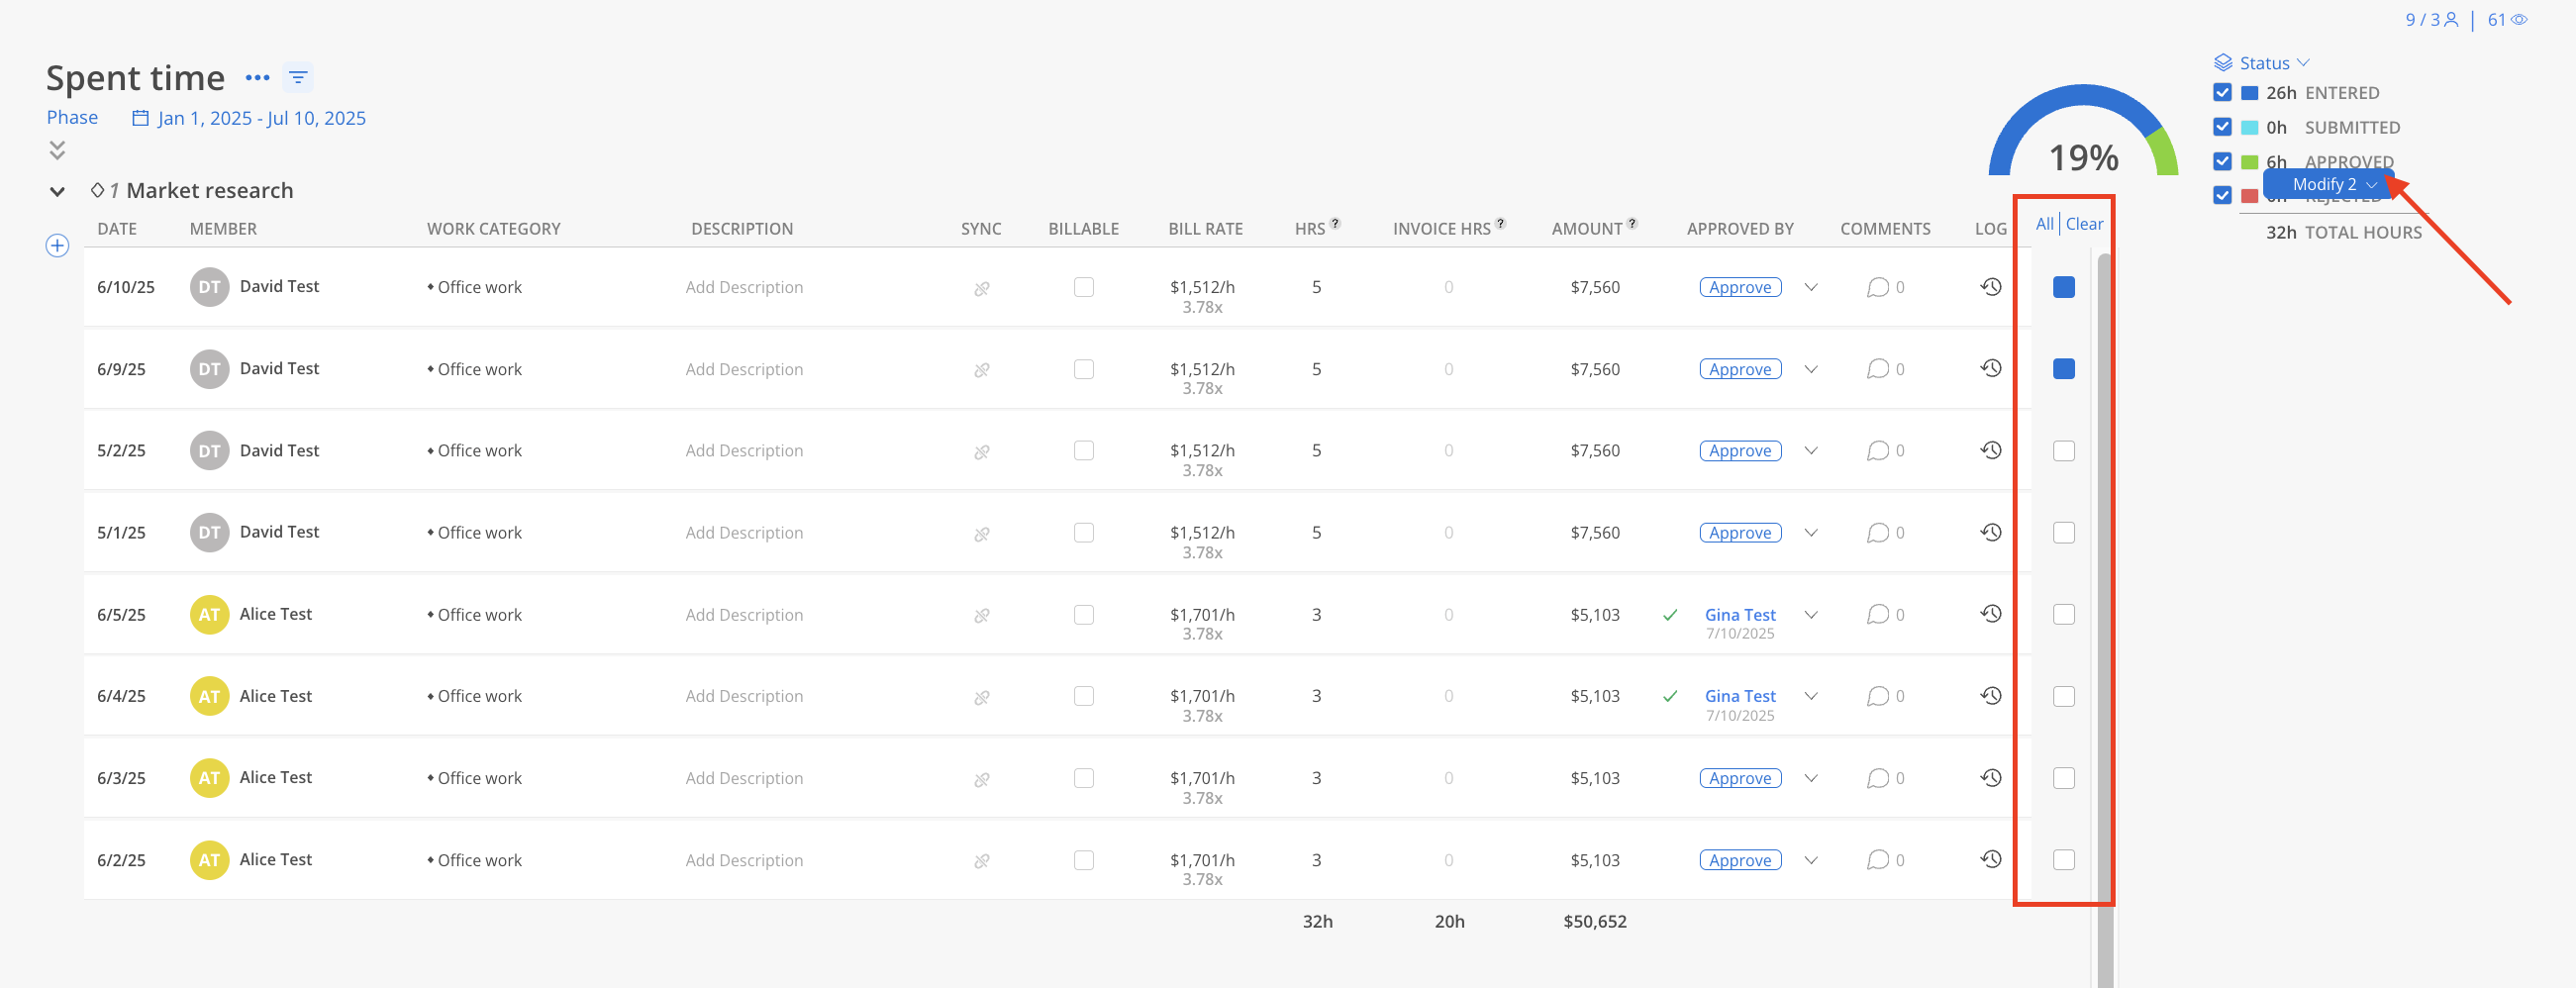
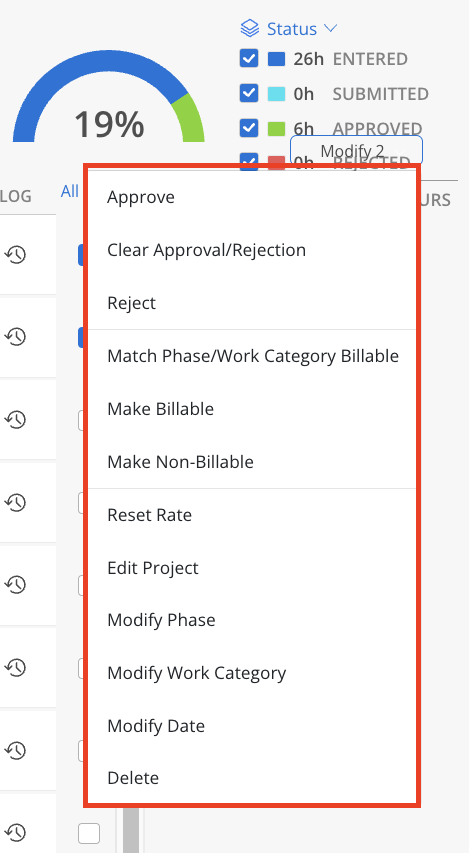
From this menu, the following actions can be performed
Approve: Marks the Timesheets as approved.
Clear Approval/Rejection: Removes any previous approval or rejection status.
Reject: Rejects the Timesheets submission.
Match Phase/Work Category Billable: Aligns the billable status of Timesheets with the status of phase or work category.
Make Billable: Changes the Timesheet to billable. This is considered as overriding the billable status.
Make Non-Billable: Changes the Timesheet to non-billable. This is considered as overriding the billable status.
Reset Rate: Resets the bill rate of the Timesheet to match the default project rate.
Edit Project: Change the project on the Timesheet.
Modify Phase: Change the phase on the Timesheet.
Modify Work Category: Change work category on the Timesheet.
Modify Date: Allows modification of the date of Timesheets.
Delete: Deletes the Timesheet.
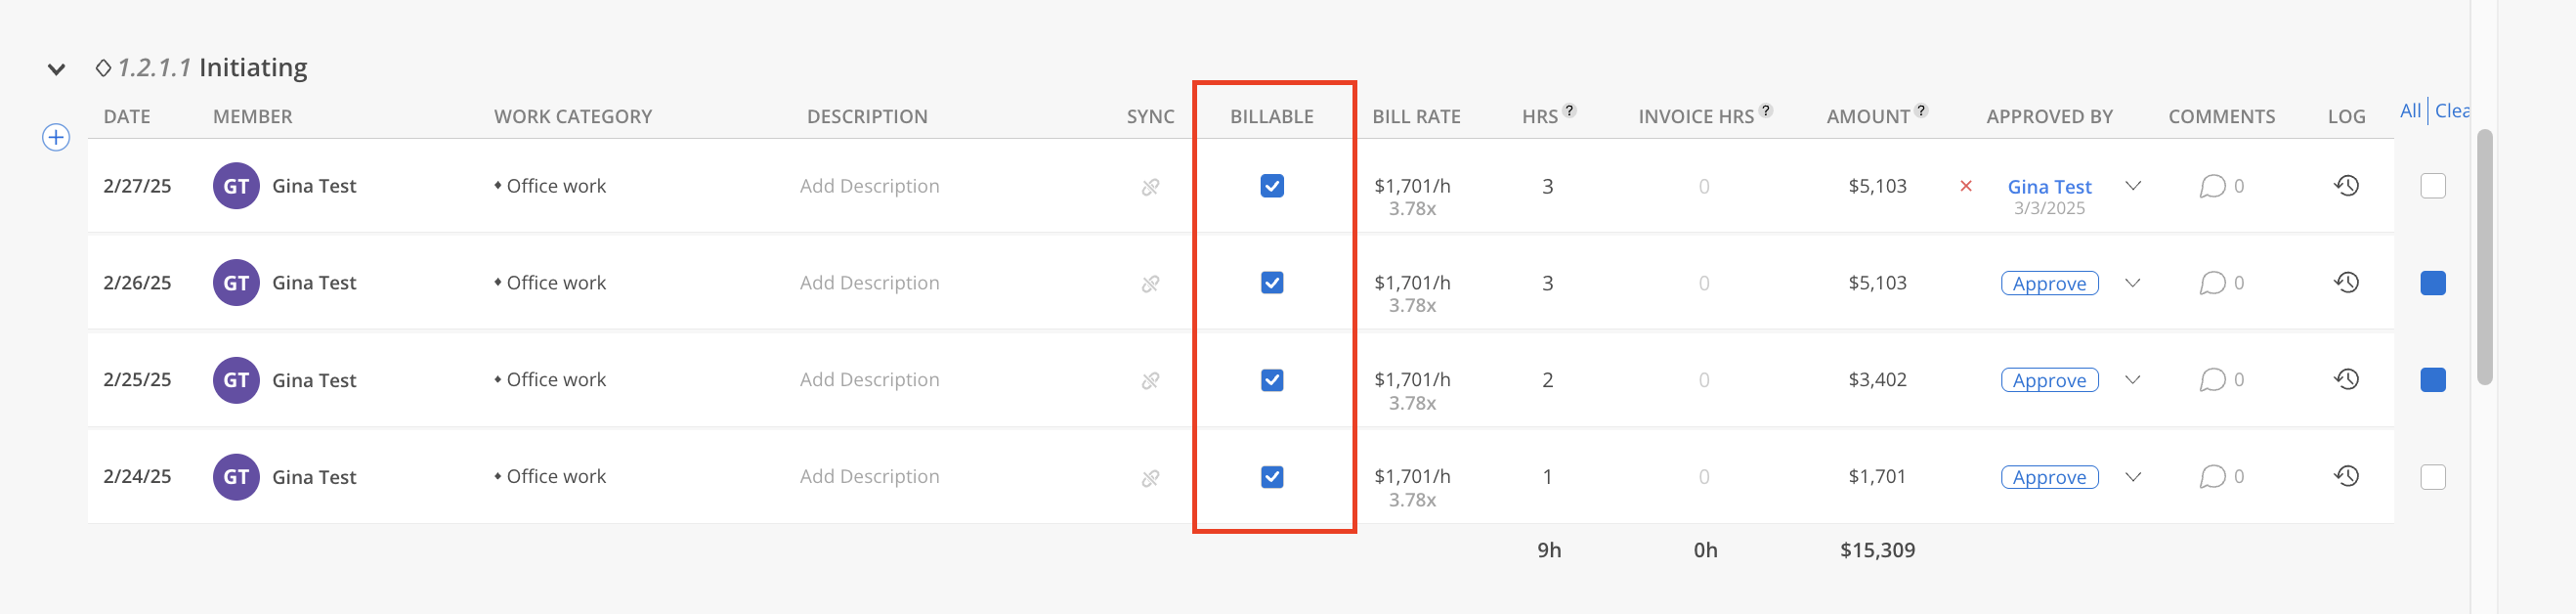
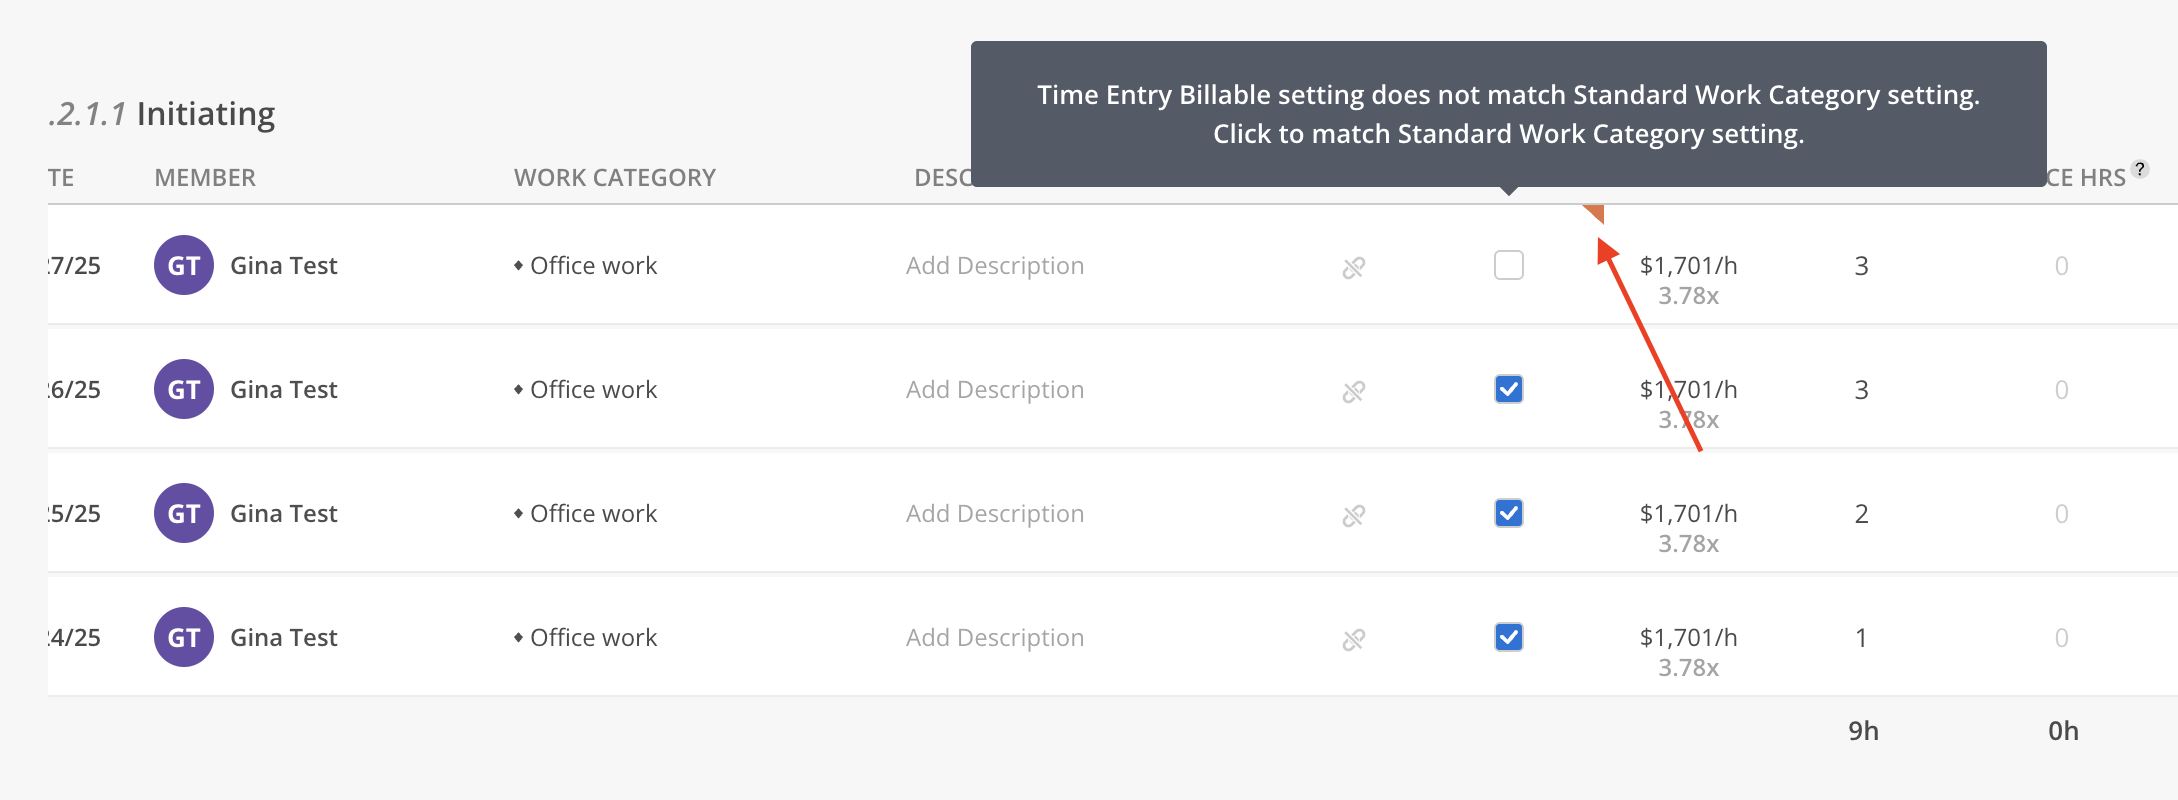
Occasionally, a Timesheet’s Billable Status may differ from the default setting.
To manually adjust this, click the Billable checkbox for the individual Timesheet.
A confirmation modal will appear to confirm the override.
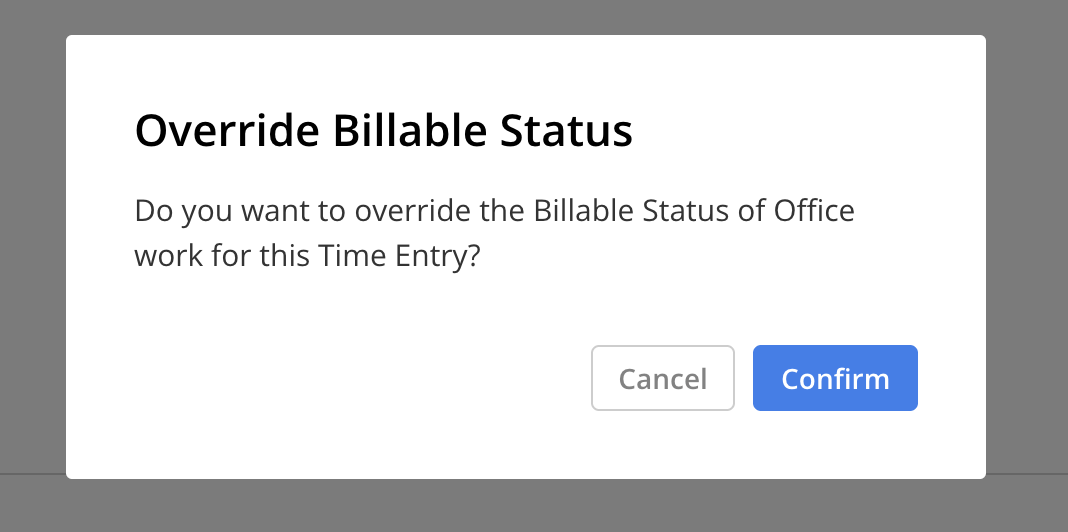
Once confirmed, a red chip will display in the Billable column, indicating that the status has been successfully changed.
For bulk updates, use the checkboxes on the right to select multiple Timesheet entries, then click Modify at the top.

Choose either Make Billable or Make Non-Billable based on the desired status. Then follow the same confirmation step to make the changes.
Select the Timesheets by clicking the checkbox. Click Modify on the top.
Select Match Phase/Work Category Billable on the menu.

