Each project in the Planner shows a list of members who are associated with it. Members appear if they have spent time on the project, have future work plans, or were synced as project members from your ERP. You can add new members, remove inactive ones, and filter the visible list to focus on specific people.
Member list — all members associated with the project, listed below the project name
Manage Members button — person icon in the project-level button row
Filter option — in the three-dot menu for each project
Project link button — opens the full project page for detailed project information
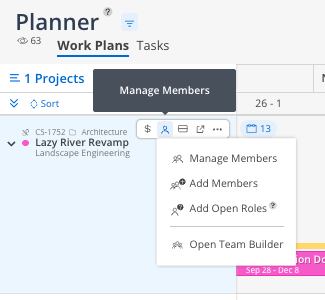
Click the Manage Members button (person icon) on the project row.
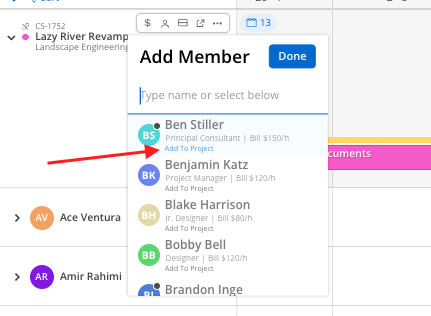
Search for the member by name.
Select them to add them to the project.
They now appear in the member list and can have work plans created for them.
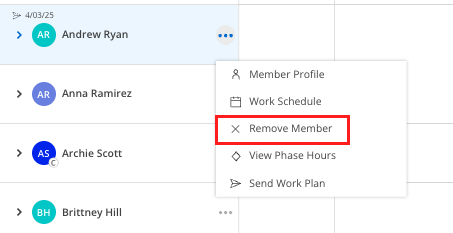
Click the Manage Members button.
Find the member you want to remove.
Click Remove next to their name.
Their historical time entries remain on the project, but they are removed from the active member list.
Click the three-dot menu on the project row.
Select Filter Members.
Choose the specific members you want to see. You can also filter by phase membership.
The view narrows to only those members, cleaning up the display when a project has many people.

Remove inactive members to keep the view clean. If someone is no longer working on a project, remove them from the member list. Their historical time is preserved.
Use member filtering for focused planning. If a project has 20+ members, filter to just the 3–5 you need to plan for in this session.
