Setting Rates for each Member establishes default Bill and Cost Rate values, which apply when creating workloads for Projects using Member Rates. This ensures that each Member has a predefined Rate for billing and cost tracking purposes.
Member Cost Rates are used by Projects and Phases for budgeting purposes. These rates are subject to Project- and Phase-level overrides.
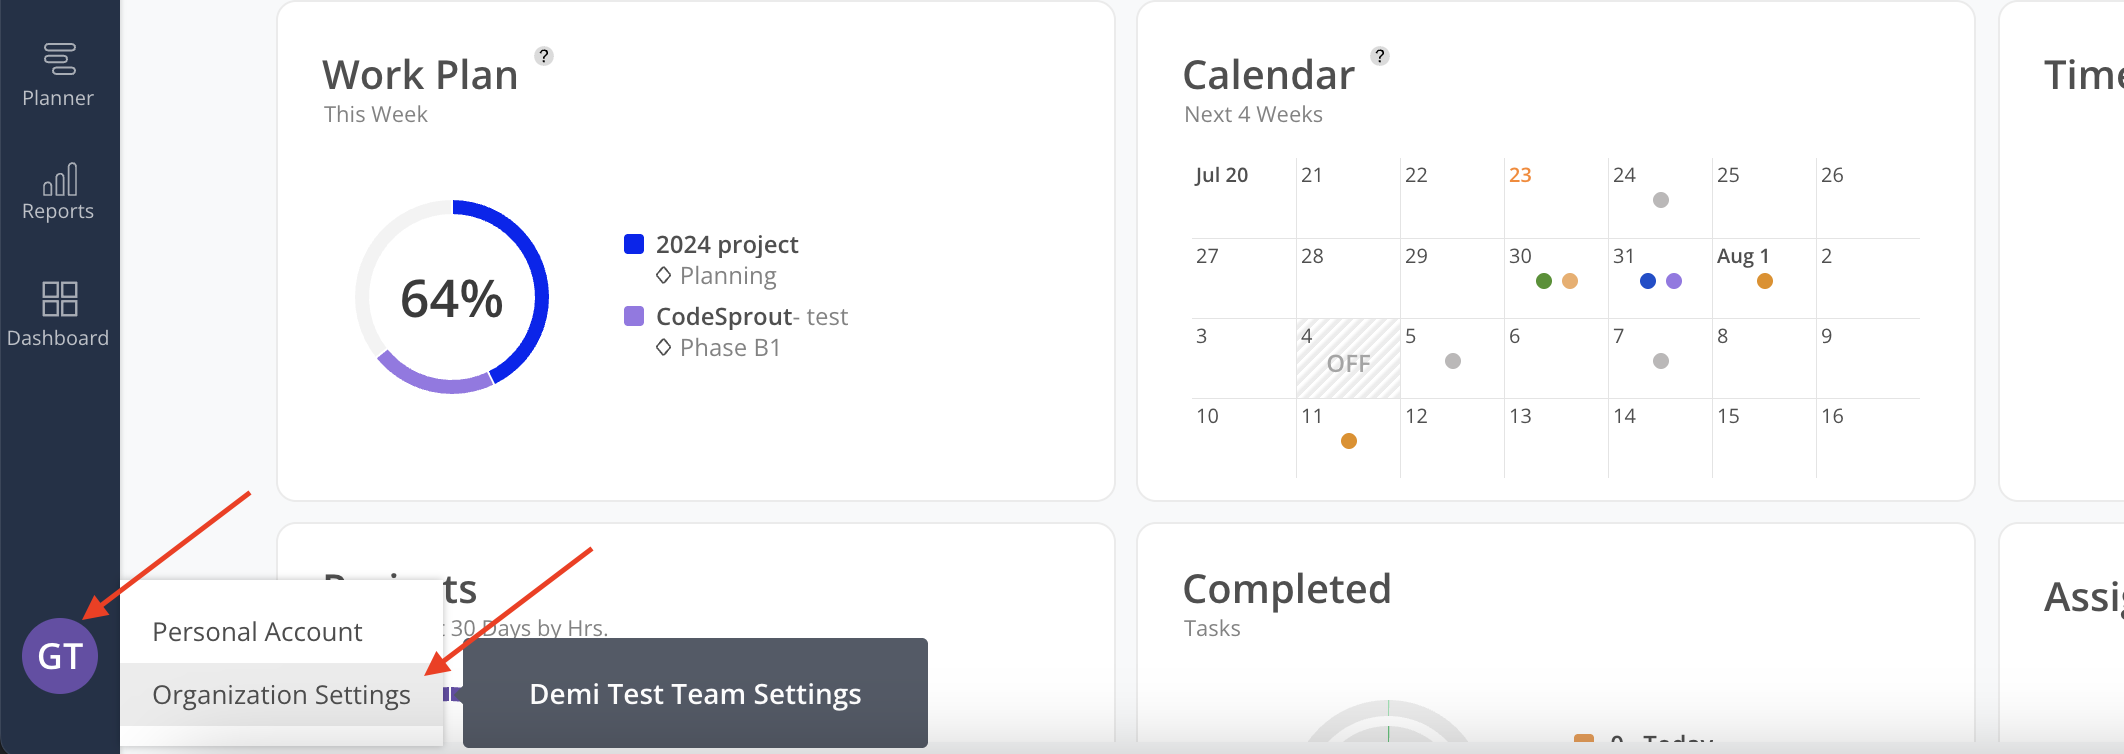
Go to Organization Settings.
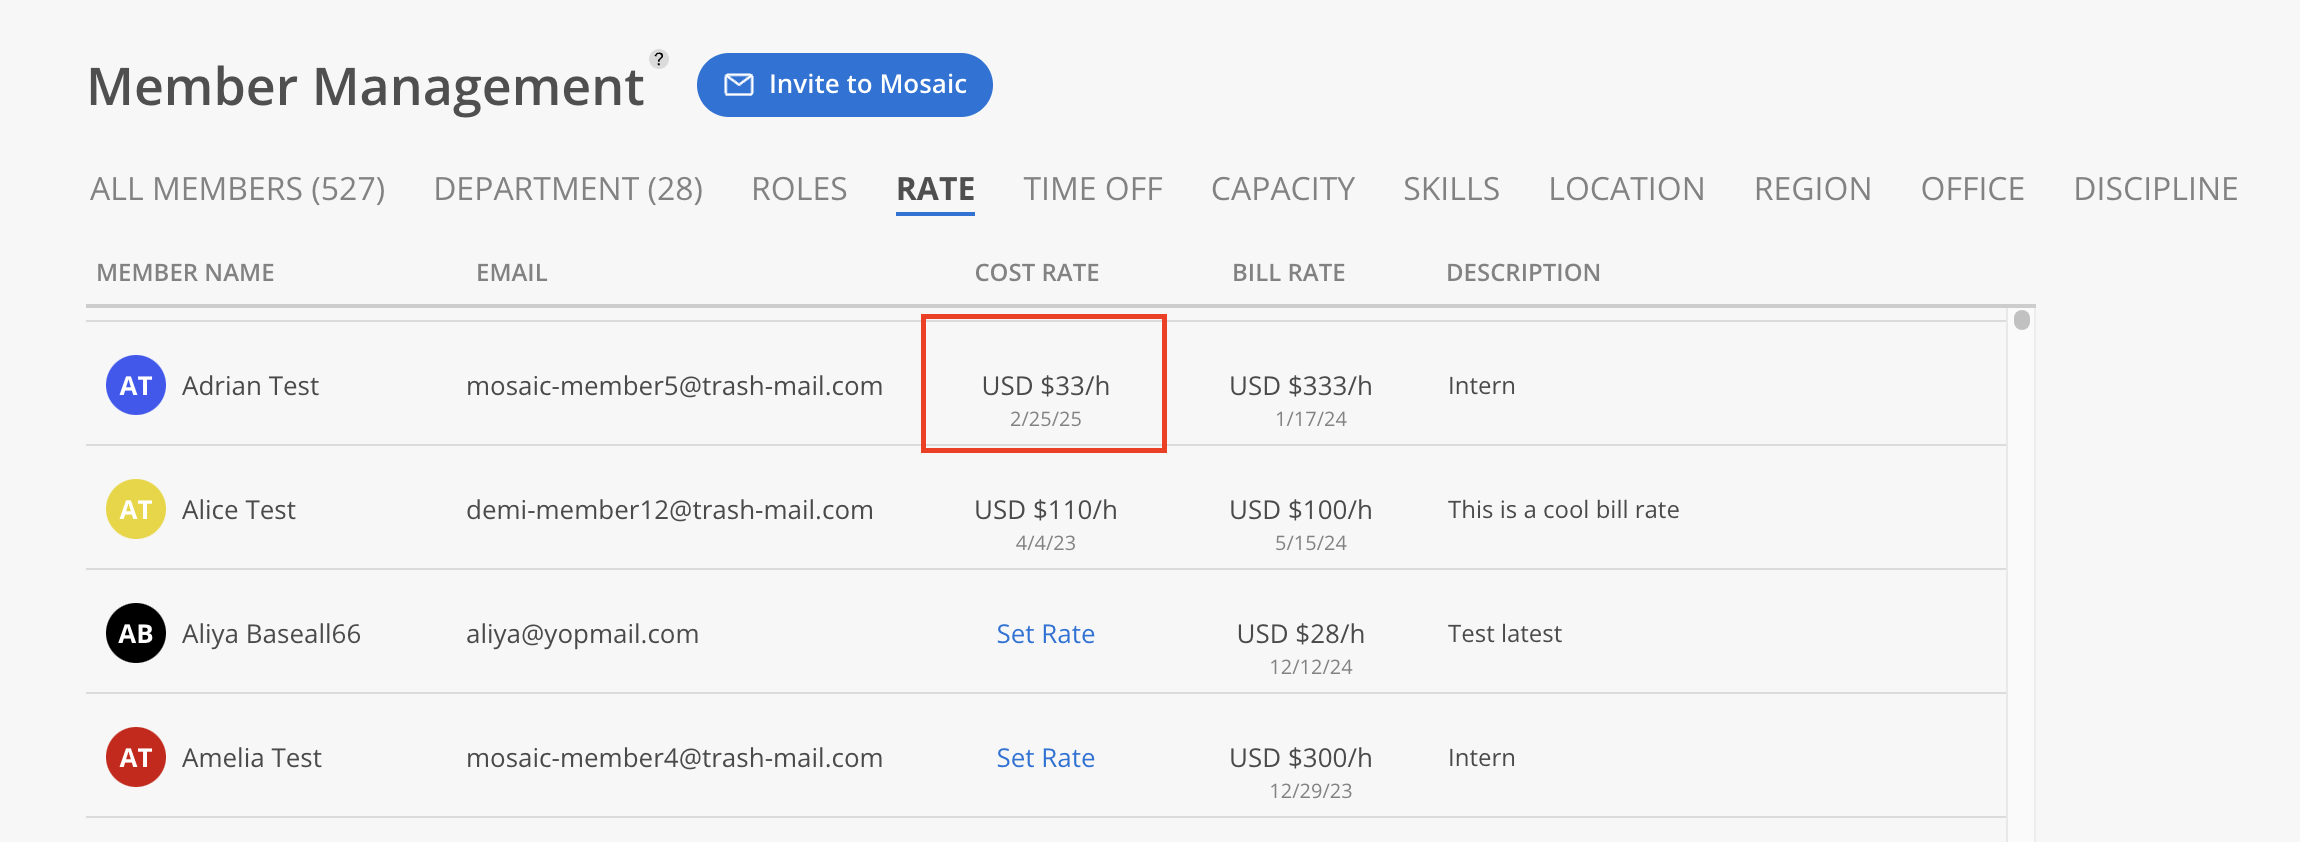
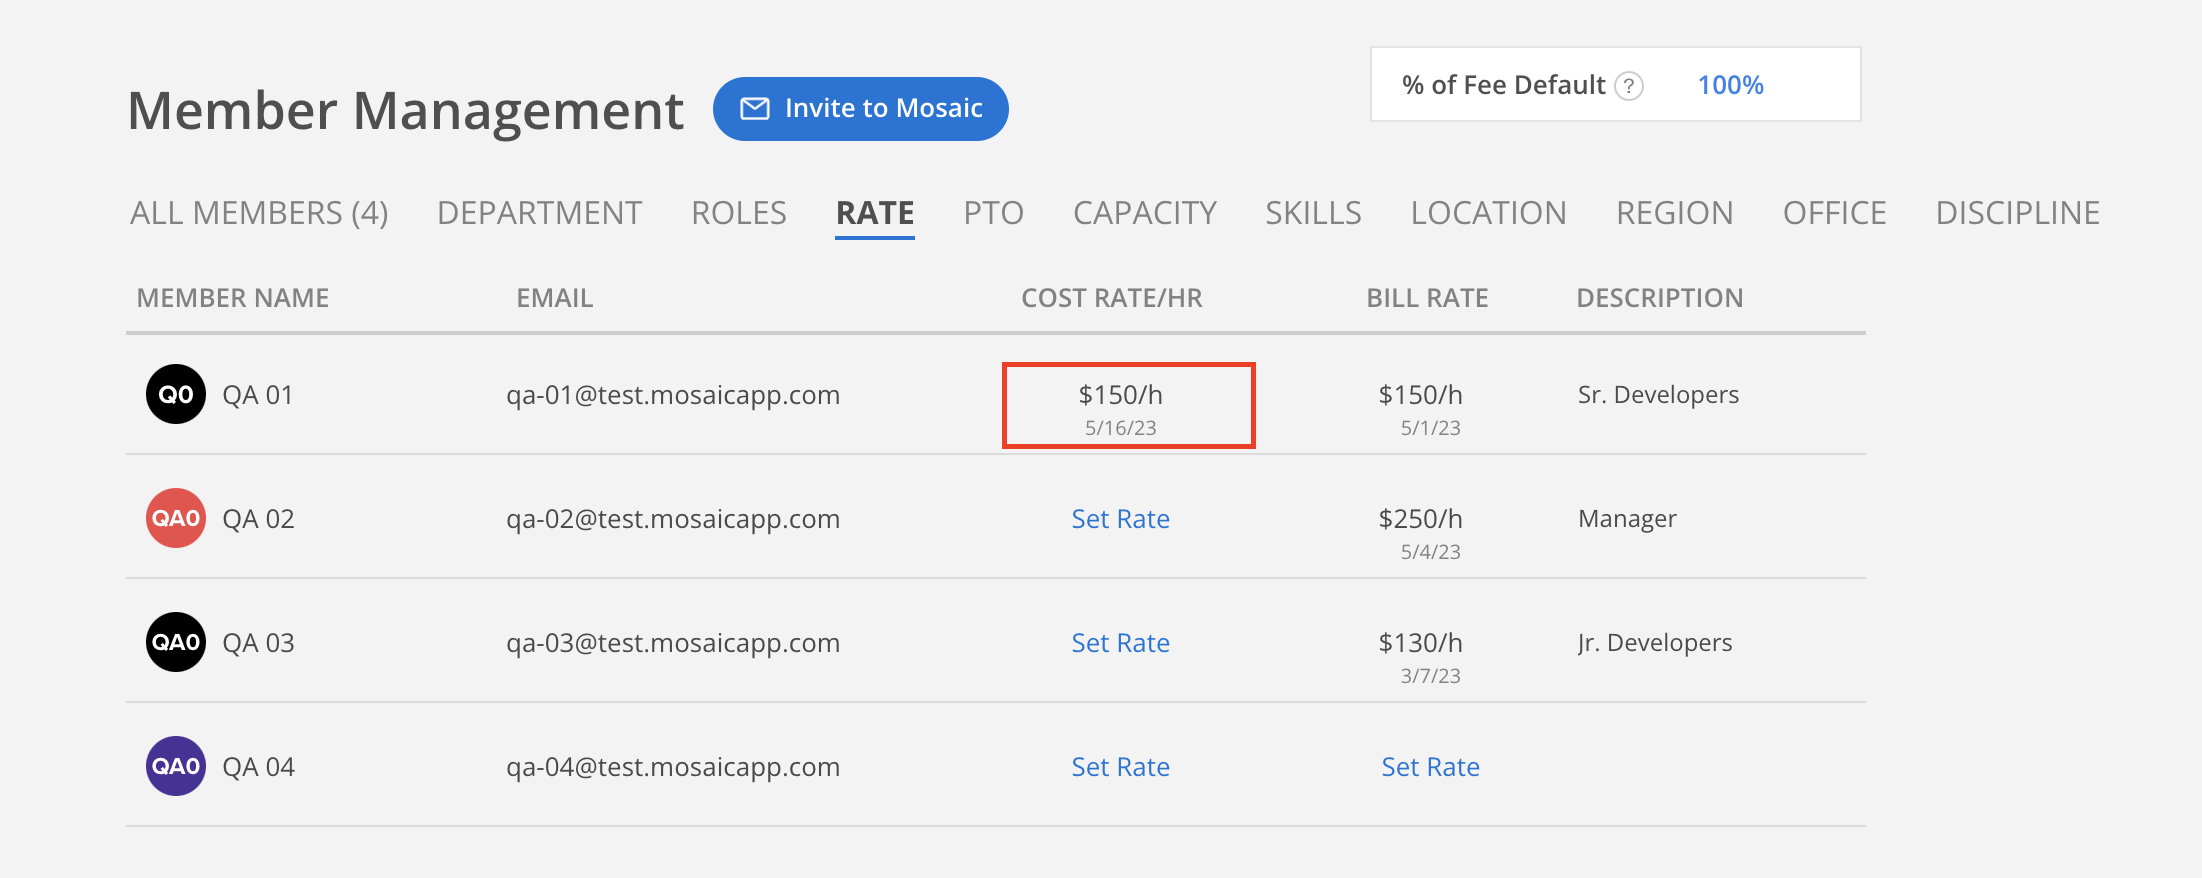
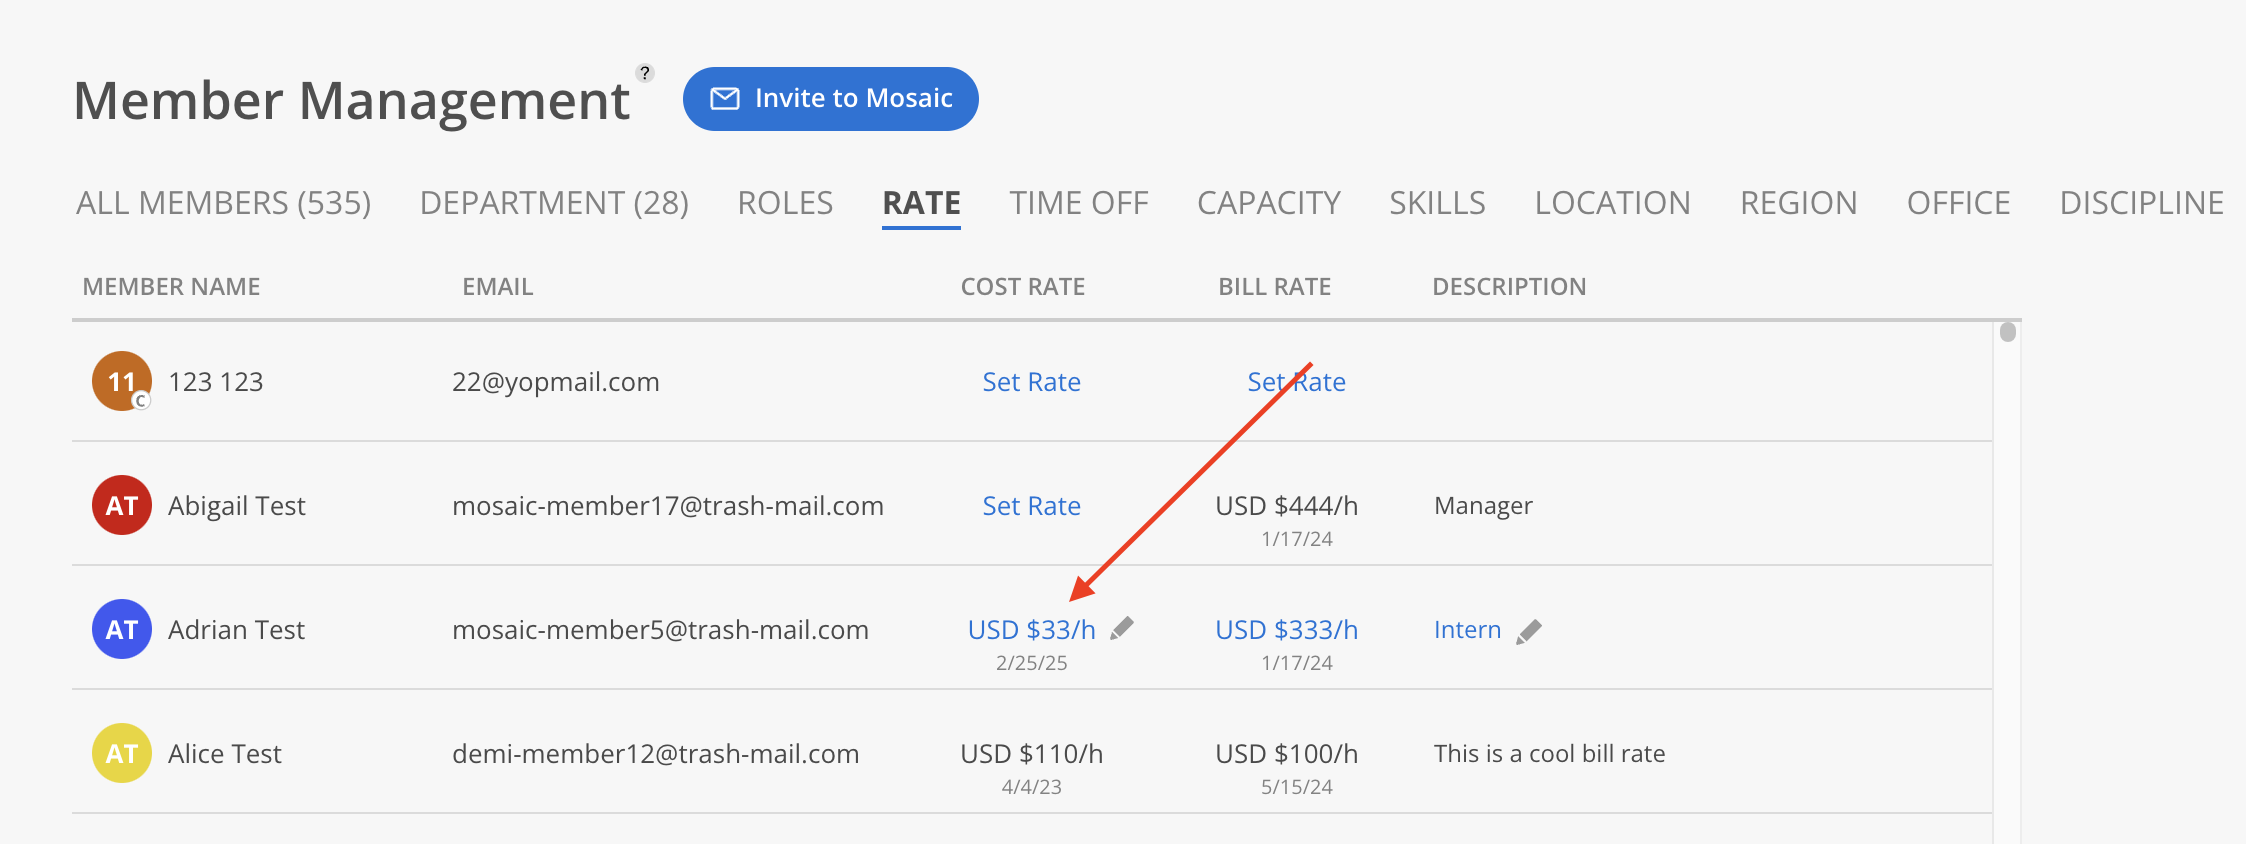
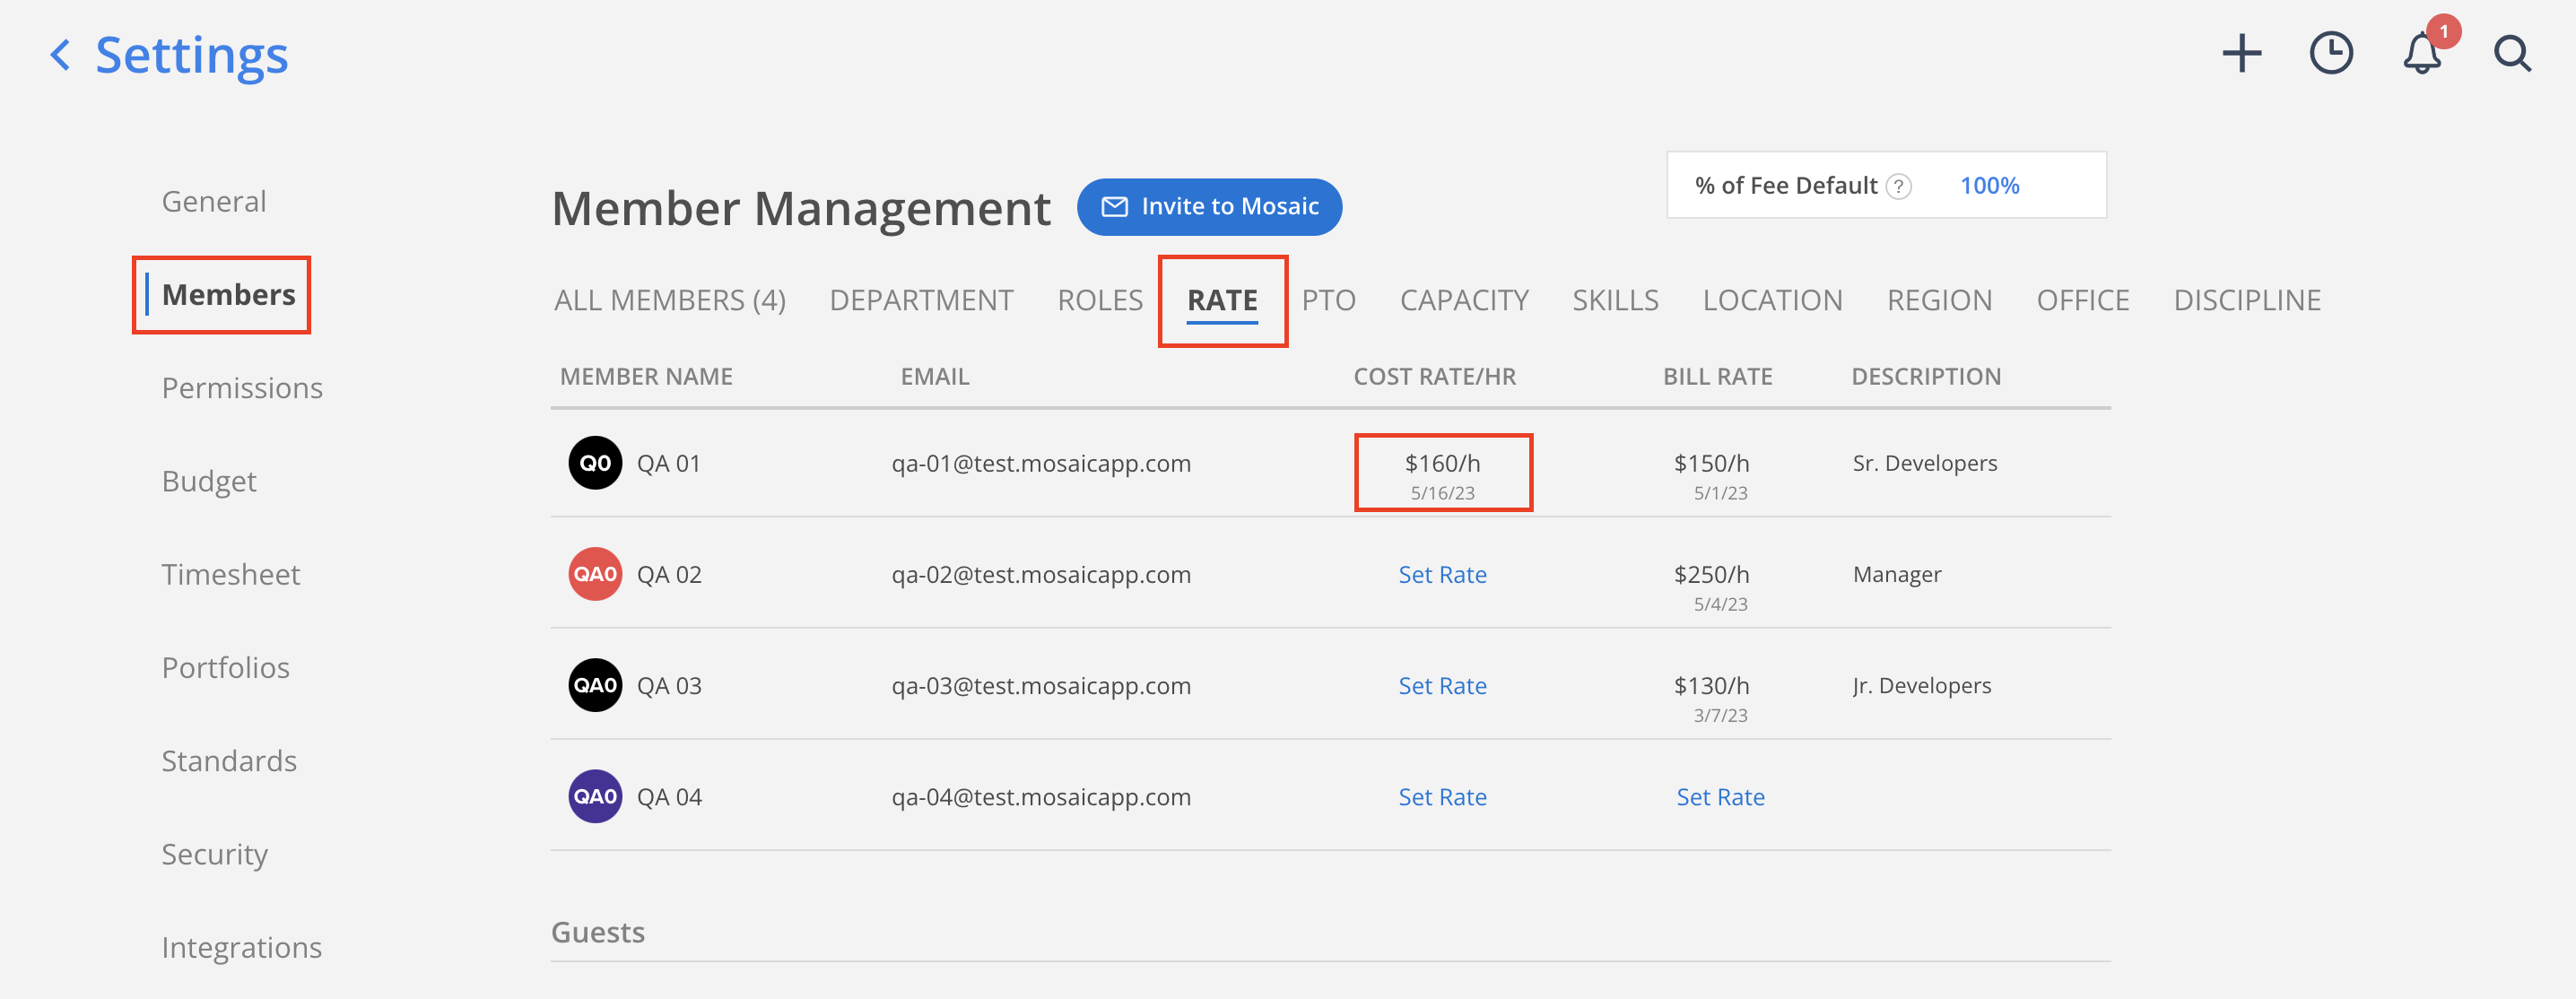
Click the Members item on the left-hand side menu, then click the Rate tab.
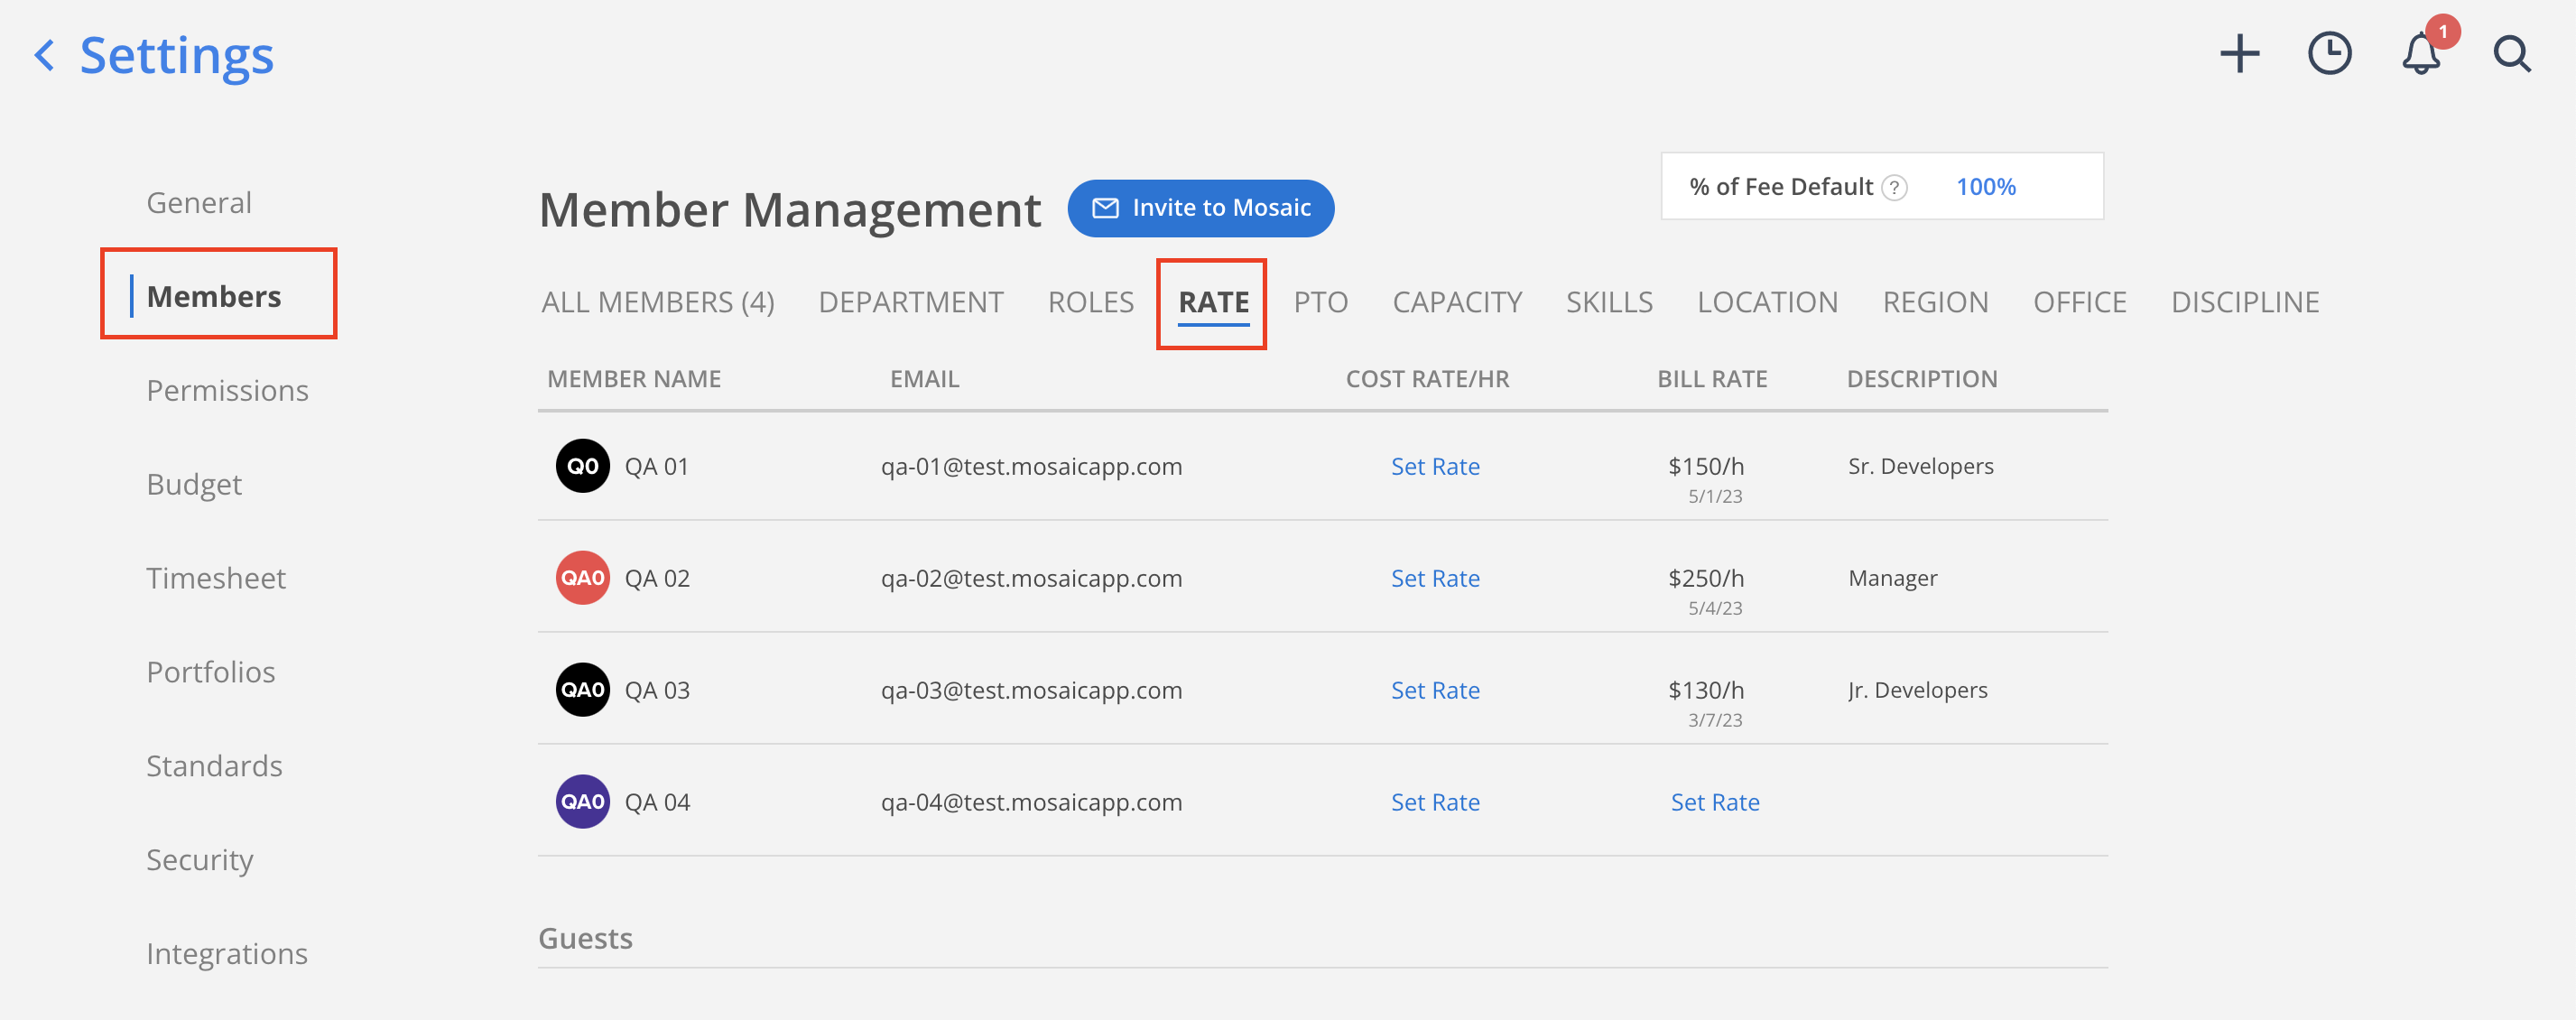
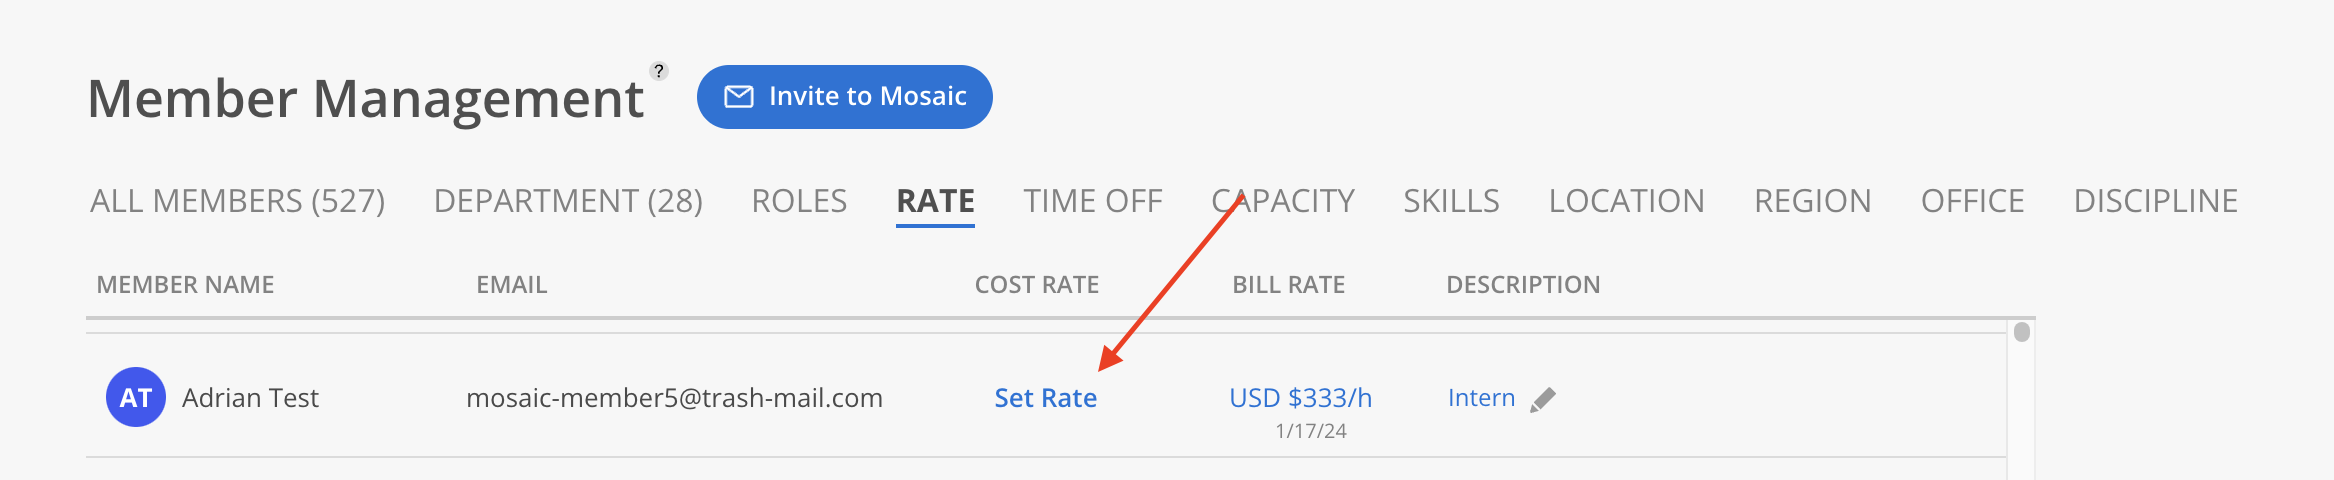
Click Set Rate button in the Cost Rate/Hr column for the Member.
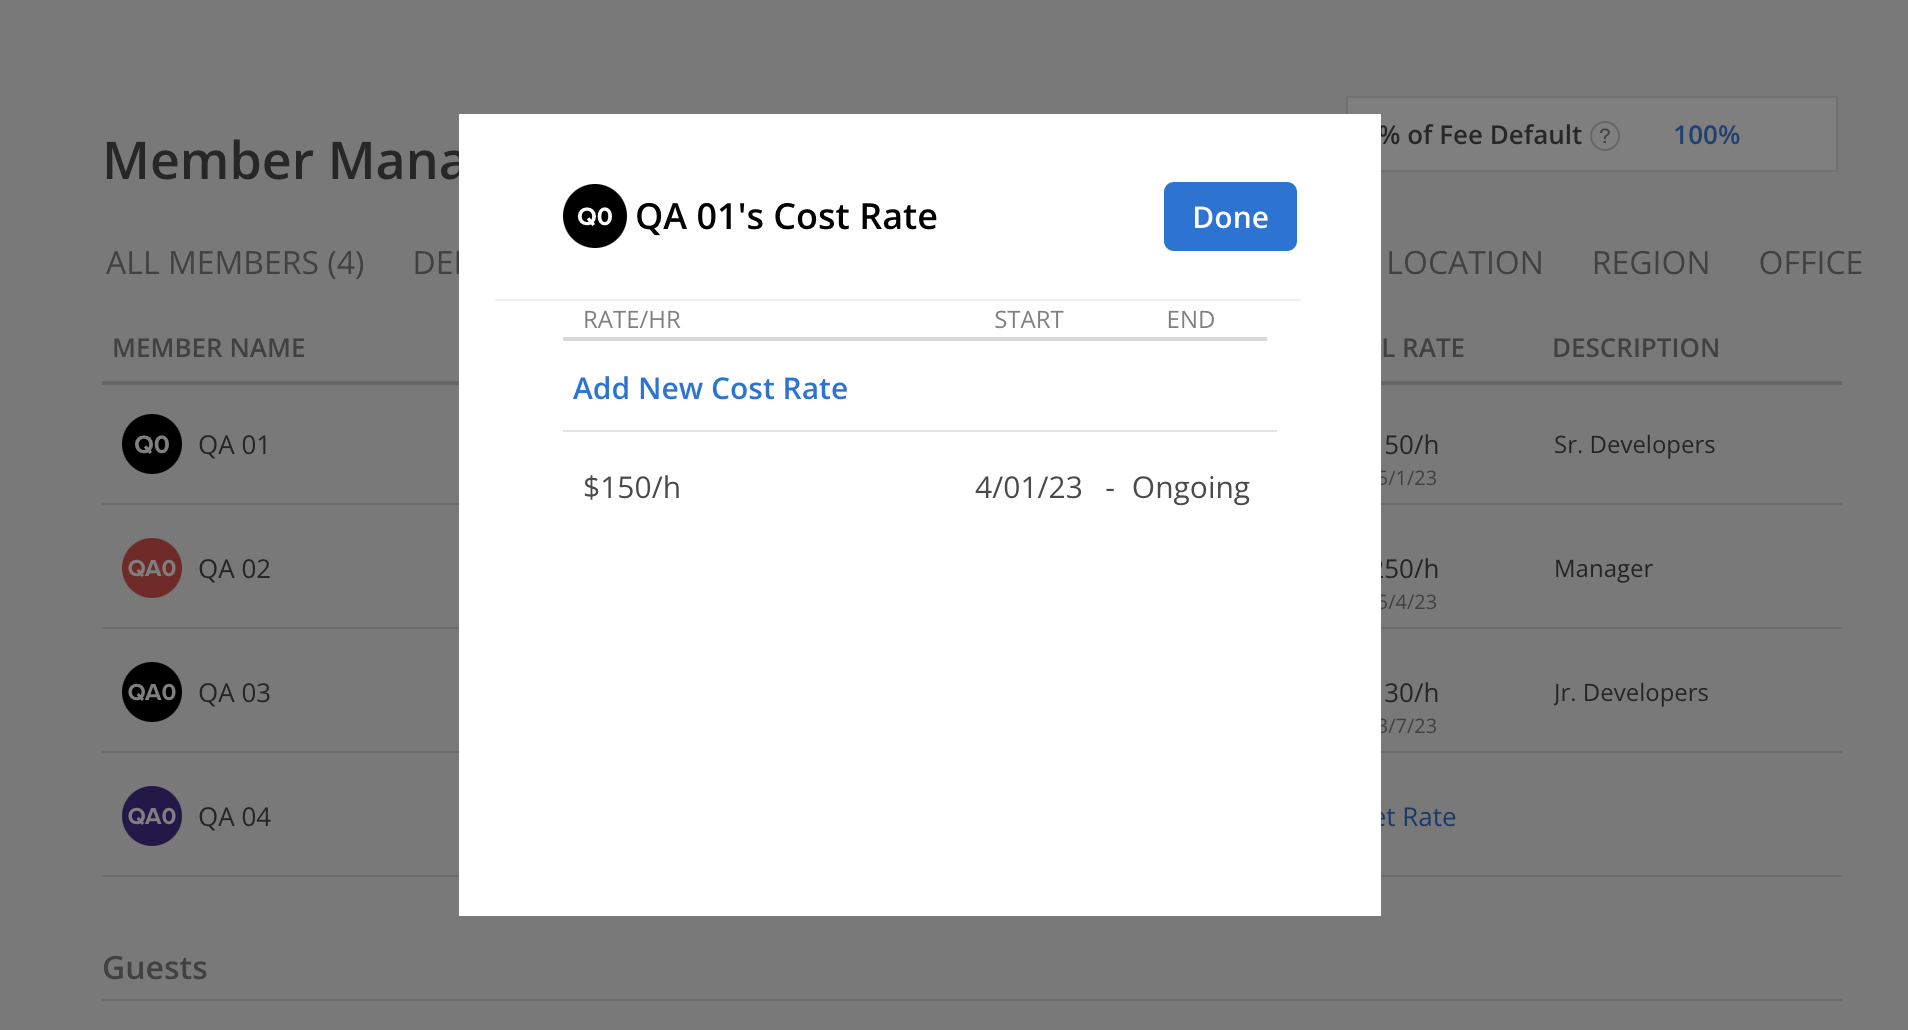
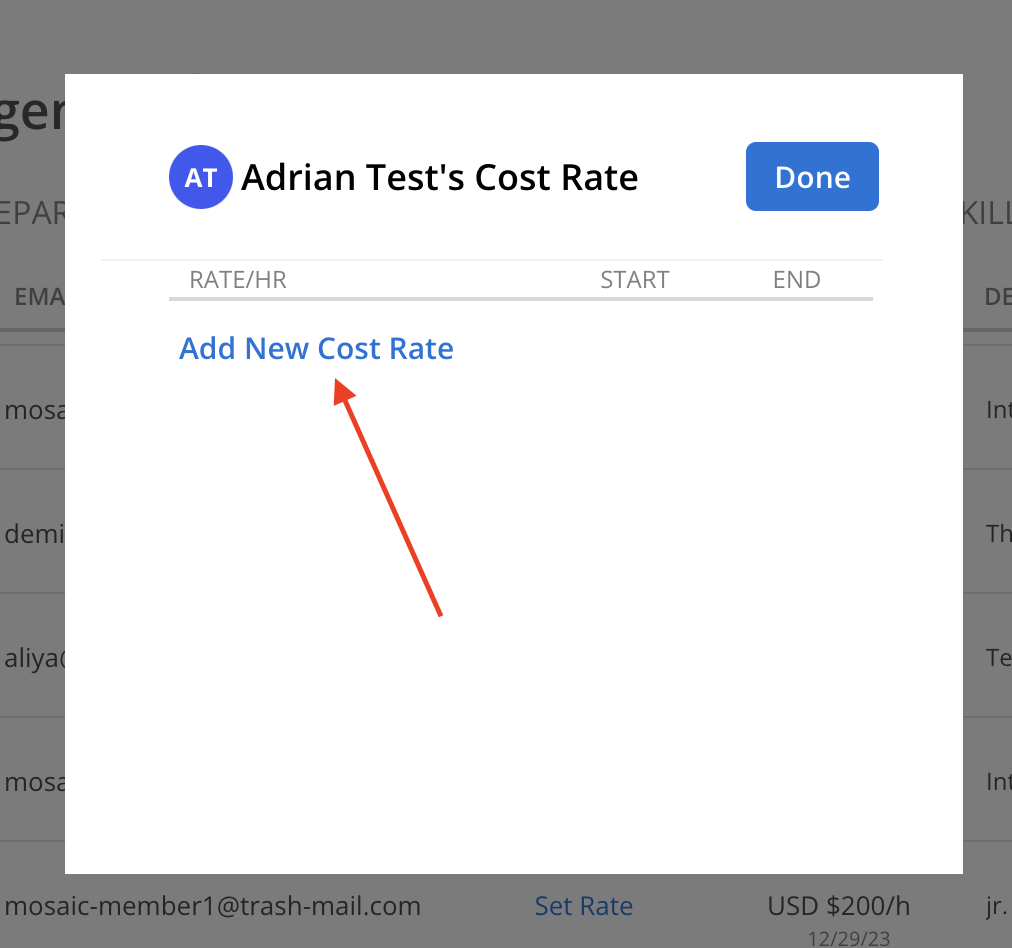
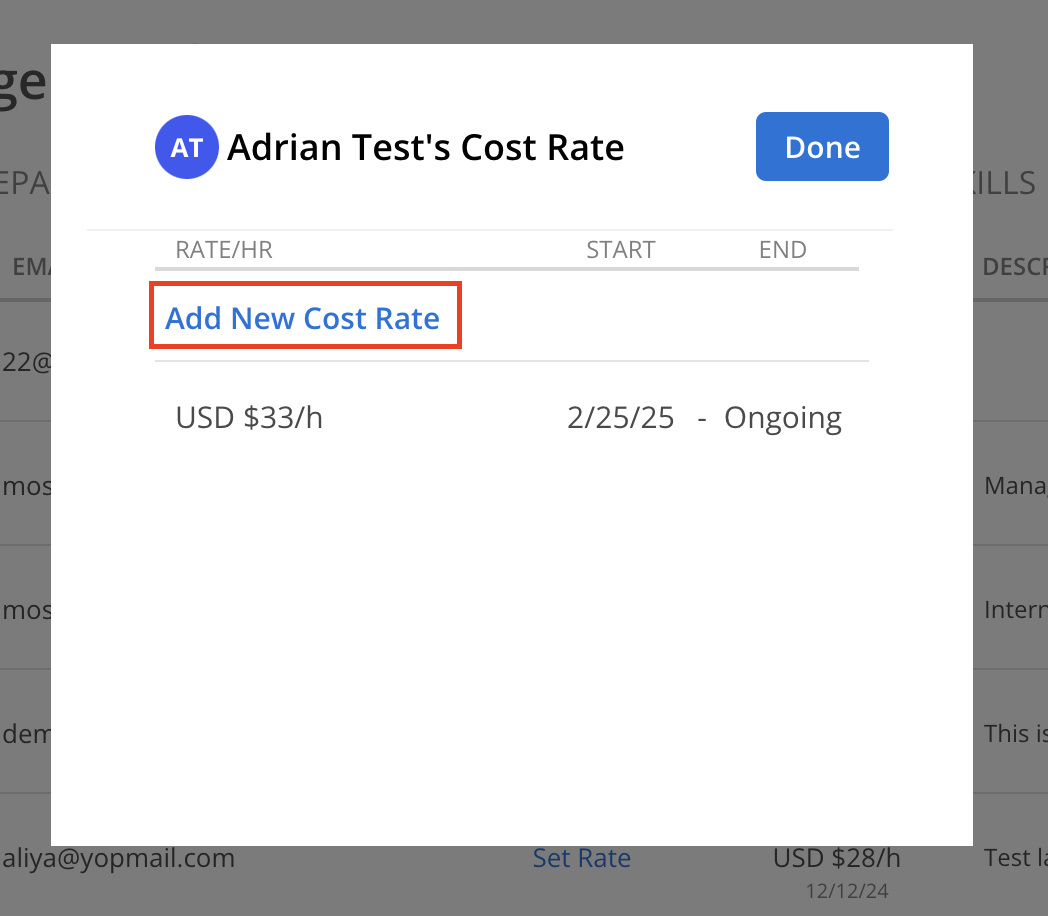
Click the Add New Cost Rate button.
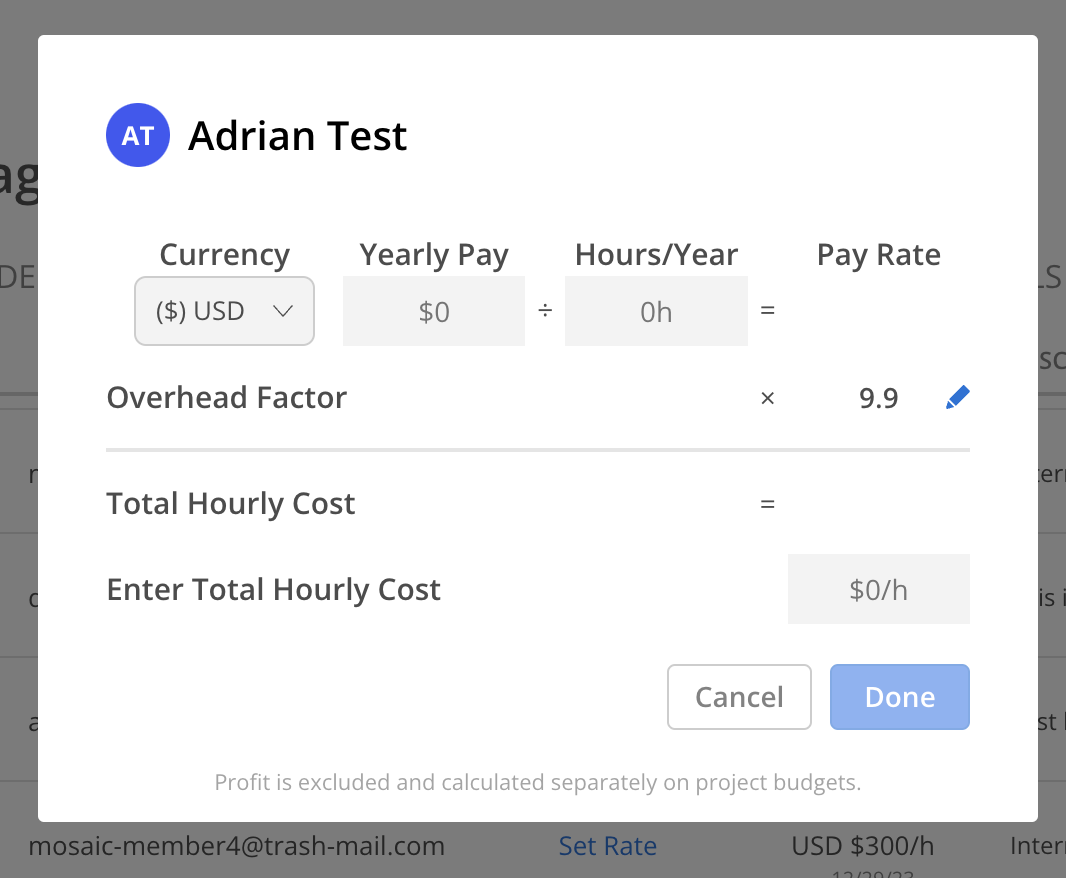
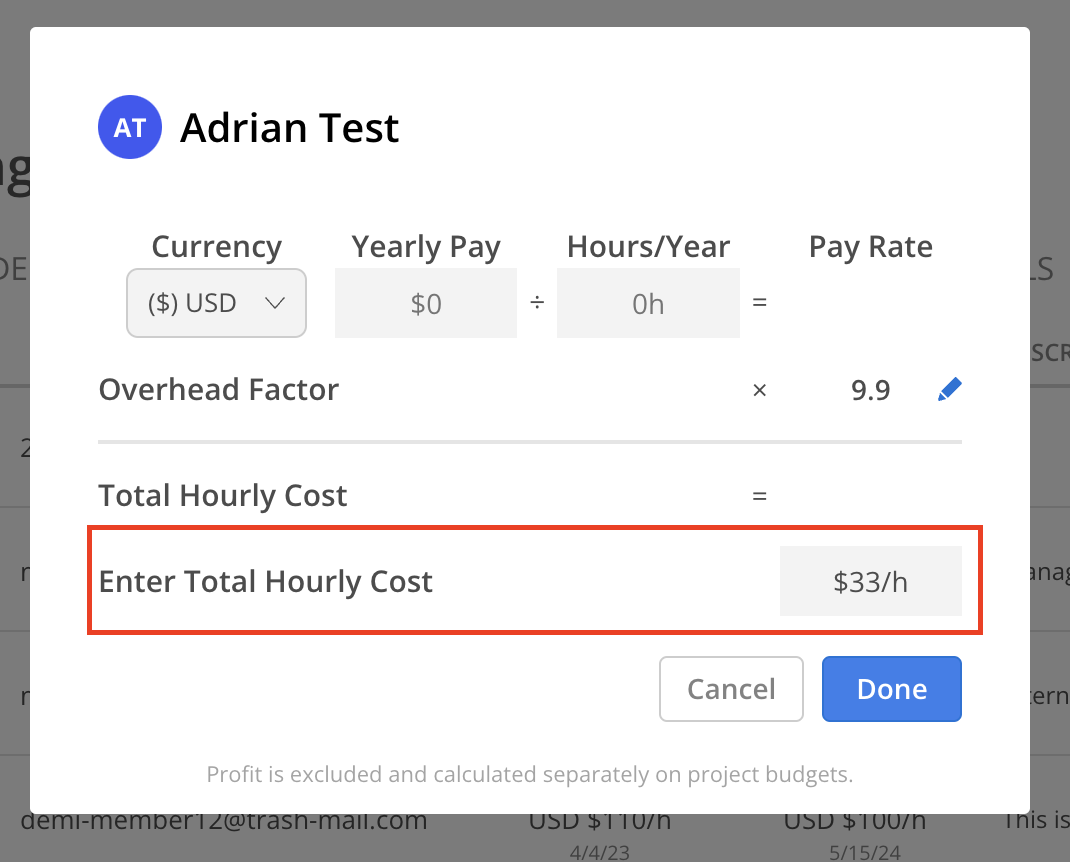
A calculator tool will open, allowing the Cost Rate for the Member to be set by entering a value in the Enter Total Hourly Cost field.
Values can be entered in the Yearly Pay and Hours/Year text boxes to calculate the Rate. However, the calculator serves only as a tool and does not automatically populate the Enter Total Hourly Cost field. After performing the calculation, the resulting value must be manually entered into the Enter Total Hourly Cost field.
The Cost Rate Currency will be in the Default Currency of the organization.
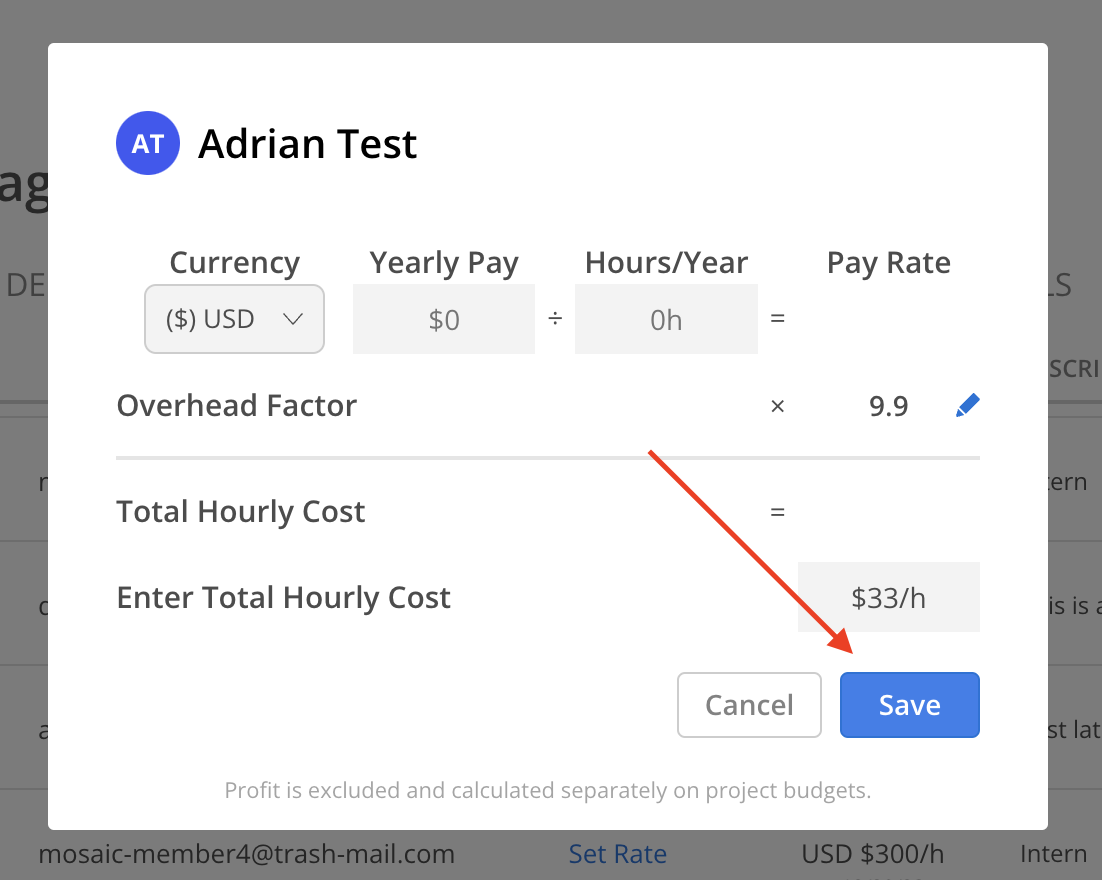
After entering a value in the Enter Total Hourly Cost field, click the Save button.
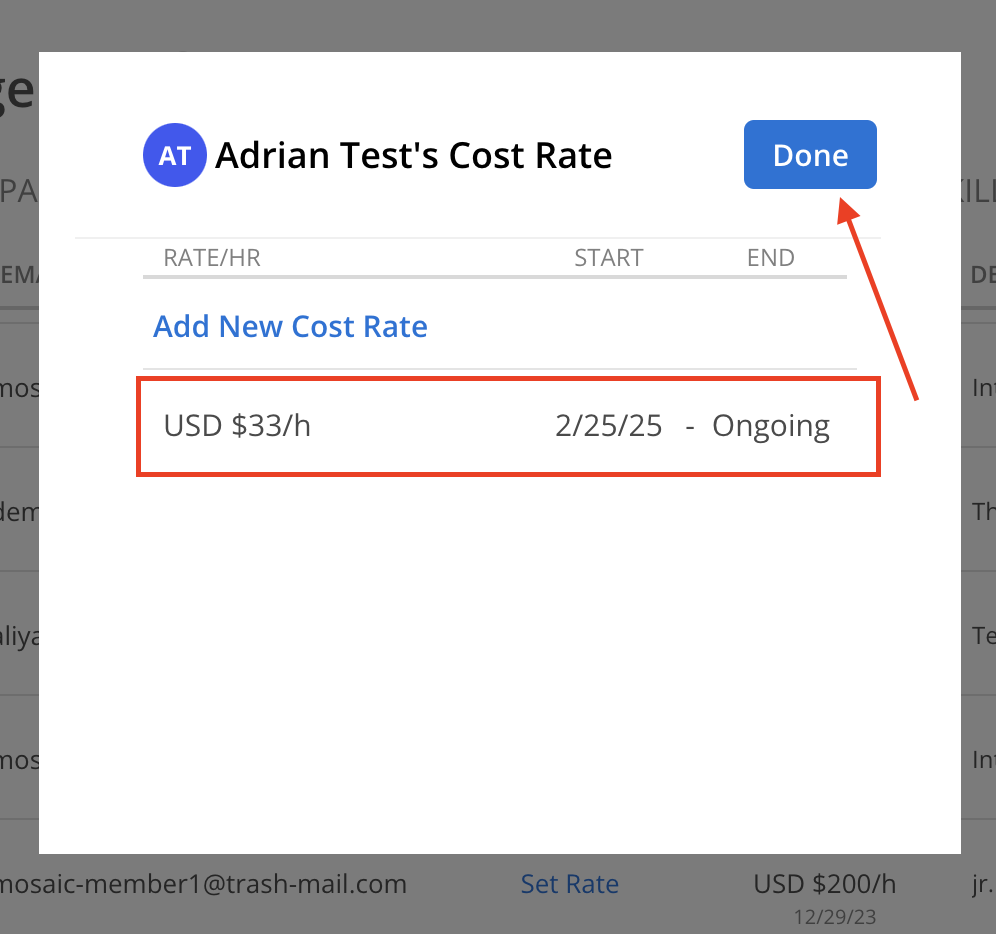
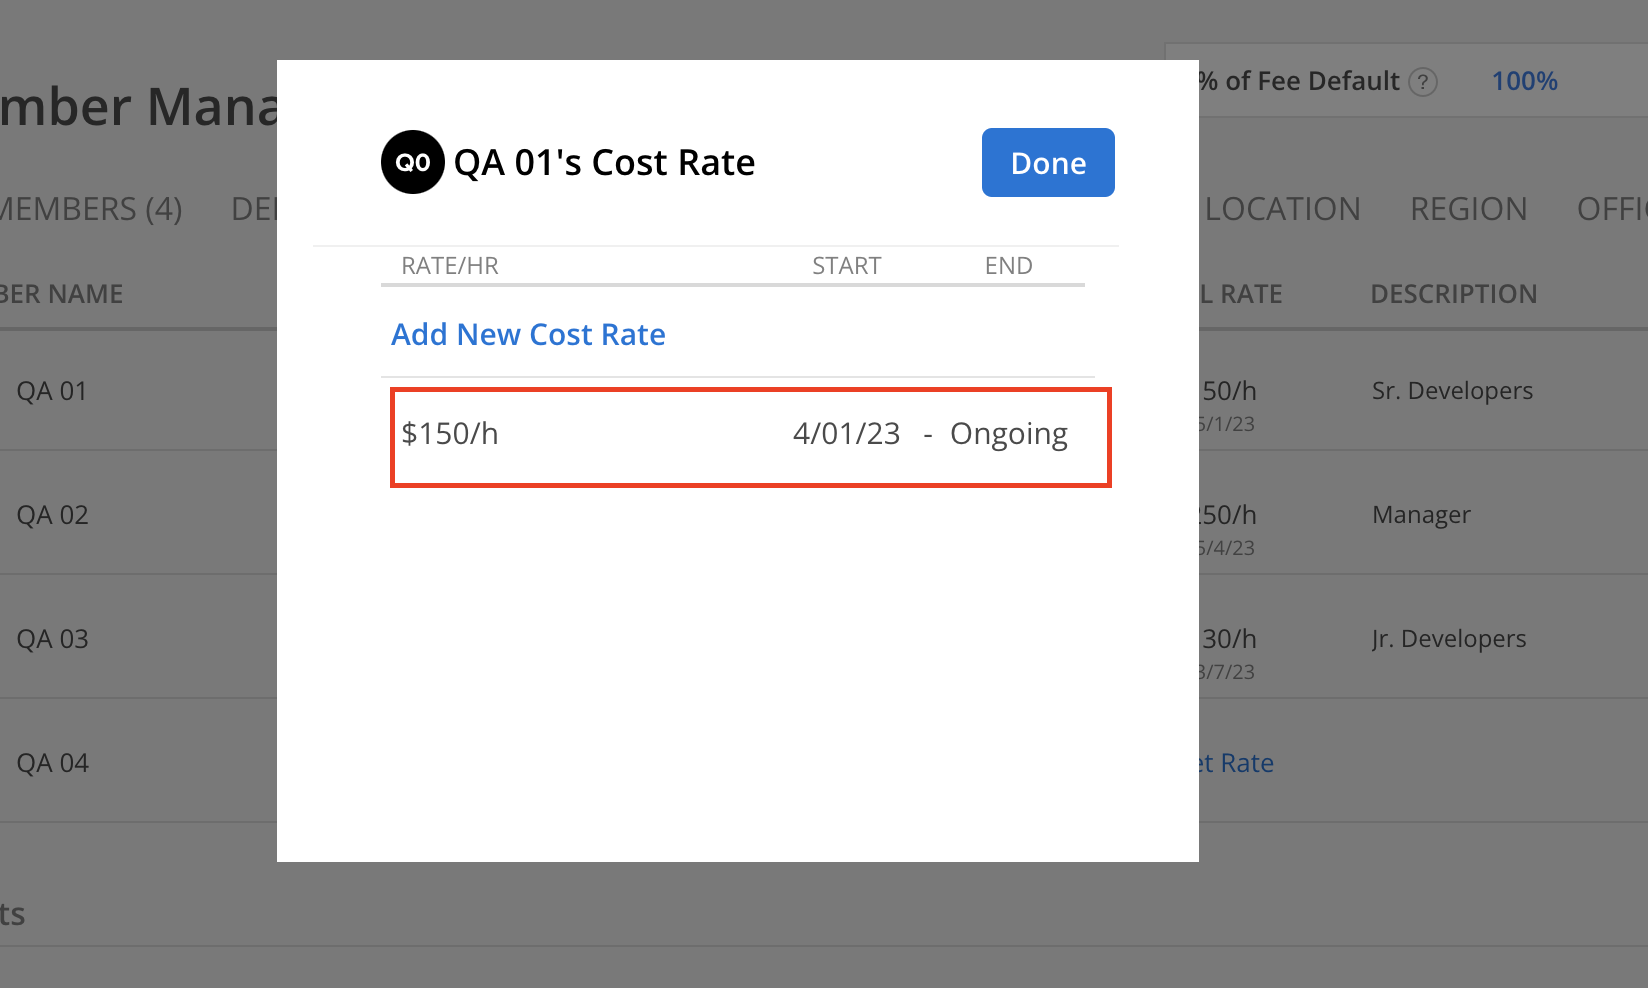
The updated Cost Rate will be visible starting today and will not have an end date in the Member's Cost Rate Modal. Click the Done button to close the modal. The Cost Rate for the selected Member will then be displayed in the Member Rates table.
By default, a Cost Rate becomes effective on the day it is added. If the Rate needs to take effect on a different date, its effective dates can be adjusted accordingly.
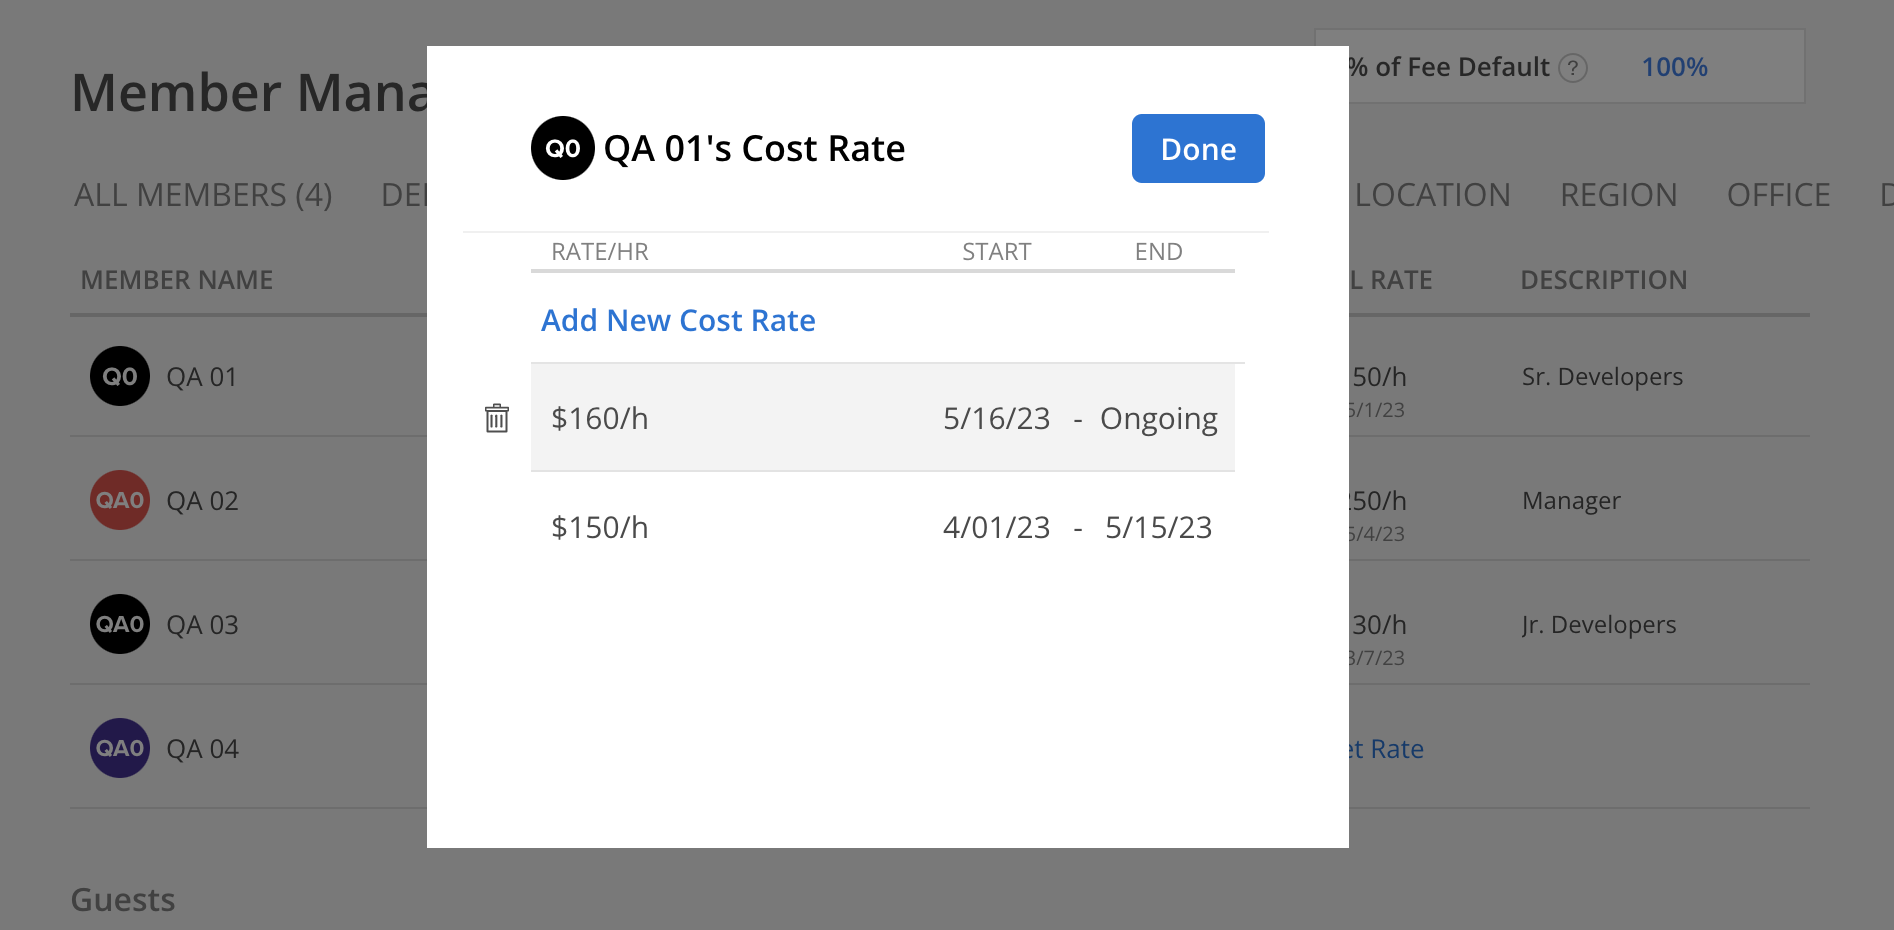
In Organization Settings > Members > Rates, click on the Rate of the Member under the Cost Rate/Hr column.
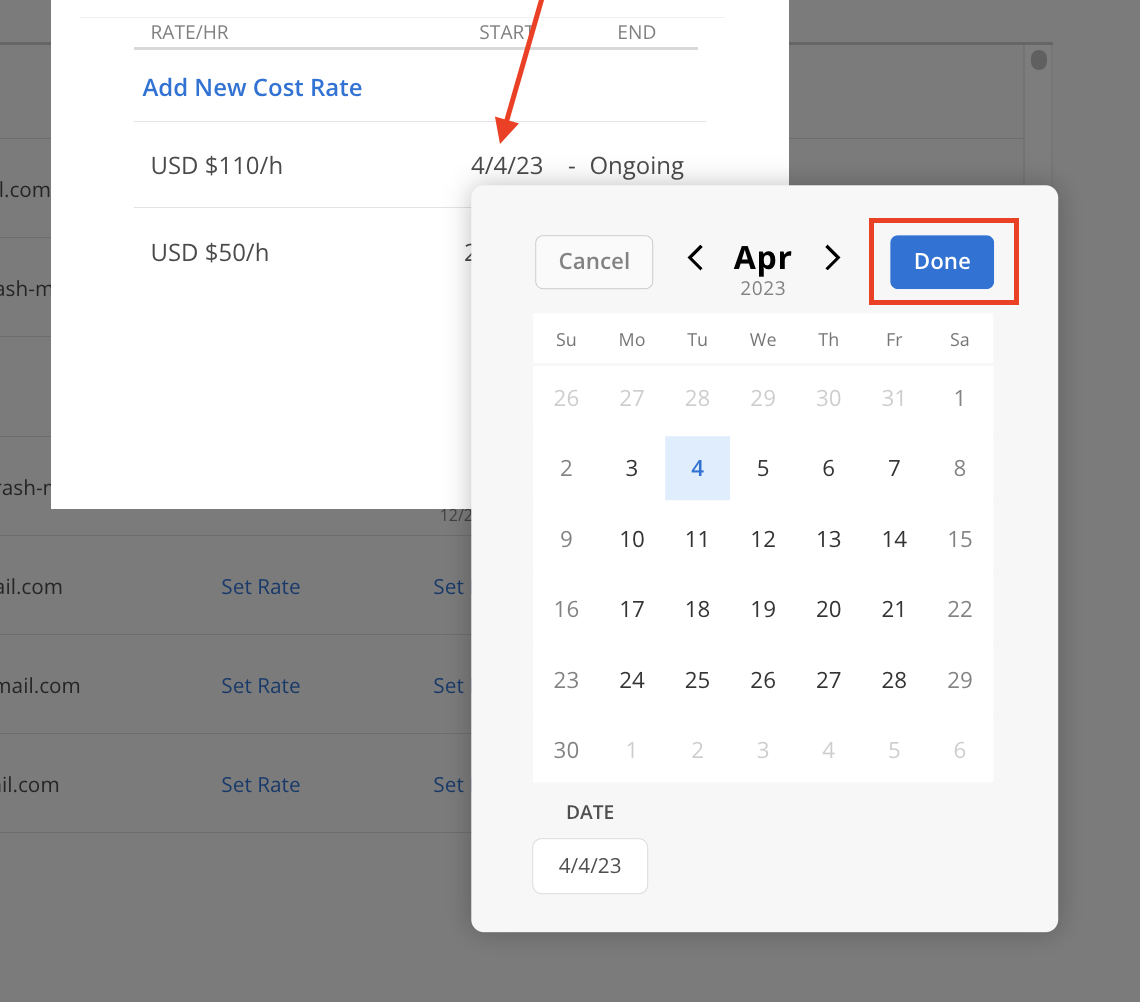
A list of the Member's Cost Rates and their effective dates will show. Click the Start Date of the Rate. Select a new Start Date for the Cost Rate, then click the Done button on the date picker. If the Member has multiple Cost Rates, the same process can be followed to adjust the End Date as needed.
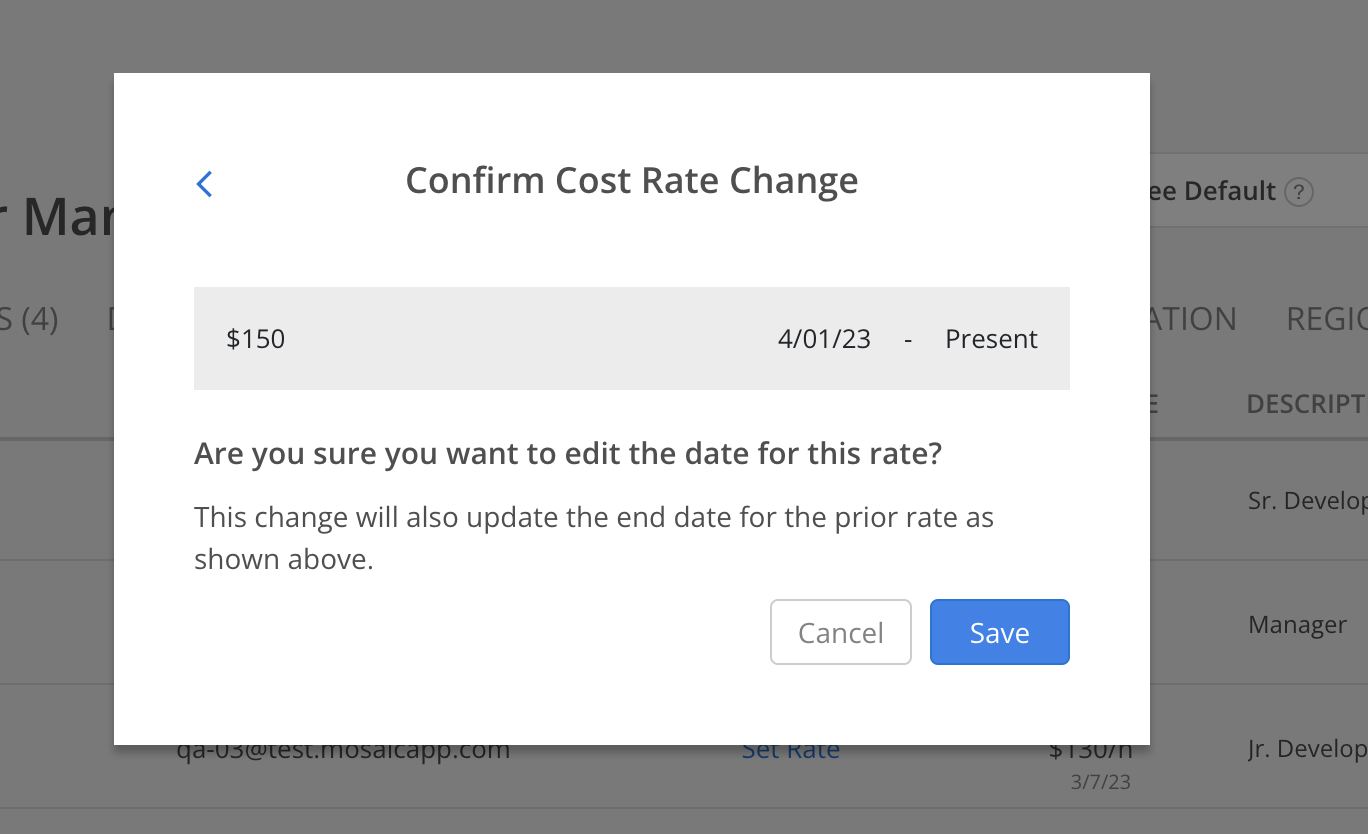
A confirmation modal will be presented with details of the change. Click the Save button.
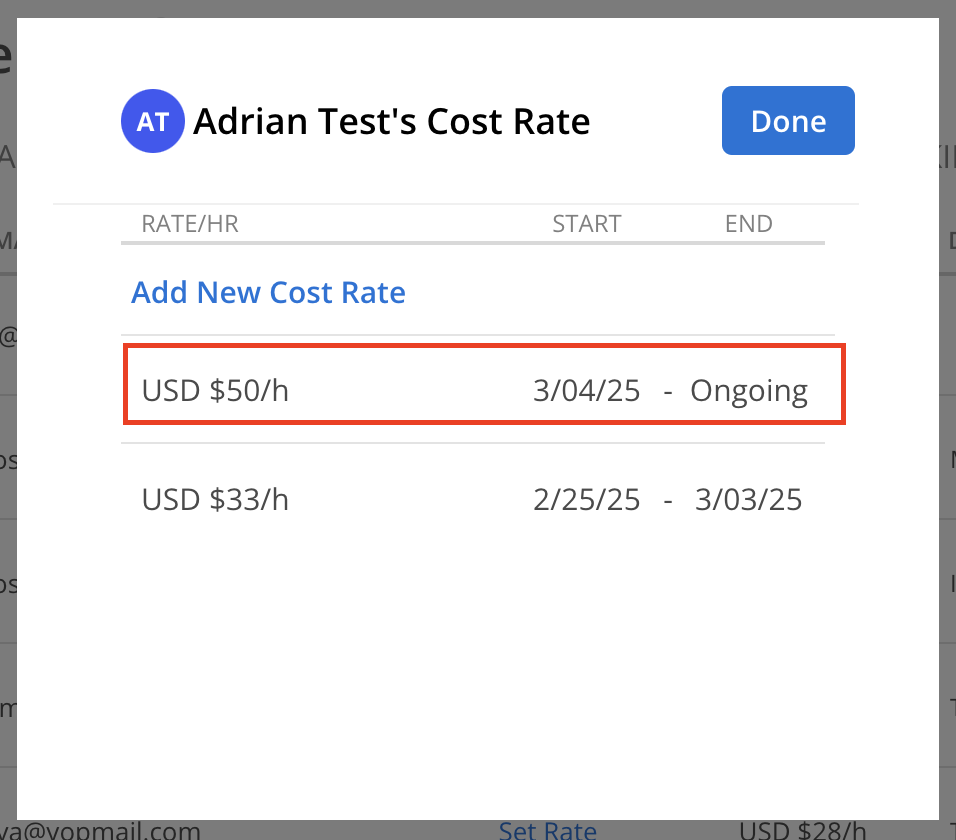
The updated Cost Rate with the selected dates will be displayed.
If the Member has only one Cost Rate, the End Date cannot be updated. However, if the Member has multiple Cost Rates, the End Date can be adjusted by following the same steps.
In Organization Settings > Members > Rates, click on the Cost Rate of the Member that you want to edit.
Click the Add New Cost Rate button.
The calculator tool will open with the previously entered values, allowing modifications as needed. After making adjustments, be sure to enter the final value into the Enter Total Hourly Cost field.
After the updated cost rate is entered into the Enter Total Hourly Cost field, click the Save button.

The additional Cost Rate will be displayed. The Start Date defaults to today, but it can be modified as explained in the section above.
In Organization Settings > Members > Rate, click on the Cost Rate of the Member.
The Member's Cost Rates will be displayed. Hover over the Cost Rate that needs to be deleted to reveal the Delete icon.
Click the Delete icon to proceed with the deletion.
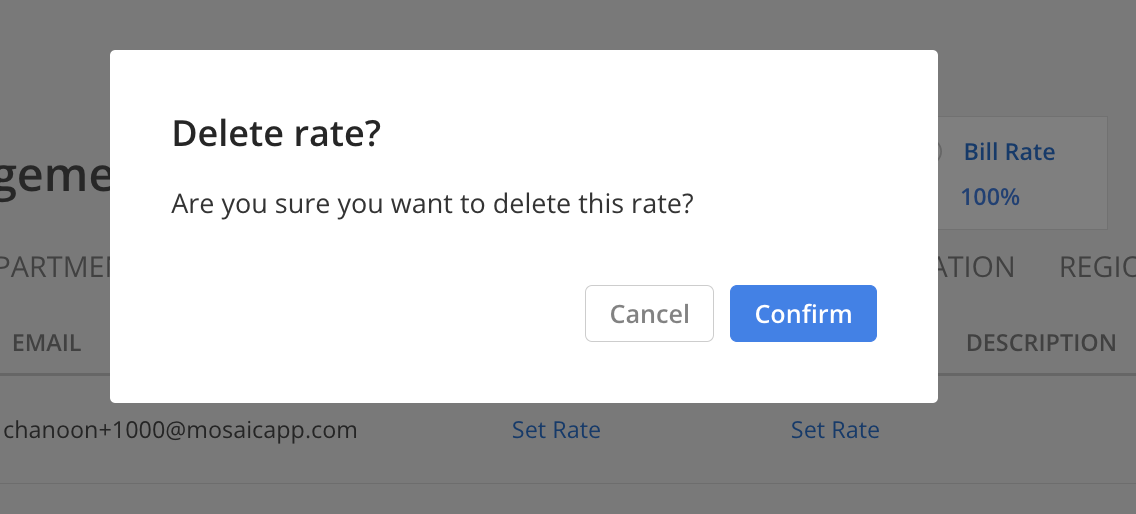
A confirmation modal will be shown. Click the Confirm button.
The Cost Rate will be deleted.
If a Member has multiple Cost Rates, deleting a Cost Rate that falls between two others will not affect the End Date of the previous Cost Rate. Instead, the Start Date of the following Cost Rate will adjust to fill the gap.